In this article, I’m going to show you how to install macOS Mojave on VMware on Windows 10 PC. Apple in WWDC 2018 announced its new operating system which is macOS Mojave 10.14. You can install macOS Mojave on virtualization software such as VMware and VirtualBox. It’s highly recommended to use VMware instead of VirtualBox because it works much better like smoother, quicker, and faster than Virtualbox. To Install macOS Mojave on VMware on Windows 10 using a pre-made ISO filled with only macOS Mojave setup then go through the step by step guide down below and do exactly as the guide is shown.
Newer versions of macOS are out, So check the guides below to install them:
- Guide to Install macOS Catalina on VMware on Windows
- Guide to Install macOS Catalina on VirtualBox on Windows
- Guide to Install macOS Big Sur on VMware on Windows
- Guide to Install macOS Big Sur on VirtualBox on Windows
Requirements:
- Minimum 2 GB memory
- Minimum 2 cores of processors
- Hard disk free space 20 GB
- Your system should support Intel or AMD VT (Virtualization Technology)
- Intel/AMD VT (Virtualization Technology) Should be enabled from BIOS setup
Required: If you haven’t already then you should enable Virtualization Technology (aka Intel VT or AMD-V).
Steps to Install macOS Mojave on VMware on Windows 10
- Download the prerequisites
- Install the Prerequisites
- Unlock VMware to Install macOS Mojave on Windows
- Create a New Virtual Machine
- Edit macOS Mojave VMX File (Optional)
- Install macOS Mojave as VM on VMware
- Complete Basic macOS Account Settings
- Install VMware Tools (Optional)
Step 1: Download the Prerequisites
Before you begin, you should download some files, and you may also download & install the Virtualisation application, which is required later on in this guide. But if you have done any of the following already, then you may skip it. Here is the list:
- Download VMware Workstation Pro 15.5.x or VMware Player 15.5.x.
- Download the macOS Unlocker V3 for VMware
- Download macOS Mojave ISO
Step 2: Install the Prerequisites
Now install the following application, and if you already have it by any chance then you’re welcome to Skip but make sure then it works properly and updated to the latest version.
- Install VMware Workstation Pro 15.5.x or VMware Player 15.5.x
Run the VMware Workstation Pro/Player setup and follow the prompt leaving all the options as default.
Step 3: Unlock VMware to Install macOS Mojave on Windows
Firstly make sure VMware Workstation application is closed completely otherwise the VMware unlocker won’t work. You can do this by Clicking on File Tab > Exit.
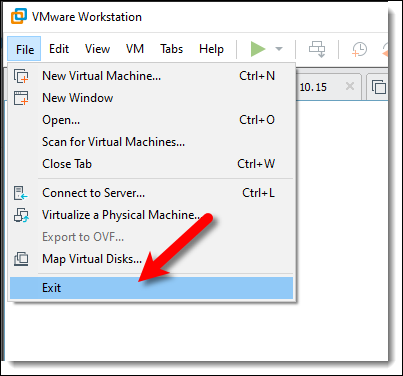
Exit VMware Workstation
You should have downloaded macOS Unlocker V3 for VMware GitHub or the direct link above. So now extract the macOS Unlocker V3.0 for VMware Workstation. Right-click on win-install.cmd and select Run as Administrator.
Note: You may always uninstall the previous version of the Unlocker before using a new release. Failure to do this could render VMware unusable. – David Parsons
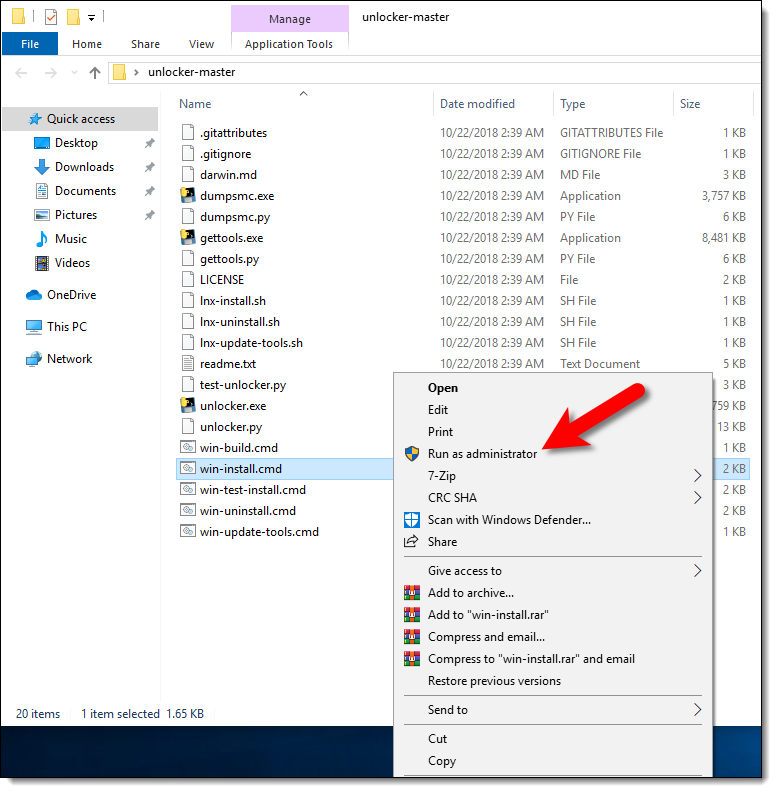
Run win-install.cmd As Administrator
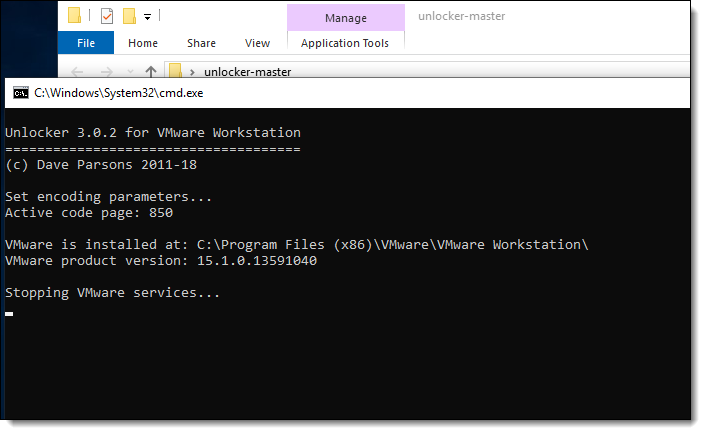
Unlocker 3.0.3 for VMware Workstation
Step 4: Create a New Virtual Machine
- Open VMware and click on Create a New Virtual Machine (Ctrl+N) then select Typical (Recommended) and click Next.
-
- Create a VM
-
- Select Typical (recommended)
-
- Now select I will install the operating system later and click Next. Choose Apple Mac OS X from operating system list then select macOS 10.14 from version and click Next.
-
- Select Install the Operating System Later
-

- macOS Mojave 10.14
-
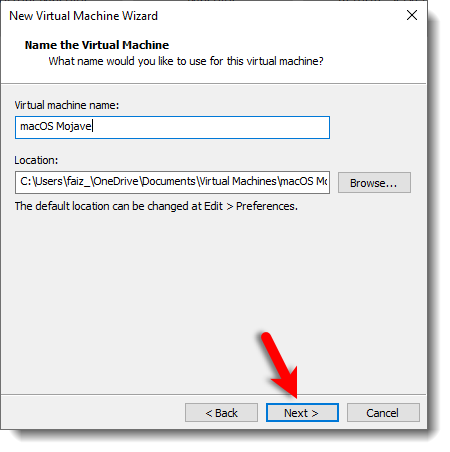
- Name the virtual machine as you prefer like macOS Mojave. Click Browse to choose a location to save virtual machine files and click Next, or you may let it as default (recommended).

Name and Save macOS Mojave VM
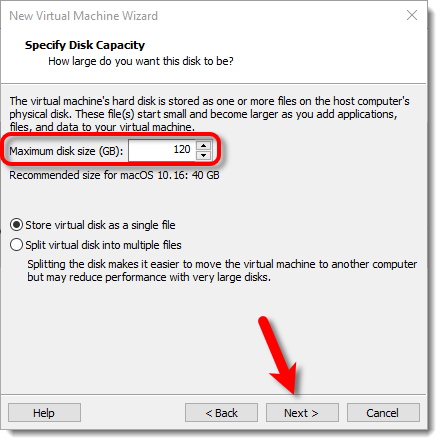
- Specify the disk size of 120 GB or more than 50 GB. Then select Store virtual disk as a single file and click Next.
Specify Disk Capacity
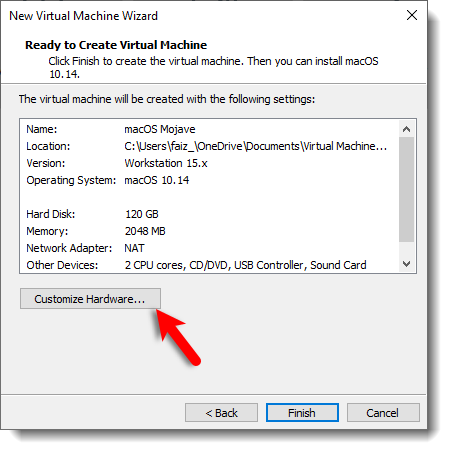
- On Ready to Create Virtual Machine, Click Customize Hardware.
Customize Mojave VM Hardware
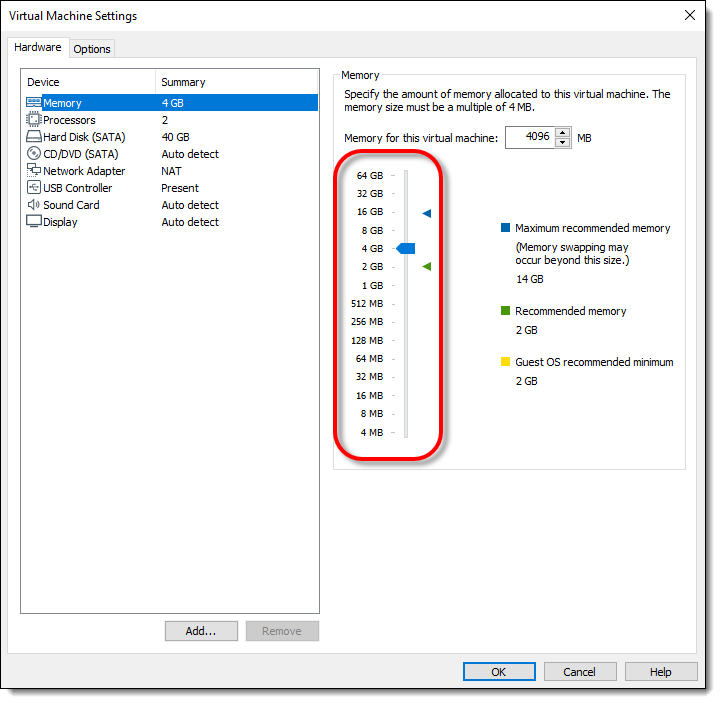
- Increase the Memory from 2 GB to 4 GB or higher for better performance.
Increase RAM
- Select Processor menu then increase the CPU processor core from 2 cores to 4 or Higher cores for better performance.
- Note: If you don’t have enough resources then you may not increase the Memory and Processor since the minimum requirement is 2 GB Memory and 2 Cores of Processor.
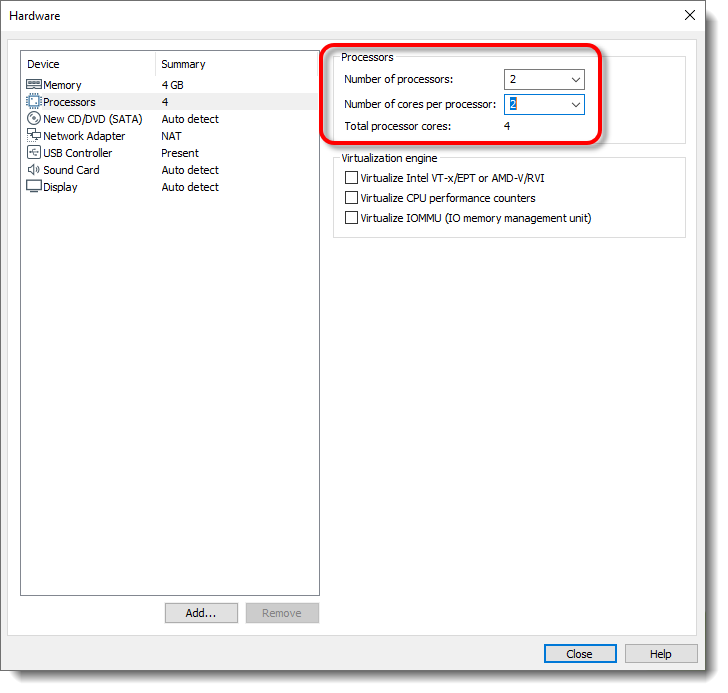
Increase Number of Processors
- Note: If you don’t have enough resources then you may not increase the Memory and Processor since the minimum requirement is 2 GB Memory and 2 Cores of Processor.
- Select New CD/DVD (SATA) from the menu then click Use ISO image file: and click Browse.
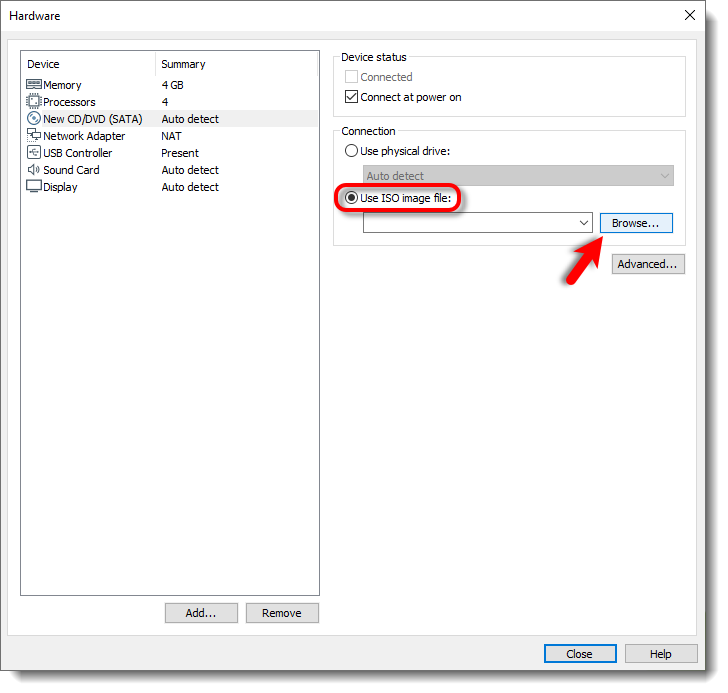
Click Browse
- Locate the macOS Mojave 10.14.6.iso file then click Open. If you don’t have this file then you should download this from Step 1: Download the Prerequisites section.
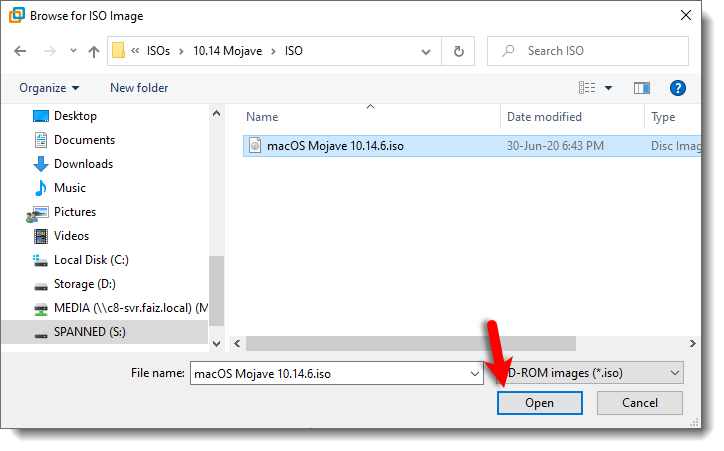
Browse macOS Mojave ISO
- Finally, click Close to save all the changes that you made to the virtual machine settings.
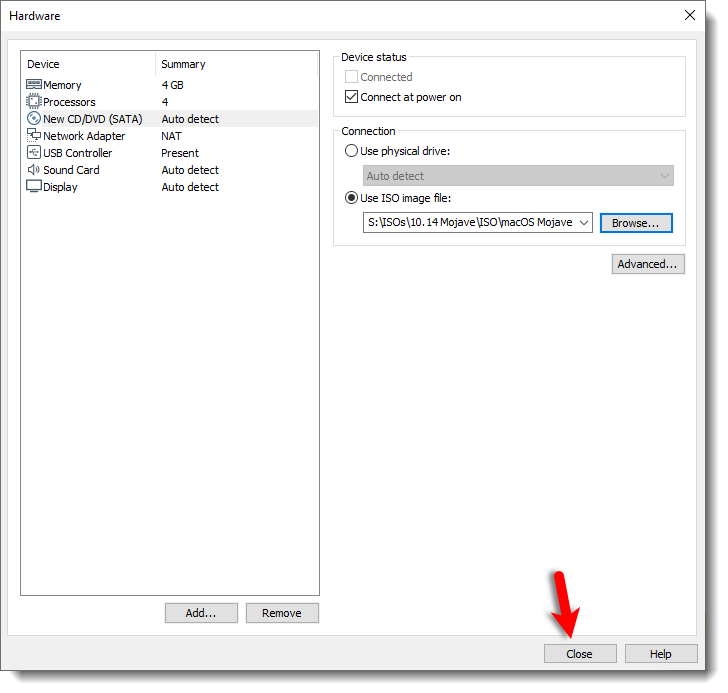
Save Changes to macOS Mojave VM
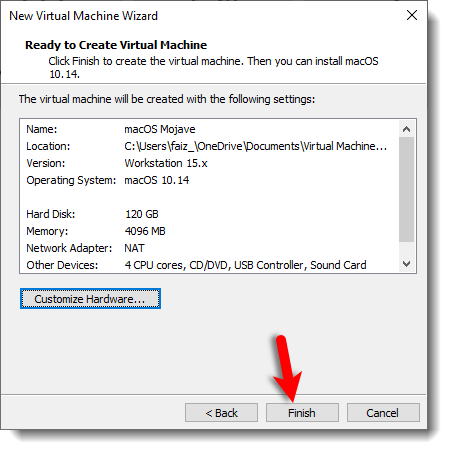
- On the New Virtual Machine Wizard Window, Click Finish.
Ready to macOS Mojave VM
Step 5: Edit macOS Mojave VMX File (Optional)
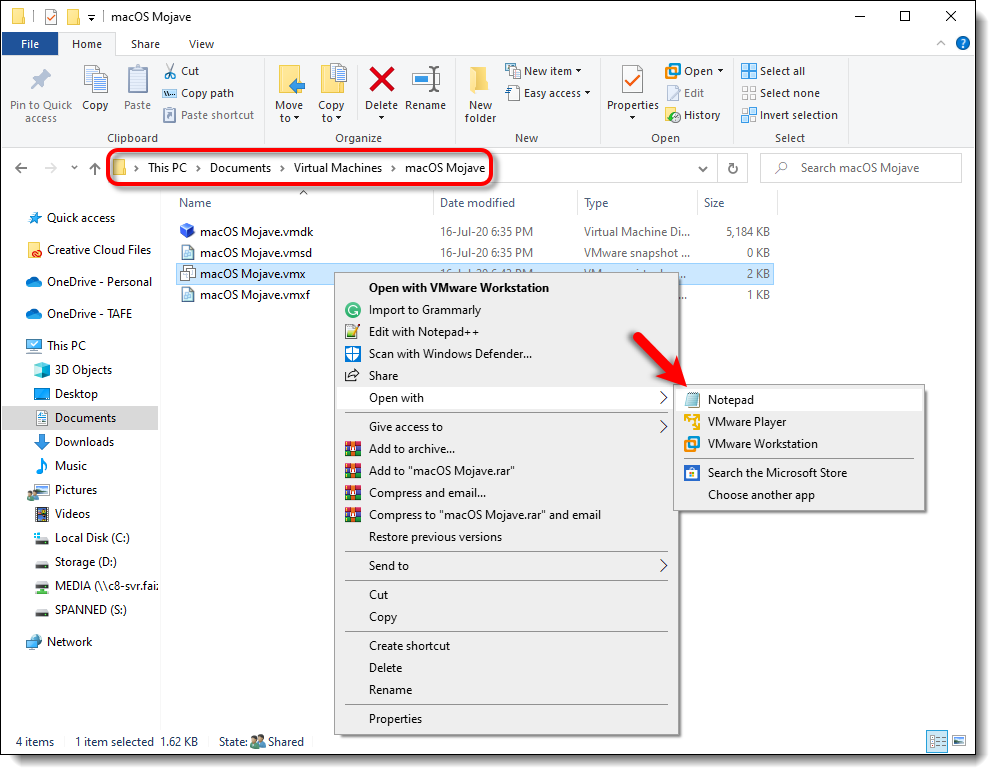
- Do these 2 steps only if you can’t boot into macOS or have other issues. Navigate to the virtual machine folder which you select in step #4.3 of this guide. If you didn’t specify a new location, then the default location is in Document > Virtual Machine. Right-click on macOS Mojave.vmx then open it via Notepad or any third-party text editor of your choice.
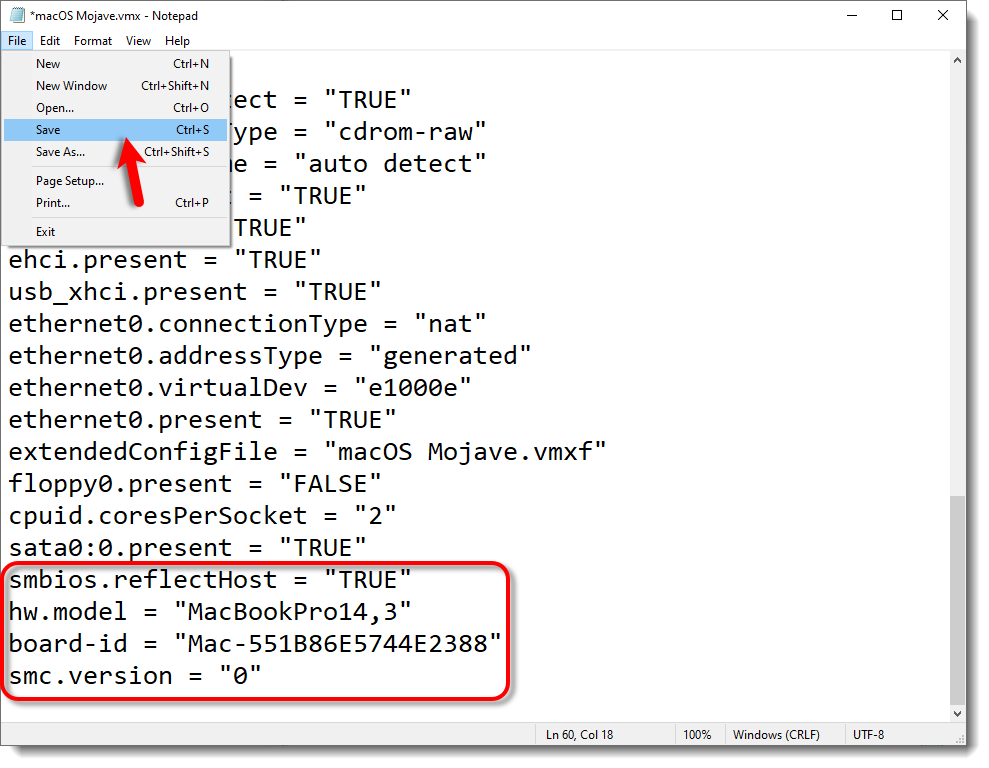
- Scroll down to the bottom of texts and add the following code; then click on File > Save. After that, you may close it as you don’t need it anymore.
smbios.reflectHost = "TRUE"
hw.model = "MacBookPro14,3"
board-id = "Mac-551B86E5744E2388"
smc.version = "0"-
- Open macOS Mojave VMX File
-
- Save macOS Mojave VMX File
Step 6: Install macOS Mojave as VM on VMware
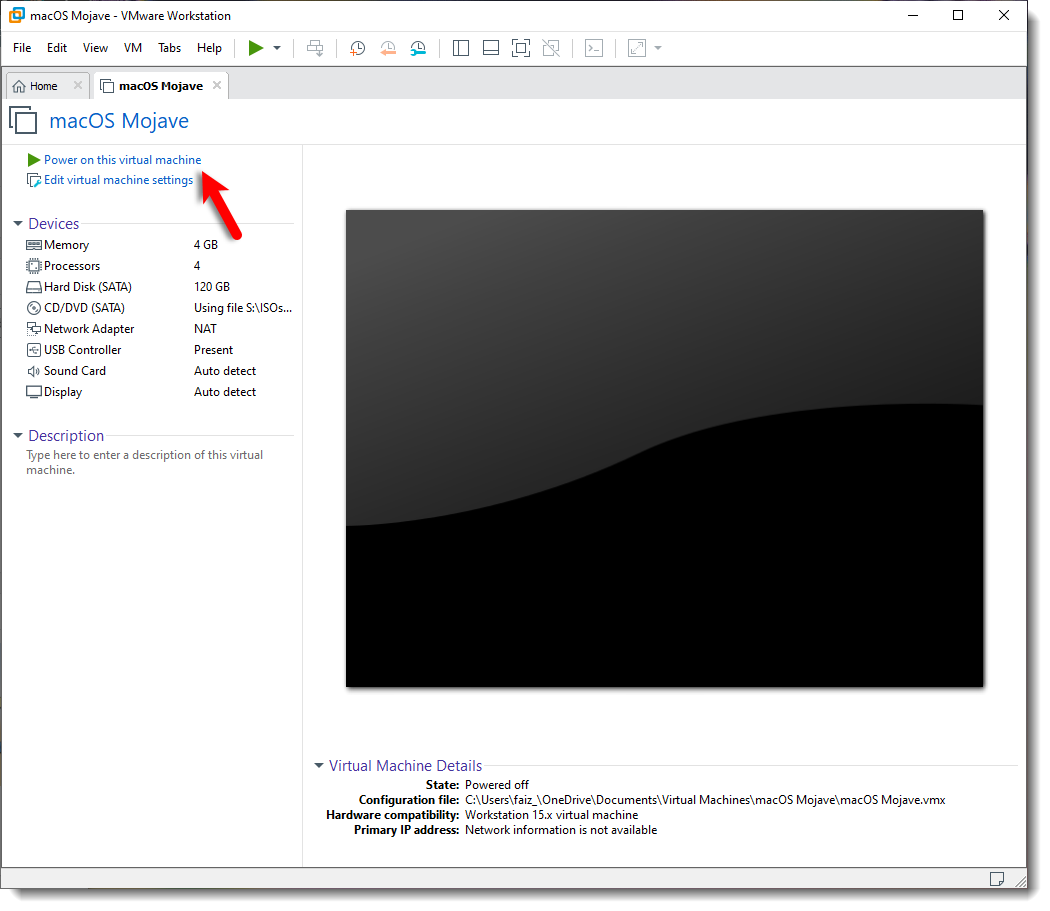
- Open VMware and on the macOS Mojave VM window Click Power on this Virtual Machine.
Power On macOS Mojave VM
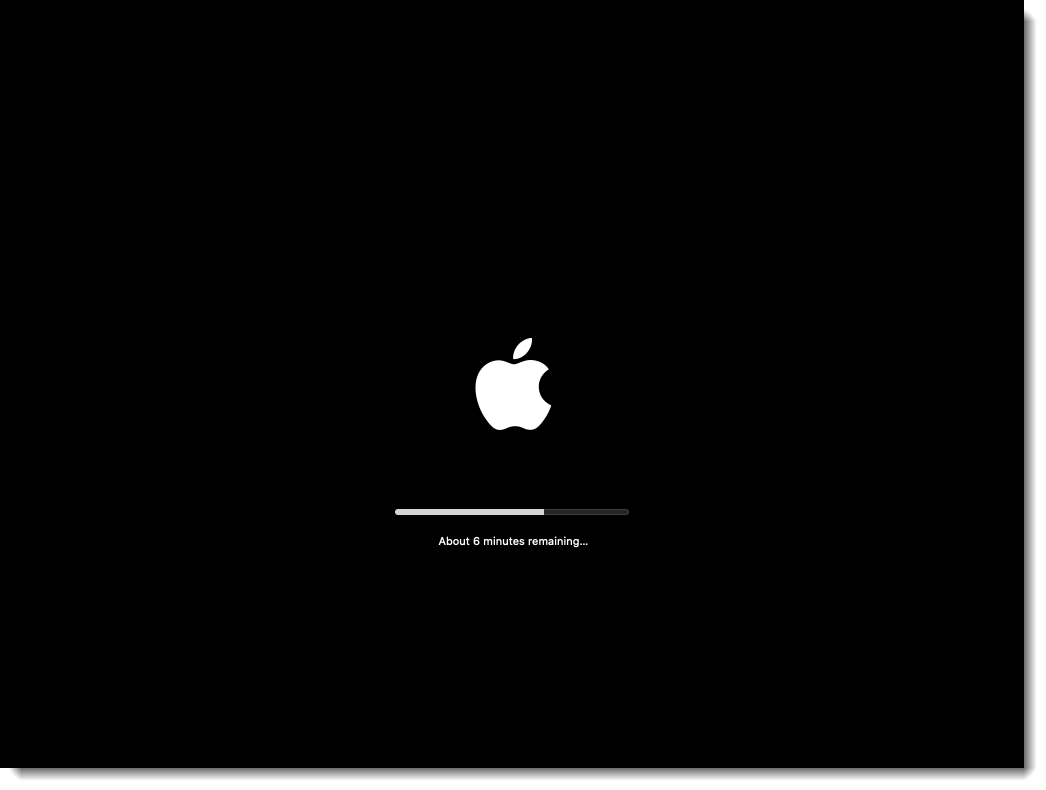
- Wait for macOS to boot up.
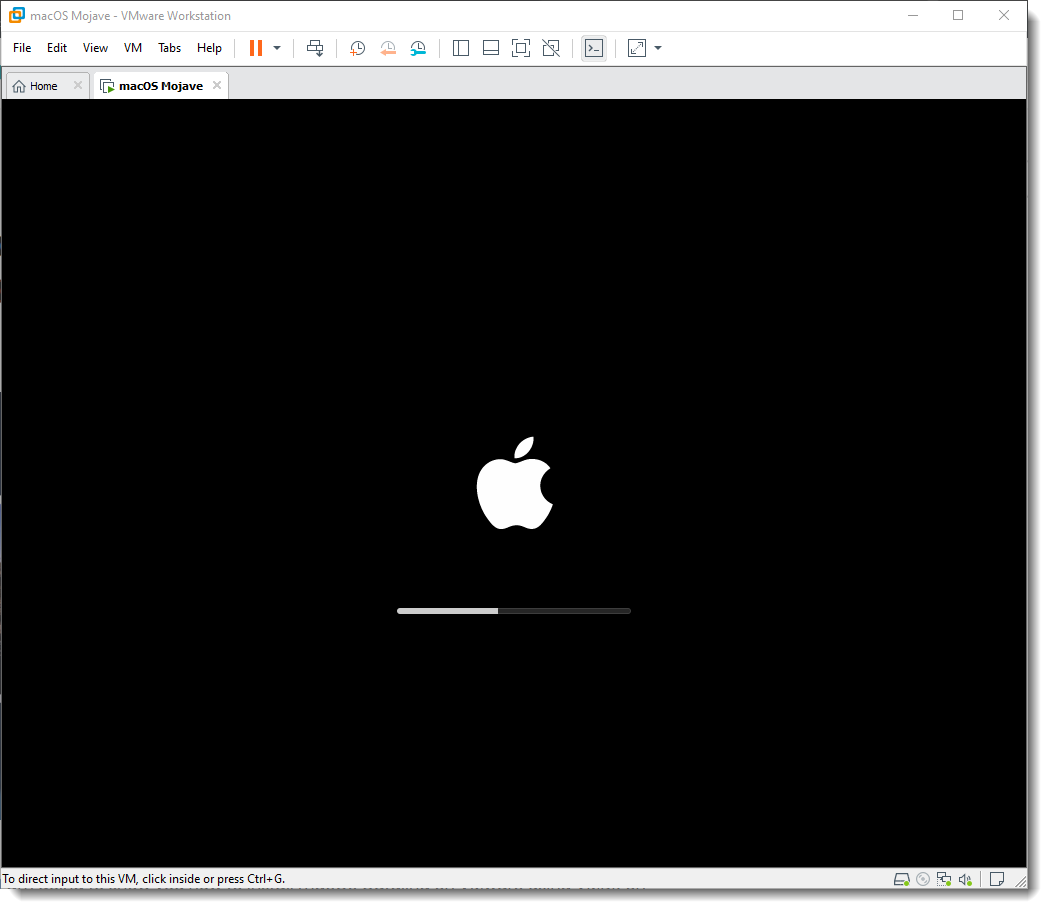
Booting macOS Mojave
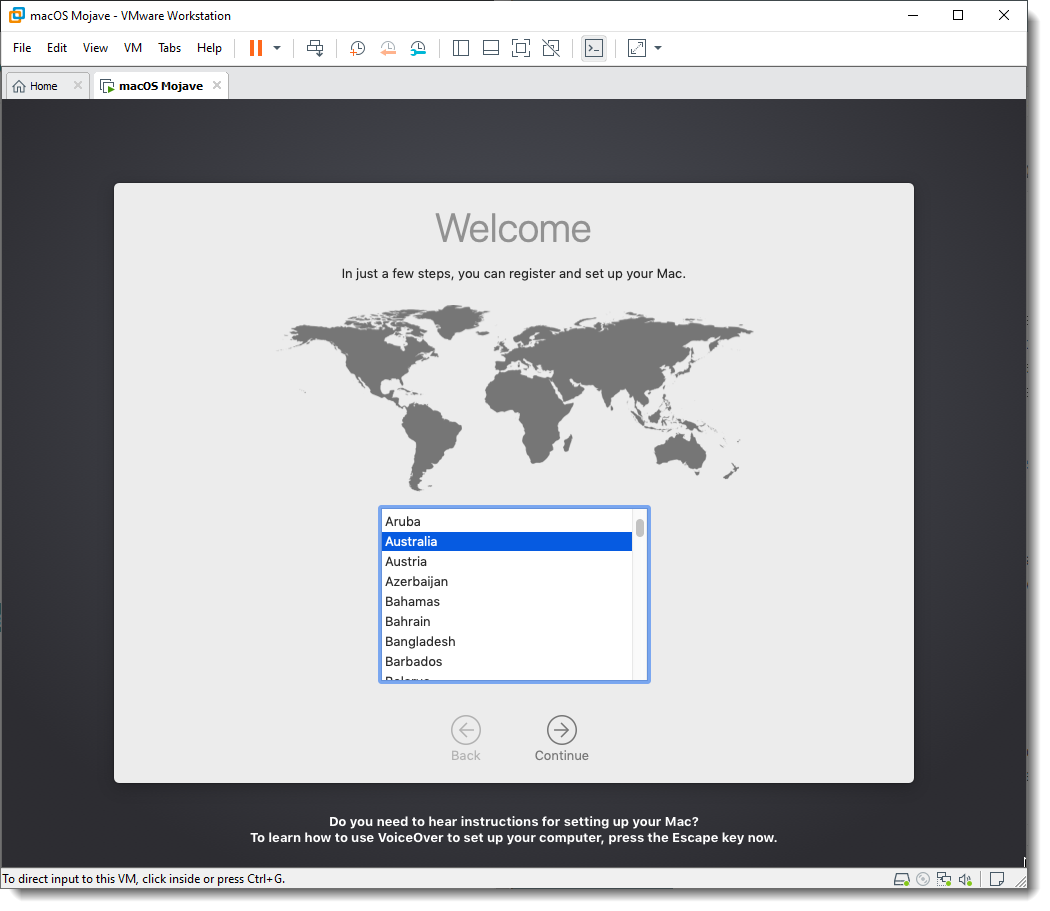
- Select English on the language page then click Continue Arrow.
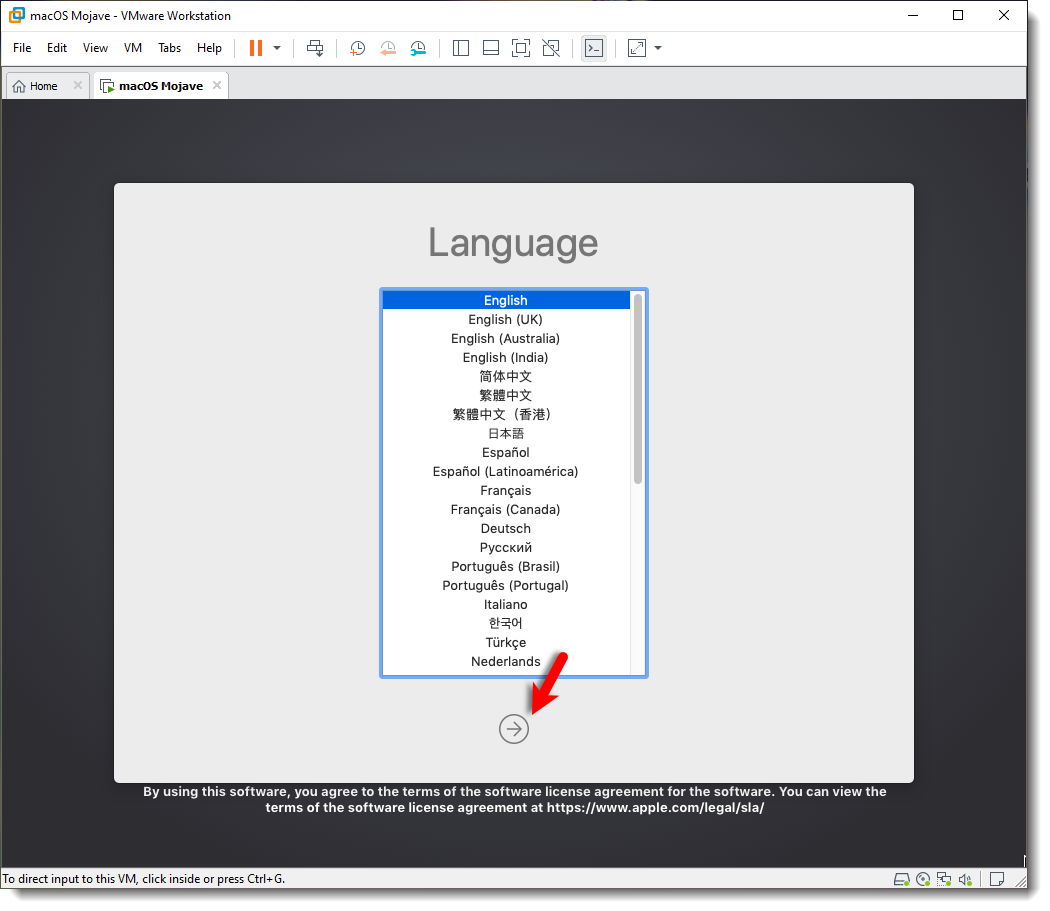
Select Language
- Now, you’ll see macOS Utilities Window. From the list, select Disk Utility and click Continue.
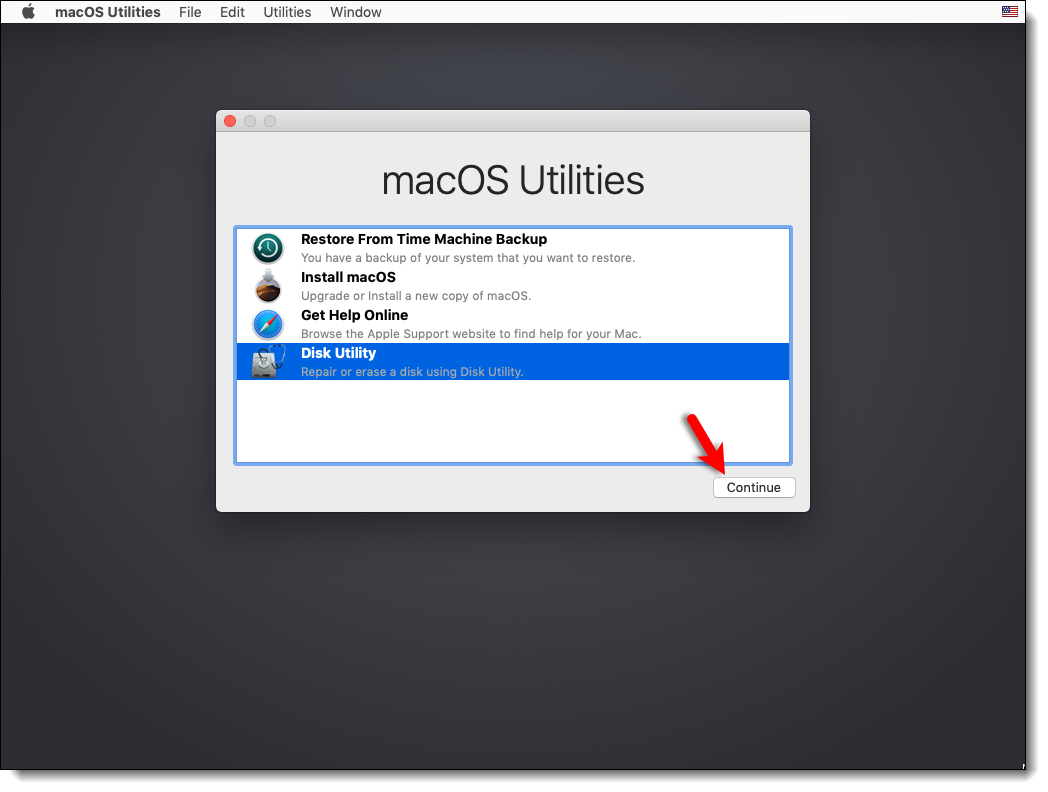
Go to Disk Utility
- Select VMware Virtual SATA Hard Drive Media then click Erase. Choose the following options and again click Erase.
- Name: macOS HD (You can type any name you want)
- Format: APFS (If you get an error, select Mac OS X Extended Journaled)
- Scheme: GUID Partition MAP

Format the VMware Virtual SATA Hard Drive Media
- From Disk Utility Tab, click Quit Disk Utility
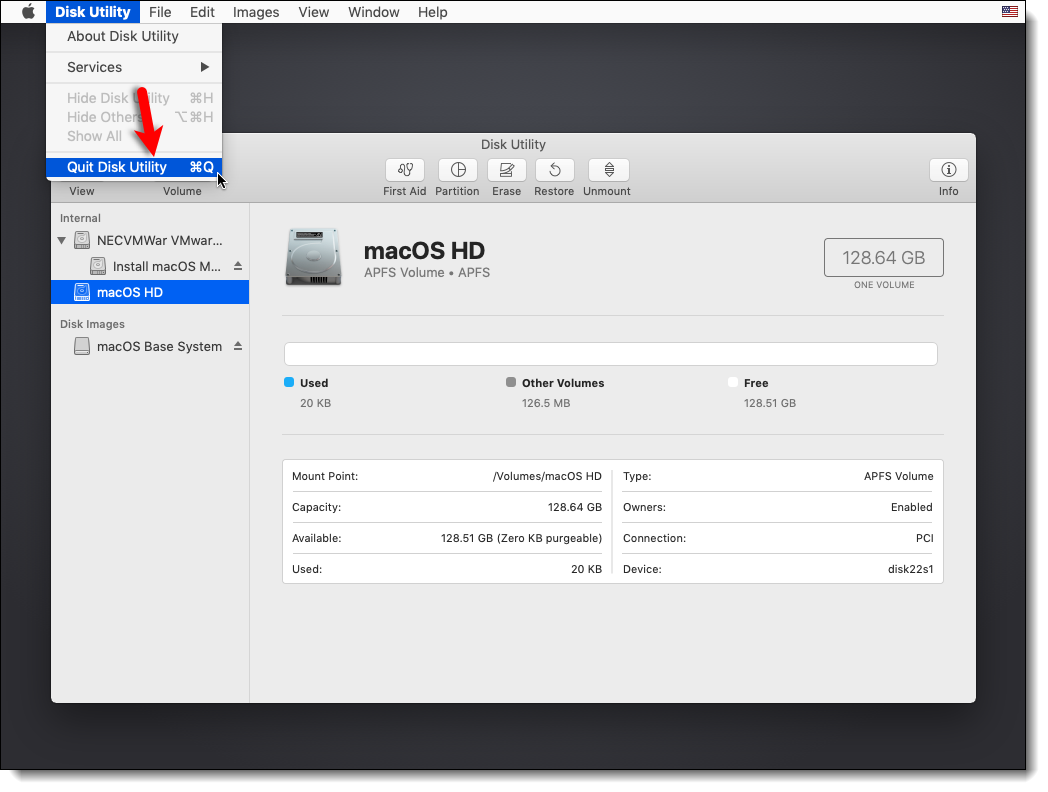
Quit Disk Utility
- From macOS Utilities, select Install macOS and click Continue.
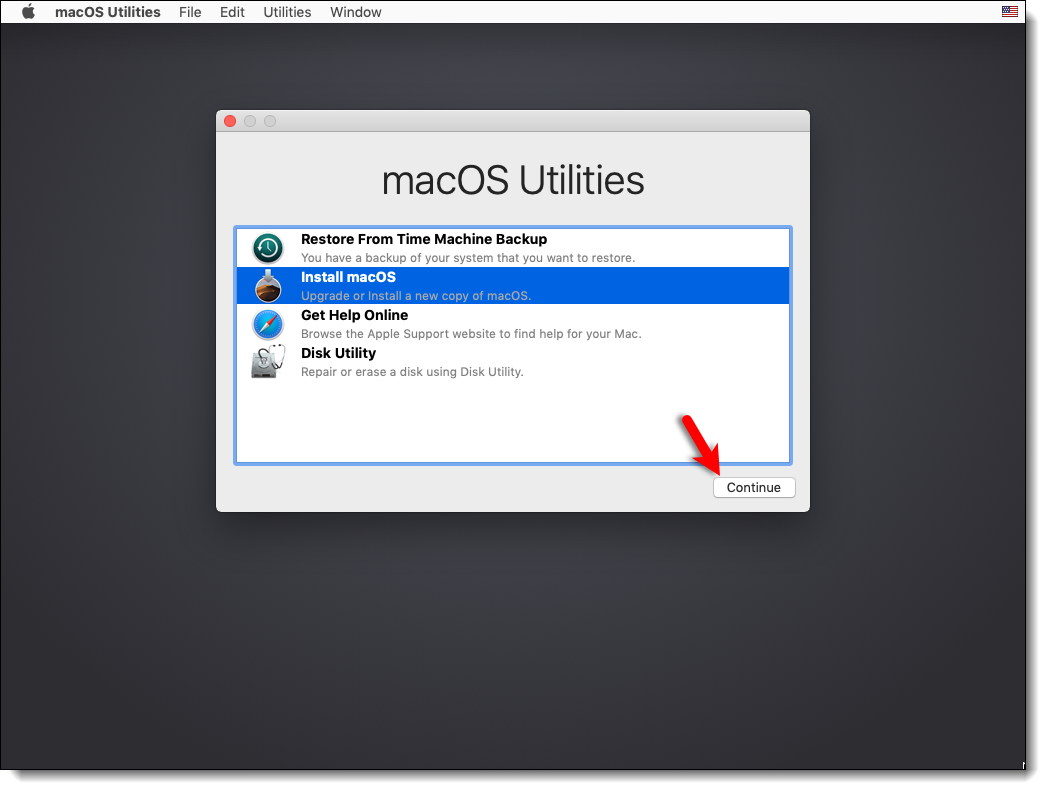
Select Install macOS Mojave
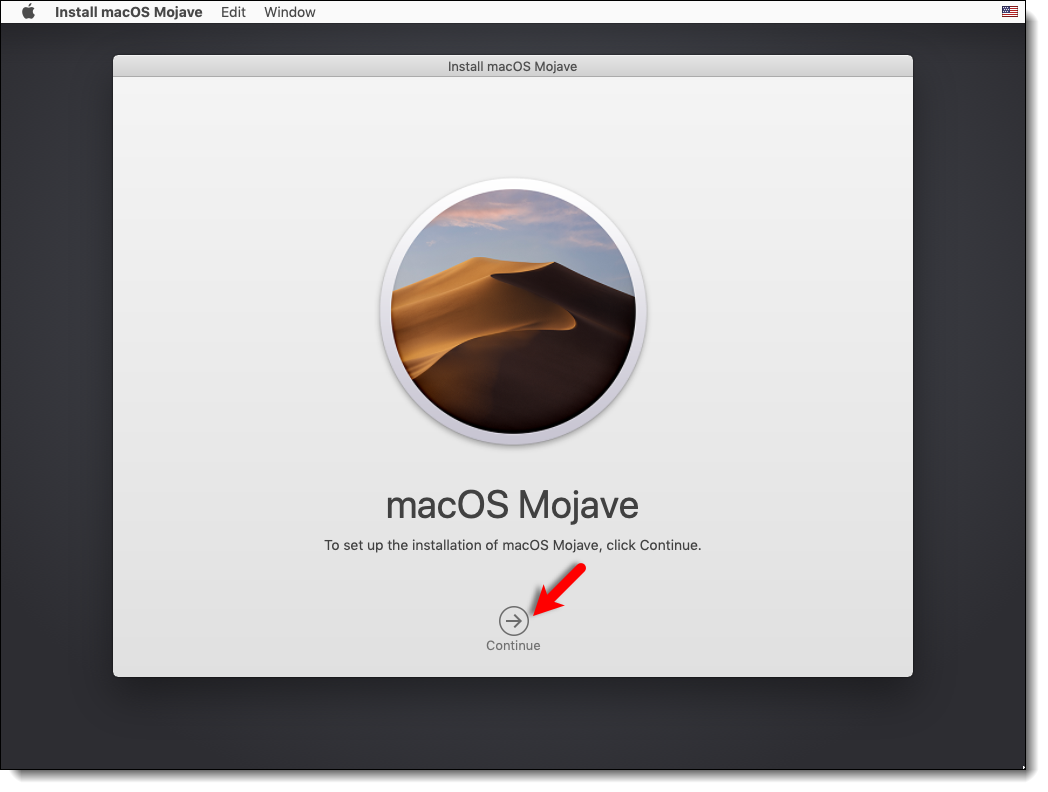
- Click Continue on Install macOS Mojave screen.
Install macOS Mojave
- Agree to the macOS Mojave License agreement.
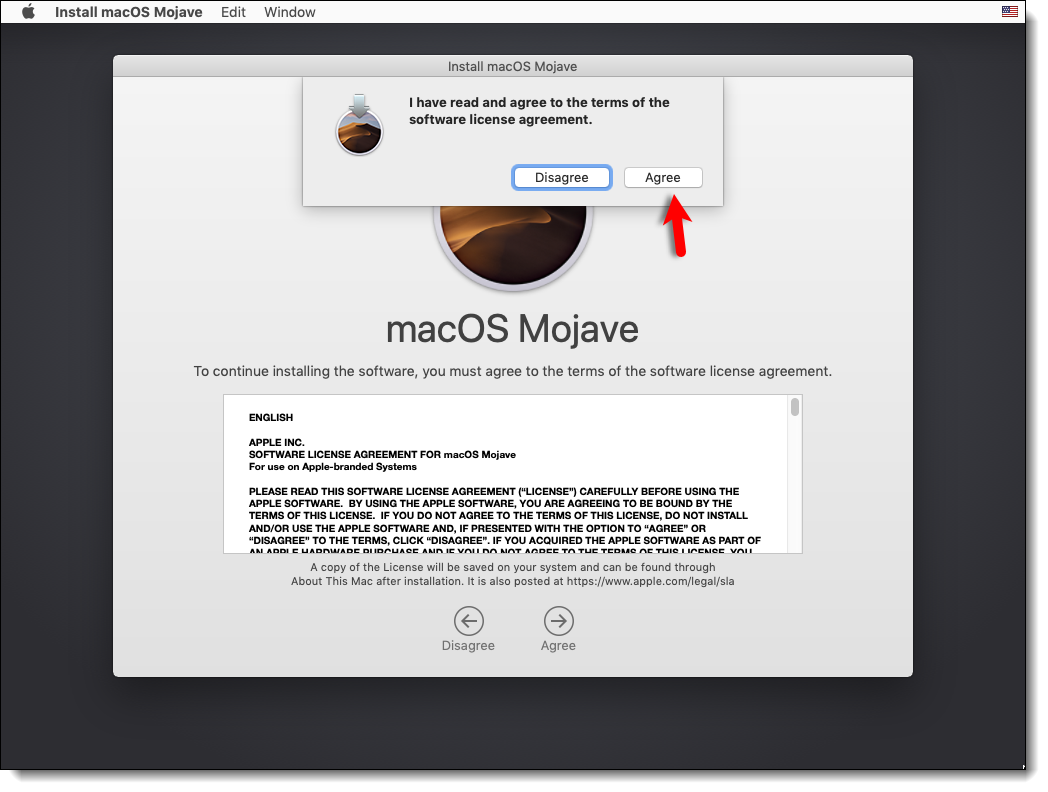
Agree to the macOS Mojave License agreement
- Select macOS HD and click Install.
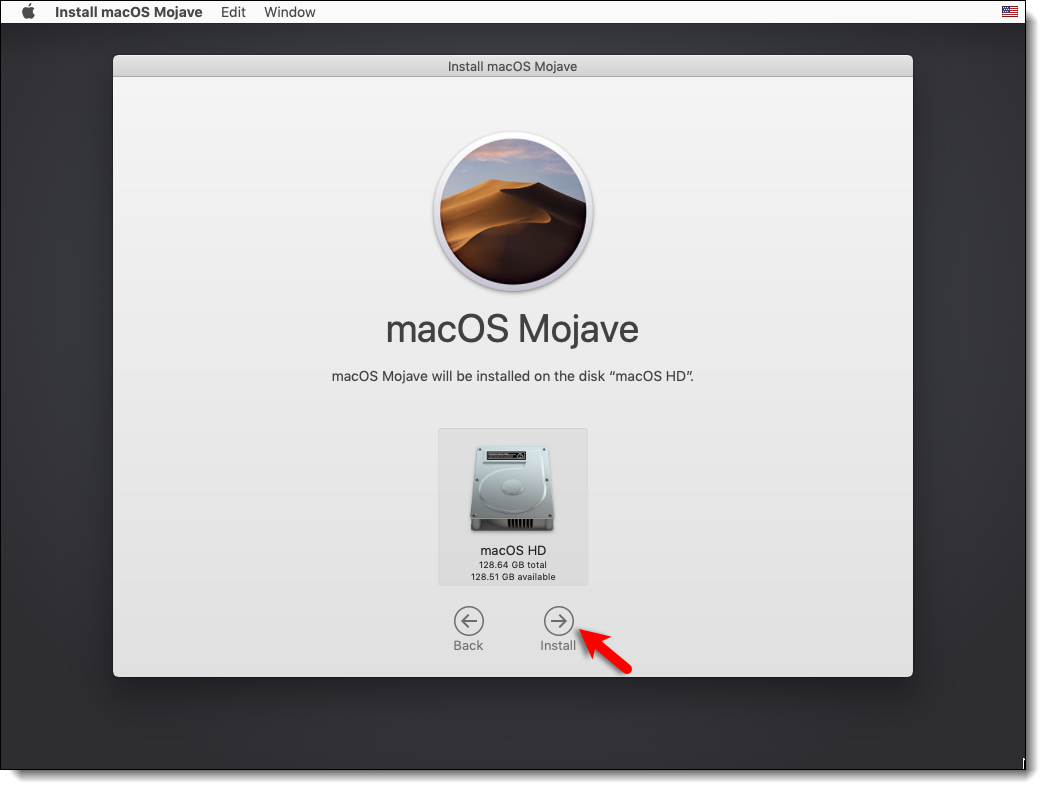
Install macOS Mojave On the VMDK
- Wait for macOS Mojave will restart 2/3 times to complete the installation itself without you touching anything. It will take roughly 15-20 minutes depending on your system, be patient.
-
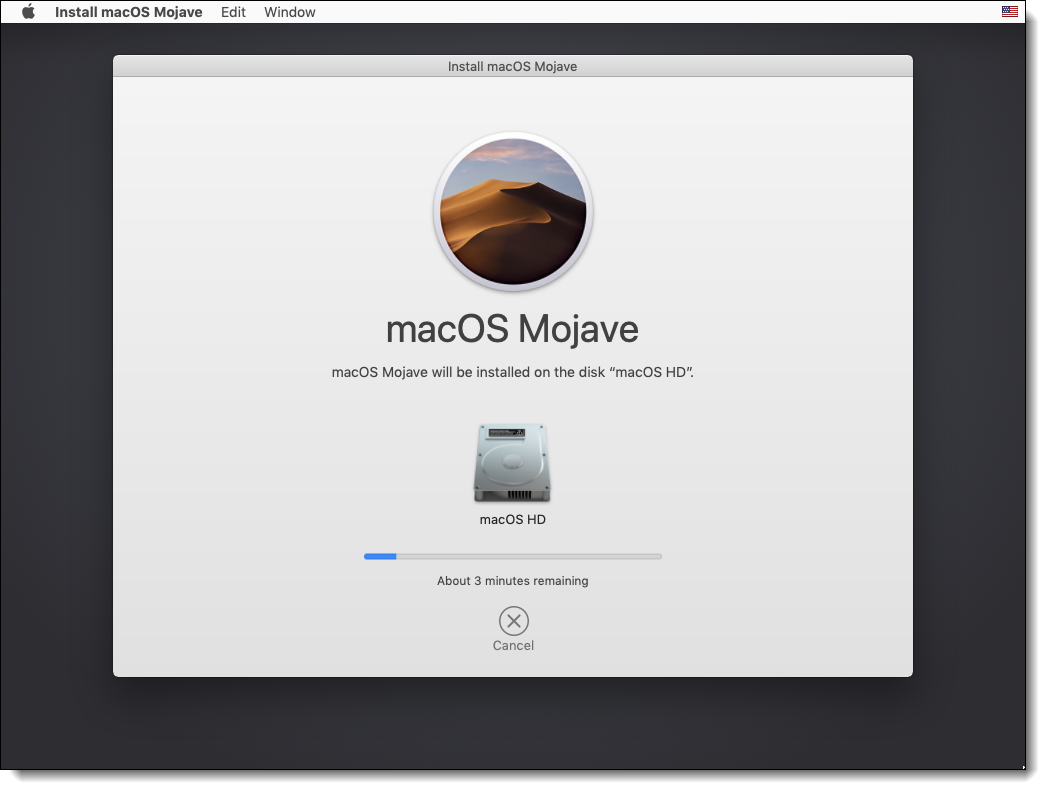
- Installing macOS Mojave On the VMDK
-
- Installing macOS On the VMDK
-
Step 7: Complete Basic macOS Account Settings
Once the installation part complete, the VM will reboot, and after the reboot, you should see macOS Mojave Welcome page.
macOS Mojave Welcome VMware
- Choose your Country and click on Continue.
- Choose a Keyboard Layout and click Continue.
- On the Data & Privacy page, click Continue.
- Select Don’t transfer any information now and click Continue.
- On Sign in with your Apple ID page, click Set up Later and click on Skip.
- Agree to the Terms and Conditions.
- Fill out the Full name, Account name, Password, Hint and click on Continue to create your user account for macOS Mojave 10.14.
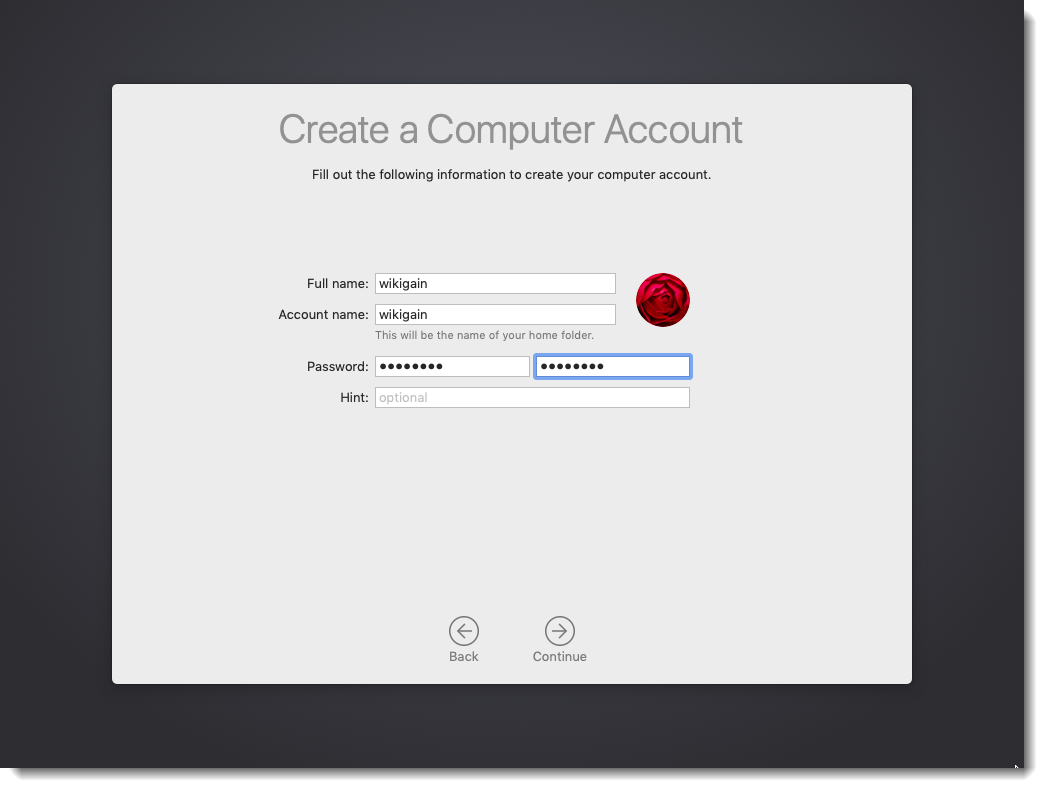
Create macOS Mojave User Account
- On the Expres Set Up page, you don’t want to do something just click Continue.
- Dark mode feature is added newly to macOS Mojave 10.14 so you can select Light or Dark mode then click Continue.
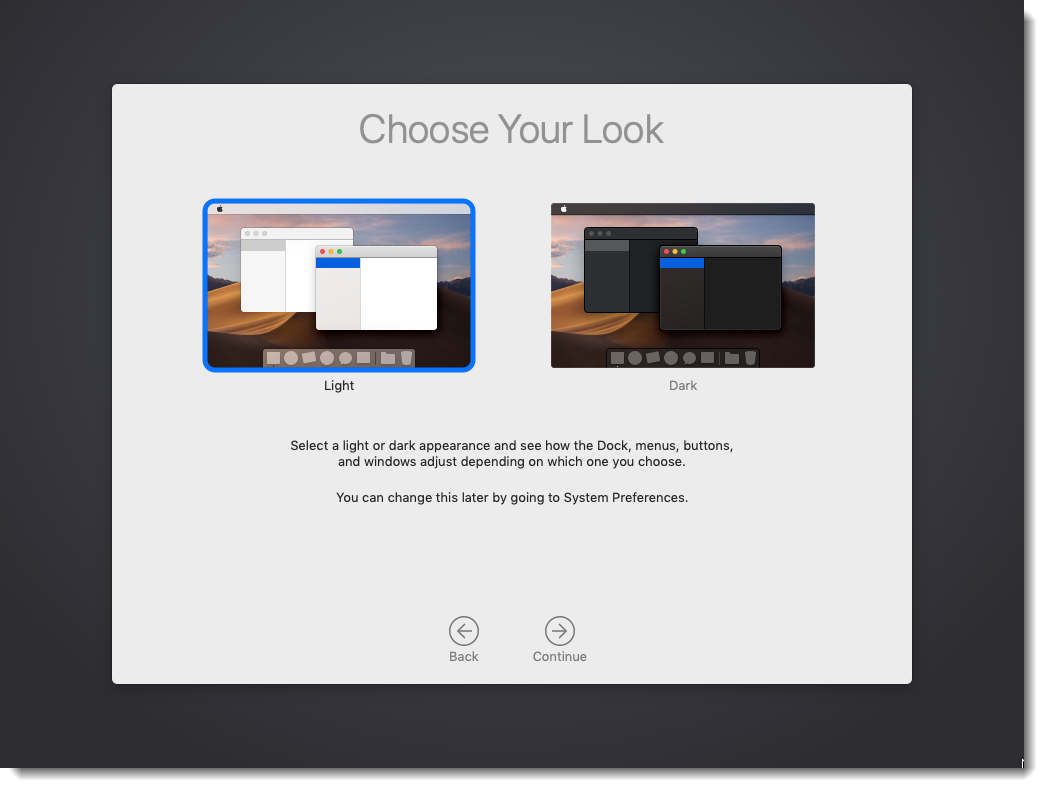
Choose macOS Mojave Look
- Wait a little while to Setting Up Your Mac. Then you should end up in the desktop of macOS Mojave.
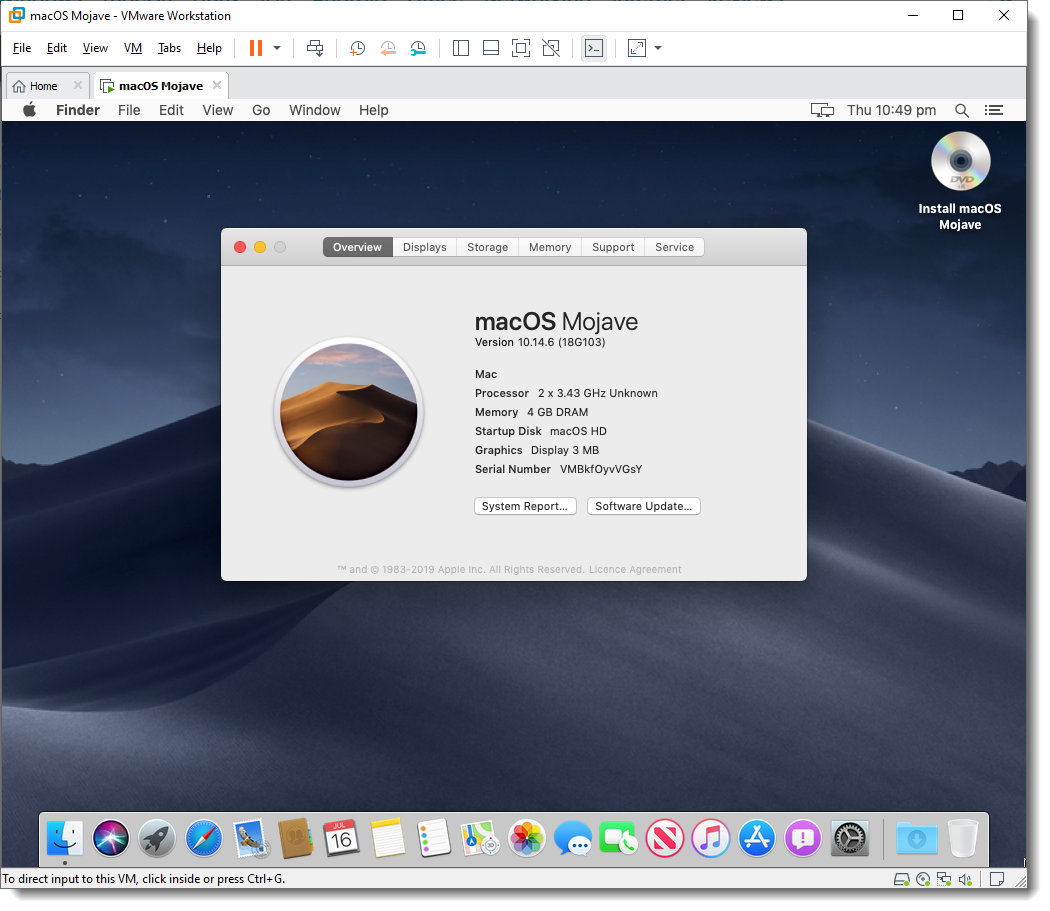
Successfully Installed macOS Mojave on VMware
Step 8: Install VMware Tools (Optional)
So now you should have noticed that the resolution of macOS Mojave can’t be changed and it’s not working as smoothly as you expected. To fix macOS Mojave Resolution on VMware or Make it more responsive, you need to install something called VMware Tools. It’s quite easy and straightforward to work with any system. So to do that we have created a comprehensive guide. Please click the link below and follow the guide Step by step.
See this guide: How to install VMware Tools on macOS.
Summary
Basically, in this article, I’ve shown you the step by step pictorial guide on how to install macOS Mojave on VMware on Windows 10. After reading and following this guide, you should have done the following:
- Download the prerequisites
- Install the Prerequisites
- Unlock VMware to Install macOS Mojave on Windows
- Create a New Virtual Machine
- Edit macOS Mojave VMX File (Optional)
- Install macOS Mojave as VM on VMware
- Complete Basic macOS Account Settings
- Install VMware Tools (Optional)
Related: How to Install macOS Mojave on VirtualBox on Windows.
We are ready to keep receiving your feedback about this article, and other posts on wikigain. Your suggestion and feedback are highly appreciated. Please share with us if the above guide worked.
Any fix for this error?
“The operation on file “C:\Users\no\OneDrive\Documents\Virtual Machines\macOS Mojave\macOS Mojave.vmdk” failed.
If the file resides on a remote file system, make sure that the network connection and the server where this disk resides are functioning properly. If the file resides on removable media, reattach the media.
Select Retry to attempt the operation again.
Select Cancel to power off the virtual machine.
Select Continue to forward the error to the guest operating system.”
Thank you Mukhtar
I had the mojave 10.14 beta on my startup, xcode complained I needed 10.14.4 I downloaded the version in the AppStore which was 10.14.6 and said the drive must be APFS, ,looking around there was a suggestion of creating a partition on AFPS and install on it, I did and it went thru. After it was done I have the 2 partitions but my original partition stayed as HF and the xcode still there works now. I see in the APFS partition it installed the basic OS stuff. Since it works probably I leave it as is… it is not broke then don’t fix it
I really pleased to find this site on bing, just what I was
looking for 😀 as well saved to my bookmarks.
Nice 😀
after vmw boot its show just apple logo than restart im stack
The Patch tools didnt work on my VMWARE Workstation 15. There was no option of apple macos
Download & reinstall from here: https://github.com/theJaxon/unlocker
why when i get extract the compressed folders of the mac os mojave didn’t work out ad give me an error!!!!!
please help me
What the erro says?
What the error says?
I followed that sentence, but it doesn’t work with VMware Player 15, which is installed on Windows 8.1 and keeps booting continues to boot. What should I do?
Did you add smc.version = “0” to vmx file ?
i did this and mine still crashes. What am i supposed to do?
Hi – I installed Mojave successfully. Everything looks good, but Apple will not take my Apple password to connect me to my data on iCloud. I tried to authenticate several ways. I input my password (I know it is correct) but the window hangs.
In another attempt to authenticate, Mojave asks me for my passwords on my iPhone and iPad, but even though they both have 6-digit passwords, Mojave is only giving me a field for 4 digits.
Sorry, this was a year ago, but to help other people, you need to sign into iCloud during the setup if you want to use services like iMessages.
It runs sluggishly in VMware. Does that mean that mean I probably shouldn’t install the OS on my laptop? Is VMware an accurate way to see how it would run if I did so?
Hello there,
Thanks for all your tutorials. I am intended to run macOS on windows just because of Xcode. I used your tutorial and installed High Sierra besides linked VM Tools on that tutorial. Everything worked well but when I tried to DL Xcode I noticed that it is possible for OS 13.x and earlier versions. So I decided to to install Mojave. A problem with Mojave’s tutorial is that there is no linked VM Tools specified to Mojave. I used the VM Tools linked for High Sierra but it did not work. Would you please help me with installing a proper VM tools for macOS mojave on VMW 14?
Tanks a lot.
Great content and post.
I managed to get my Mojave VM up and running on Win10 & Player 15, but the Photos application is not rendering many of the photos in my iCloud library and instead displaying solid black rectangles instead of the photos, both in thumbnails and then when I click on them to drill down into the photo. When I try to Edit the black rectangle/photo from within Photos, the Photos app dies with a core dump that references CUI render/draw calls as the culprit. This seems to impact only HEIC files taken in portrait orientation by my iPhone XS Max. Oddly enough, the same HEIC files render fine if taken in landscape orientation. When I pull any of the non-rendering files out of the Photos app, they render fine in “Preview.”
On my physical Macs, these photos are fine, and they’re fine in iCloud.
Any ideas?
Hi, thank you.
I tried to use Xcode but when a i do click en New Project the app crash. Do you know why?
same problem here, no answers found anywhere on the internet, help would be appreciated
Same problem here
hello
thank you for lesson and work 100% for me
but i have a problem. i install app and copy files to my vmware mac
but when delete and move to trash my copied files and uninstall installed apps, not free up space after empty trash and uninstall apps and the vmdk mac file size is constantly increasing
please help me
hello
please add 10.14.1 version of mac, vmdk file
i know update in mac with app store and update center but need 10.14.1 latest stabke version of mac vmdk file, thank you
when the 10.14 final will release please? I’m waiting for stable version
Hi,
I have an error when i launch macOS : “The CPU has been disabled by the guest operating system. Power off or reset the virtual machine.”
I have Ryzen 7 1700X with SVM Mode enabled so normally virtualization work but with macOS 10.14 (and 10.12, i have tried) no. Maybe you have a fix for this ? :/
What did you do that you’ve got this error?
Did you install macOS on VMware and after installation you’ve got this issue or during installation?
It is because you are on AMD. use this link to make an amd Mojave 10.14.1 vm
vmware.amd-osx.com
I also am having this issue with AMD Ryzen 3900X. You mention in the comment above to “use this link…” What link? Nothing is clickable and there is no URL listed.
Just installed following that instruction. Everything is fine except the speed itself of the running macos 🙂
Mouse Pointer Issues: I am somewhat of a noob with this. I have installed VMware Tools but the mouse is “misaligned.” It does not respond where the mouse pointer appears. How do I fix this?
All archives are corrupt or damaged. i downloaded the files 10 times but still show the same error.
the irony is that i have a limited bandwidth connection and i have already used my bandwidth for whole month due to this download. i am so sad now !!!
Hi there the archives are not working they are all damaged. I downloaded the file 10 times but it shows damage error everytime and the irony is that i have limited bandwidth connection so due to this download i have already used my bandwidth for the whole month. i am very sad right now !
Can you please upload the final version of Mojave?
Yeah, We are working on the and ASAP we will update the guide with macOS Mojave final version.
hi. I need use a vmware version 12, but when I run the virtual Mojave it return this error : “The selected virtual disk is incompatible with this Workstation 12.x virtual machine. Adding this disk would make this virtual machine incompatible with older VMware products.”
Can you help me ?
Desperately waiting for mojave build (18A391) vm release.
coming soon
Any updated regarding screen resolution? Used VM Tools.iso from Patch Tool, not working 🙁
Update guide with new tools coming soon
Very complete tutorial, worked perfectly!
Nice job!
Thanks for sharing your feedback dear:)
Any way to change the Display resolution?
Watch this video: https://www.youtube.com/watch?v=Ukqaqz_GiQY
i am stuck at running the vm
apple brand show with progress bar then comes nothing just a grey display
where is the problem
Did you do step #5 of the guide ?
i did it
no chance until now
but i really need a solution because i need to setup the virtual machine for ios development
plz if you can lend a hand help me to solve this issue
Where did you stick? What’s your error?
would like to know how to increase vram/graphics memory to try out some photo editing.
i install the Patch Tool for mojave 10.4
the probleme in select a guest operating systeme apple mac os s x not show
It seems that the patch tool didn’t worked. Try again and install it as admin.
is there a way to increase the resolution please ?
thanks
any way to change the resolution on the screen as there was with previous versions ? thanks
Yes dear, the guide will be available shortly after the final version of macOS Mojave is released.
The same as Ben:
1 – The resolution is stuck on HiDPI so I get 2x UI size. I try to switch to non HiDPI and it immediately reverts back without any input. I tried SwitchResX and it crashed trying with switch resolutions.
how to increase graphics memory? i can’t find the option to change or increase it.
Can We take a backup and restore it to MAC from version to another?
I’ve not tried but according to Macworld, it’s possible. Just read this guide.
Archive files are corrupt! Hours of downloading and in the end they cannot be opened at all. Both Mojave and Patch Tools
Thanks for sharing your feedback. I will check it out and fix it ASAP.
Archives of both Mojave and patch tools are damaged and cannot be opened!
If you mean the links are damaged then i have checked and it is working fine.
I’ve a problem after I installed Vmware tools : I still can’t fix the display? or the shared folder?
I did uninstall an install many times with no results
Use this link.
https://drive.google.com/file/d/1pkxFURdFuPglH5qSqmPel-GeO4kBlXWp/viewI tried that now but the same problem every time. doesn’t support display or shared folder!!!
my virtual mac is 10.13 and I update before to 10.13.5 do you think if I update it to 10.13.6 could fix this issue or not?
No dear, i think it’s not because of the macOS version. Reinstall and make sure to install VMWare tools also and it might fix your issue.
Is there a way to run it under Hyper-V? I cannot disable Docker to run it 🙂
Anyway, great tutorial !
We’ve not tested on Hyper-V
I think Hyper-V doesn’t support Mac OS
i got this msg the cpu has been disabled by the guest operating system.
AMD cpu any help?
I’ve managed to install things but there are a couple goofy things:
1 – The resolution is stuck on HiDPI so I get 2x UI size. I try to switch to non HiDPI and it immediately reverts back without any input. I tried SwitchResX and it crashed trying with switch resolutions.
2 – Performance is sluggish, especially with the UI. I feel like it is having graphical troubles, is it because my NVidia 1060 is not supported?
Yeah, there are a lot of things to fix. Install VMware tools and it might fix some of them.
Hey Ben,
It sucks, I’ve struggling it so far until I found it here how to fix things, check. You’ll thanks me later.
https://www.geekrar.com/fix-macos-mojave-screen-resolutionhidpi-on-vmware/Hi, the Download links are not working the files are missing archive.
please advise.
Hi dear,
Try again, all the links are working now.
Is there any way to install mac OS on linux VMware?
Yeah, all the steps are pretty much the same if you want to install macOS on Linux on VMware.
Great tutorial! Thank you. Just need to find serial key for VMWare Workstation. Better to user VmWare Player instead.
@heythem
You need to update VmWare to latest version and then run unlocker. This will give you 10.14 as an option.
the unlocker game me only mac 10.13 as option
Didn’t get what you mean!