
In this article, I’m going to show how to enable virtualization technology on Asus, Acer, HP, Dell, and Lenovo based systems. This feature is a modern technology on the laptops or desktops which allows us to install multiple operating systems on the host machine without any problem.
What is Virtualization?
Virtualization is the process of creating a software-based, or virtual, representation of something, such as virtual applications, servers, storage, and networks. It is the single most effective way to reduce IT expenses while boosting efficiency and agility for all size businesses. Read more on the VMware website.
Modern businesses virtualize their environment to reduce the cost of hardware and labor. Because by using virtualization technology, the organization doesn’t need to buy physical hardware to install the operating systems on them. Instead, they buy one physical computer with virtualization capabilities and install various operating systems.
Why Enable Virtualization Technology?
Modern CPUs include hardware virtualization capabilities that help accelerate VirtualBox, VMware, Hyper-V, and other virtual machine applications. However, Intel VT-x is not always enabled by default. If the hypervisor is not enabled, you will see a message like “The processor on this computer is not compatible with Hyper-V” or or “No hypervisor was found” or “The guest operating system has disabled the CPU“.
Simply, we should enable VT-X when we want to use VMware, VirtualBox, Hyper-V. If you want to install any OS on virtualization applications then you need to enable vt-x from your system bios. In this guide, I’ll show some popular computer virtualization technology such as Asus, Acer, HP, Dell, and Lenovo.
How to Determine Virtualization Technology is Enabled or Disabled?
To know whether your system has virtualization technology and enabled or disabled, follow the following steps.
- Right-click on the Taskbar and select Task Manager.
- Click on the Performance tab and select CPU from the left-hand side.
- See Virtualization on the CPU page (Enabled).
If it’s enabled, you don’t need to do anything. If it’s disabled than should follow the steps below to enable the Virtualization Technology on different computers.
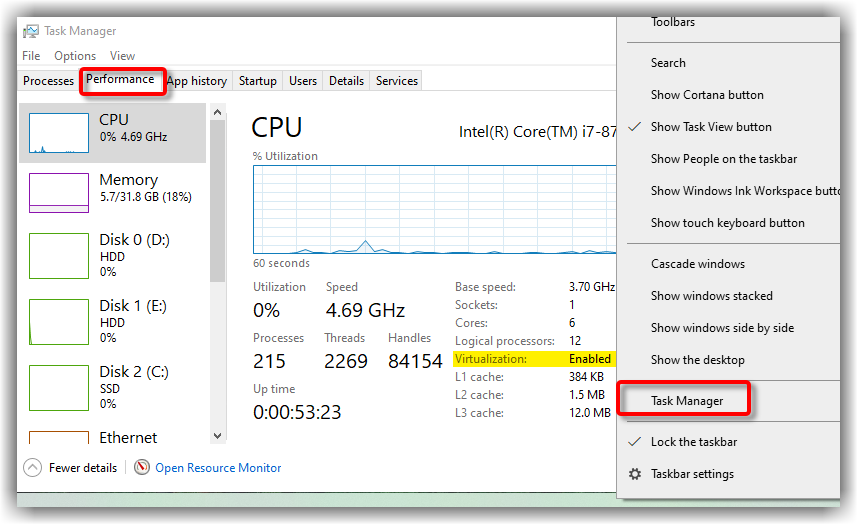
Determine Virtualization Technology is Enabled or Disabled
Enable Virtualization Technology on Asus Acer HP Dell Lenovo
I’ve given as many details as needed so now without any further details, let’s get the ball rolling. Before you enable VT-x, you should find your BIOS and Boot menu keys from the link below.
Related Post: BIOS and Boot Menu Keys for All Laptops & Desktops
Enable Virtualization Technology on ASUS
On the Modern BIOS, the virtualization technology is under CPU Configuration whereas it’s different on older BIOS. So read the following steps to learn about old and new BIOS.
- Turn on or Restart your computer then press the F2/Del key from your keyboard to enter into Asus BIOS.
- From the BIOS, click Advanced Mode (F7).
- Click the Advanced Tab and CPU Configuration.
- Scroll down and click Intel (VMX) Virtualization Technology. Select Enable from the drop-down menu.
- Press the F10 key to save the changes.
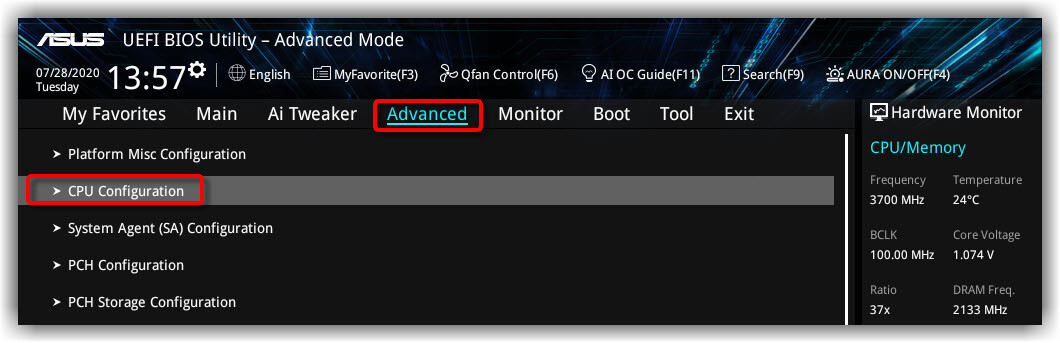
Enable VT-X on ASUS
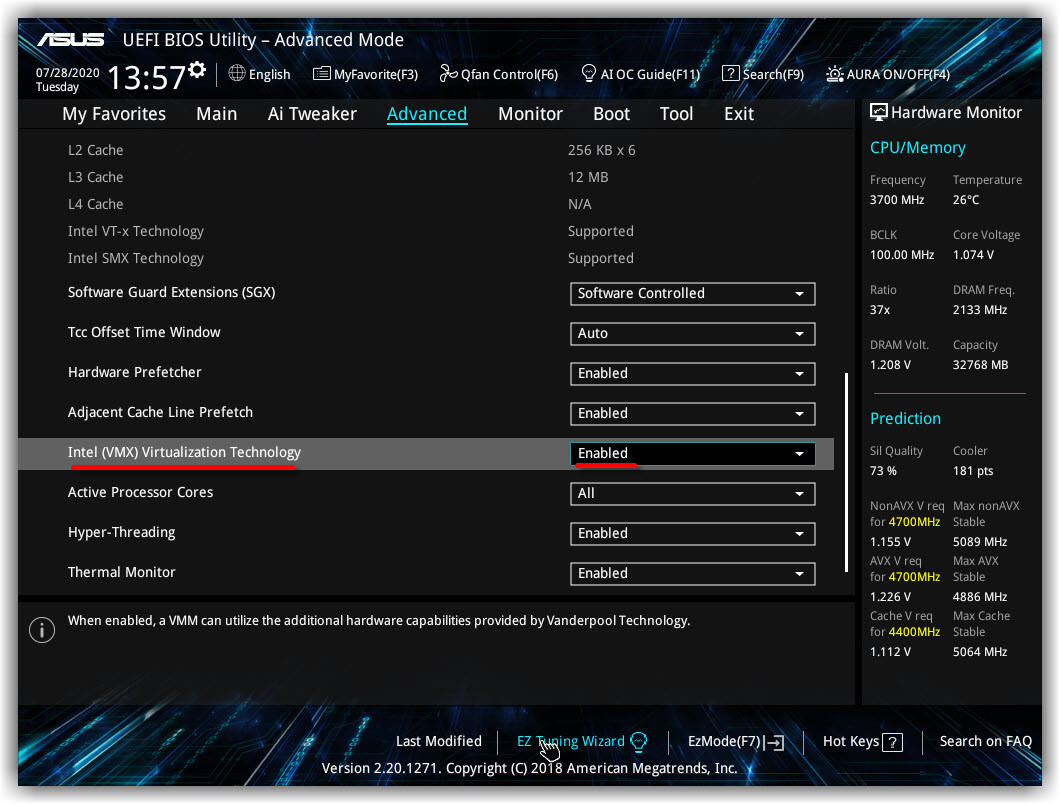
Intel (VMX) Virtualization Technology
Enable Virtualization Technology on Acer
- Turn on your system or Restart if you already turned on. Press the F2 key to enter into BIOS Setup.
- Select the System Configuration tab, then select Virtualization Technology and press Enter.
- Select Enabled and press Enter. Press the F10 key to save your changes.
Enable VT-x on Acer
Enable Virtualization Technology on HP
- Turn on the HP computer and immediately press F10 to boot into the BIOS.
- Under the Security tab, use the down arrow to select System Security and press Enter.
- Select Virtualization Technology (VTx), press Enter, then Enable it.
- Press the F10 key to save your changes and exit from the BIOS.

Enable VT-x on HP
Enable Virtualization Technology on Dell
Newer models: F2 key while Dell logo is on screen.
Alternatively: F1, Delete, F12, or F3.
Older models: CTRL+ALT+ENTER or Delete or Fn+ESC or Fn+F1.
- Turn ON the System.
- Press F2 key at startup BIOS Setup.
- Press the right arrow key to Advanced tab, Select Virtualization, and then press the Enter key.
- Select Enabled and press the Enter key.
- Press the F10 key and select Yes and press the Enter to save changes and Reboot into Windows.
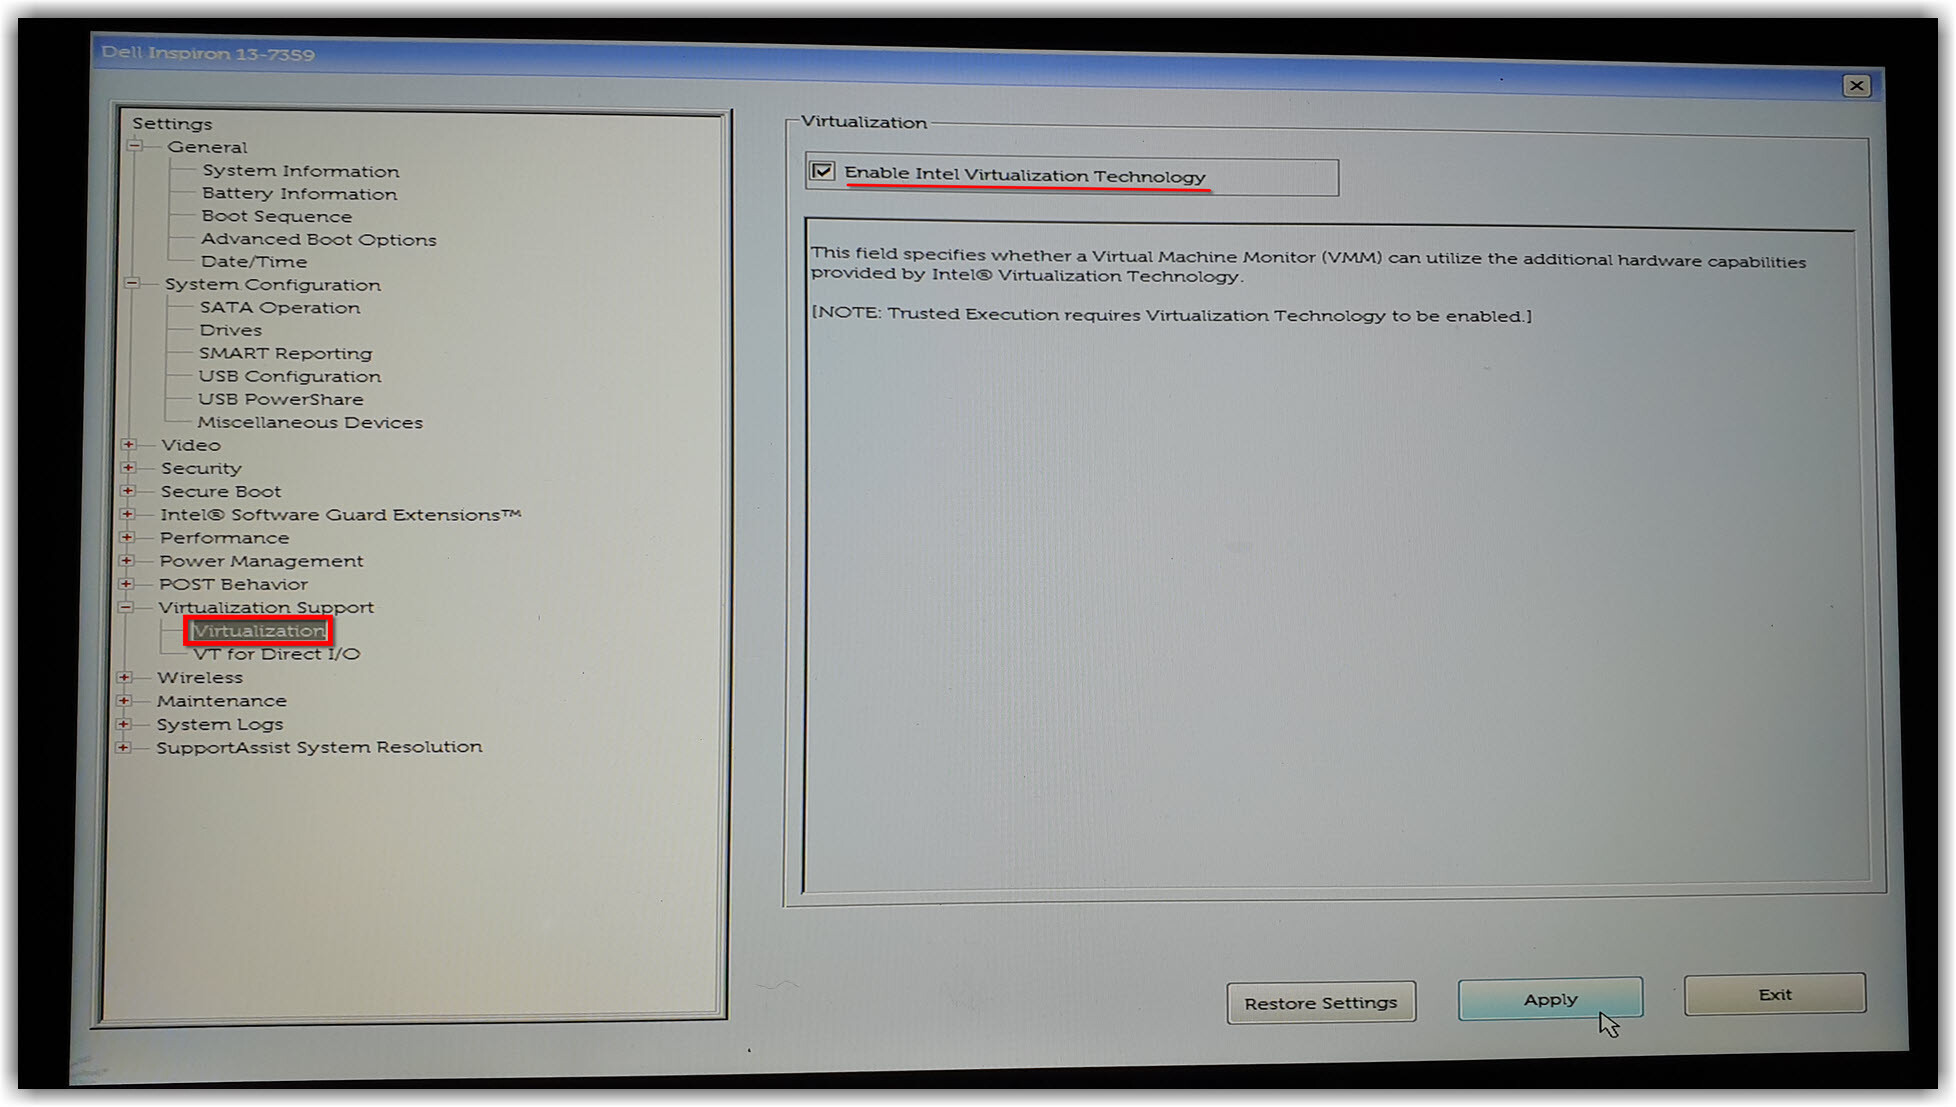
Enable VT-x on Dell

Enable VT-x on Dell
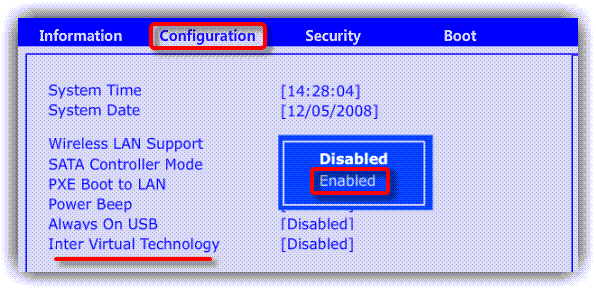
Enable Virtualization Technology on Lenovo
- Turn on your computer.
- Press the BIOS key (F1,F2) to start the BIOS.
- Navigate to the Configuration tab and select Intel Virtual Technology, then switch to Enabled.
- Press F10. Then, press Enter and YES to save the settings and confirm booting to Windows.
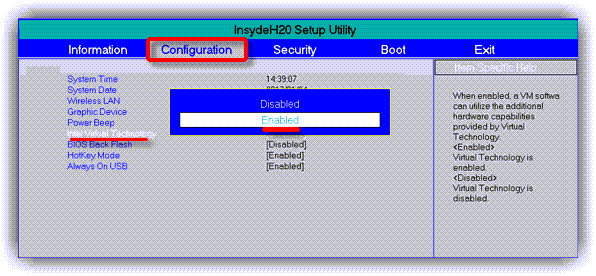
Enable Virtualization Technology on Lenovo
Enable Virtualization Technology on Sony
If your VAIO has an ASSIST key, try to press and hold it while you power on the laptop. This also works if your Sony VAIO came with Windows 8. With the computer turned completely off, press and hold the Assist button until the black VAIO screen appears.
NOTE: The location of the Assist button will be different depending on the computer model. Refer to the operating instructions supplied with the computer for the exact location of the Assist button on your model.
- At the VAIOCare | Rescue Mode screen, press the Down Arrow key until the Start BIOS setup [F2] option is highlighted, and then press the Enter key.
- In the [BIOS Name] Setup Utility screen, press the right-arrow key until the Advanced tab is selected.
- On the Advanced tab, press the down-arrow key until Intel(R) Virtualization Technology is selected and then press the Enter key.
- Use the arrow keys to select Enabled, and then press the Enter key.
- Press the right-arrow key until the Exit tab is selected.
- Press the down-arrow key until Exit Setup is selected and then press the Enter key.
- In the Save screen, verify Yes is selected and then press the Enter key.
Enable Virtualization Technology on Toshiba
- Turn ON the System.
- Press F2 key at startup BIOS Setup.
- Press the right arrow key to Advanced tab, Select Virtualization Technology and then press the Enter key.
- Select Enabled and press the Enter key.
- Press the F10 key and select Yes and press the Enter key to save changes and Reboot into Windows.
Summary
In this post, I’ve shown how to enable virtualization technology (VT-x) on different computers such as Asus, Acer, HP, Dell, Lenovo, Sonny, and Toshiba. I hope you guys liked the article and have been helpful. If your system is not on the list, let’s know in the comment section and we’ll find it for you.
I have an Acer Aspire 5332 and there is no configuration tab in the BIOS. Also, in the task manager it says virtualisation is not capable