Windows 11 system requirement are pretty strict specifically for the TPM 2.0 chip. At the beginning it was an issue for the virtualization software’s but right now many virtualization software have fixed the TPM 2.0 chip issue. The Parallels desktop which is a fine application for virtualization and the open source community tools like VirtualBox and UTM are also counted one of them. In fact UTM is free and really simple compared to the parallel desktop for installing and testing any operating system. Since UTM is an open source virtual machine application I have decided to guide you how to install windows 11 on it. The steps are the same for installing macOS and Linux operating systems too. The only difference is, instead Windows 11 VHDX, you have to add the macOS and Linux installer. Enough, lets begin the process of How to Install Windows 11 on UTM Virtual Machine in M2 Mac?
Steps to Install Windows 11 on UTM Virtual Machine in M2 Mac
Step #1. In order to install windows 11 on UTM virtual machine and M2 MacBook you have to download the required files.
Download Files:
- Download UTM Virtual Machine App: you can visit the official site of UTM and get the latest version of UTM for your macOS.
- Download Windows 11 ARM version: A standard Windows 11 ISO will not work and you have to download an ARM version of Windows. The bad news is that Microsoft has not yet released the Windows 11 ARM addition ISO image. But if you are part of the insider program, you can download the Windows 11 ARM version in the VHDX format. So you need to sign up for the Windows Insider program and get the Windows 11 ARM VHDX right away.
- Spice drivers for Windows: After you installed windows 11 on the UTM virtual machine you will notice a screen problem and the drivers issue. For that you have to simply download and install the spice guest tools right away.
Step #2. To begin the process of installing Windows 11 on UTM virtual machine, you have to install it first. So the double click on the UTM.dmg file to mount it. The moment it is mounted, you have to drag the UTM into the applications directory. It means right now the UTM has been added to the launchpad and to the applications directory. Whenever you search through the spotlight the UTM will appear.
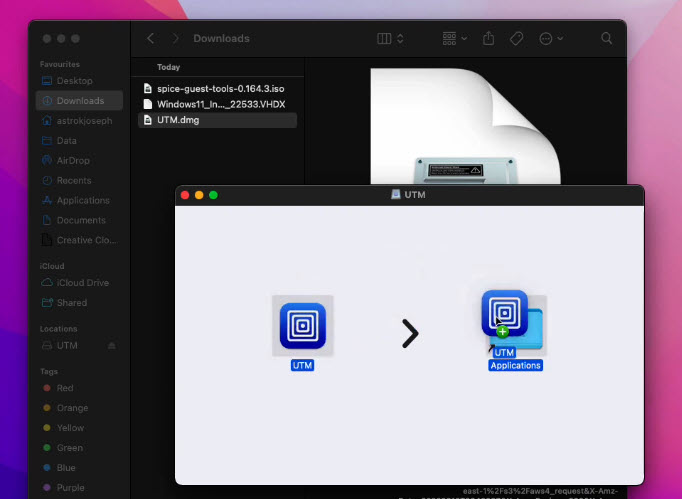
Install UTM
Step #3. it is time for us to create a virtual machine of Windows 11 into the UTM virtual machine. So, open the UTM through the launchpad or spotlight, any mtheod that you are comfortable with. Once it is opened click on create a new virtual machine.
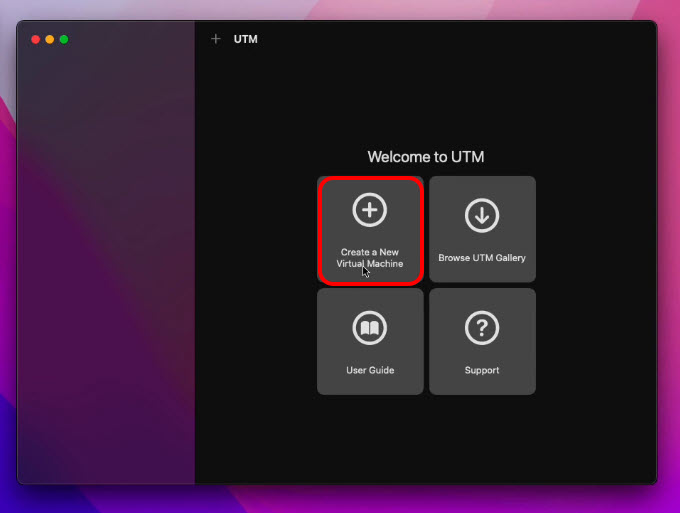
Create a New Virtual Machine
Step #4. To start the process UTM provide us with the two options, virtualize and emulate, for now you have to click on virtualize.

Virtualize
Step #5. This is a step where you have to select the guest operating system and in our case it is windows, because we are about to install windows 11 inside the macOS 12.
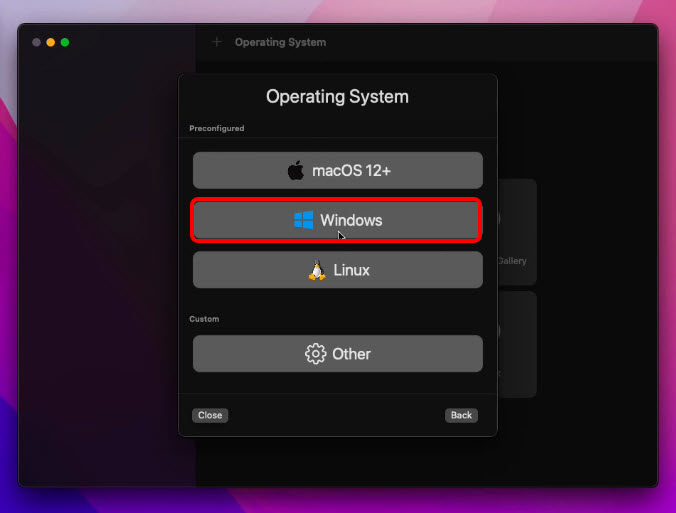
Guest Operating system
Step #6. After choosing the guest operating system, you need to add the Windows 11 ARM edition to the UTM. Make sure the box “Import VHDX Image” and “UEFI Boot” are selected. Click on browse and locate the location of windows 11 VHDX that you downloaded from the Microsoft website using your insider account.
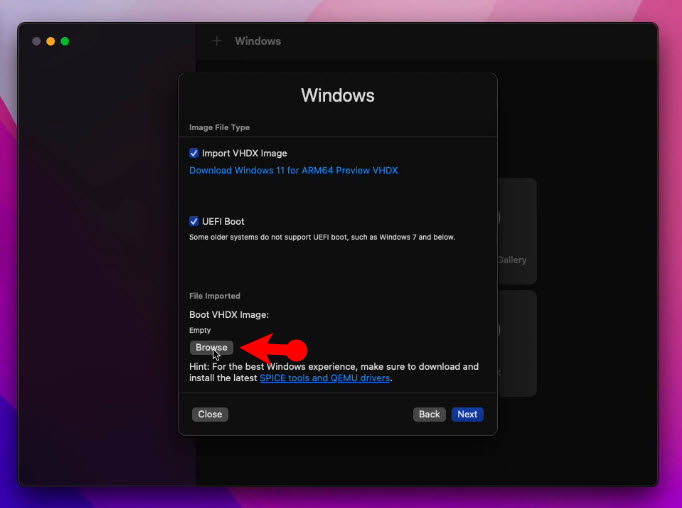
Add the Windows 11 VHDX to the UTM VM
After clicking on Browse, locate the windows 11 VHDX file and open it.
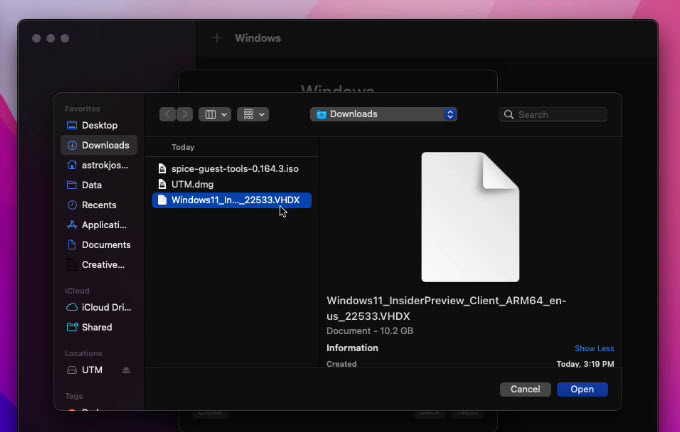
Open it
Step #7. You have to configure hardware settings in this step, such as RAM and the CPU cores. By default Windows 11 requires 4GB of RAM and 2 CPU cores, it means you can leave it with the default settings and go on.
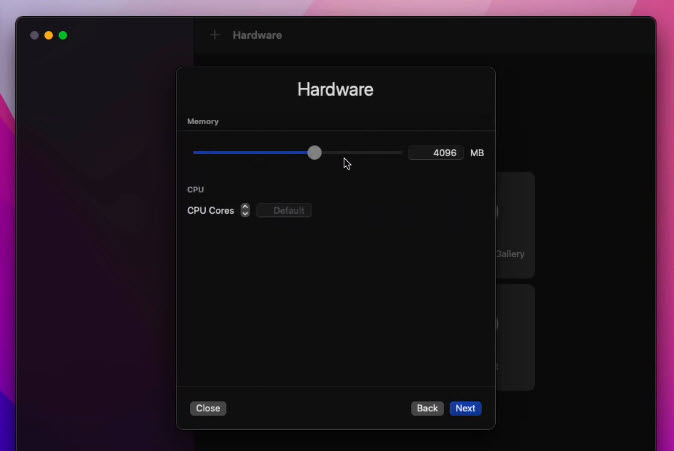
RAM and CPU Cores
Step #8. Shared directory is a folder which is shared between the guest operating system and the host where you can share files bidirectional. If you have a specific folder in mind to share between the host and the guest operating system, click on browse and locate and open it.
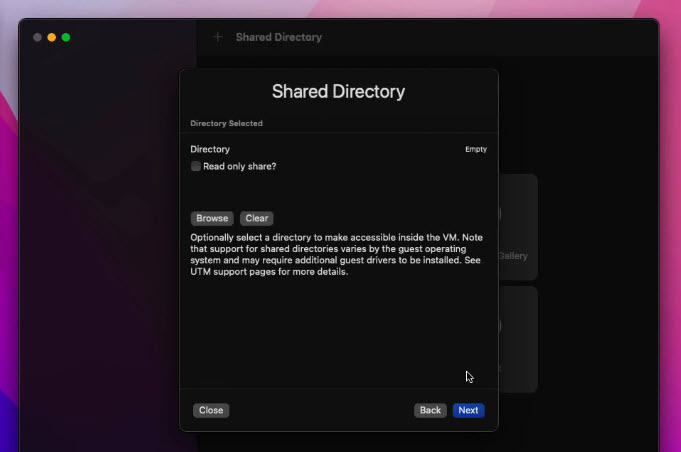
Shared Directory
Step #9. Let’s review all the settings until now we have configured to the UTM virtual machine for Windows 11. You can change the name and the other settings that you are seeing on this summary Window in your screen. In my case, I am fine with the current configuration and click on save.
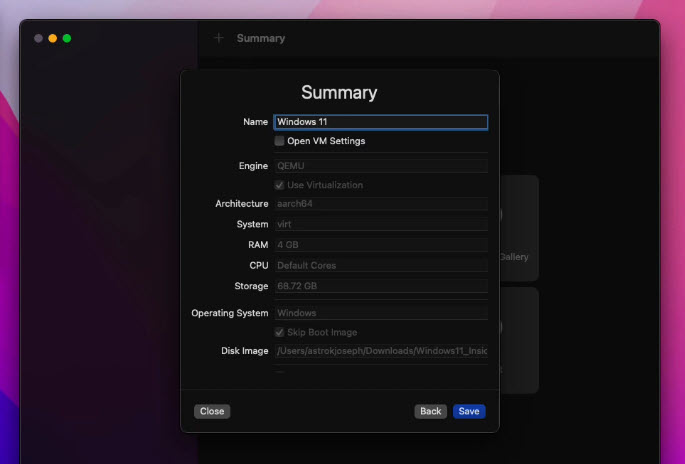
Summary
Step #10. Before starting to install Windows 11, we have to add the spice guest tools to the virtual machine. To add it click on the CD/DVD> then click on browse and locate the Spice Guest tools and open it.
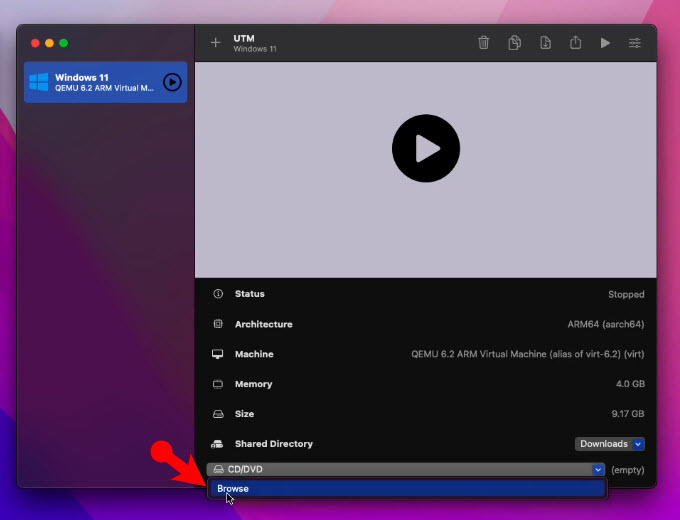
Browse and Add the Spice Guest Tools
Step #11. Open the Spice Guest Tools in the Windows 11 Virtual machine.

Spice Guest Tools
Step #12. Everything is done and now you are ready to install windows 11 in the UTM virtual machine on your M2 and M1 silicon chip. To start the discussion process click on the play icon.
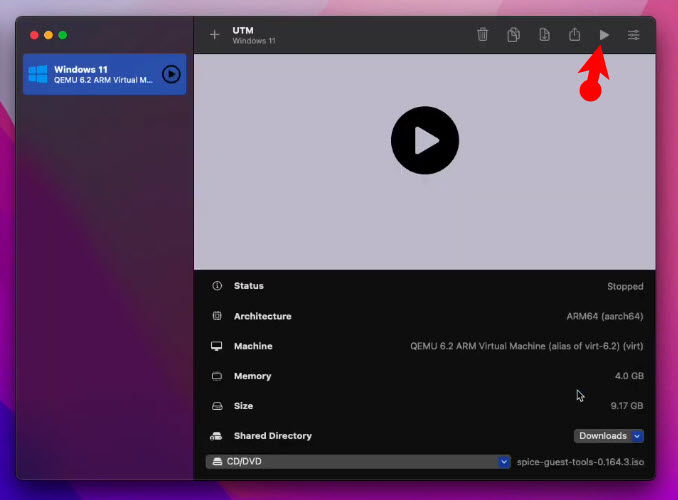
Play the Virtual Machine
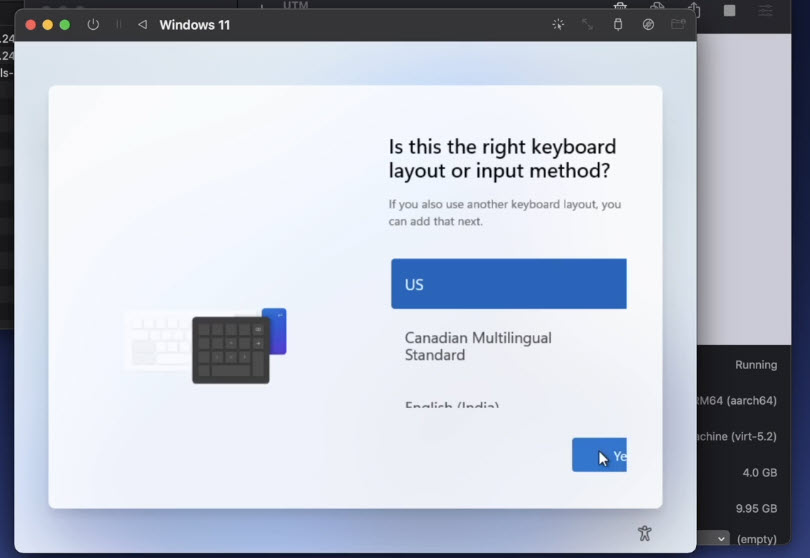
Step #13. After powering on the virtual machine, you have to install windows 11. The steps of Installing Windows 11 is simple.
Start Installing Windows 11
Step #14. After installing the Windows 11 on the UTM App, you will notice the screen resolution is not fine. Also the drivers are not installed, so we have to install the Spice Guest Tools. Open This PC and click on the CD/DVD> double-click on the installer of Spice Guest Tools and Install it.
After installing the Tools, you have to reboot the guest operating system and the drivers issues are fixed. Now you can easily enjoy using Windows 11 on your M2 and M1 Macbook.

Install Spice Guest Tools
Conclusion:
By far this is the easiest method that you can use to install windows 11 on a guest operating system in your MacOS. I hope that this article has been helpful to you for testing windows 11 M2 and M1 Macbooks.
Leave a Reply