There are several methods that you can use to make windows 11 bootable USB on your Mac, and boot camp is also one of them. Frankly to to be clear, boot camp is a feature in Mac which is allowing you to dual macOS and windows side by side in a single hard drive. This feature is only available on the Macs with Intel processors so, silicon chips is out of the equation. Still there are many people that are using Intel macs, it means boot camp is available there. So, they can use this feature to make a bootable USB of Windows for their friend or for another computer.
Steps to Make a Windows 11 Bootable USB using Boot Camp
As I said earlier that there are several methods available that you can use to make a windows 11 bootable USB. These methods includes terminal, boot camp and third party applications such as UUByte ISO Editor.
Step 1. Download Windows 11 ISO Image File
To get this started with making a Windows 11 bootable USB using boot Camp on your Mac, the first step is to download the Windows 11 ISO image file. For downloading the Windows 11 ISO image, you have to open your favorite browser and search for google.com. After that, you have to type download windows 11 ISO and press enter on the keyboard.
Open the first link which will take you to the download page of Windows 11 in Microsoft website.
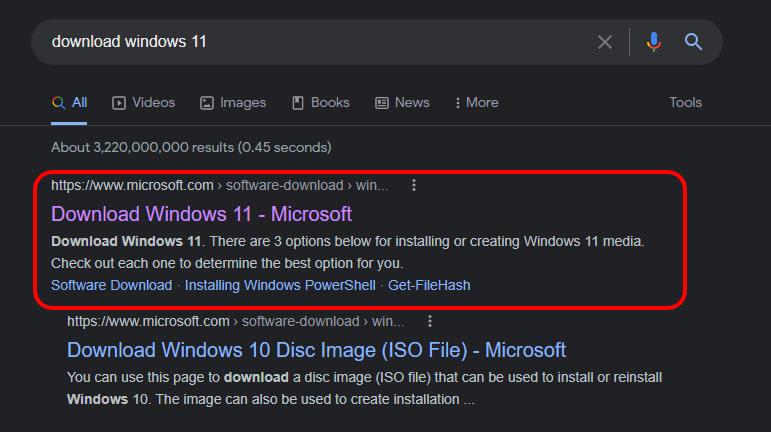
Download Windows 11
Find the section for the download Windows 11 ISO image, configure the settings such as Windows Version, language and finally click on the 64-bit download.
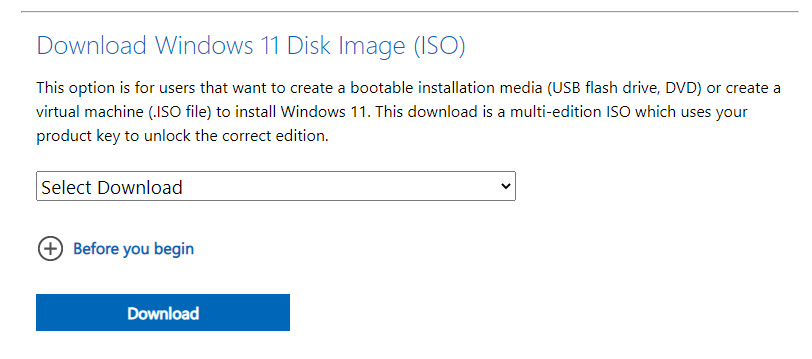
Download Windows 11 ISO Image File
Note: Unfortunately there is not an option to download just a single edition of Windows 11 from Microsoft website. Except for Windows 11 enterprise which you can get the evolution version and use it 90 days for free. The Windows 11 multi edition is more than 5 GB, and if you attach it to the boot camp, I’m sure it’s going to give you an error. The error is because of the file system that mac does not support (NTFS). For that the boot camp is going to format the USB into the Ms-dos or known as fat 32. FAT32 cannot copy more than 4GB files at once. That’s why either you have to split the install.wim or you have to download a single edition of windows 11 from uudump.net
Step 2. Insert the USB Pen drive to your Mac
For the next step of making a Windows 11 bootable USB in Mac is to insert the USB to the computer. In any case, you have to back up the files of the USB because it will be erased during the creation of the windows 11 bootable USB.
Step 3. Create a Windows 11 Bootable USB
This is the crucial and most important section of creating a windows 11 bootable USB using the boot camp. Launch the boot camp assistant from launchpad or simply search for boot camp in this spotlight and open it. Move on from the simple basic configuration of the boot camp and once you are in the tasks Window, you need to Make sure the box of create a Windows 10 or later install disk.

Create a Windows 11 Bootable USB
You need to specify the Windows 11 ISO image that you downloaded in the step one. To specify the location or simply import the ISO into the boot camp click on choose, find it and simply open it. For the destination disk you have to select the USB flash drive that you attached earlier. After adding the ISO and selecting the USB click continue.
The moment you clicked on continue, it’s going to erase the USB, then it’s going to partition it for Windows and finally it’s going to download the required files for creation of the USB.
Conclusion:
The steps to make a Windows 11 bootable USB using boot camp is really simple. But on the other hand since it is not available for this Apple silicon chips, that is the back down to it.
Leave a Reply