If you are an Amazon virtual assistant, perhaps your client may be into a different time zone, for instance USA and you are living into Asian countries. There is a huge time gap between both the countries. So in your day you have to Create an email and then schedule it into the time of the work of USA. Or if you have created a startup of your own, suddenly you remembered to send an important email to your client in the middle of the night. At that time you have to simply create the email and then schedule it for tomorrow or the other day, simple enough. In any case, you need to learn how to schedule email on PC, and Android devices in such cases.
Schedule Email On PC
- launch your favorite browser and search for gmail.com.
- Following that you have to log in with your credentials into the web version of Gmail
- Click on compose to create a new email. In the meantime you have to fill in the required info such as the email address, title of the email and the content that should be included into the email.
- After creating the email, click on the triangle icon beside the send button.
- You can use the default presets of Gmail (tomorrow morning, this afternoon and this Monday) to send the email or you can simply use the custom time and date to send the email.
Note: You can schedule up to 100 emails using the Gmail.
-
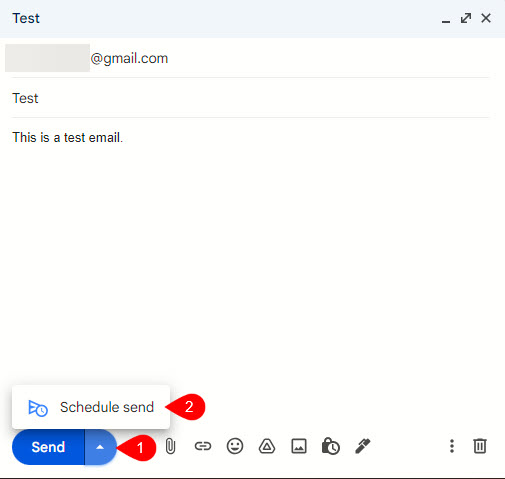
- Schedule Email
-
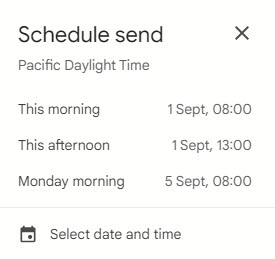
- Configure the Time
Schedule Email On Android
- open the Gmail application on your Android phone.
- Click compose and create a new email. Following that you have to fill in the required info for that email, this info are the title, the email address to whom you will send and finally the content of the email.
- When you are done with creating or typing your email, you need to tap on the three dots at the top right corner of your screen. Then you need to choose Schedule Send.
- You can either choose one of the presets that Gmail recommends or pick a custom date and time to schedule your email.
-
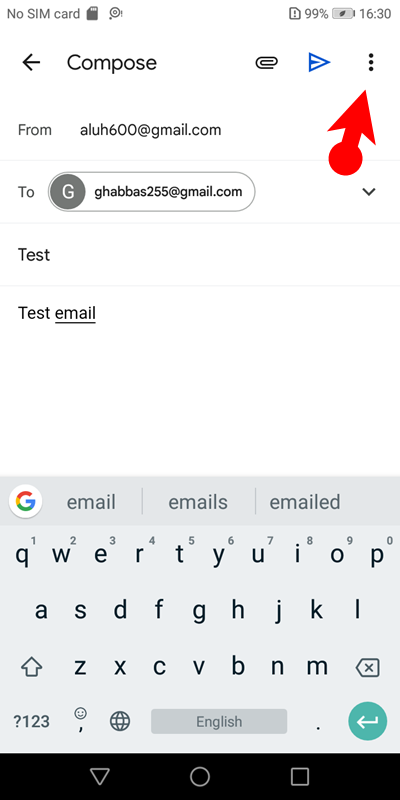
- 1. Tap on the three dots
-
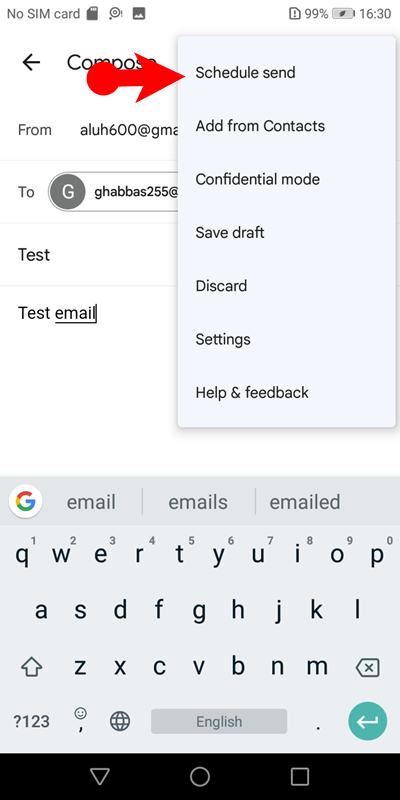
- 2. Schedule Send
-
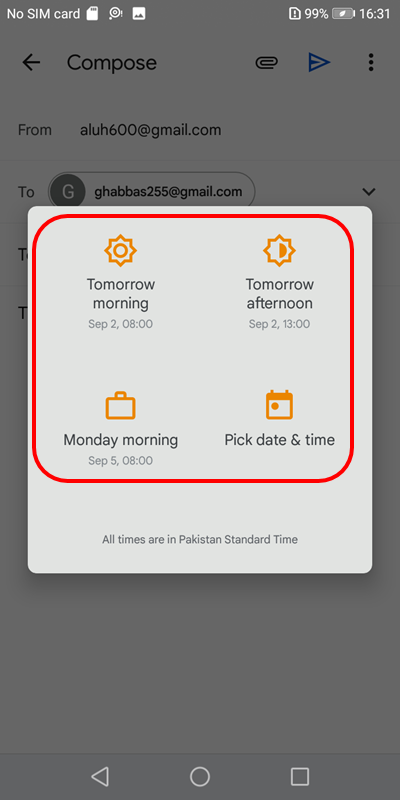
- 3. Pick a date and time
Cancel or Edit the Scheduled email on Desktop
In case you may want to cancel or edit the scheduled email, there is also the option both on PC and Android. Once the e-mail is scheduled, you will find it in the left panel on your desktop version of Gmail. To edit the scheduled email, click on cancel send. It will be reverted back into the draft. Once the email us drafted, you can edit it. After editing the email, simply schedule it once again.
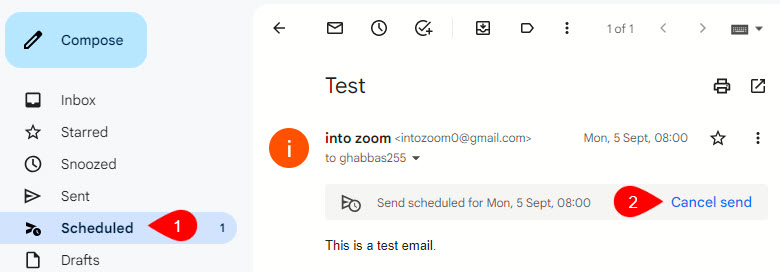
Cancel Scheduled Email
Cancel or Edit the Scheduled email on Android
- Open the Gmail application and then tap on the hamburger menu from the top left corner of your screen.
- Tap on scheduled.
- Following that, view the email, then you can find the option to cancel it. After that make the changes and reschedule the email.
-
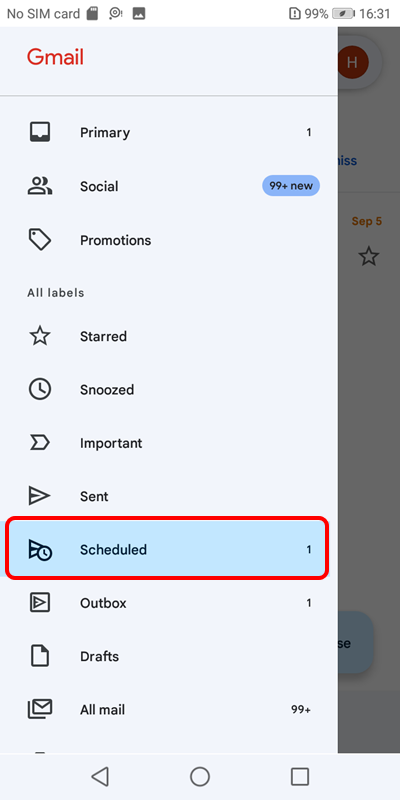
- 1. Scheduled
-
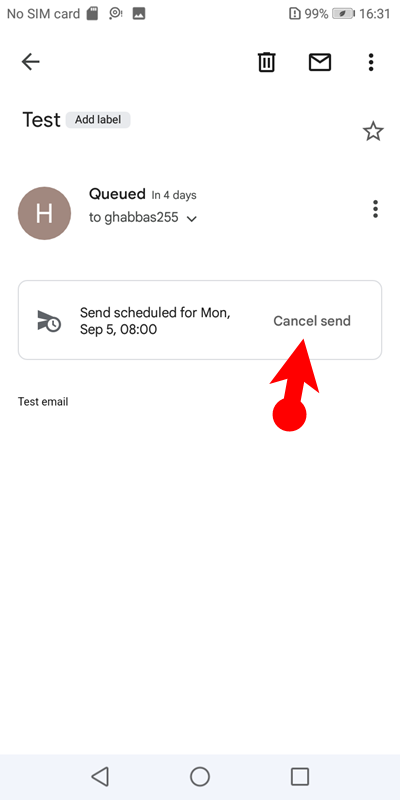
- 2. Cancel the Scheduled Email
Conclusion:
To schedule email means that you have learned an amazing trick to break the time zone issue between you and your client. I hope this trick will come in handy when you need it.
Leave a Reply