Let me guide you on how to install macOS Ventura on VMware on Windows PC easily. On the WWDC (6th June 2022) Apple announced a lot of new lineup products and a new operating system for the M2 silicon chip is introduced. macOS Ventura is a bit cooler compared to the macOS Monterey and the older version because a new design has been applied to the macOS, especially the settings. This time, Apple has also focused on gaming on their new desktop operating system. Some cool amazing new features have also been added such as the stage manager, updates to the spotlight, and an application that can use your iPhone as a webcam.
Steps to Install macOS Ventura on VMware
- macOS Ventura Recommended Requirement
- Check and Enable Virtualization.
- Get and Install VMware Workstation Pro or player.
- Install macOS unlocker.
- Acquire macOS Ventura ISO Image or CDR image. (If you can’t acquire it, create macOS Ventura ISO or cdr image right away.)
- Create macOS Ventura Virtual Machine in VMware on Windows PC.
- Execute command.
- Partition of the macOS Ventura’s Virtual Hard Drive.
- Configure basic Installation of macOS Ventura
- Fix Network Issue in macOS Ventura
- Enable Drag and drop between macOS and the Host
Note: Download Links are provided in each step.
Step 1. Check macOS Ventura Hardware requirements
Make sure your computer has the following hardware capacity.
- Minimum 8 GB of RAM
- Minimum 150 GB of storage
- 4 CPU Cores (2 will also do)
Step 2. Virtualization
By far the most required step of all is to check if the virtualization technology is available on the motherboard of your computer or not. If it was available then you have to enable it. If it was not available then you should ignore installing MacOS Ventura on your Windows PC right away.
To check if your PC has the Virtualization chip on the motherboard, whether it is enabled or No, follow the below steps.
- Open Task Manager by pressing Ctrl + Shift + ESC.
- If you are opening the task manager for the first time, click on more options at the bottom.
- Go to the performance tab> click on the CPU.
- Check the status of the virtualization.

Virtualization
If the virtualization is not enabled, you have to visit the BIOS of your computer and enable it. A full detailed step-by-step guide on how to enable virtualization on Dell, HP, ASUS, and other brands is guided in the below post. First, configure the Virtualization tech, then move on to the next step.
Step 3. VMware Workstation
VMWare is a giant virtualization technology company, and that’s why the VMWare workstation pro is one of their product. You can use it to install and test any guest operating system. In our case, the MacOS Ventura is the perfect option to test it. If you don’t have the VMWare workstation pro, then you can use the free version of the VMWare workstation known as VMWare player. It is free but not open-source, but it can fulfill our needs.
After getting the VMWare workstation, double click on the installer and install it. The installation process is simple enough that you can go with the default options that VMWare is giving to you.
Step 4. macOS Unlocker
I admit that the virtualization technology known as VMware workstation is powerful enough to test any guest operating system. But unfortunately, the apple guest operating system is not available within the VMWare. So you have to enable it by installing the macOS unlocker.
You can get it right now from the Github repository.
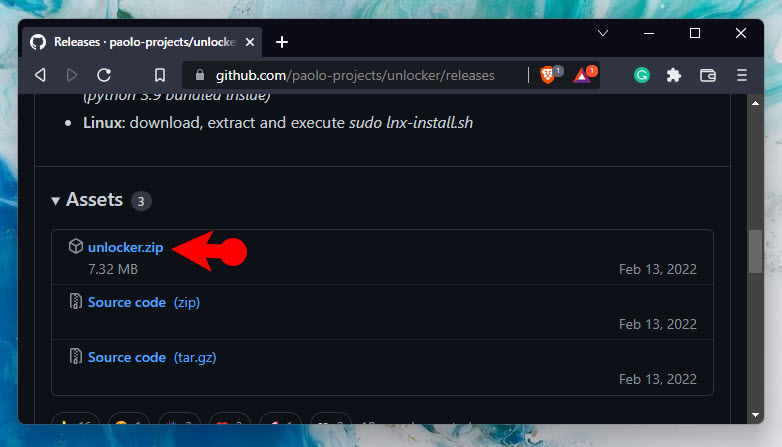
Get macOS Unlocker
After getting the installer, extract it. Following that, find the installer called “Win-Install.cmd”, right-click and run it as Administrator.

Install Unlocker
Wait for the installer to complete the task.
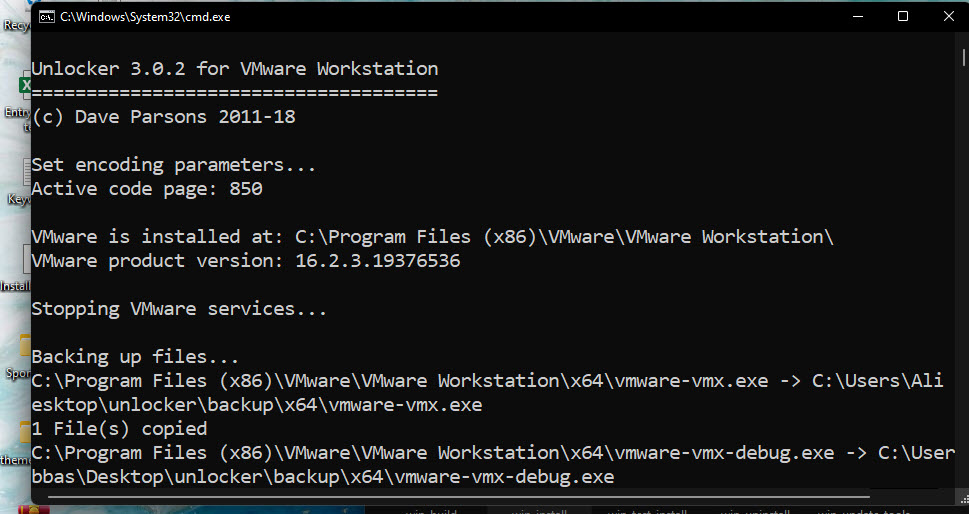
The installation process of the unlocker
Step 5. Get macOS Ventura ISO Image or CDR Image
Perhaps the most important part of installing and testing the macOS Ventura on a virtual machine on windows is to get the ISO or the Cdr image. Unfortunately, you cannot install MacOS Ventura using the installer.the app, install assistant.pkg and the macOS Ventura.dmg. None of them are going to work except for the ISO or Cdr images. You may know the ISO is very common among Windows users but DMG is common for Mac users. That can be one of the reasons that you can’t use the DMG or other versions of the MacOS to test the macOS on the virtual machine in Windows and Linux.
How you can acquire the macOS Ventura ISO image?
There are two ways that you can use to acquire the MacOS Ventura ISO image.
- Get it from WikiGain.com. (Uploading soon)
- Or you can create the MacOS Ventura ISO image yourself.
You may be asking why I’m not recommending other sites to acquire the images. The answer is simply because right now there is only one site that has uploaded the MacOS Ventura ISO image and it is not stable. VMware and Virtualization, none of them detecting it at all.
If you have access to a macOS, using a terminal you can create the ISO yourself by following the below post.
Step 6. Create the macOS Ventura Virtual Machine
Let’s focus on the creation of a virtual machine for MacOS Ventura on windows 11 PC.
Open the VMWare workstation> Click on the “Create a New Virtual Machine.”
On the welcome wizard of creating a new virtual machine, Choose typical (Recommended) and click next.
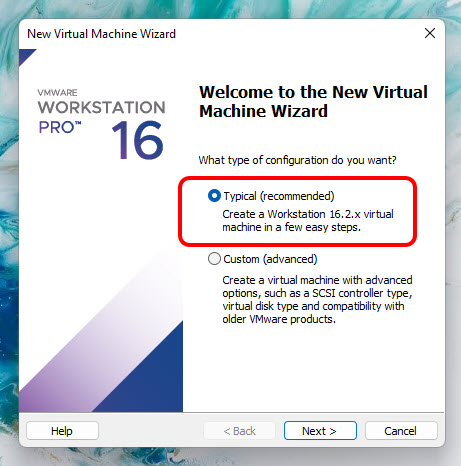
Welcome
Choose the Installation media image, for this step you have to choose “I will Install the Operating System later.”
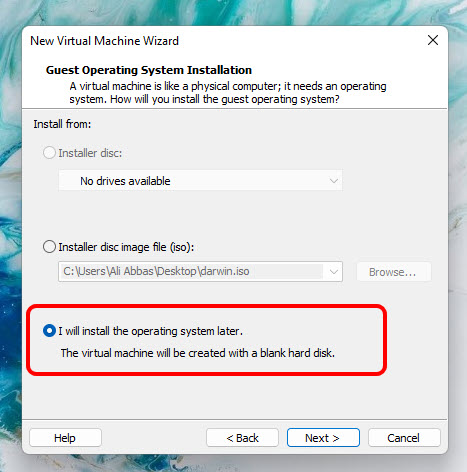
Choose Guest OS Installation Media
For the guest operating system please Choose “Apple Mac OS X” and for its version, make sure that the “macOS 13” is selected.
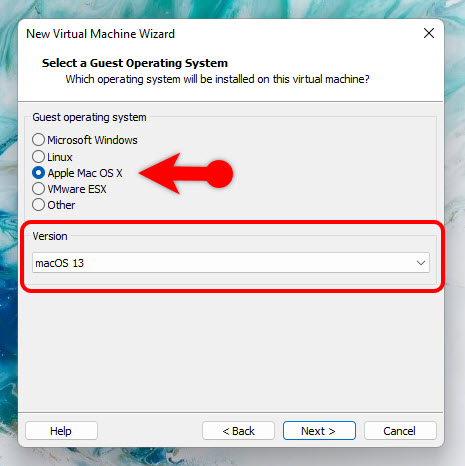
Select the Guest OS and Version
Name your Virtual Machine and saved it to somewhere you have access.
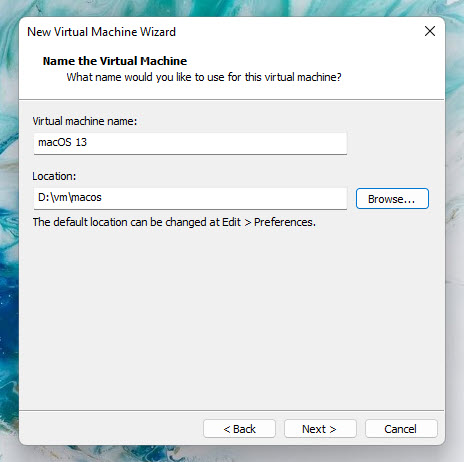
Virtual Machine Name and Location
Specify the storage size, 150 GB should be enough, then please make sure to check the first option known as ” store virtual disk as a single file“.
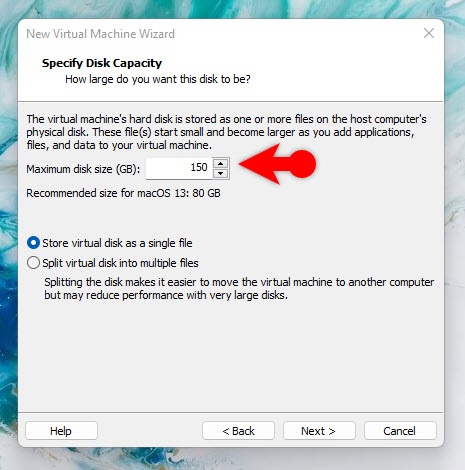
Storage Size
For the Final part, customizing the hardware is required, so click on customize hardware.
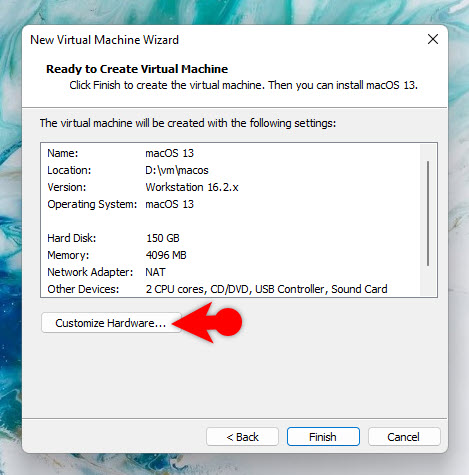
Customize Hardware
Make sure to implement the hardware requirement that is mentioned in step one. Requirements such as RAM, Processor, and most of all add the “macOS Ventura ISO Image to the virtual machine.” To Add the ISO, click on the “New CD/DVD (SATA)“> then select “Use ISO Image file“> After that click Browser and locate the ISO File.
The moment the configuration with the hardware is done, click ok.
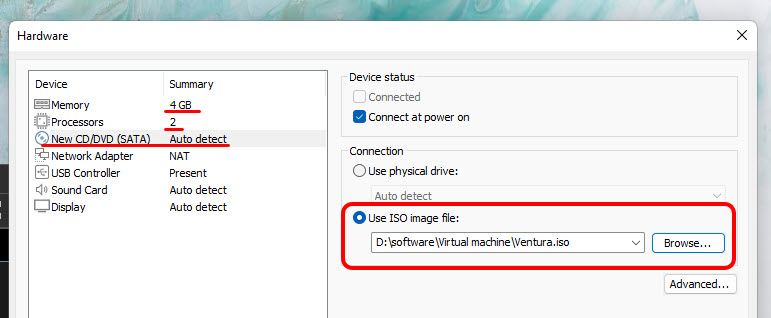
Add ISO Image
Once Again you will be back on the Customize hardware page, this time click Finish.
We have to add a small code to the Virtual machine configuration, so go to file> select exit.
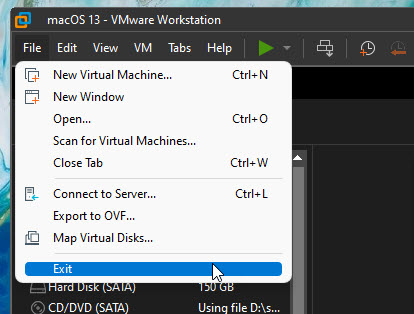
Quit and the VM
Open the place where you saved the macOS Ventura virtual machine> right-click on the file with the extension of vmx and open it with Notepad.
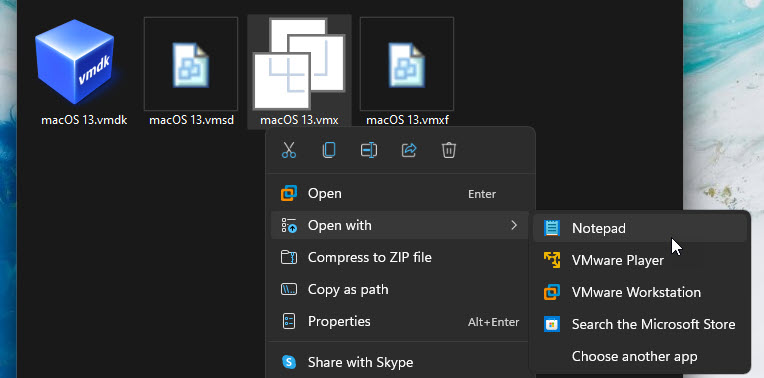
Open with Notepad
At the end type (smc.version = “0”) and save it.

Add the code
Step 7. Partitioning the Virtual hard drive for macOS Ventura
It is true that until now we have done everything for the sake of installing MacOS Ventura on VMWare Workstation on a Windows PC. So now the real deal begins. It means we are going to power on the virtual machine and then once we are on the MacOS recovery section, there we are going to partition the virtual hard drive. Once the virtual hard drive is partitioned, we are going to select it to install MacOS Ventura, which means it’s going to be wiped out.
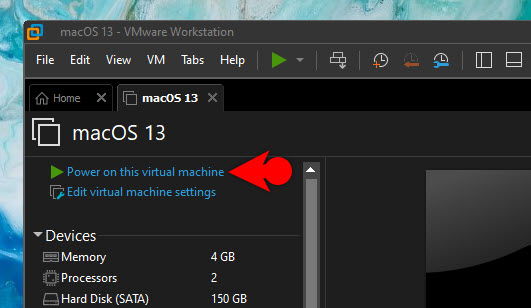
Power on the VM
Once the virtual machine for MacOS Ventura is launched, wait until MacOS boots up. It means you have to wait until the apple logo goes away. Once it is done you have to select your preferred language and click on the arrow at the bottom.
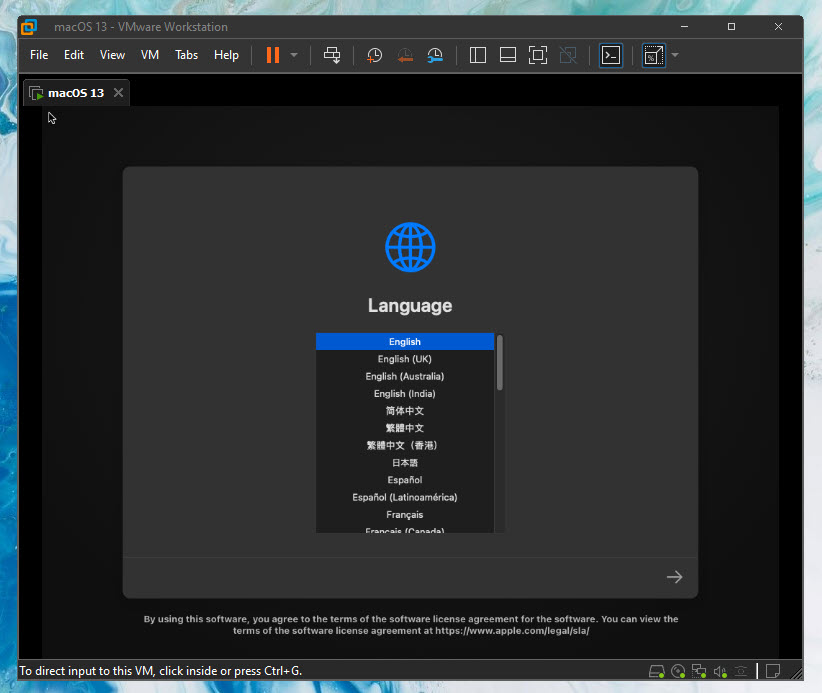
Choose your preferred language
In the MacOS recovery section, you have to click on Disk Utility to partition the hard drive.
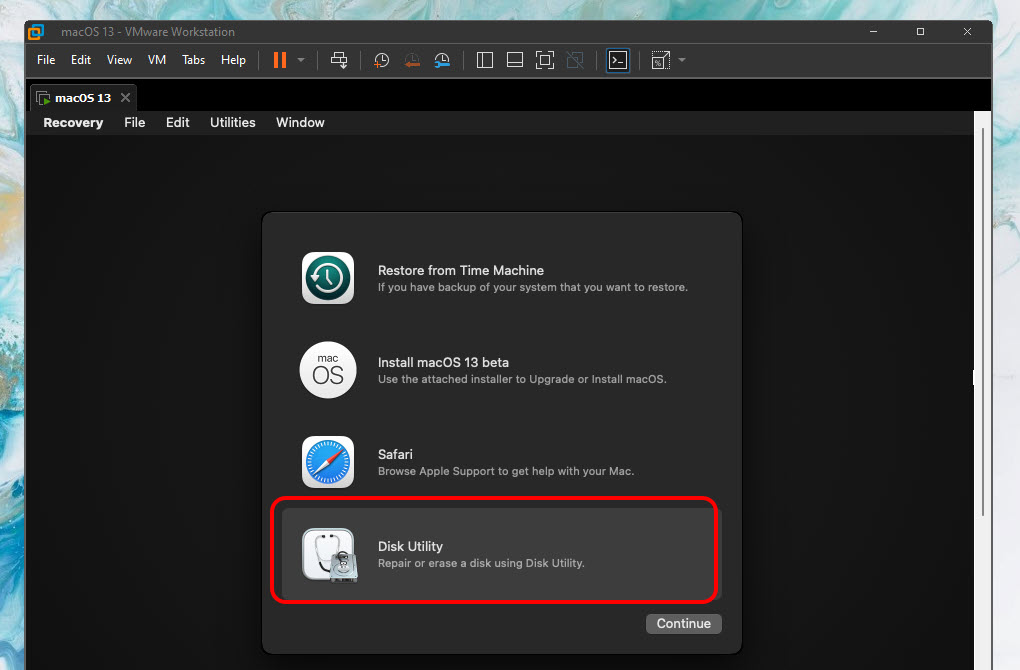
Disk Utility
Select the hard drive from the left panel, then click erase from the top menu.
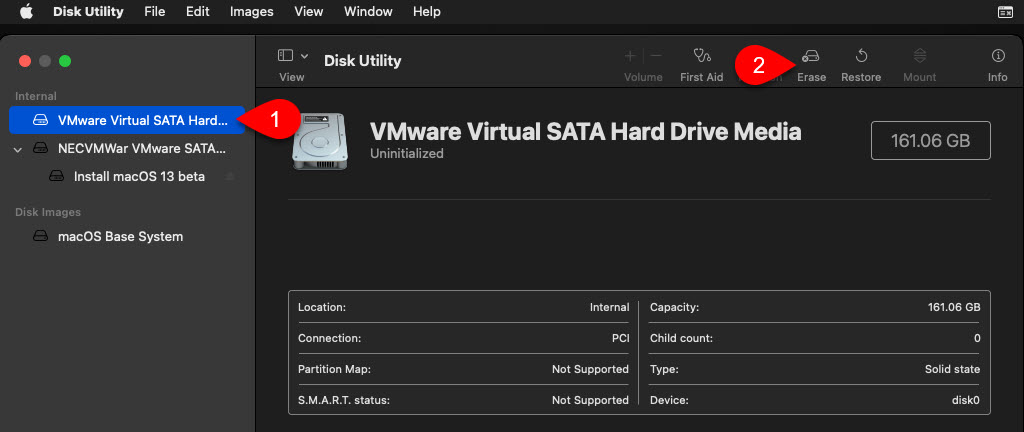
Select the Virtual hard drive
Erase the hard drive with the following parameters.
- Name: macOS 13
- Format: APFS
- Scheme: GUID Partition Map
once you are done with the configuration of the hard drive, quit the disk utility.
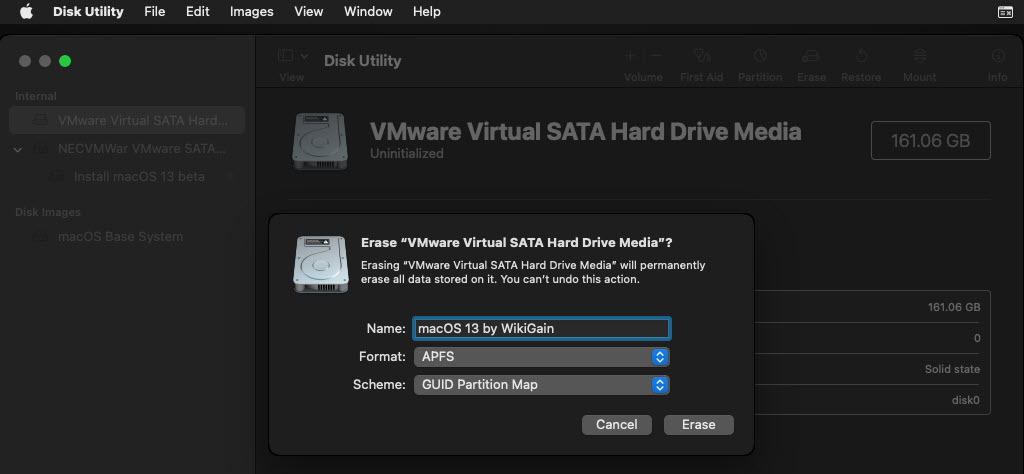
Erase the Hard Drive
Select install macOS 13 beta.
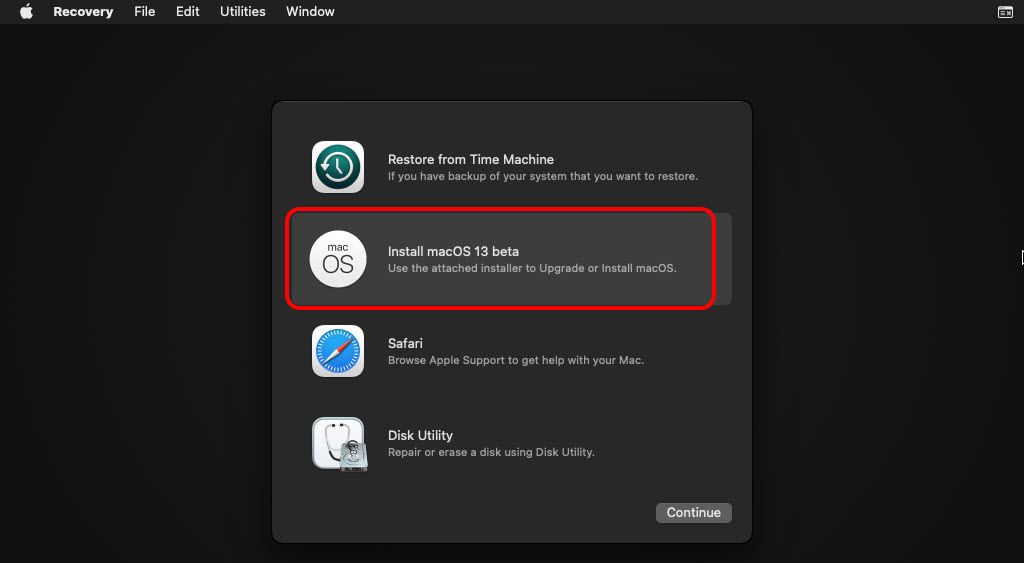
Install macOS 13
Click continue> agree> again click agree.
-
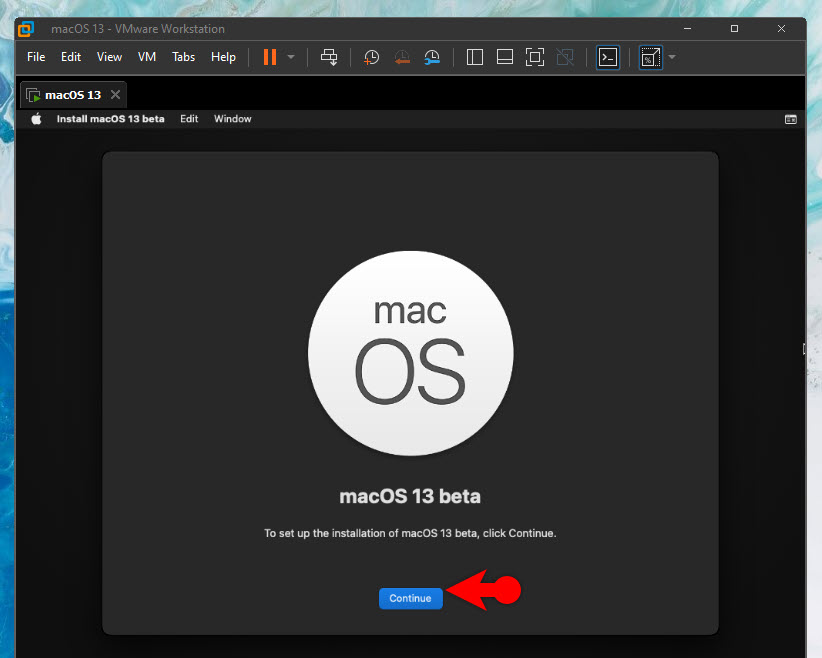
- Continue
-
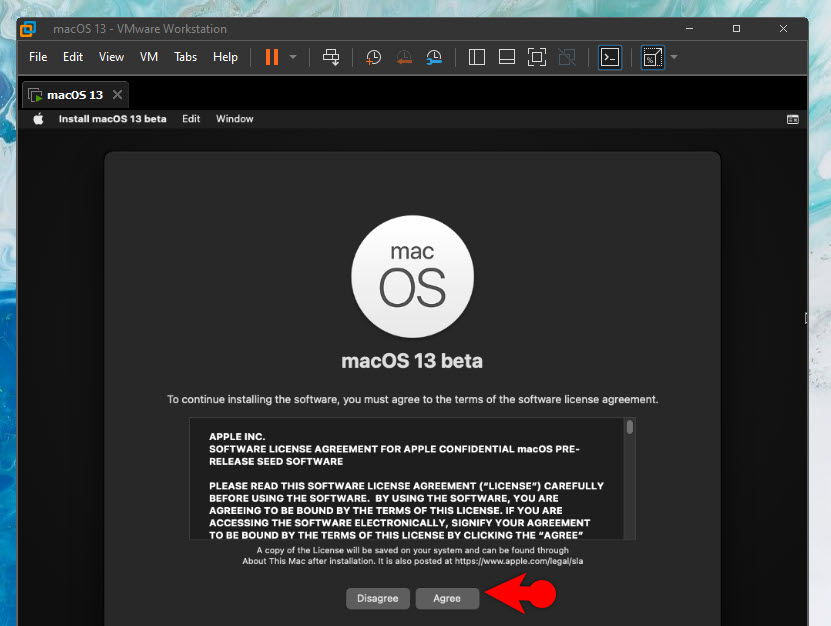
- Agree
-
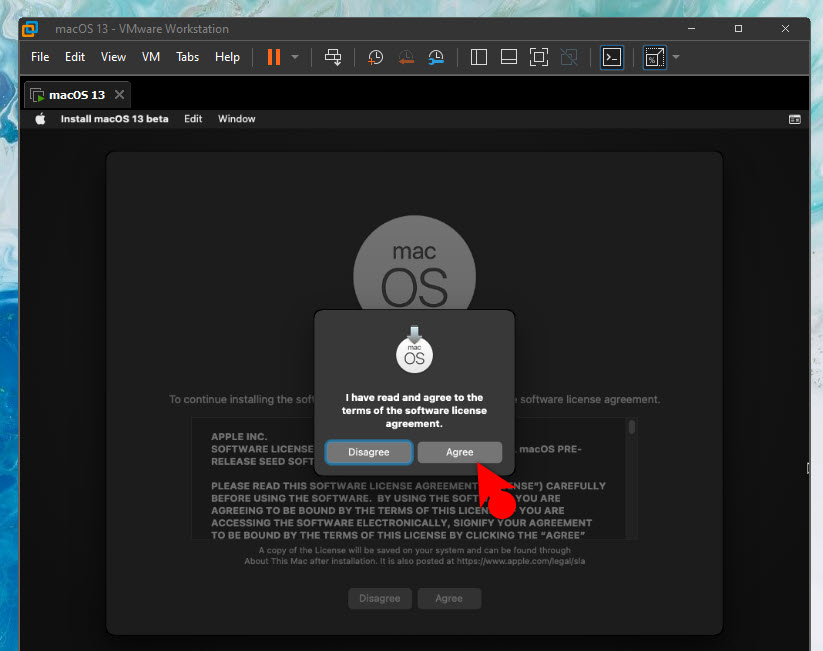
- Again Agree
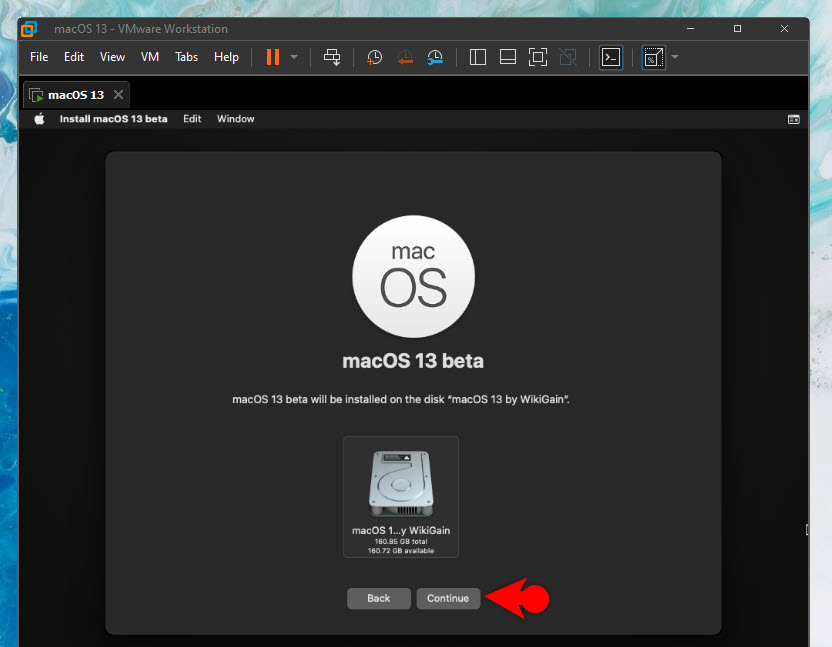
And Now select the formatted Hard Drive and click continue.
Select the drive
Step 8. Configuring macOS Ventura Basic user Settings
Once the macOS Ventura files are copied into the hard drive it is going to restart several times. After the final restart, you will be on the basic macOS Ventura settings.
For the first step, you have to select your country which is important.
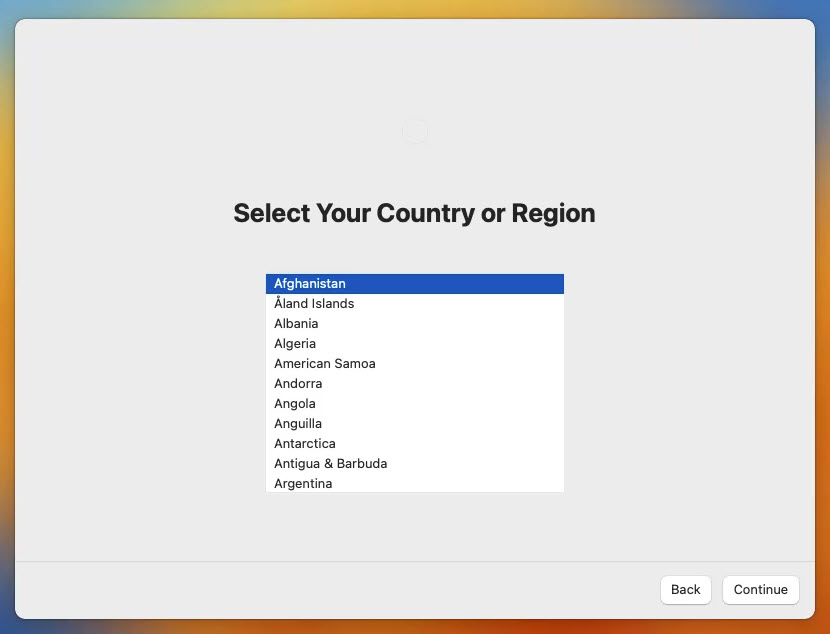
Select your Country
Based on the country that you have selected, macOS Ventura is going to add those languages. So if you have selected Pakistan, the following languages will be available to you.
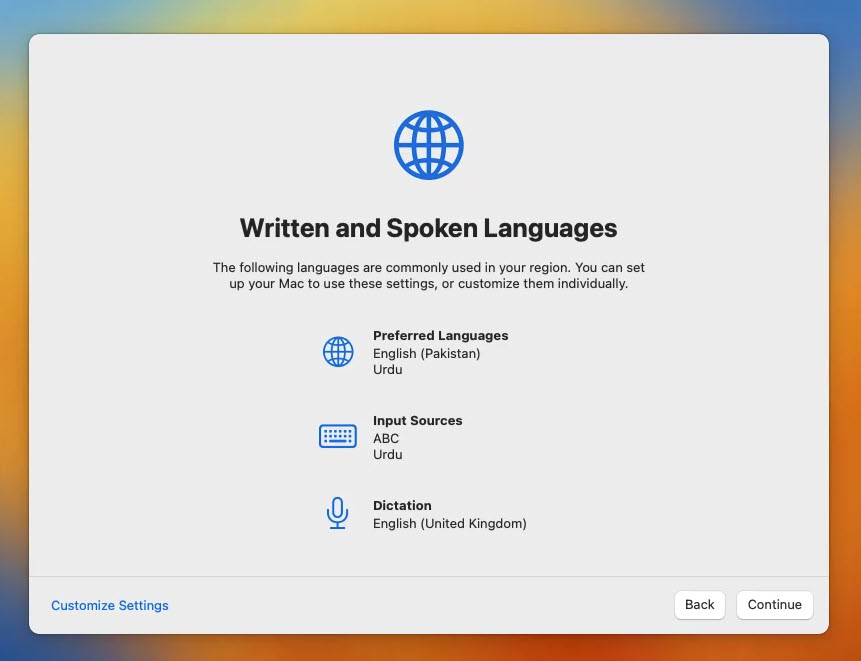
Languages
This year Apple has improved accessibility even more and they have taken it to the next level. You can configure accessibility settings right now or you can configure them after installing. But for now, you have to click not now.
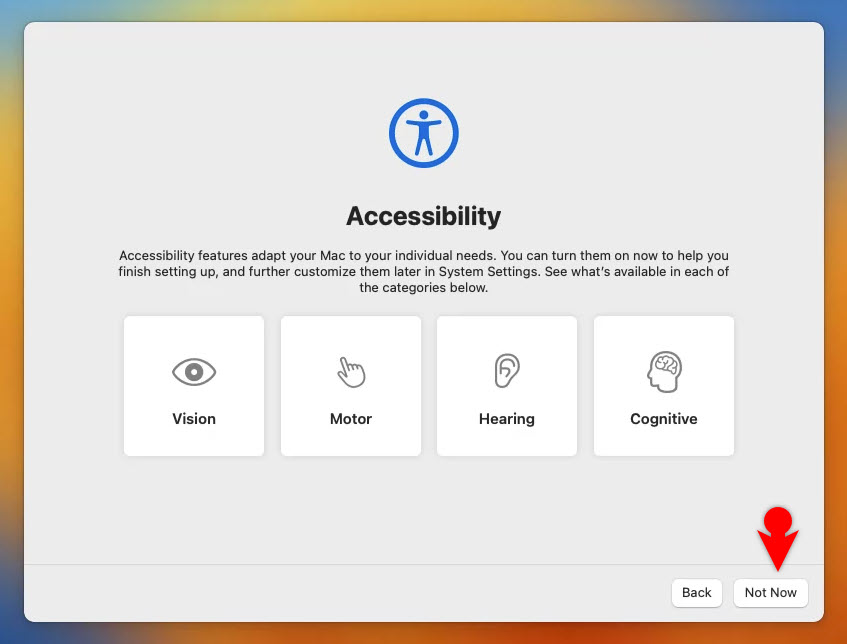
Accessibility
“How do you connect” is often asked for Internet connectivity. So for this section, you have to select “my computer does not connect to the Internet”. Because Wi-Fi is by default turned off, and the local network is not connected according to the virtual machine. So we will configure the settings once the installation is done.

Internet Settings
The data and Privacy section is another important section where you have to read it completely. Apple is explaining that they are going to use your personal data once you agree to the terms. When you open those apps after the installation, you won’t see this message, since it is applied to all the Apps.
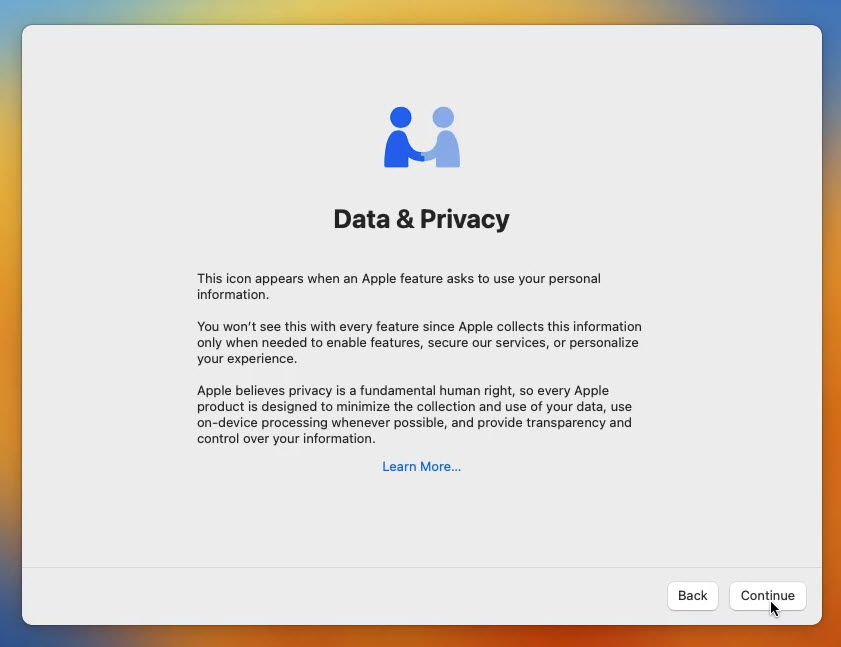
Data & Privacy
Migration Assistant, it’s helpful when you are migrating from Windows, Mac, or any other OS to the Mac. But for now, we have to simply click not now.
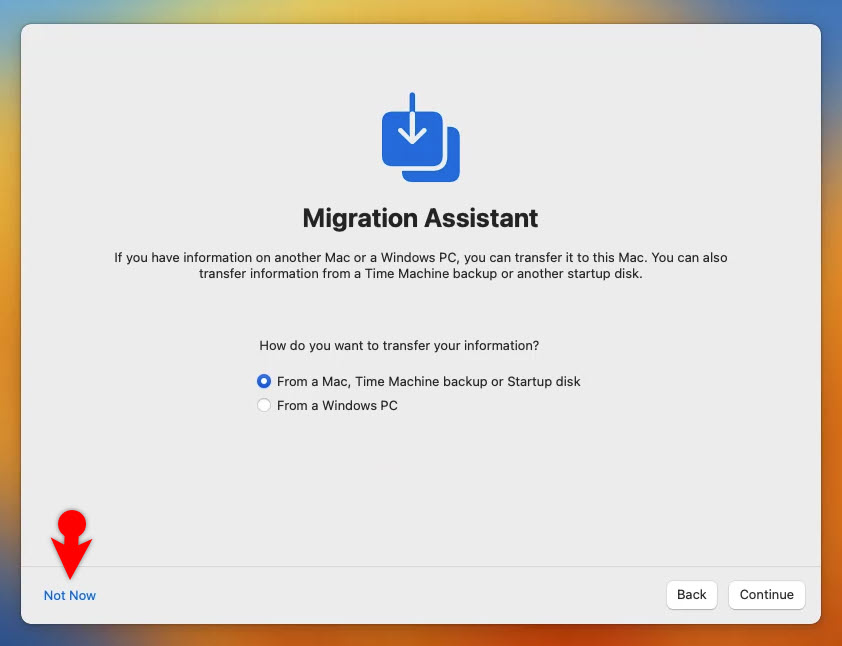
Migration Assistant
Apple is explaining the terms and conditions of using your Mac computer, its software is based on the below conditions. For this step, you have to simply agree and move on.
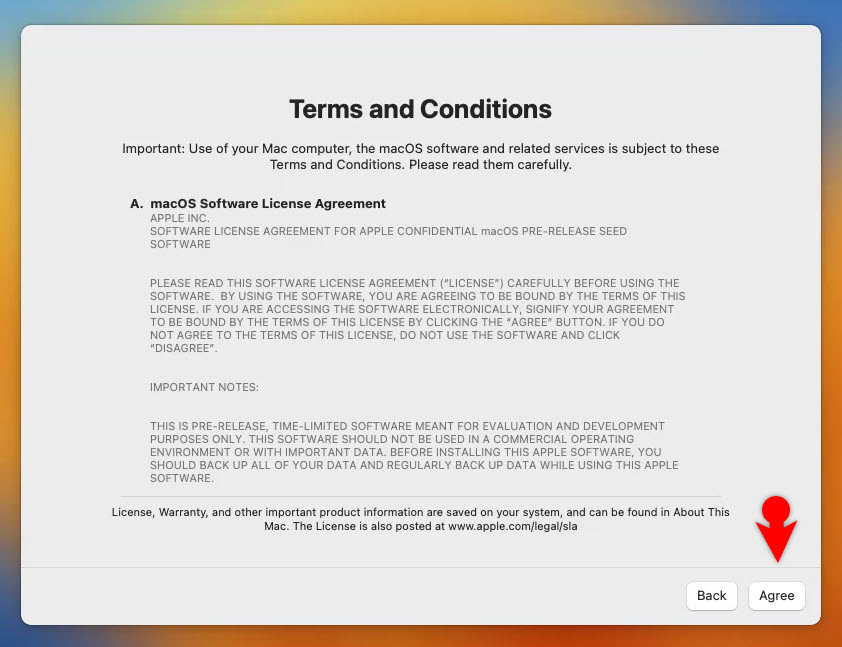
Terms and Conditions
Then you are consenting that I have read and agree to the MacOS software license agreement.
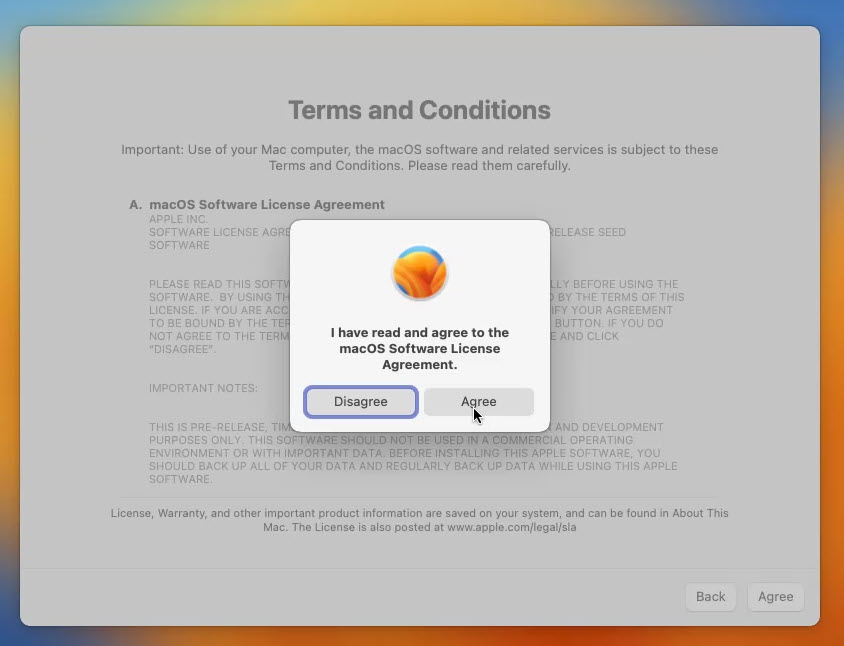
Agree to Terms and conditions
Since our computer does not connect to the Internet, we are about to log in with a local account. Create a user account with a password and move on. Otherwise, if you are connected to the Internet you could sign in directly using your Apple ID.
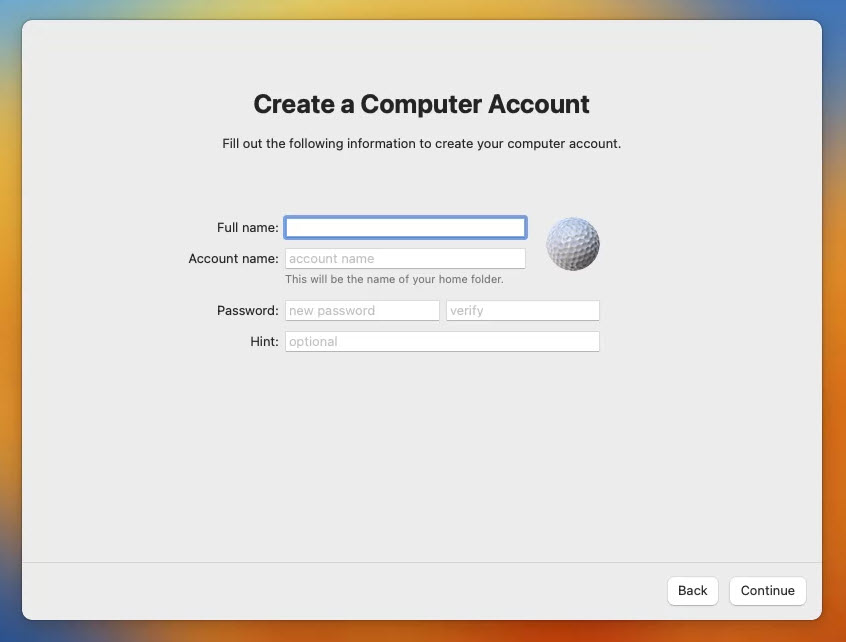
Create User account
If you are using maps or other applications that are connected to maps, go ahead and enable the location services. And move on, otherwise, you can simply choose not to enable and move on.
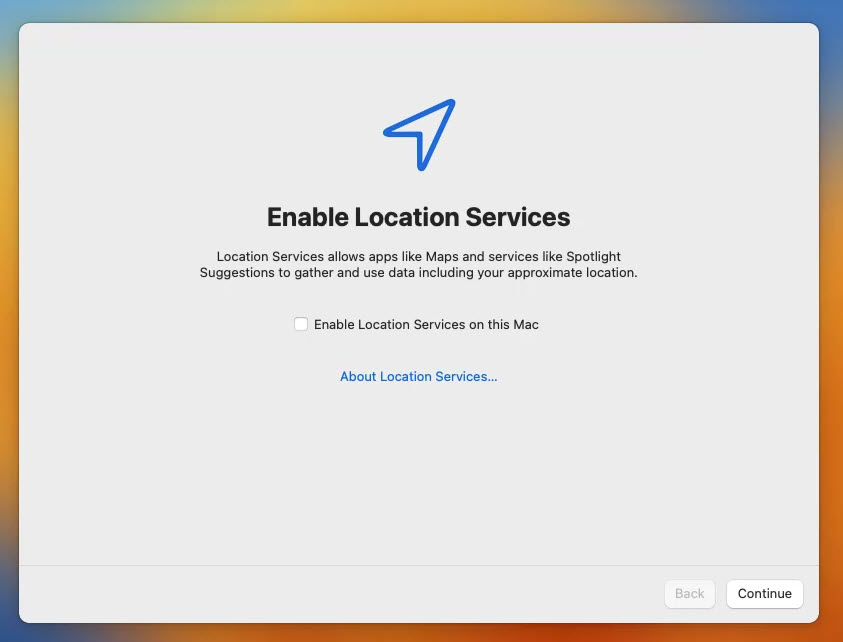
Location Settings
Apple is warning you that some features such as “find my” won’t be available unless you enable the location services. In my case, I am ignoring it by selecting Don’t use.
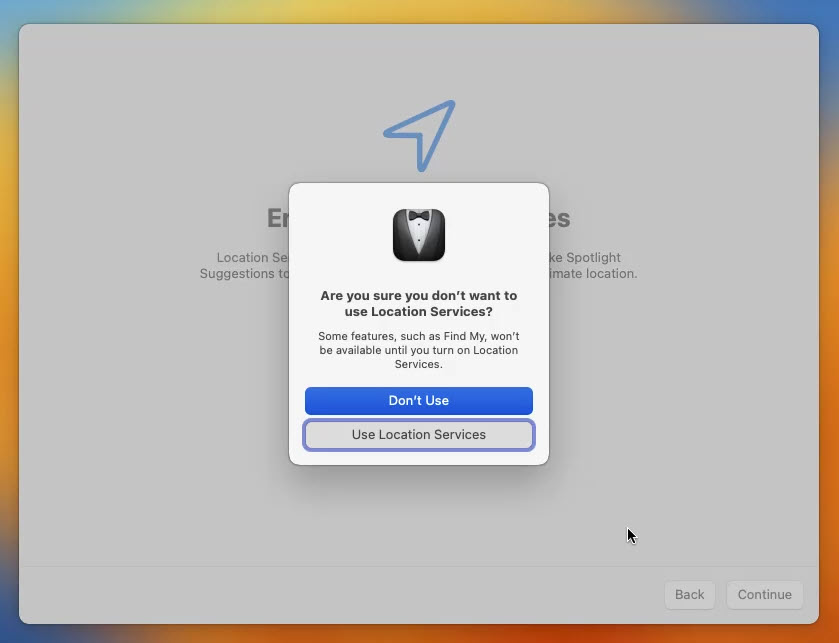
Don’t use Location Services
to configure your time zone.
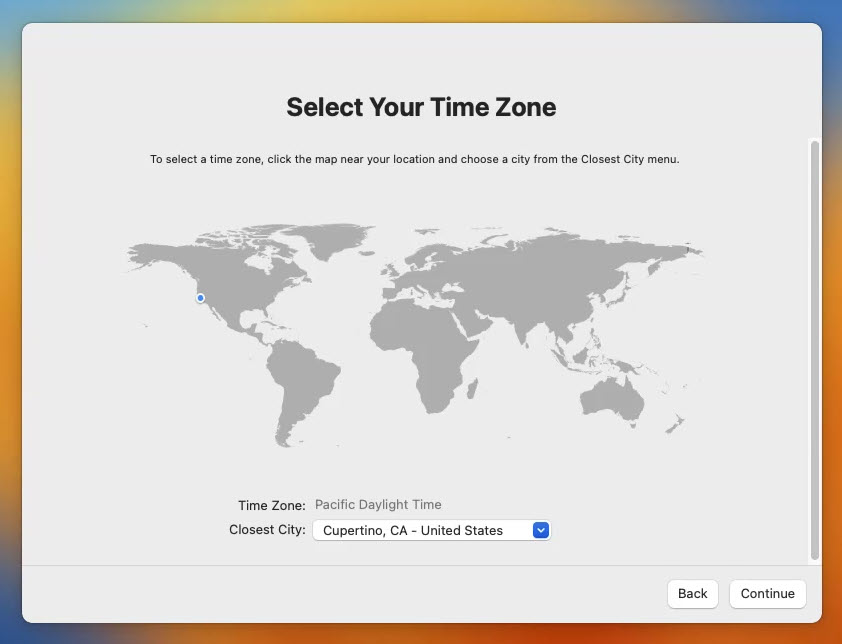
Time Zone
Analytics is about helping Apple and developers to improve by sending your data to the company. You can read about its policy but for now, choose Continue.

Analytics
screen time is about monitoring your activity such as daily, weekly, monthly, and more. You can configure it or choose Set up later.
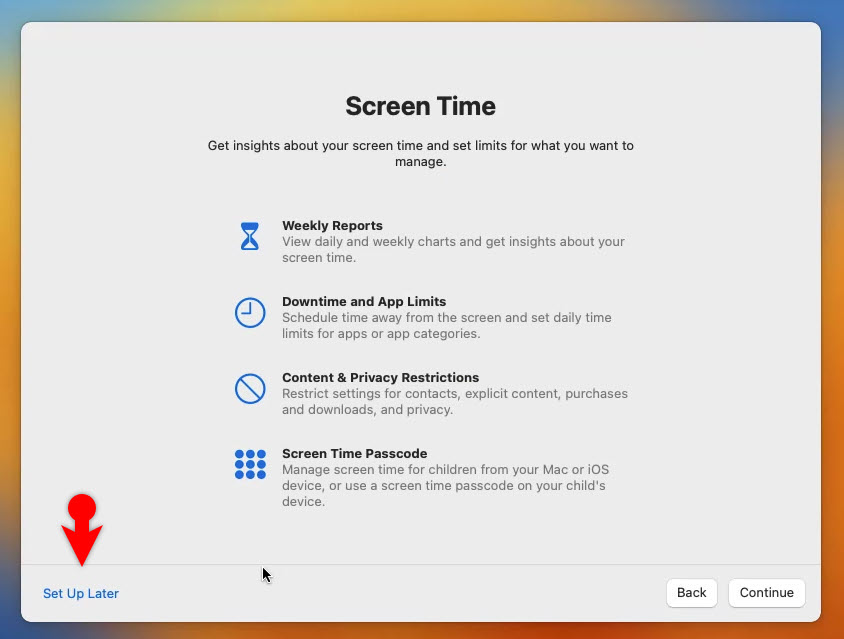
Screen Time
Please Choose a Look for the macOS Ventura in Virtual machine.
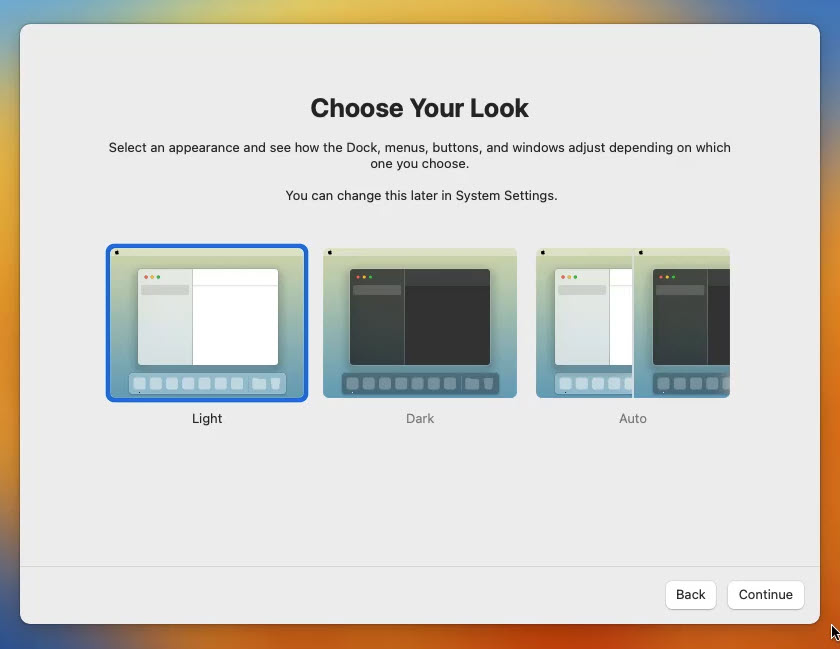
Theme
Congratulations on successfully installing macOS Ventura on VMware on Windows PC easily.
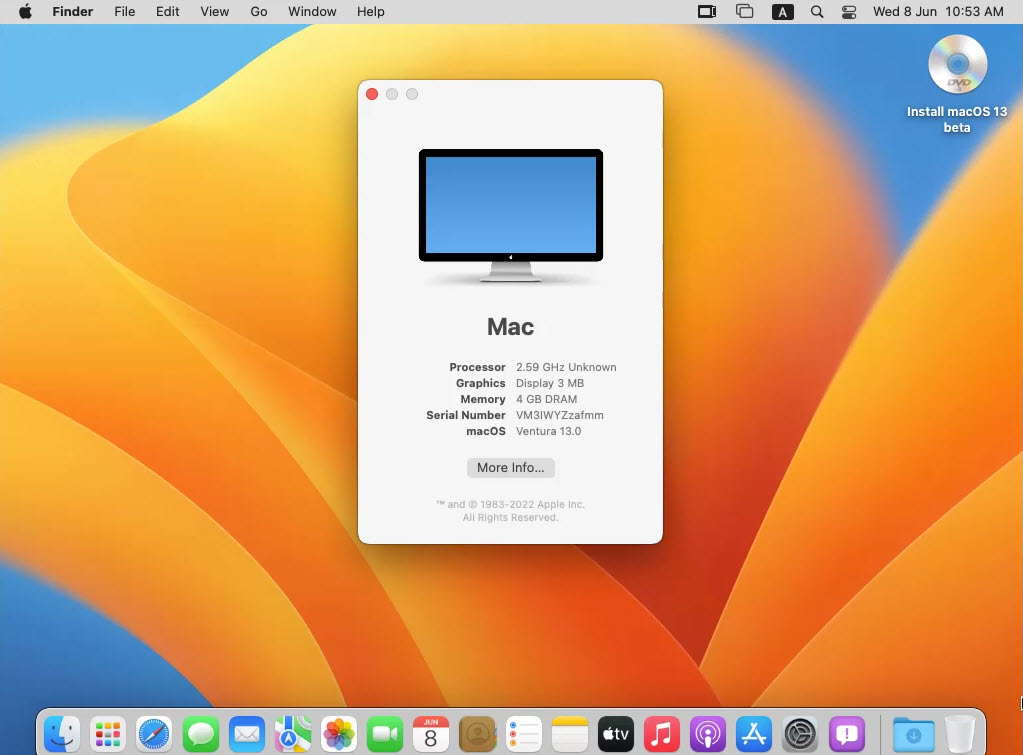
macOS 13 Installed on Virtual Machine
Step 9. Fix Network issue on macOS Ventura
The moment you installed macOS Ventura on VMWare virtual machine, you will notice that you are not connected to the Internet. If you try to change the ports of the Internet it is not going to work either. So we have to configure the MacOS Ventura settings from the VMX file. So you have to power off your virtual machine> and go to the place where the macOS Ventura is saved. Open the vmx file with Notepad.
- Press Ctrl + F to enable Search on the Notepad.
- Search for Ethernet0.VirtualDev = “e1000e”
- Replace the e1000e with vmxnet3 and save the changes.
Step 10. Install VMware Tools to Fix the Screen resolution
You can say that VMWare tools are the driver of the guest operating system. When you install the VMWare tools, it’s going to fix the graphics, it will fix the screen resolution, and you can enable the drag and drop between the host and the virtual machine. And besides, its sound and other hardware parts are not working through installing the VMWare tools they are going to fix mostly those issues.
Step 11. Activate Drag and Drop
The other step which is required for the users who want to share the file between their virtual machine of MacOS Ventura and the windows host is the drag and drop. This is required whenever you are trying to copy the files between the virtual machine and the host. If you use an external hard drive you can also use it but it’s going to take a lot of time and besides the resources will be used quite a lot compared to the drag and drop.
The first step to enable the drag and drop between the two operating systems is to install the VMWare tools which we already did to fix the screen resolution. Now for the next step, there is a small setting that is located within the system preferences in the accessibility category. It must be enabled from there.
- At the top-level menu click on the apple icon and choose system settings.
- Access privacy and security.
- Within privacy and security, you have to find accessibility.
- Once you are inside the accessibility, you will see a tool listed there, it is called VMWare tools daemon. Toggle it to turn it on and then insert your password to confirm the changes.
Go ahead and now enjoy drag and drop between the host and the virtual machine.
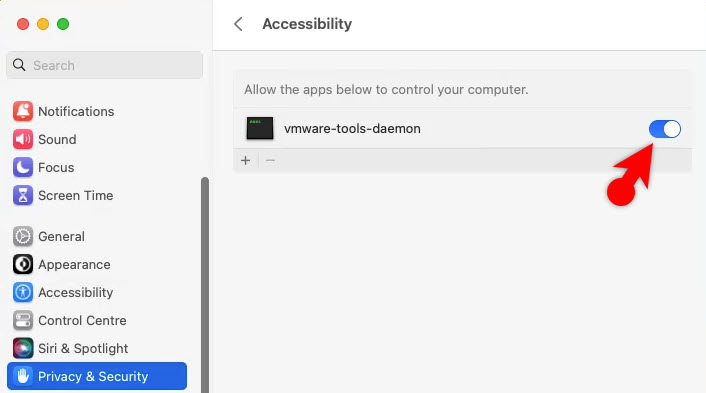
Enable Drag and Drop.jpg
Step 12. Take Snapshot
Recovery is really important because who knows when your computer is going to fail. The same ideology is applied to the virtual machine but not in the form of recovery, it is called snapshot. You are going to check a snapshot of the operating system and whenever you run into a problem you can just simply revert to the previous snapshot. It is really important and please keep in mind, that is going to take a lot of storage on your computer.
Taking a snapshot in VMware is simple. Just go to the VM menu> click on the snapshot and then choose to take a snapshot.
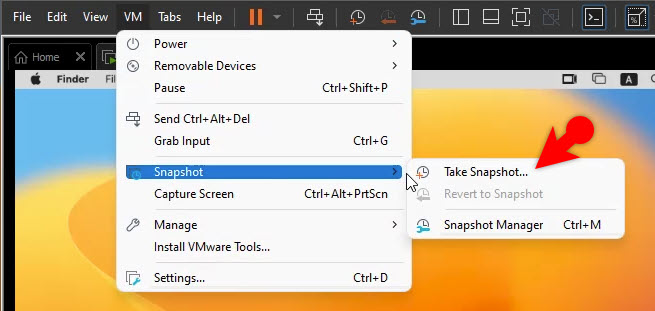
Take Snapshot
Conclusion:
Apple has brought overall changes to the MacOS Ventura. It seems like for the first time that Apple has worked and brought changes to the OS 100%. System preferences are now called system settings, a whole new look has been applied to the system settings which is quite cool to the previous versions. In any case, now you know what are the required files, and the required steps to perform a clean installation of MacOS Ventura on VMWare on a Windows PC. I am hoping that you are not facing any trouble during the installation of MacOS Ventura on the virtual machine. Let me know if you are facing some kind of issue I’ll do my best to help you.
Watch its video:
https://www.youtube.com/watch?v=m5OwyZc4d3Y
Leave a Reply