In this article, I’m going to show you the step by step guide to install macOS High Sierra on PC. There are hundreds of Videos and posts on the internet, but in this guide, you’ll learn all the steps with screenshots and easy wording sentences. Creating a Hackintosh PC these days became an excellent topic for none Apple users. It’s costly to buy an iMac or MacBook device, and most people can’t afford it. That’s the reason some volunteer developers try hard to create some tools and application to use them and building a Hackintosh PC with a minimal budget.
Note: This guide is mainly for GIGABYTE systems, and some supported Intel Based systems.
Install macOS High Sierra on PC -Hackintosh 2018
- Download macOS High Sierra
- Create a Bootable USB Via UniBeast
- Change BIOS Settings to support macOS
- Install macOS High Sierra on PC
- macOS High Sierra Post Installation
- Troubleshooting
Tested on GA-Z270N WiFi Motherboard
We’ve installed macOS High Sierra on Gigabyte Z270N WiFi Motherboard. You can check the system specifications down below.
- Processor: Intel Core i7-7700k
- CPU Speed: 4.20 GHz
- Ram: 16 GB
- Graphics: Intel HD Graphics 630
- Chip Type: Intel HD Graphics
- DirectX Version: Direct X 12
What works?
- Ethernet
- Bluetooth
- Apple Store and iCloud
- iMessage
- External WiFi
- Sleep power
- External USB headphone
- USB 3.0
What doesn’t work?
- Graphics
- Sound
Things to Download
- Download macOS High Sierra
- Download UniBeast
- Download MultiBeast
- Download WiFi Card Driver
- Buy EDIMAX WiFi Card
Step #1. Download macOS High Sierra
At the very beginning, you need to Download macOS High Sierra from App Store using your Apple ID on any Mac or functional computer running Mac Operating System. Launch App Store and click on the Feature tab then look at the right-hand side for macOS High Sierra. Click on Download button and type your Apple ID with the password.
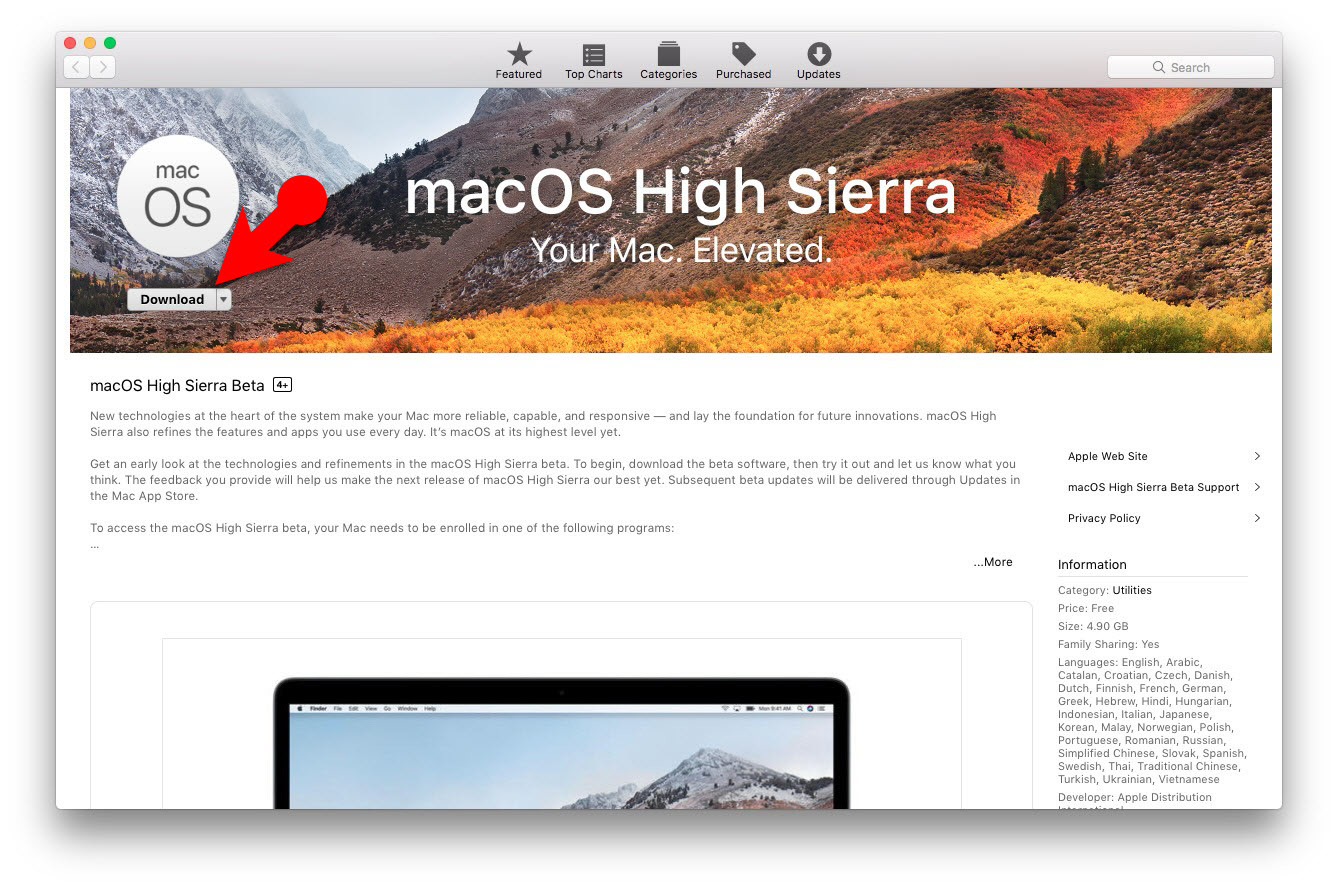
Download macOS High Sierra Free
Step #2. Create a Bootable USB Installer Via UniBeast
Once you’ve downloaded macOS High Sierra, it’s time to create a bootable USB installer.
Register at tonymacx86 to Download UniBeast if you don’t have one. Also, you must back up all your data because you might lose it. Once you’re done till here, then follow the steps down below.
- Insert the USB flash drive to your MacBook Pro, Air, iMac, or Virtual Machine running macOS.
- Open Disk Utility. Navigate to Application>Utilities>Disk Utility
- Select the USB Thumb Drive in the left column
- Click on Erase Tab
- As a name type USB, like format, select Mac OS Extended Journaled and as scheme choose GUID Partition Map.
-
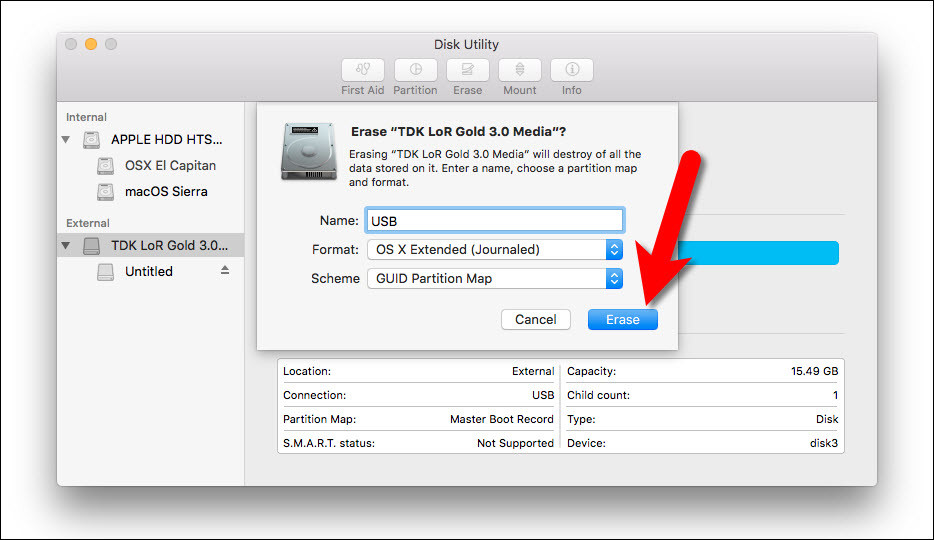
Erase-USB-for-macOS-Sierra
- Click Erase and wait for a few seconds. Finally, click Done and quit Disk Utility.
- Run UniBeast and click Continue>Continue>Continue>Agree.
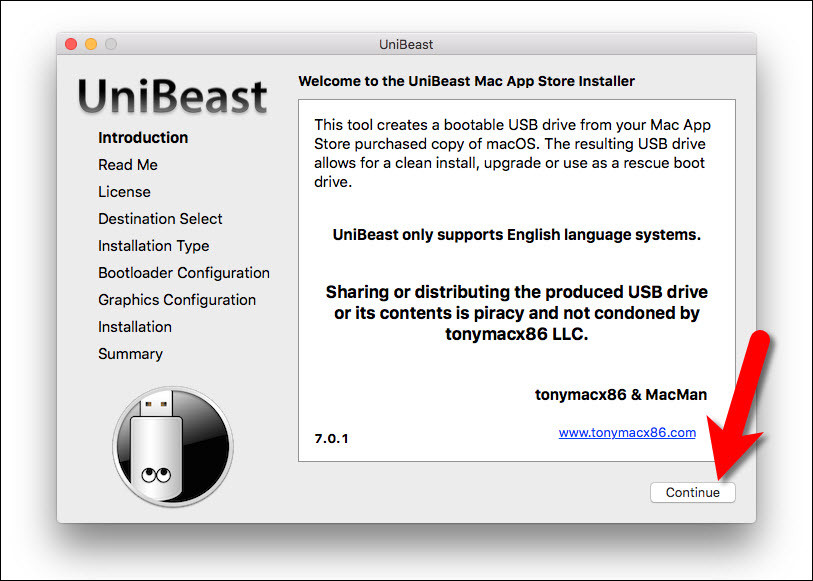
Welcome-to-Unibeast
- Select the USB drive and click Continue.
- At the Select OS Installation screen, choose High Sierra and click Continue. At the Bootloader Options screen, select UEFI Boot Mode or Legacy Boot Mode. UEFI Boot Mode is recommended for 7/8/9/100/200 Series CustoMac desktops and all UEFI capable systems. Legacy Boot Mode is recommended for 5/6 Series CustoMac desktops and all BIOS-based systems.
- Select an appropriate graphics configuration and click Continue.
- Verify installation options then click Continue. Enter the Password and click Install.
USB Installer created Successfully
If you didn’t understand the above topic, visit this step by step guide to creating a Bootable USB install via UniBeast. Also, if you don’t have any Apple device, then you Create Bootable USB Installer on Windows.
It’s time to Download MuliBeast from tonymacx86 and send it to your Bootable USB Installer because later on, you’ll need it for post installation.
Step #3. Change BIOS Setting to Support macOS
Restart your PC and press Delete key to access BIOS Setup. Find out your Boot menu key and Bios key if you don’t know. Once you see the BIOS setup, then load everything to default.
#1. Click Load Optimized Defaults and click Yes button.
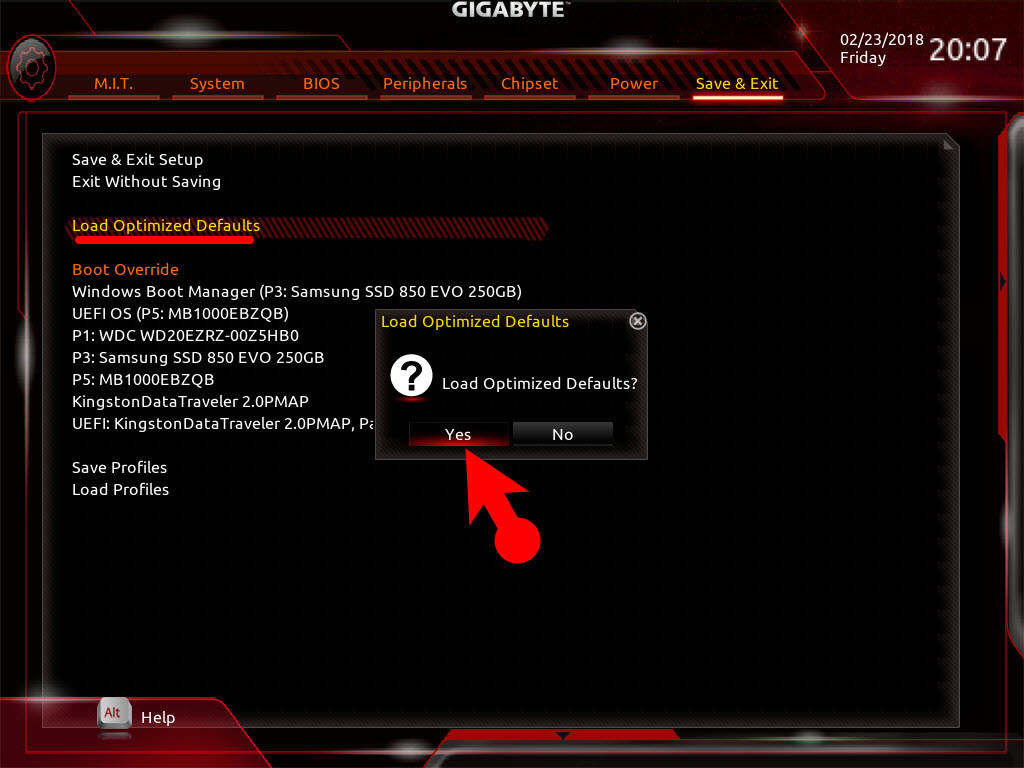
Load Optimized Default
#2. Navigate to Chipset tab. Disable VT-d.
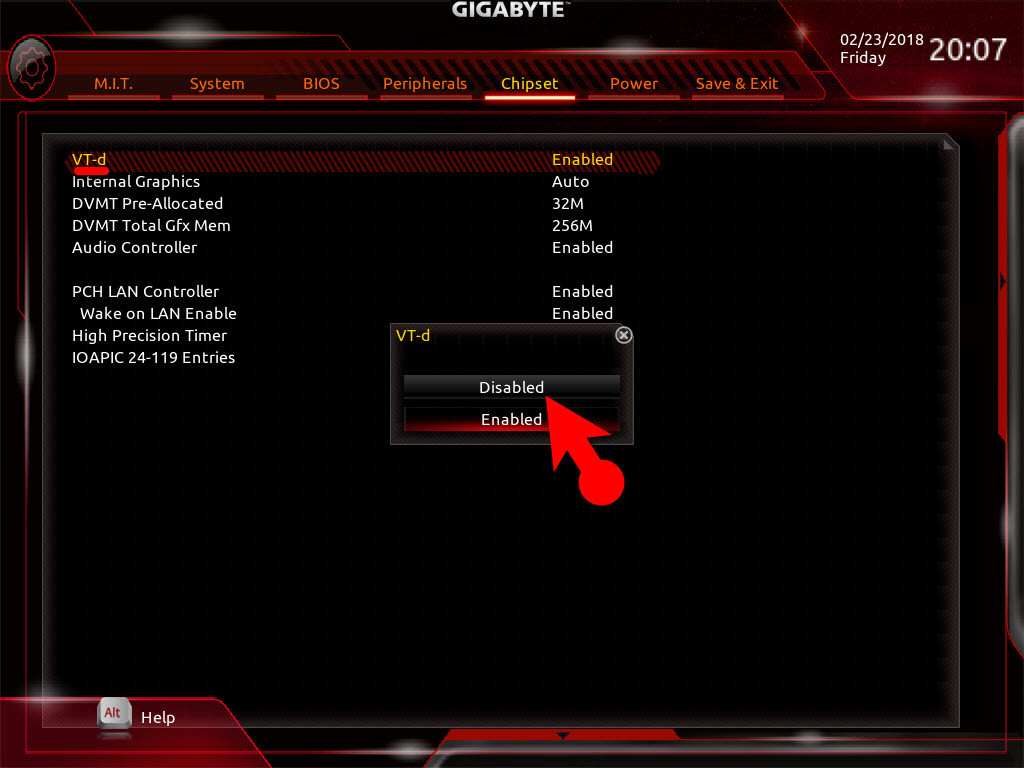
Virtualization Technology
#3. If you use External Graphics card such as NVIDIA, then Disable Internal Graphics, but if you don’t use External Graphic card, then you need to Enable Internal Graphics.
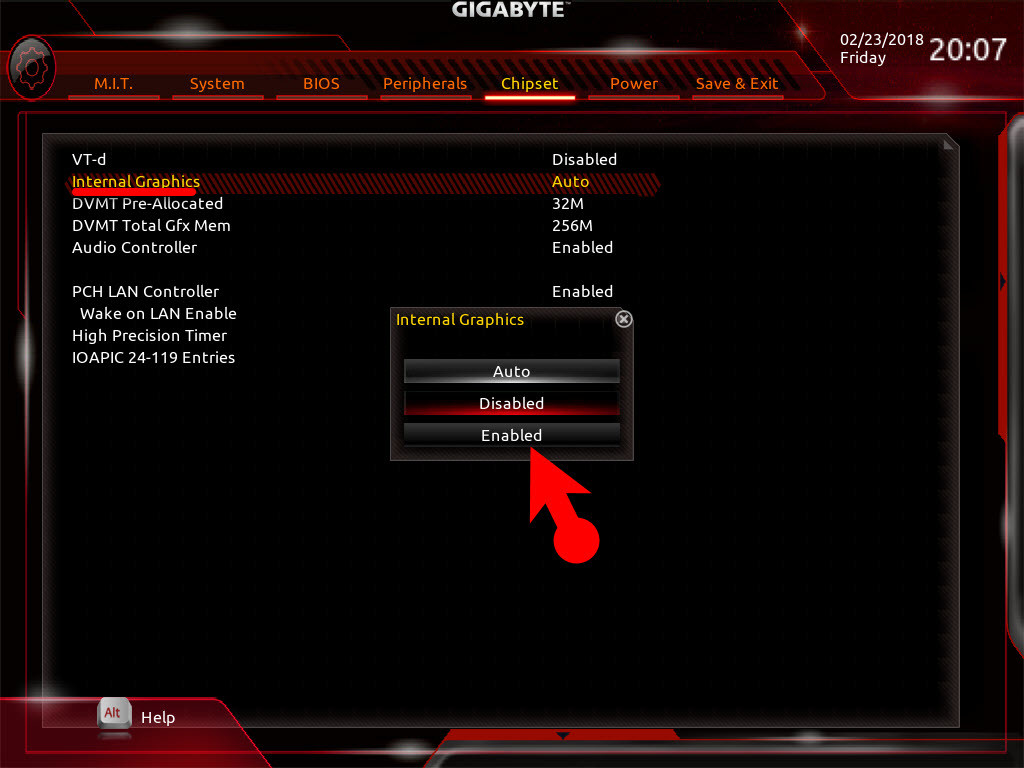
Internal Graphics
#4. On Peripherals tab, select PCIe 1 Slot for Initial Display Output.
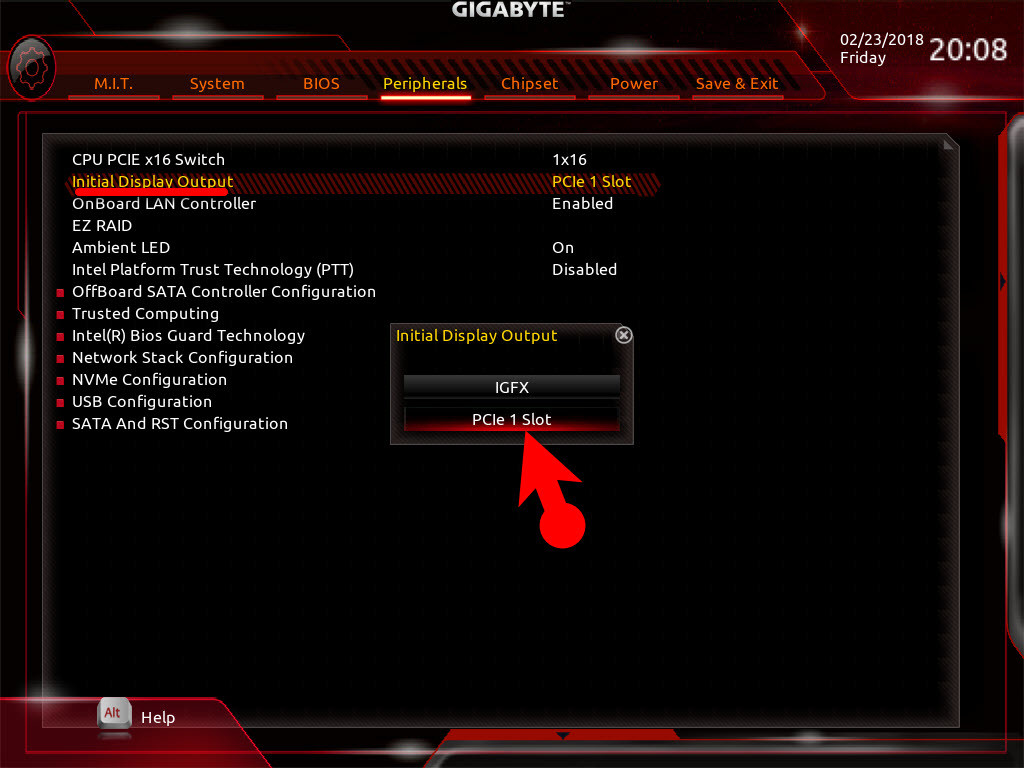
Initial Display Output
#5. Enable XHCI Hand-Off on Peripherals tab.
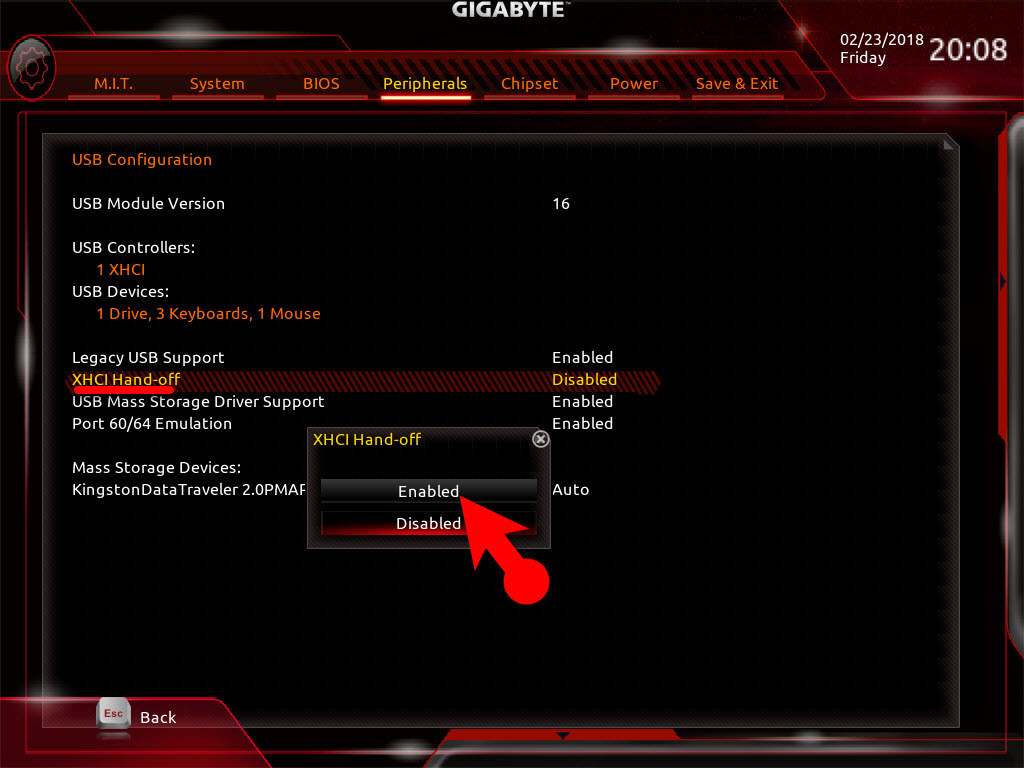
XHCI Hand-Off
#6. Set the SATA Mode Selection to AHCI.

Sata Mode to AHCI
#7. On the BIOS tab, select the Boot Priority (Boot Option 1) your USB flash drive. It means when your system restarts every time it automatically boots from USB. You don’t need to press any key.
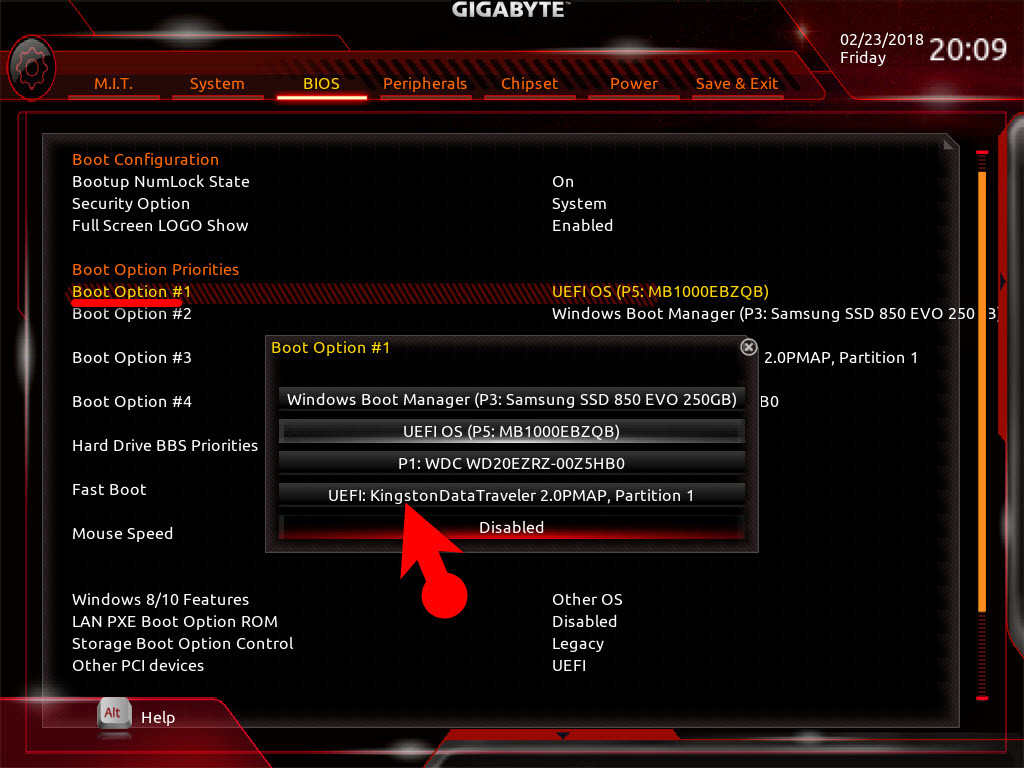
Boot Priority
#8. If your system has Secure Boot Mode and IO Serial Port, Disable them. Also, Set OS Type to Other OS.
#9. Navigate to Save & Exit tab and select Save & Exit Setup, click Yes.
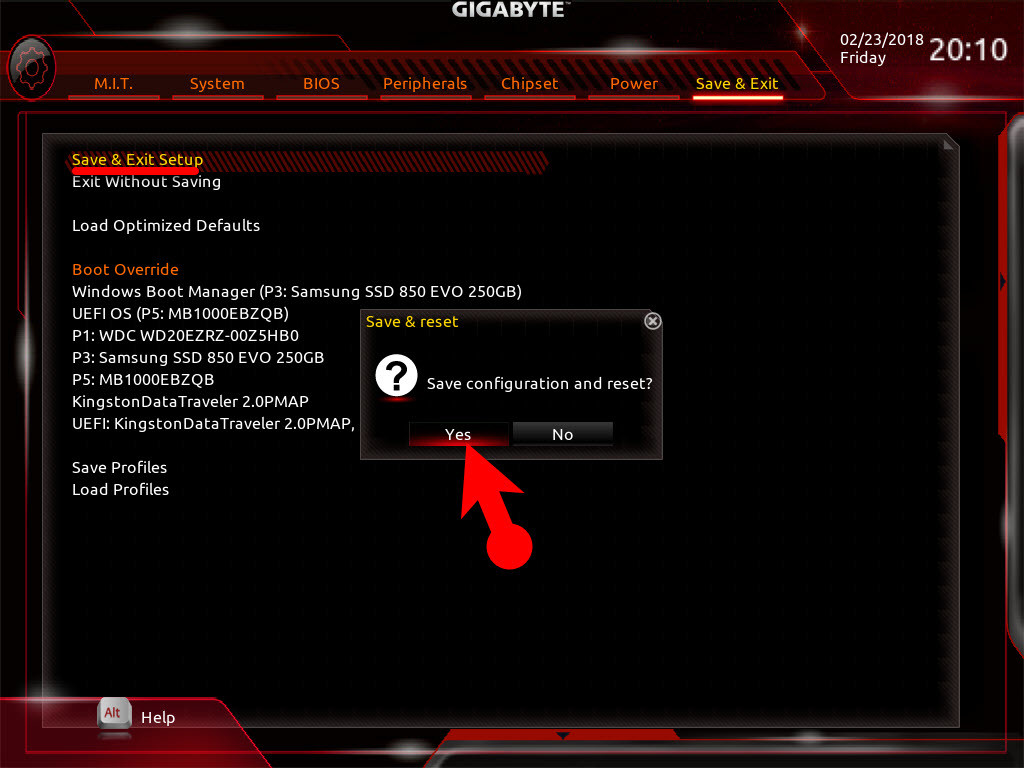
Save & Exit
Step #4. Install macOS High Sierra on PC
You’re almost done up to here. It’s better to insert your bootable USB installer to USB 2.0 port, but if your system doesn’t have any issue with USB 3.0, then you can use it too.
#1. Turn on your computer and Press the Boot Menu Key (F12 for Gigabyte motherboards, F8 for Asus motherboards and F11 for ASRock motherboards). Choose a USB Thumb drive. Here my USB installer is Kingston Data Traveler 2.0, so I select it.
Related: Boot Correctly into Bootable USB Installer for macOS Sierra
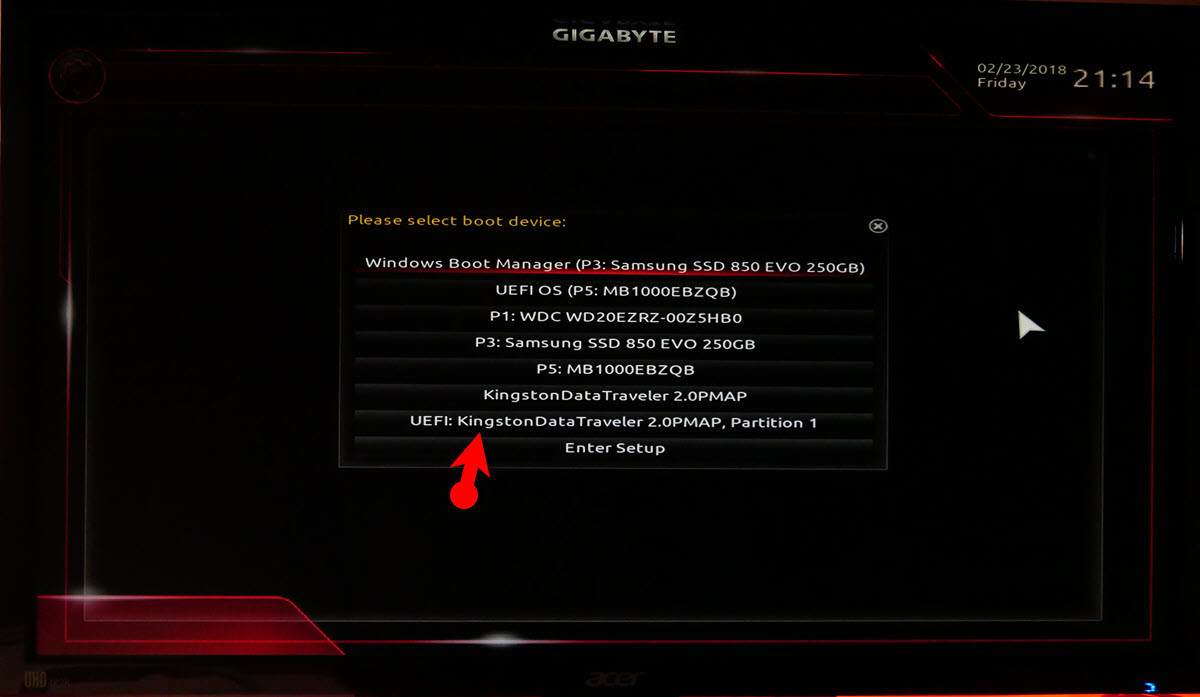
01Gigabyte Boot Menu
#2. At the clover boot screen, choose (External) Boot OS X Install from Install macOS High Sierra. Wait for a few minutes until you see the Language page. Select your prefered language, click Continue arrow button.
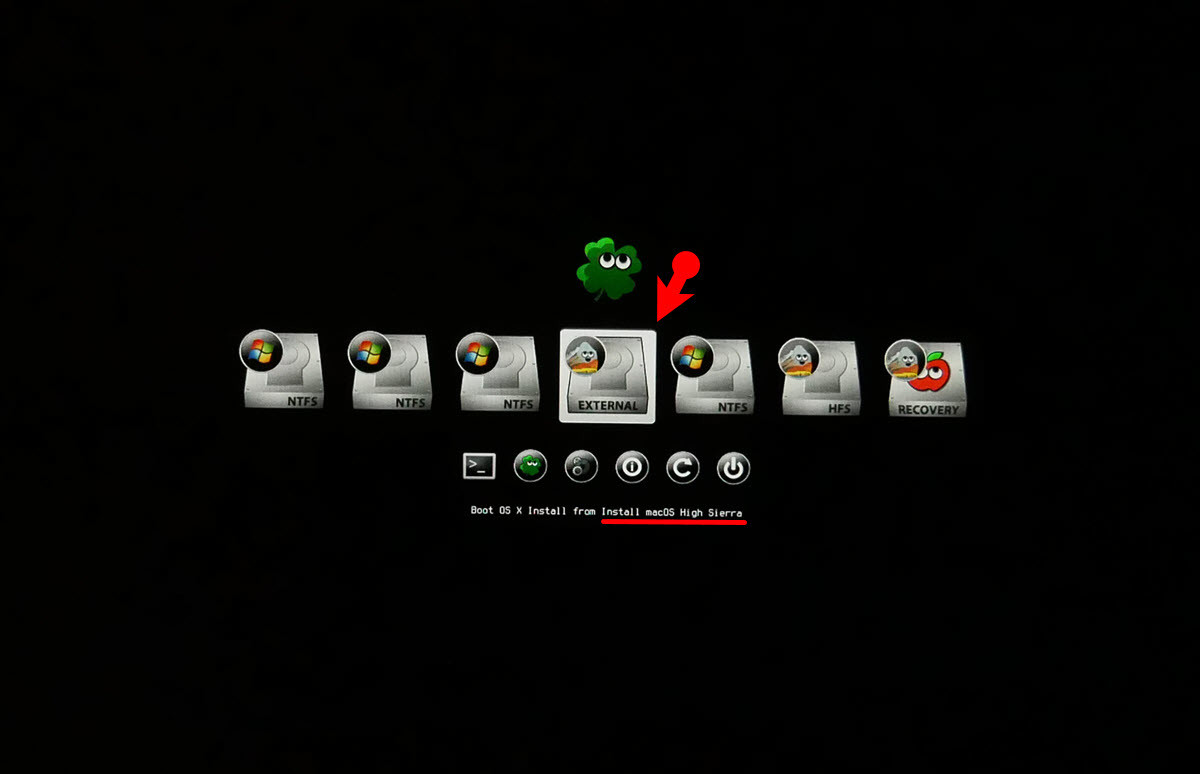
Clover Boot Menu
In case you have issues reaching the installer, you can use the spacebar on the boot screen to enter alternate boot modes such as verbose and safe mode. For more instructions on entering the Boot Flags, see Clover Basics and Switching Advice.
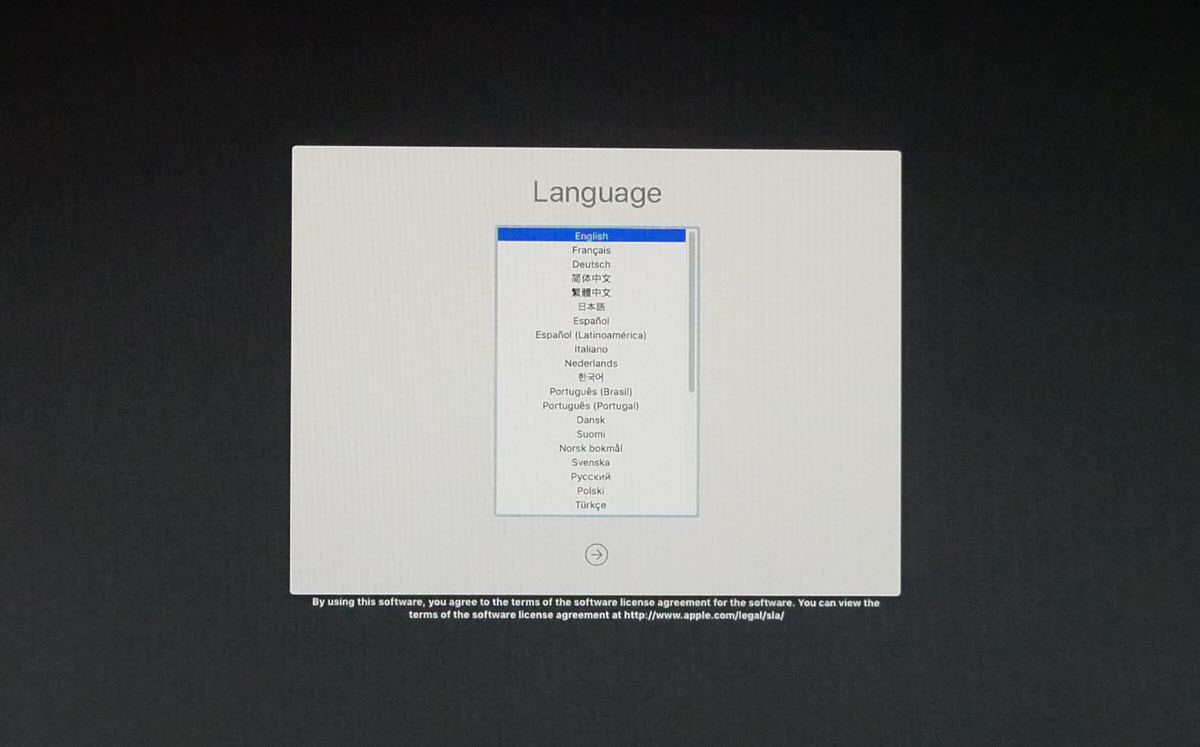
Select Language
#2. Now, select Disk Utility from the macOS utility window and click Continue.
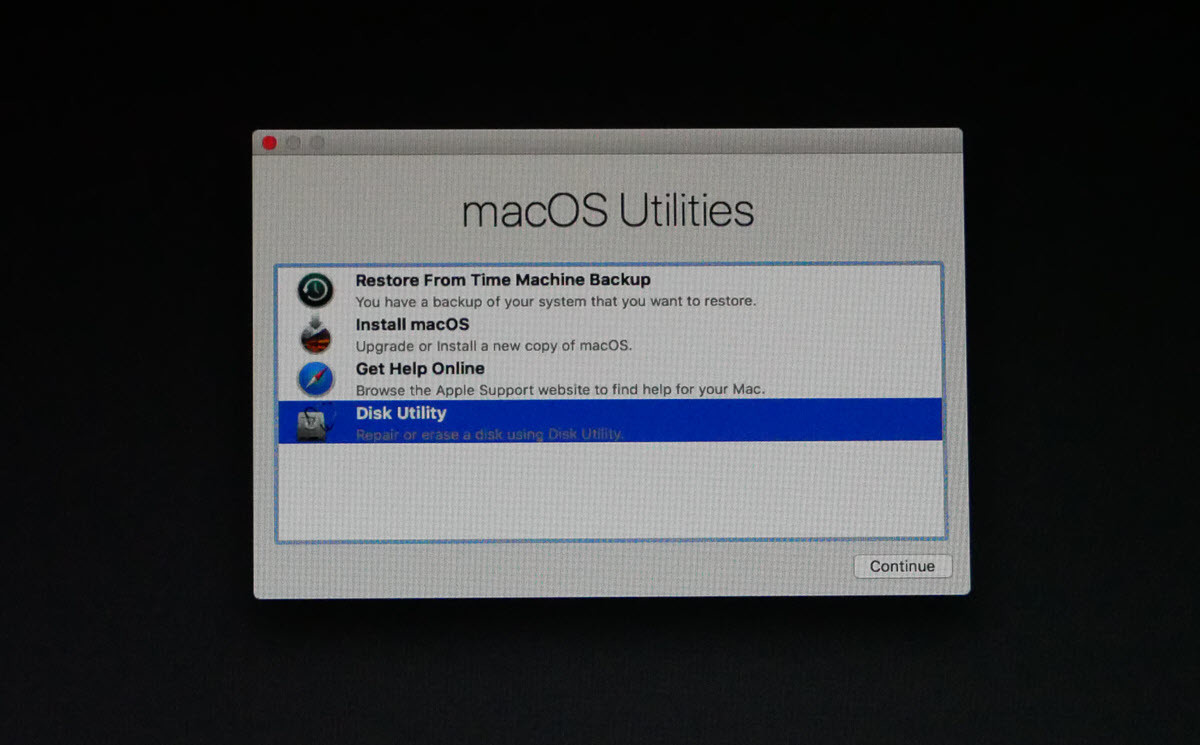
macOS Disk Utilities
#3. Click a Small Arrow at the top left-corner of Disk Utility window and click on Show All Devices.
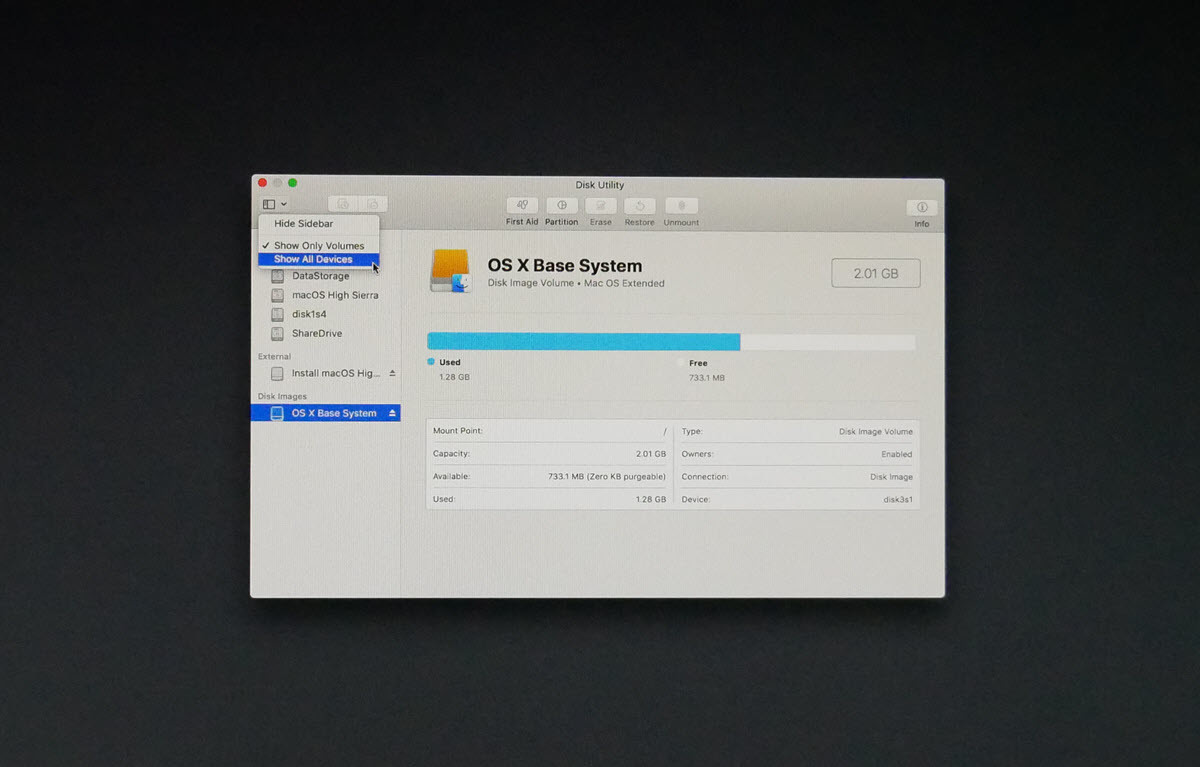
Disk Utility Window
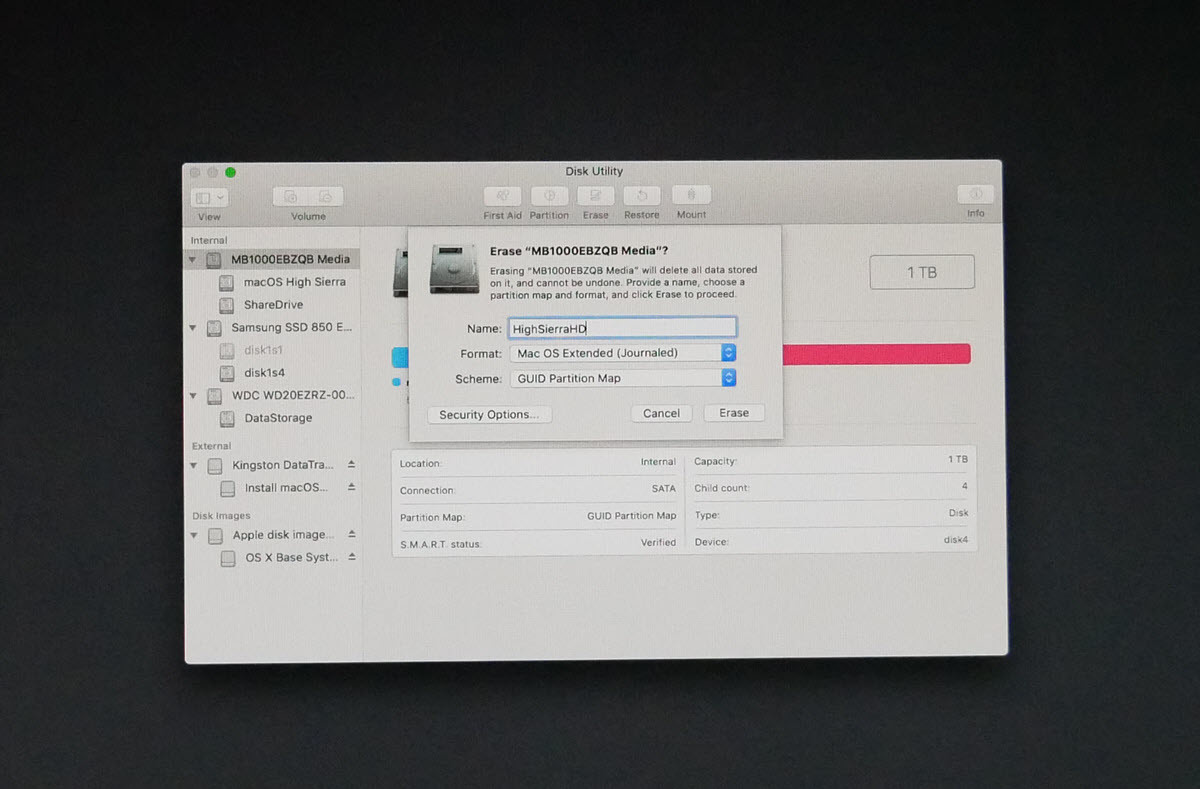
#4. Select the drive you want to install macOS High Sierra on. Click on Erase tab and as a name type HighSierraHD or any other name you want. As Format choose Mac OS Extended Journaled or APFS and as Scheme choose GUID Partition Map.
Format Disk
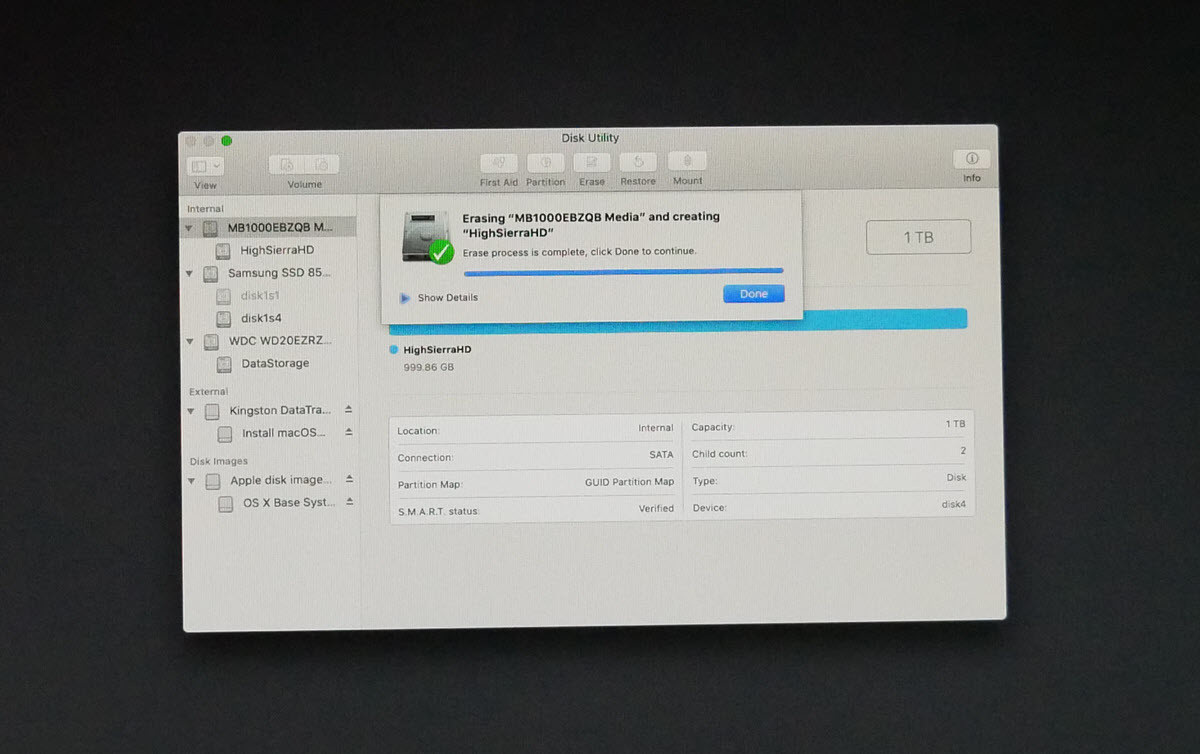
#5. Once the formatting process has finished, then click Done and close Disk Utility window.
Disk Format
#6. This time select Install macOS and click Continue.

Install macOS
#7. Click Continue.
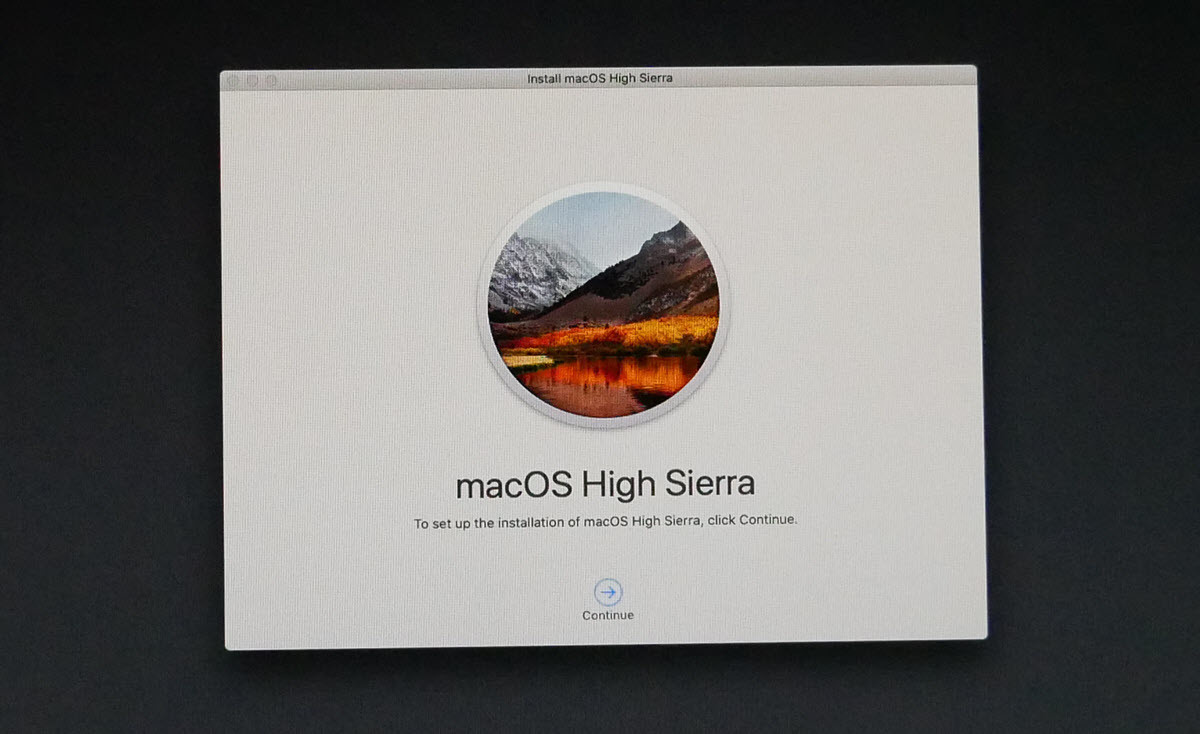
Install macOS High Sierra
#8. Click Agree.
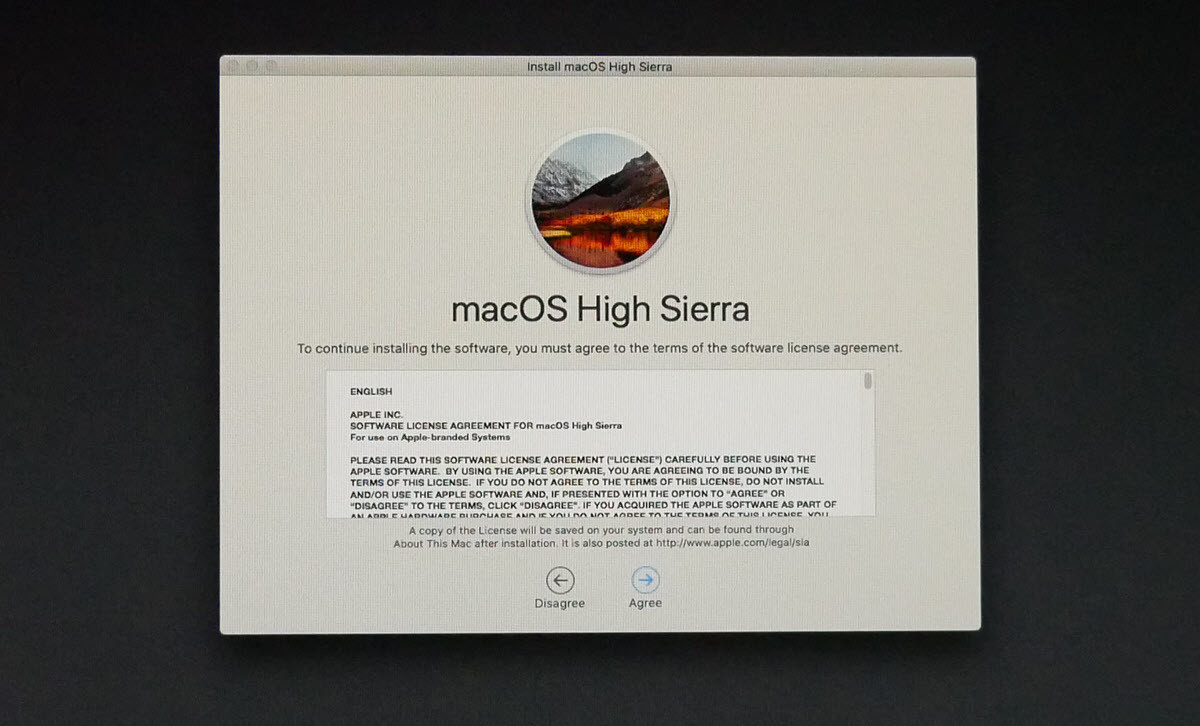
Agree to terms and Conditions
#9. Select HighSierraHD that you’ve formatted in step #4 and click Install button.
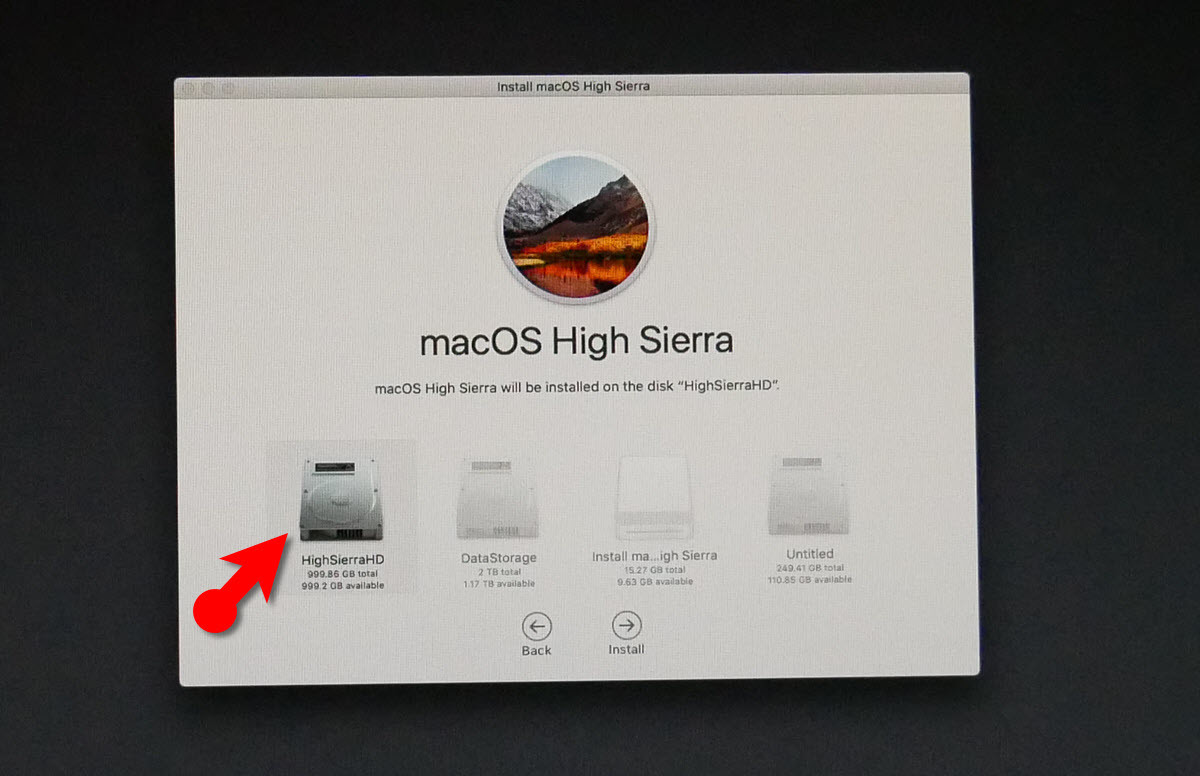
Select Disk
Wait for a few minutes and have a cup of coffee until the installation should complete.
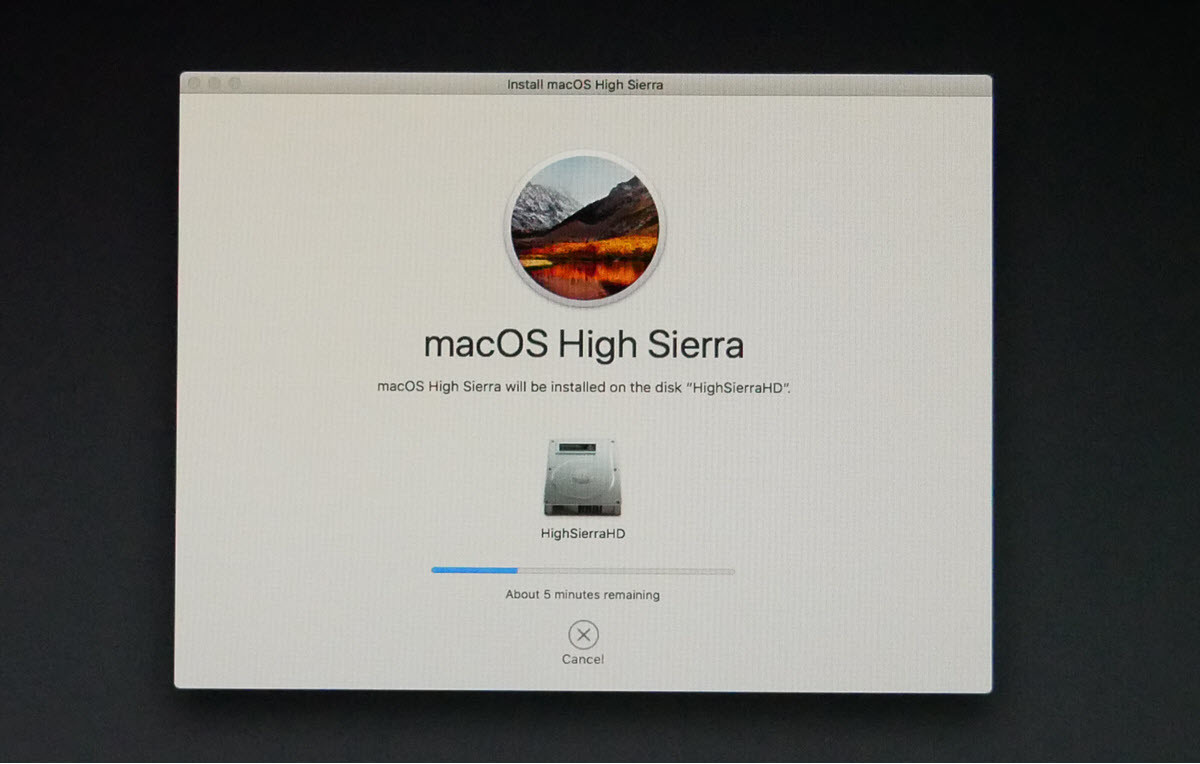
Installing macOS High Sierra
Once your system restarts, press the boot menu key again and boot to macOS High Sierra via USB and then select the HighSierraHD drive and click Enter from your keyboard.
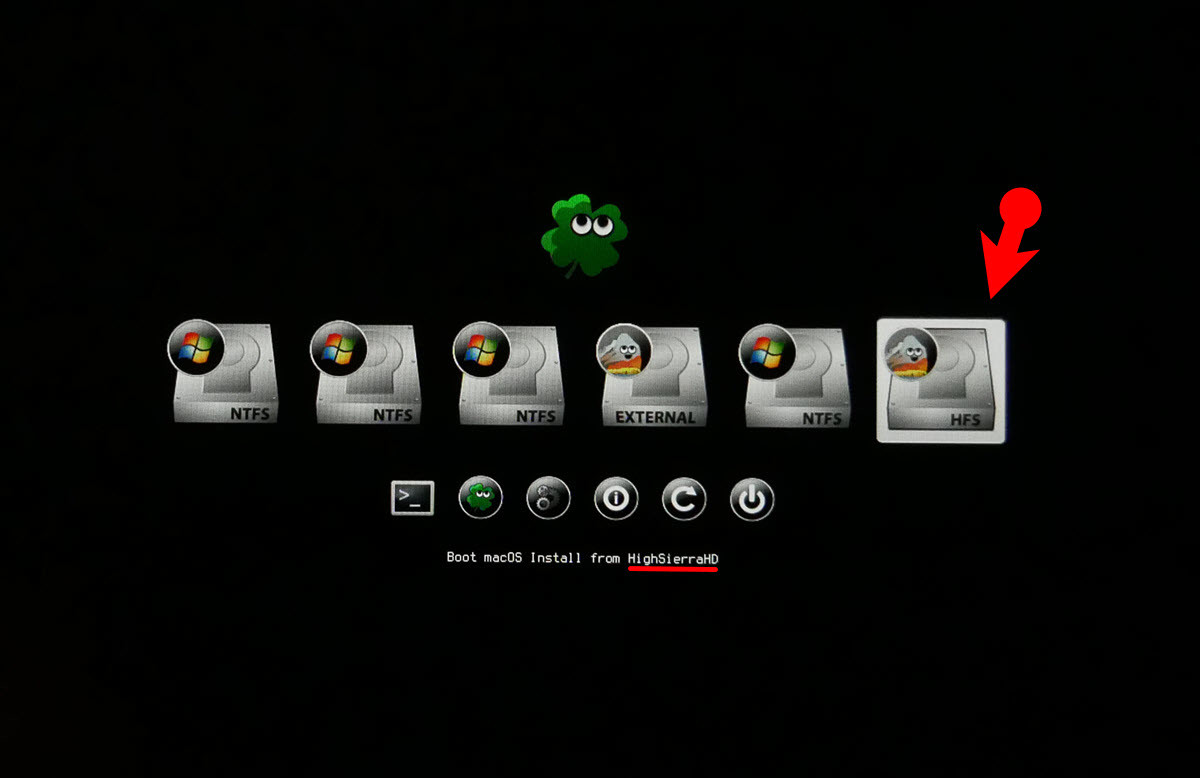
Select macOS High Sierra HD
#10. Perform a clean installation of macOS High Sierra.
Perform a Clean Installation
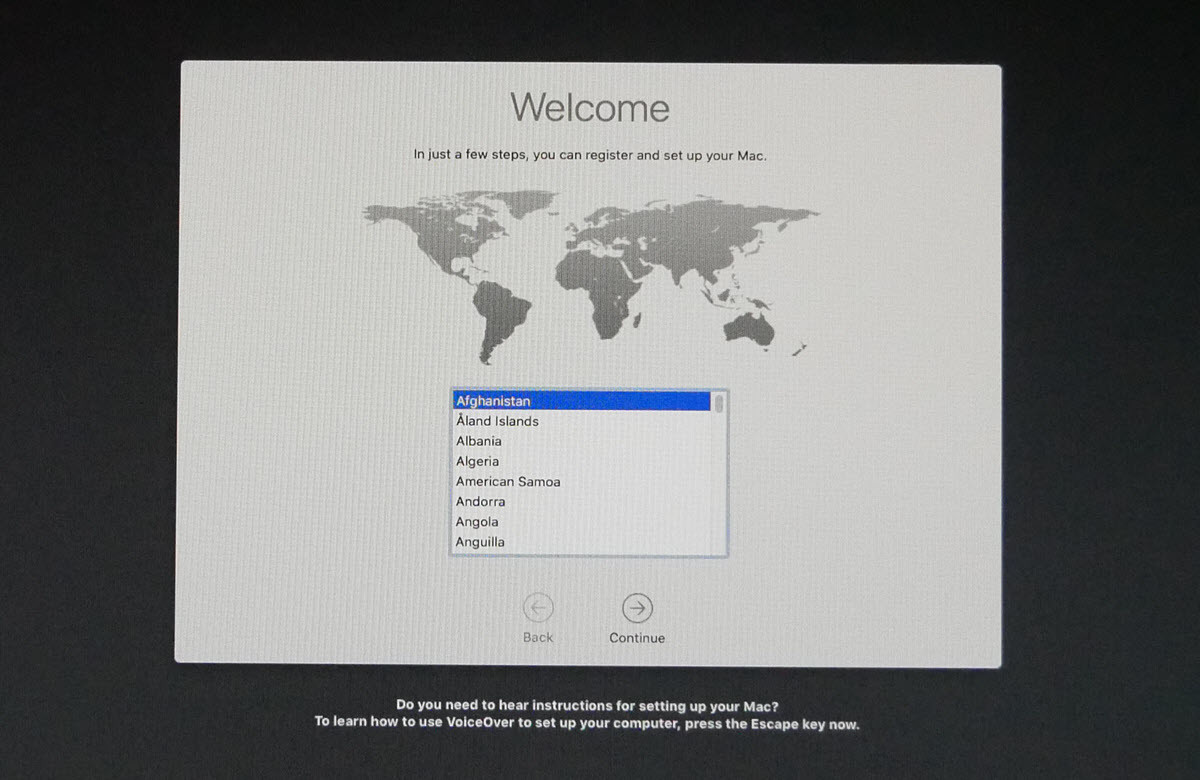
- Choose your Country and click Continue.
- Choose a keyboard Layout and click on Continue.
- Now select don’t transfer any information now to this mac and click on Continue.
- Enable location services and click on Continue.
- Select Don’t Sign In. If you would like to use your Apple ID, you can use, but we recommend not to use right now. Also, if you don’t know how to create Apple ID, then visit this step by step Guide.
- Agree to the Terms and Conditions.
- Fill out the Full name, Account name, Password, Hint and check the box of Set time zone based on Current location. Then finally click on Continue to create your user account for macOS High Sierra 10.13.
- On the Expres Set Up page, you don’t want to do something click Continue.
- Wait for a few secs to Setting Up Your Mac.
Installation Completed
Step #5. macOS High Sierra Post Installation
For the post-installation of macOS High Sierra, you need the following tools.
- Clover Configurator (Optional)
- MultiBeast (required)
- EDIMAX WiFi Card (Required)
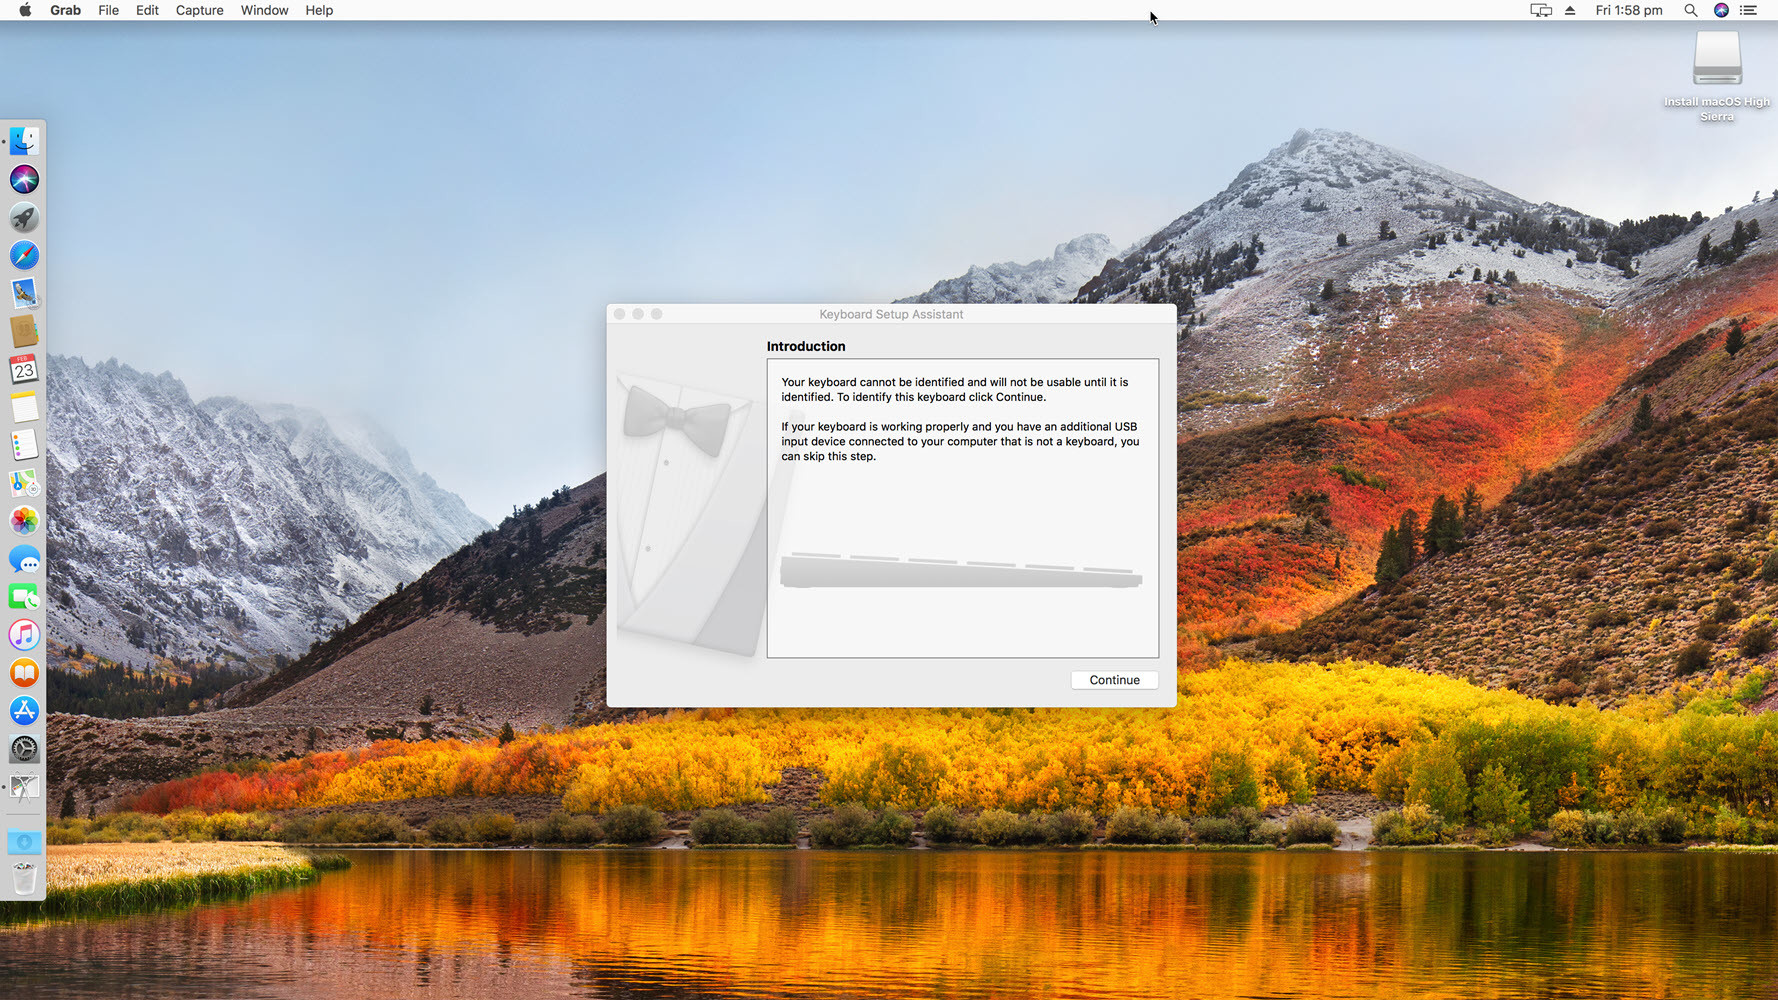
When you install macOS High Sierra on PC, then you’ll see the snapshot down below. Click Continue and follow the keyboard setup assistant guide.
#1. Download MultiBeast and EDIMAX WiFi Card driver. If the MultiBeast application didn’t work for you then for advanced modification, you need to download Clover Configurator.
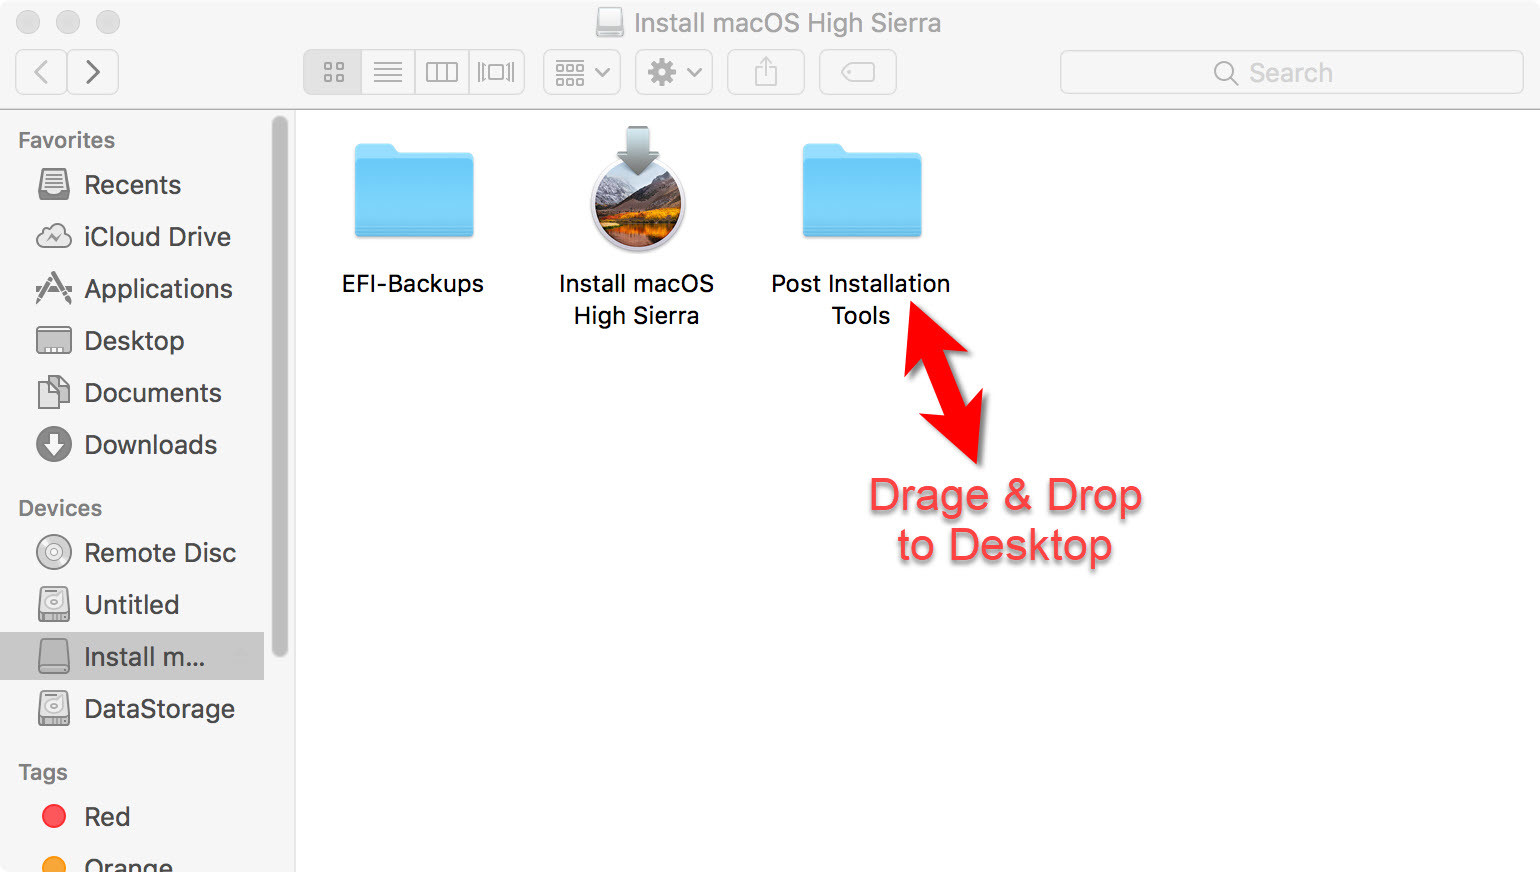
Required Files for Post Installation
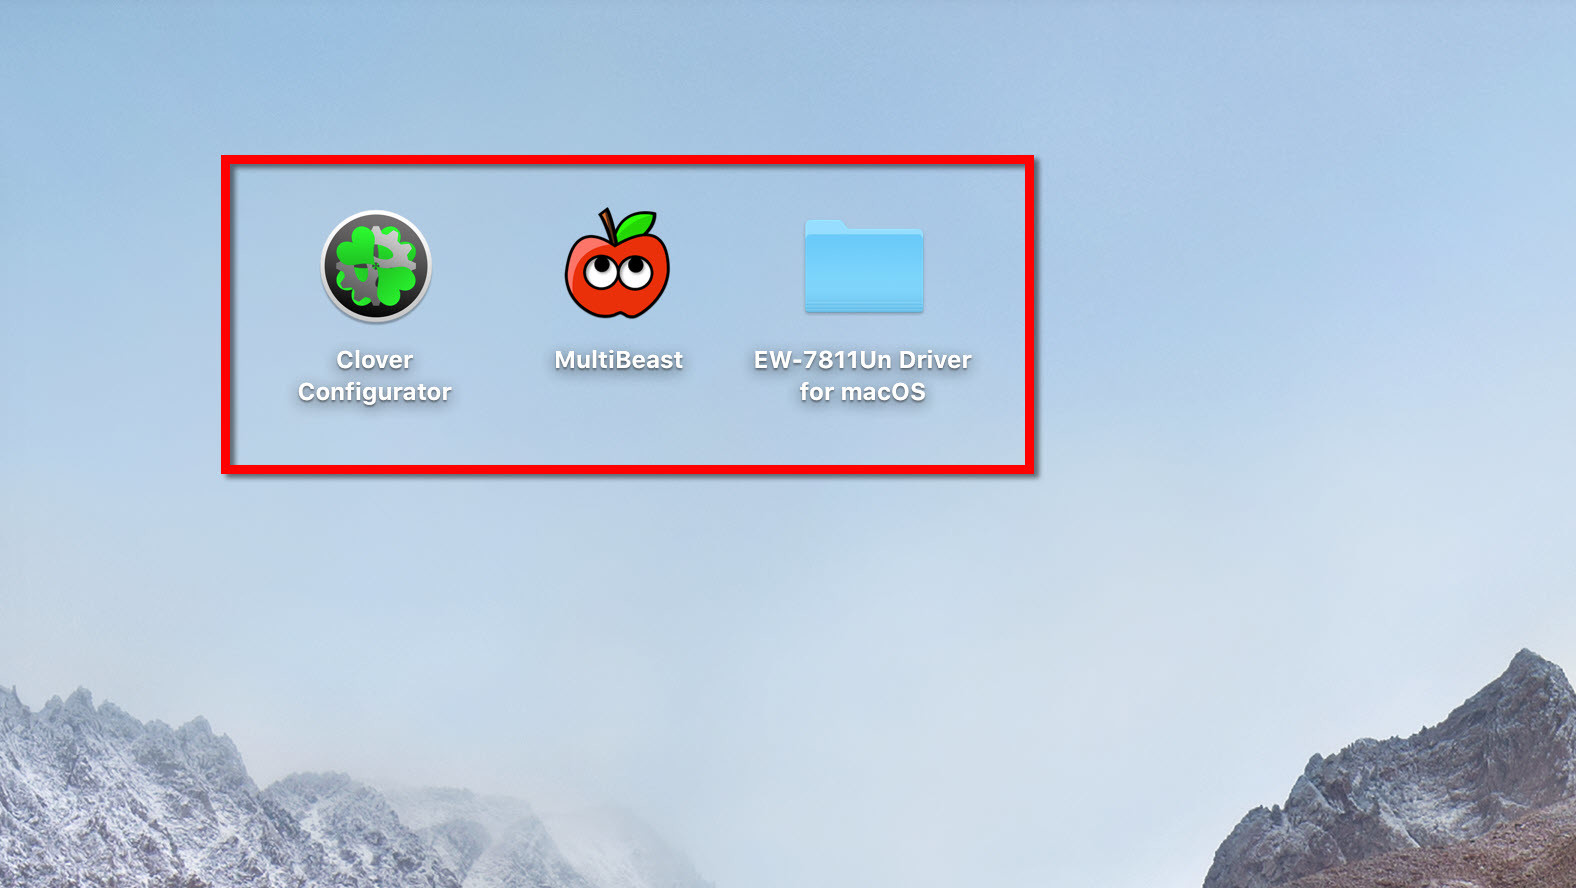
Post Installation Tools
#2. Open and Run MultiBeast. If this is a fresh installation, click Quick Start. UEFI Boot Mode is recommended for 7/8/9/100/200 Series CustoMac desktops and all UEFI capable systems. Legacy Boot Mode is recommended for 5/6 Series CustoMac desktops and all BIOS-Based systems.
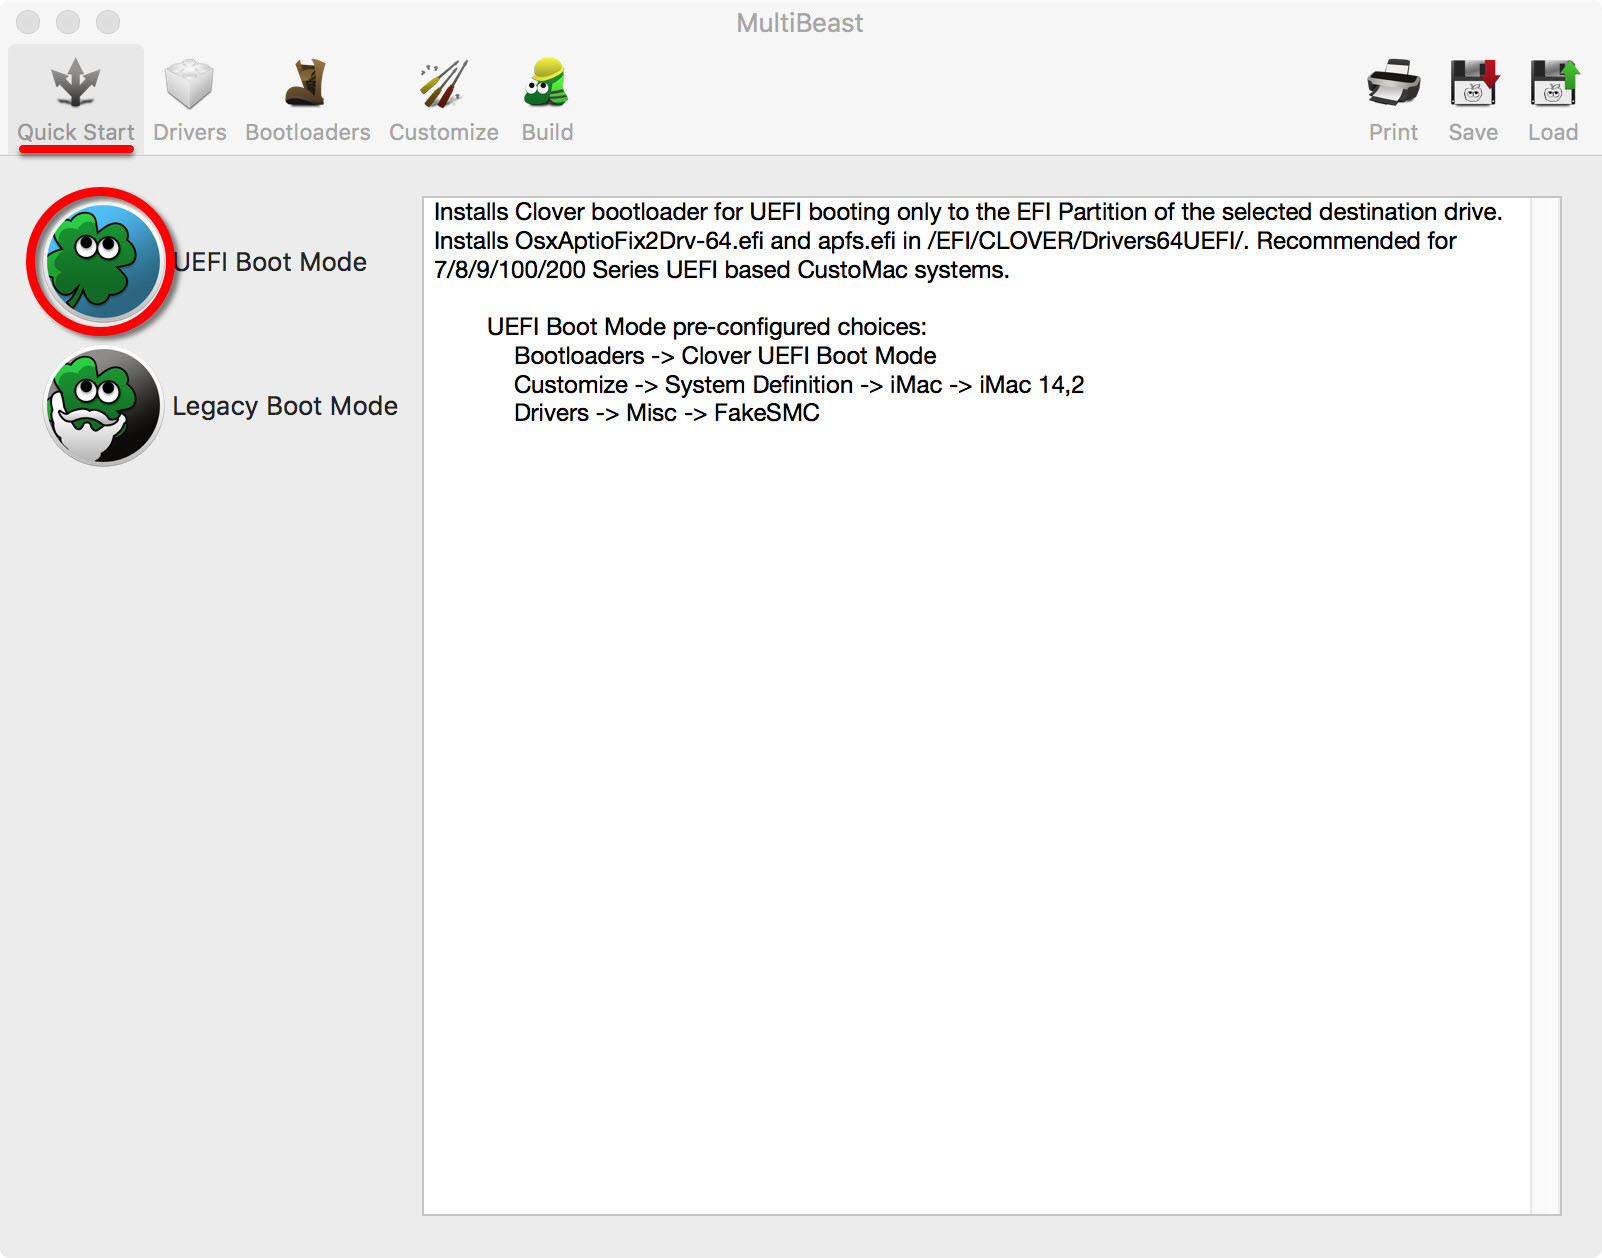
Quick Start UEFI Boot Mode
#3. Choose the appropriate audio and network driver for your system. In my case, I select ALC1220 and 100/200/300 Series Audio support.
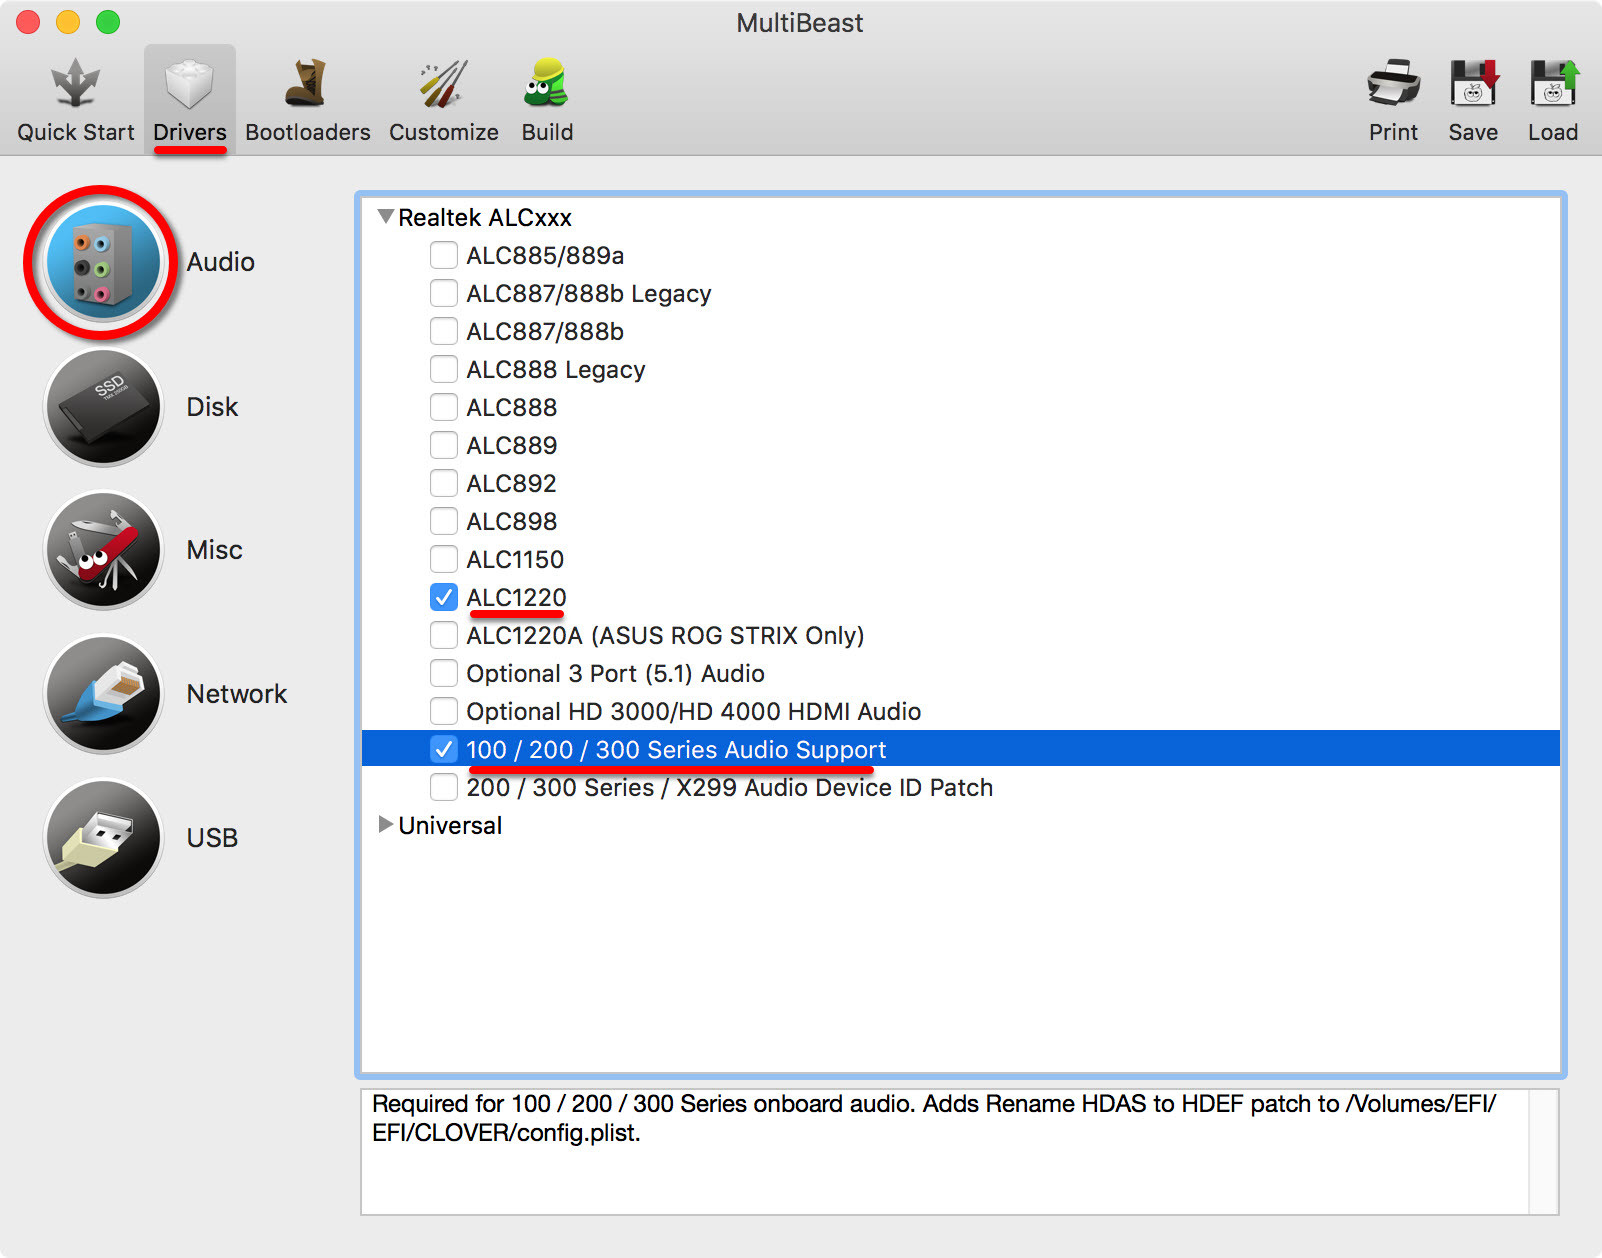
Audio Drivers
#4. For USB, I choose Increase Max Port Limit 200 Series. It’s not 100% necessary that you must select this option. I prefer to choose this option.

USB Drivers
#5. On the Bootloaders section, select UEFI Boot Mode.
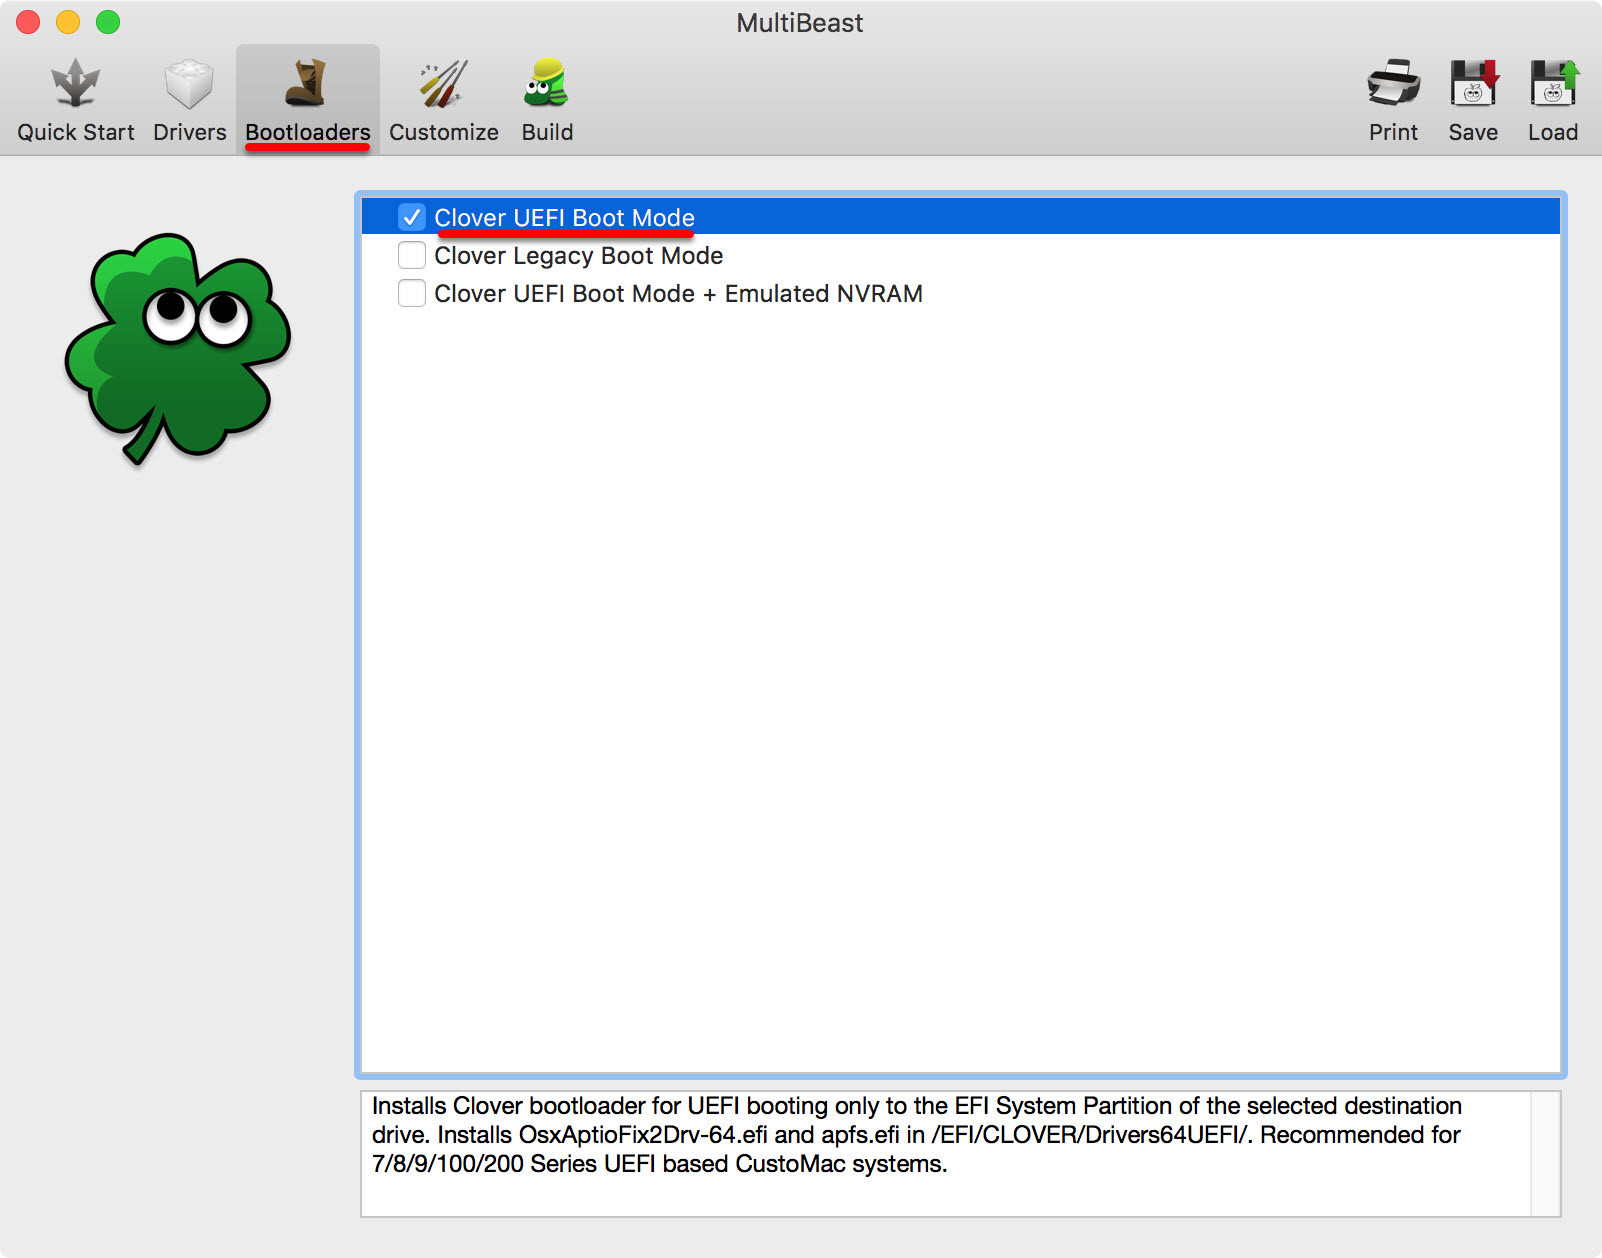
Bootloaders
#6. On the Customize tab, select your Graphics card. I don’t use NVIDIA, so I choose Intel HD 6xx. If you use Nvidia graphics card, then you’ve to select NVIDIA Web Drivers Boot Flag with NVIDIA Graphics Fixup.
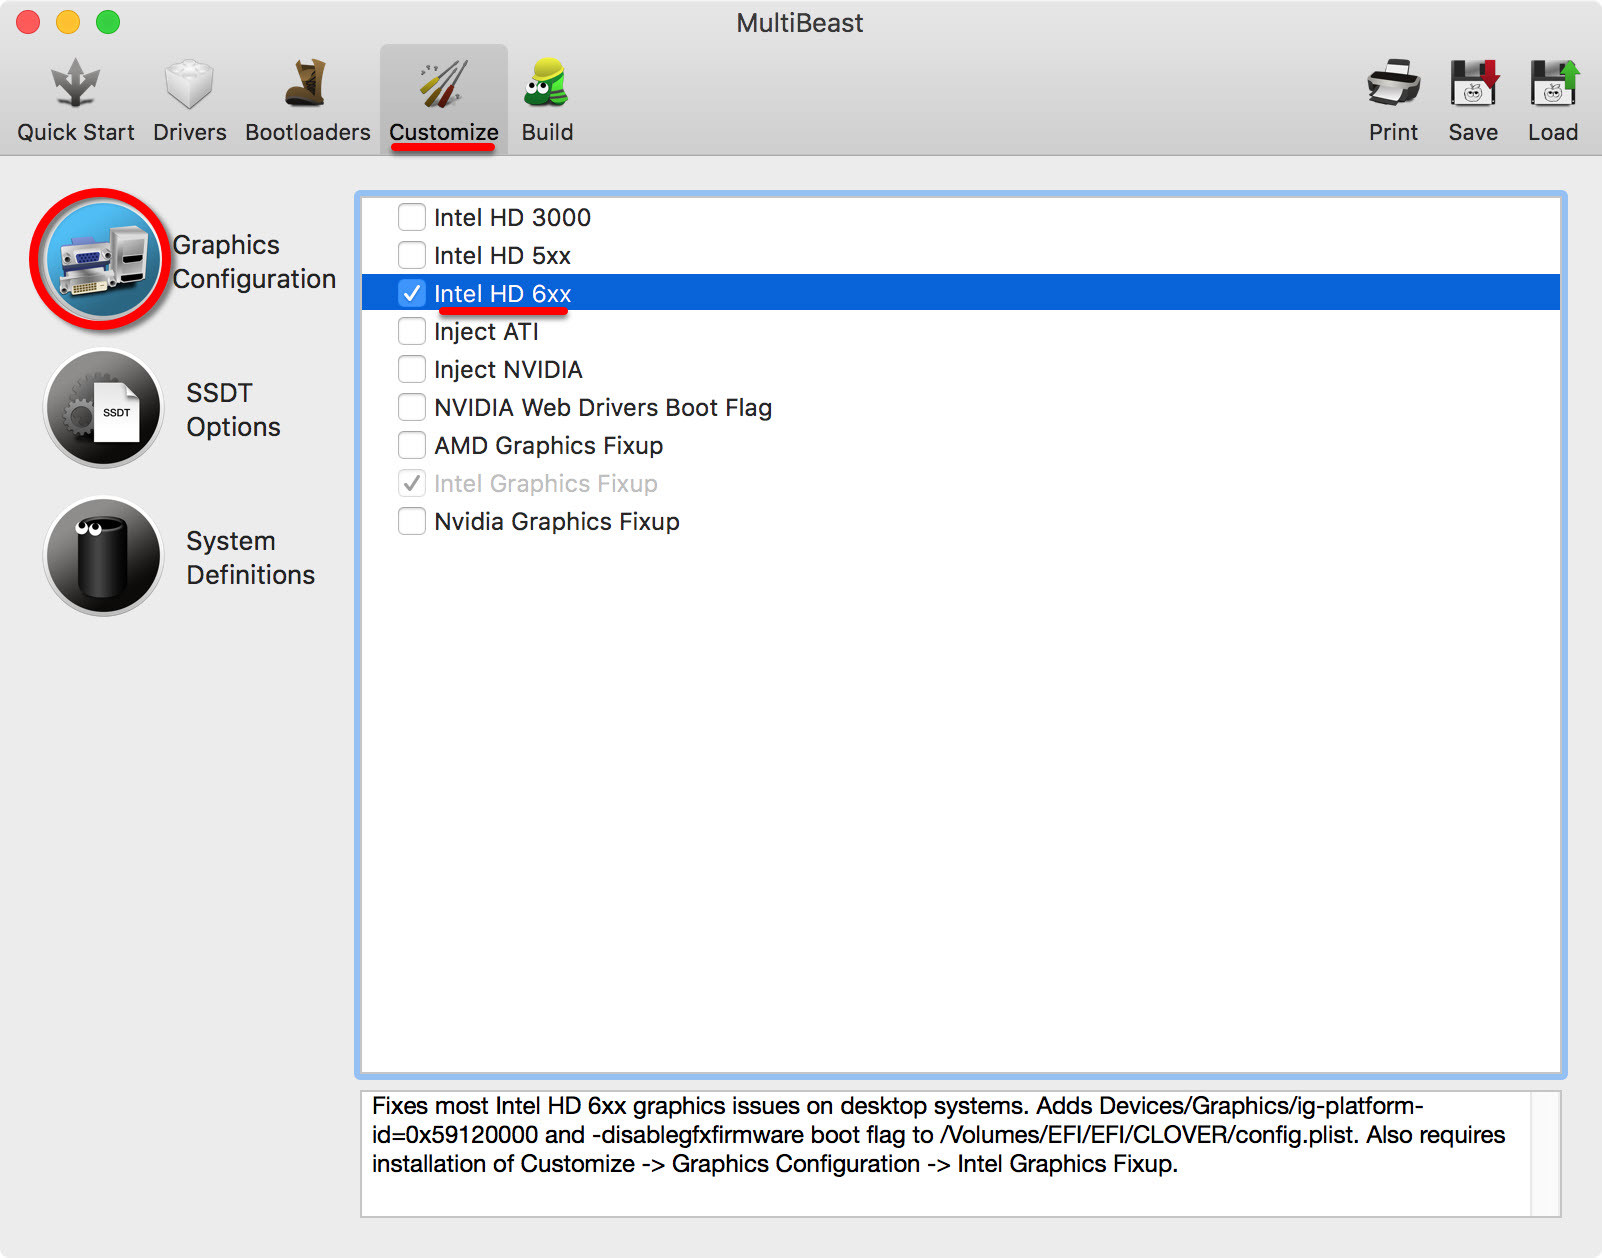
Customise Graphics Configuration
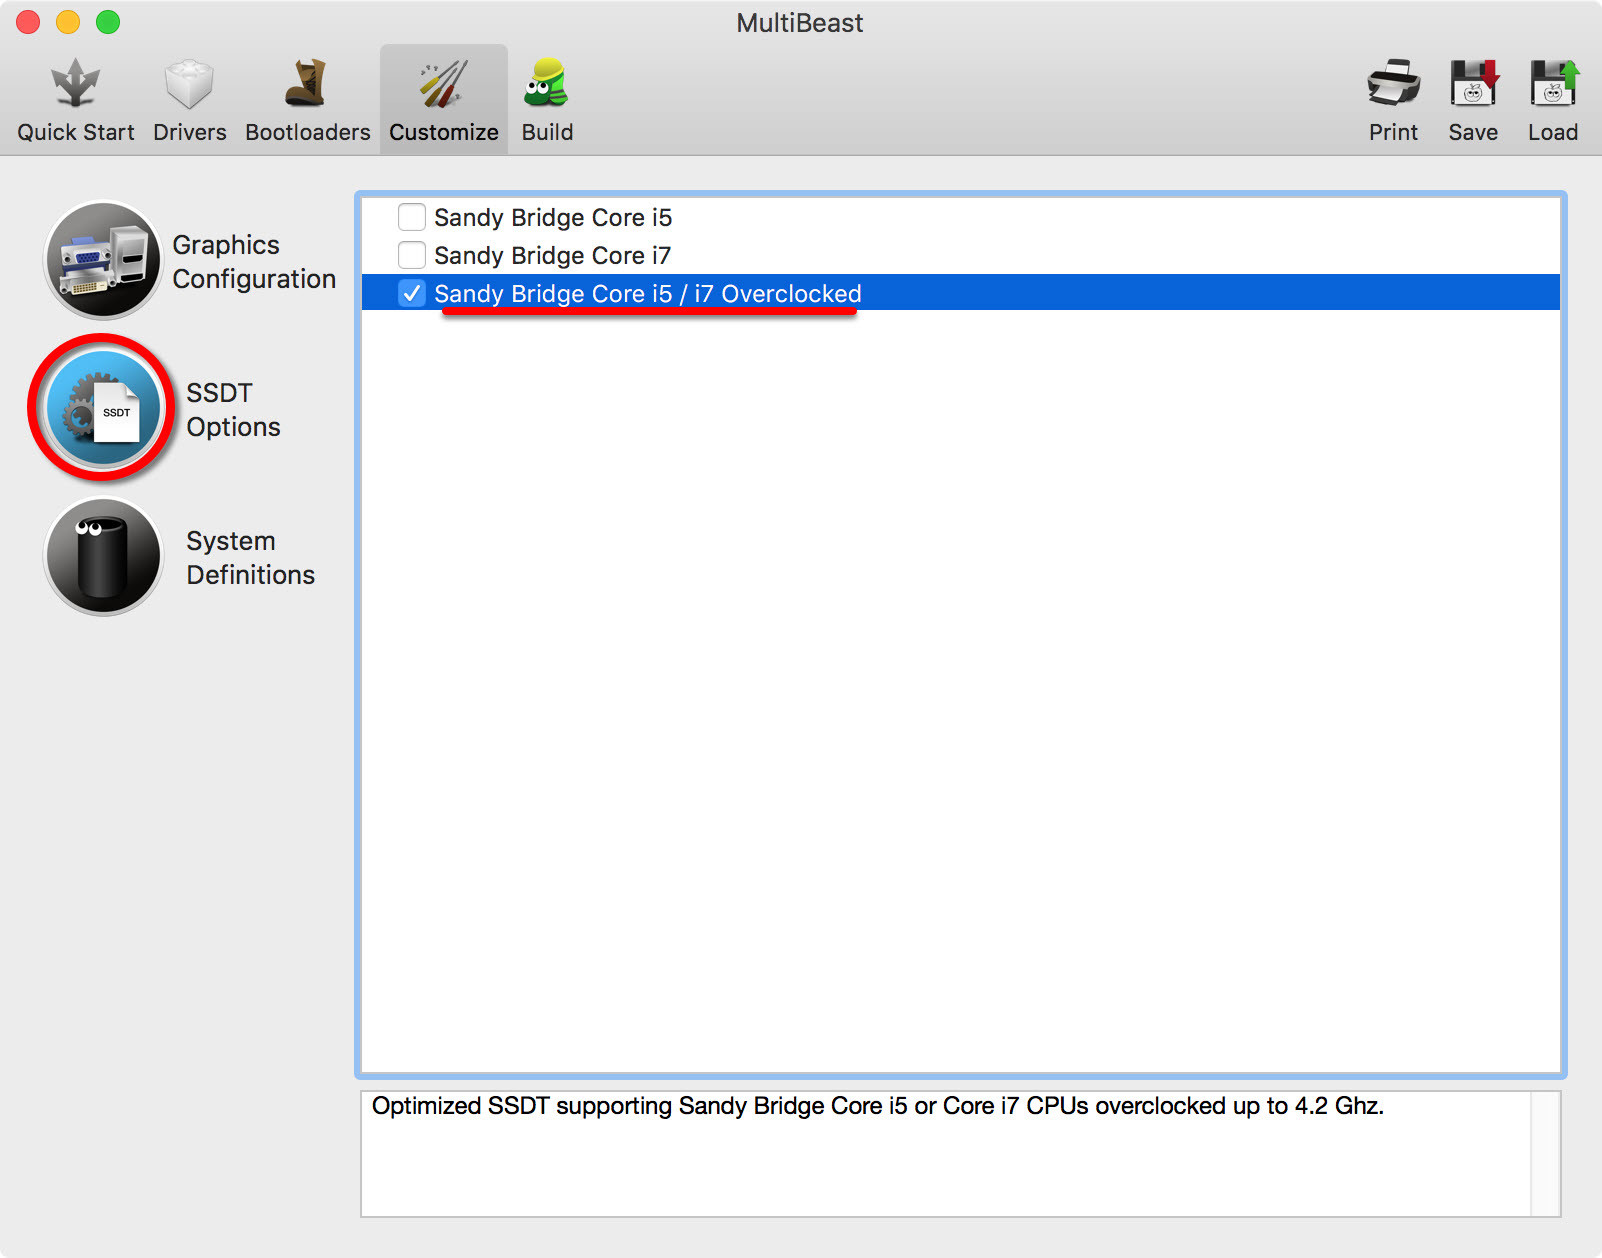
#7. Select Sandy Bridge Core i5 or i7 Overclocked. If your CPU is not Core i5 or i7, then you don’t need to check out this option.
Customise SSDT Options
#8. Select an appropriate system definition. In my case, I select iMac 18,3 because my CPU is Intel Core i7-7700K.

Customize System Definitions
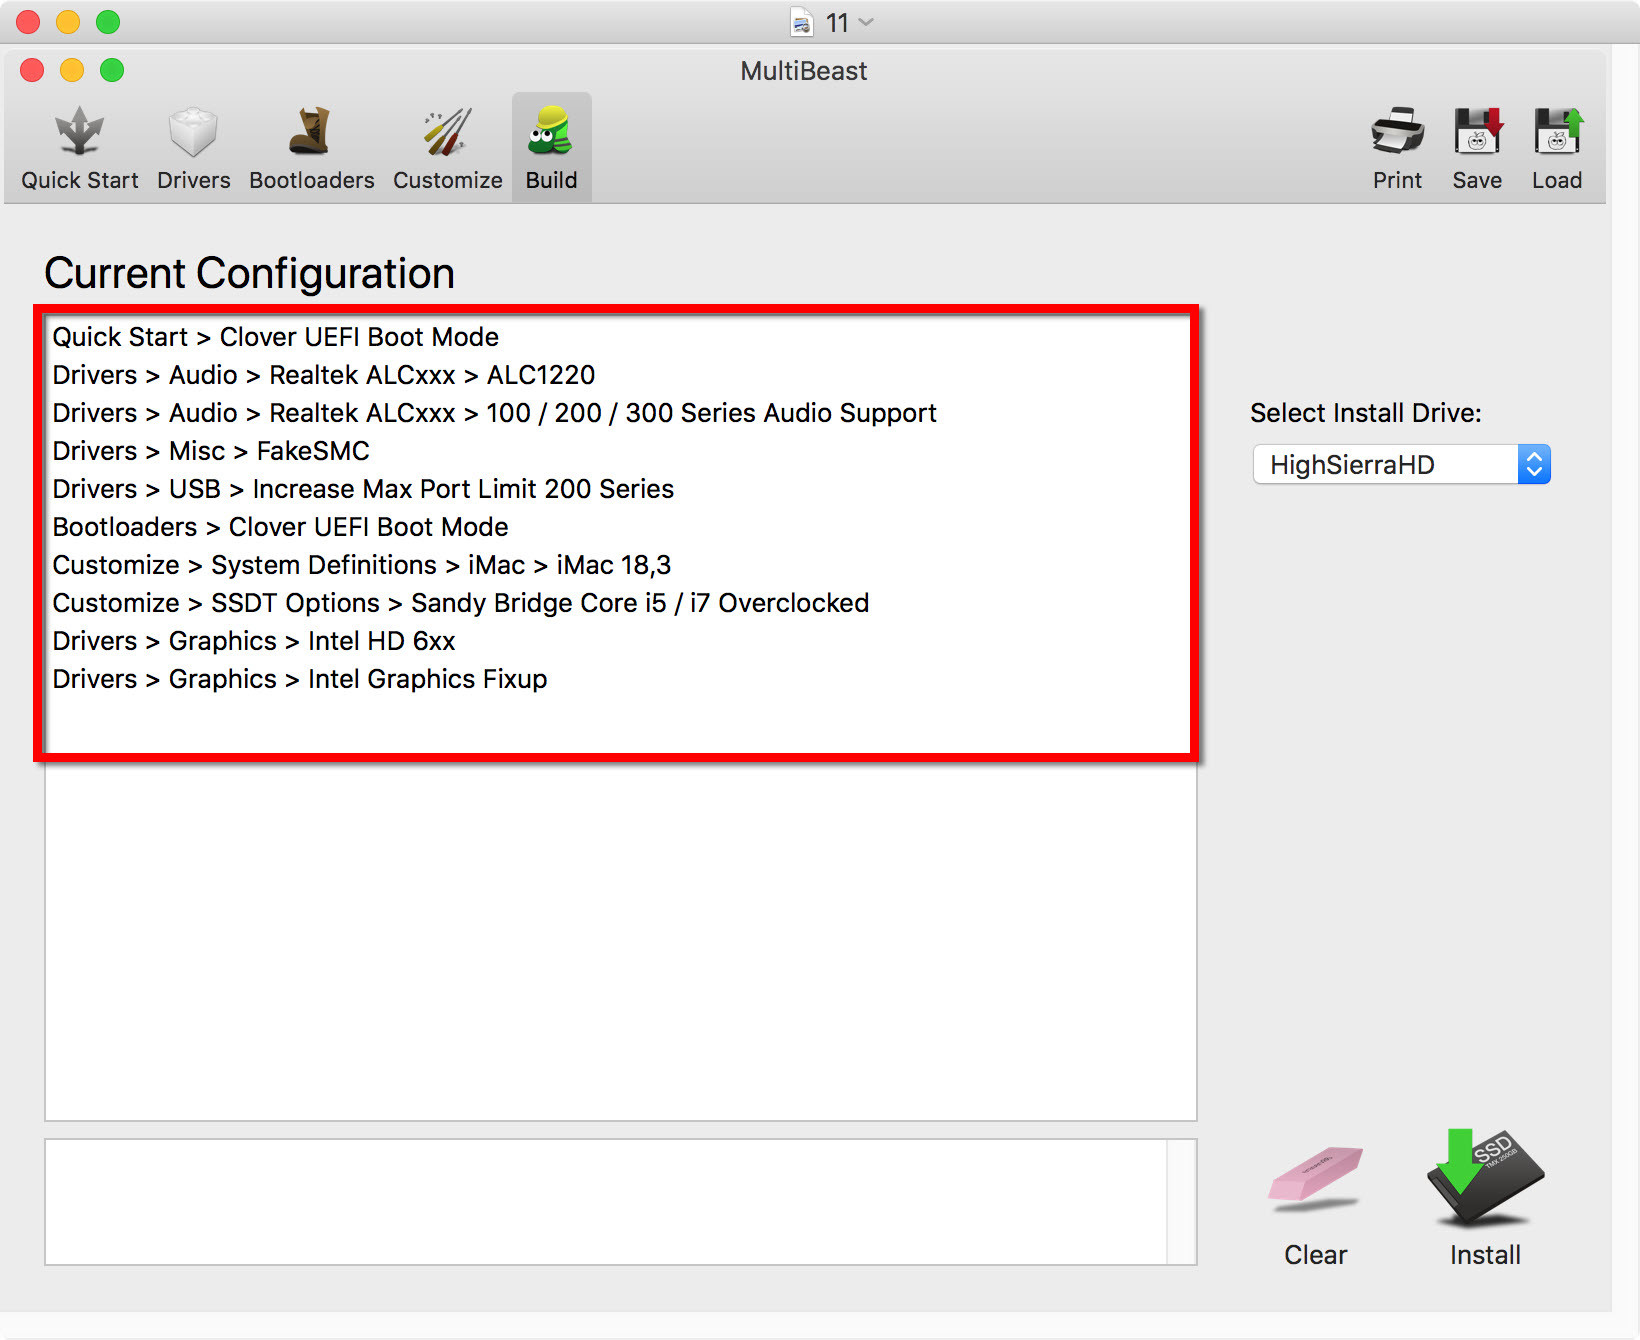
#9. Finally, click on the Build tab and select the drive you want to install the modifications. Click the Install button.
Current Configuration
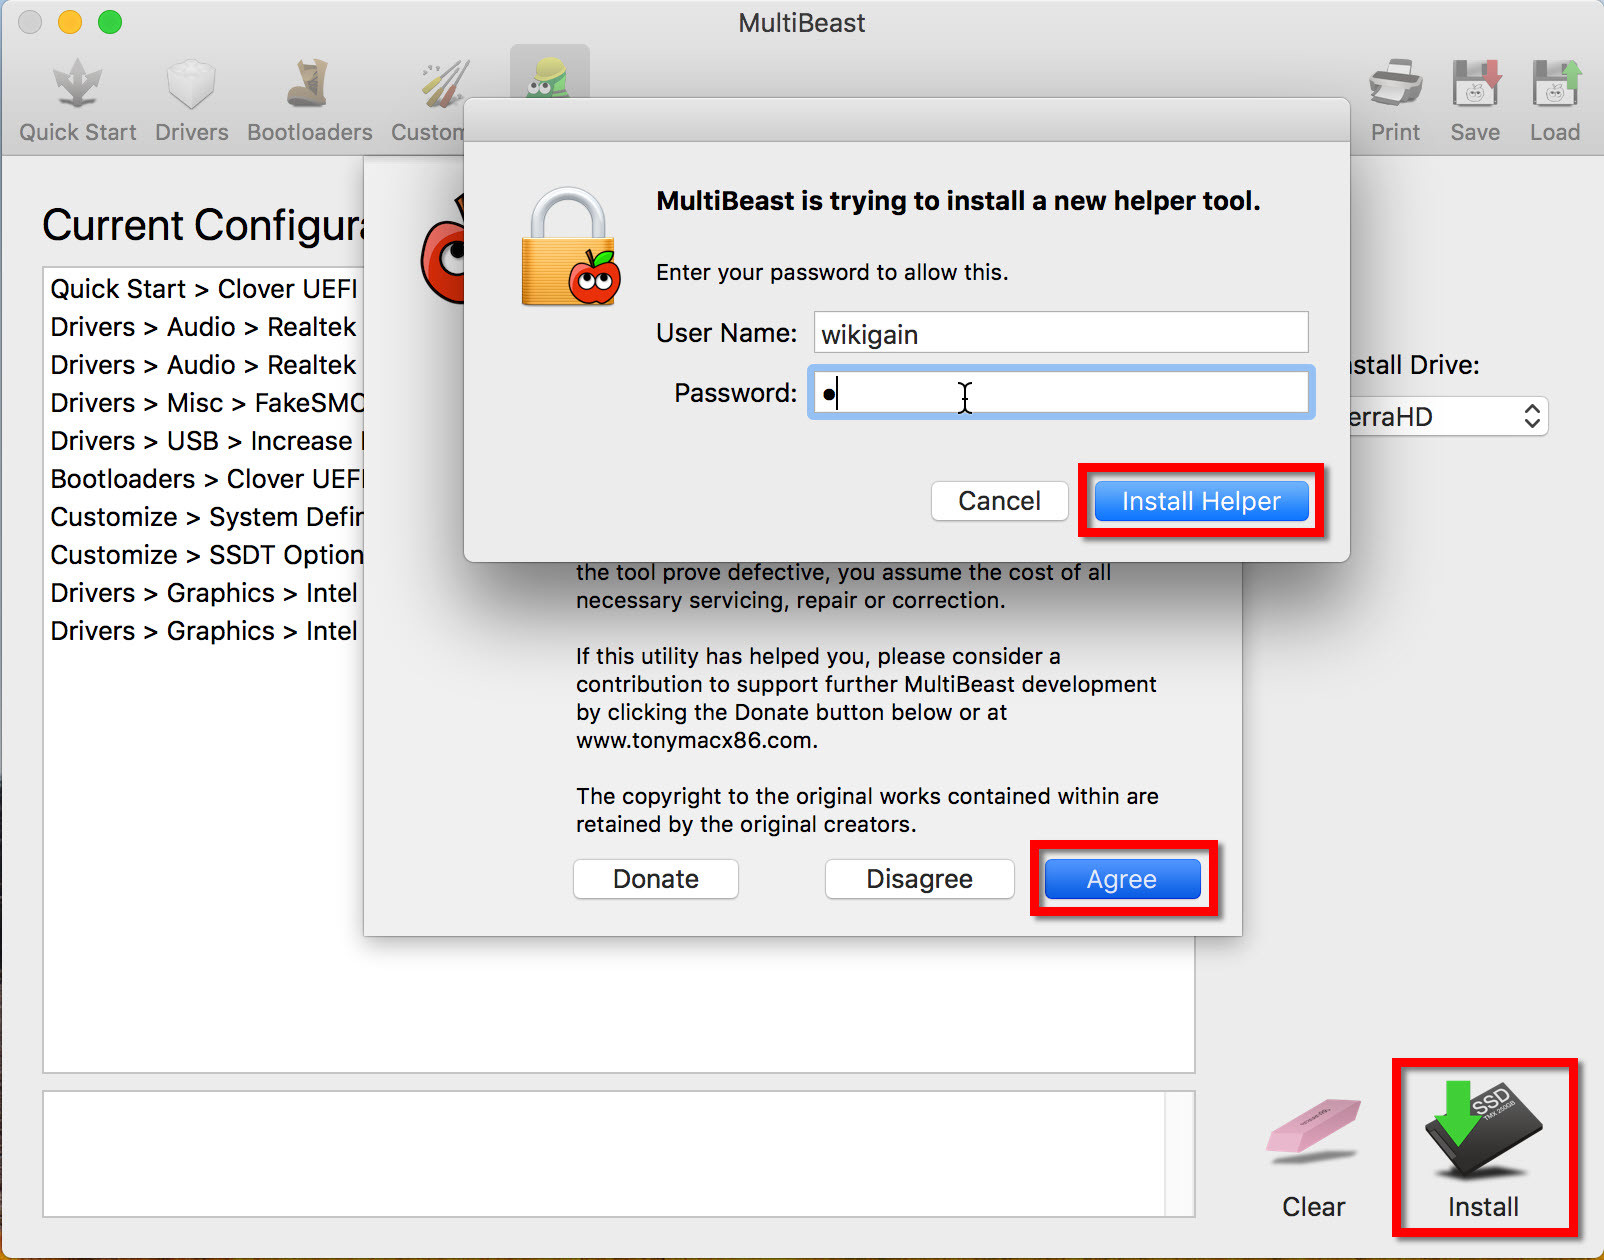
#10. Click Agree and enter your username & password then click Install Helper.
User Privileges
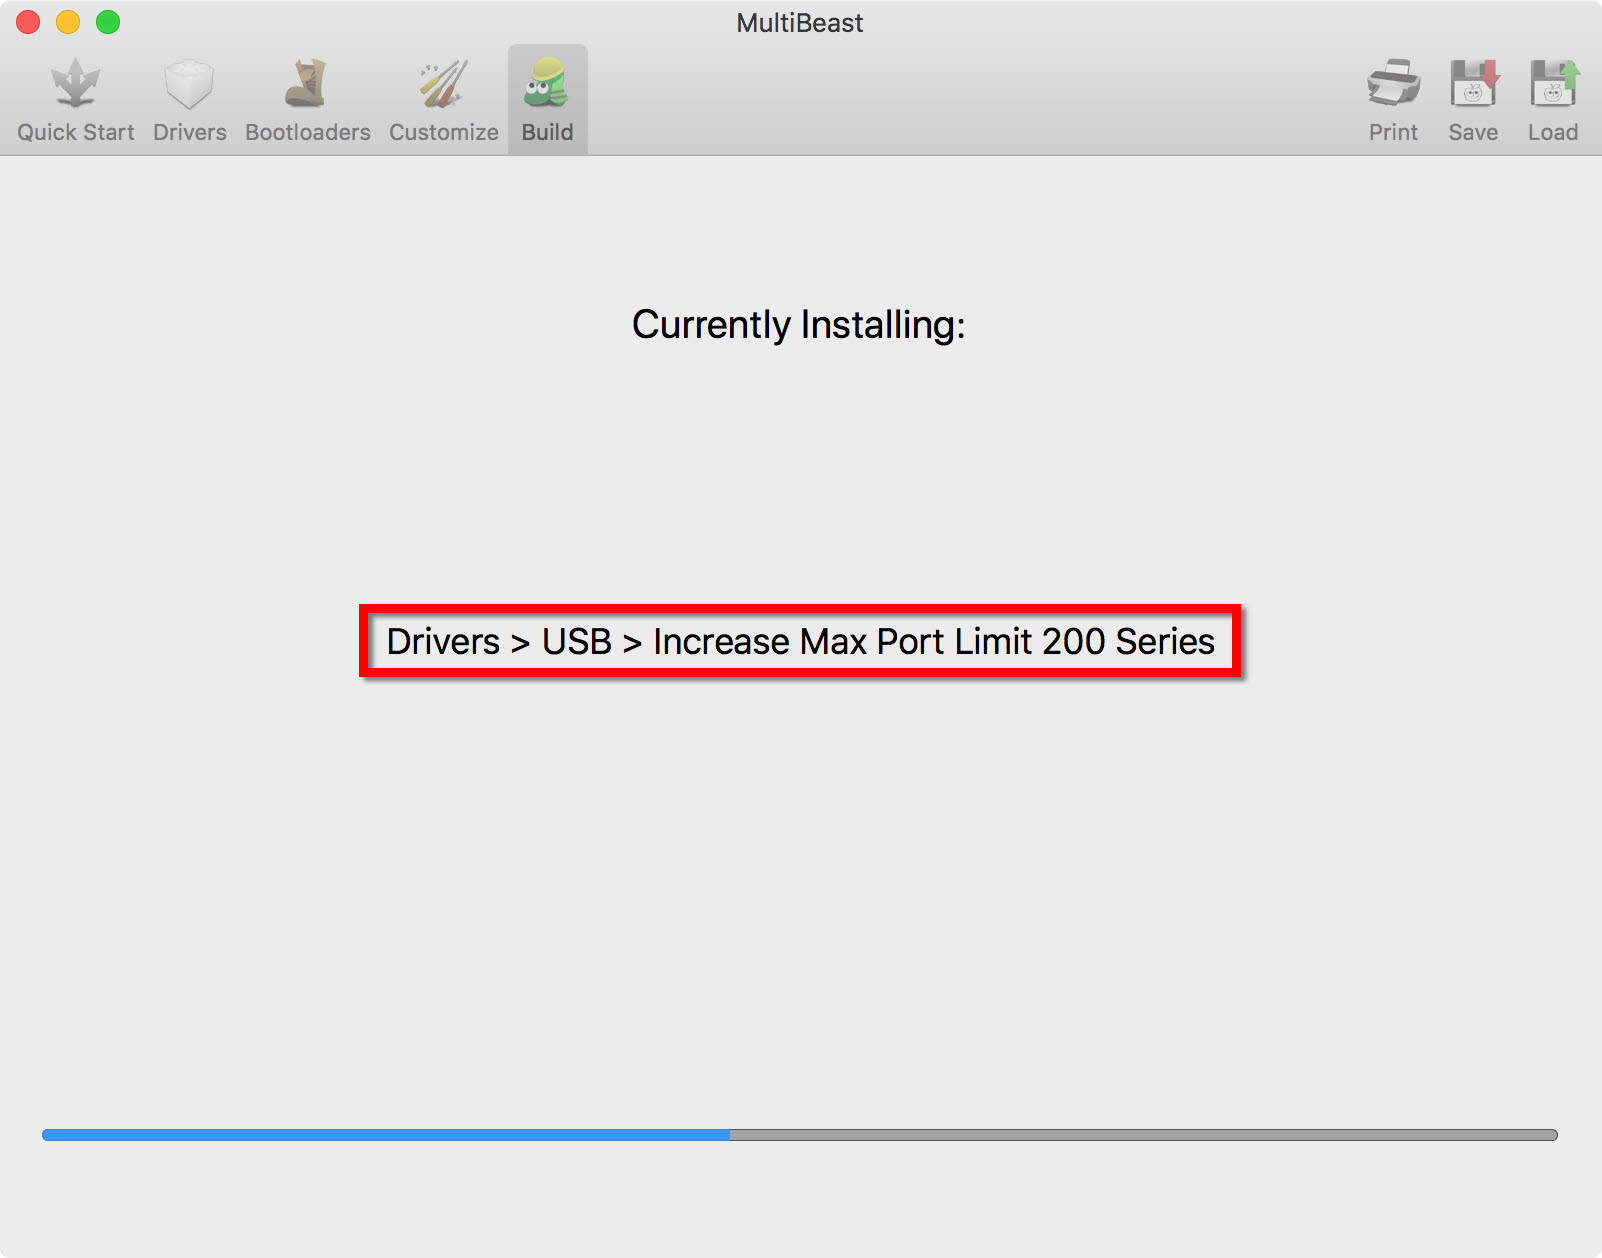
It may take a few minutes to complete. Just be patients.
Installing Drivers
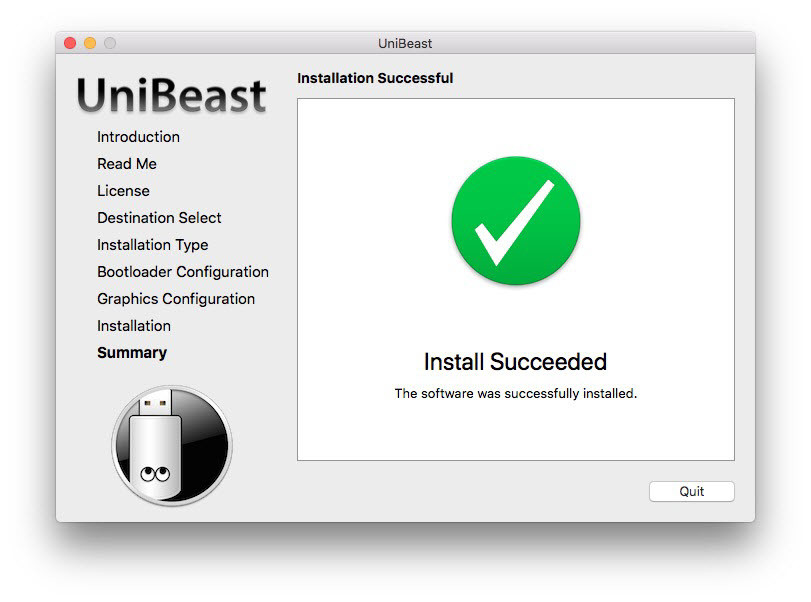
Once the software is successfully installed, then restart your system.
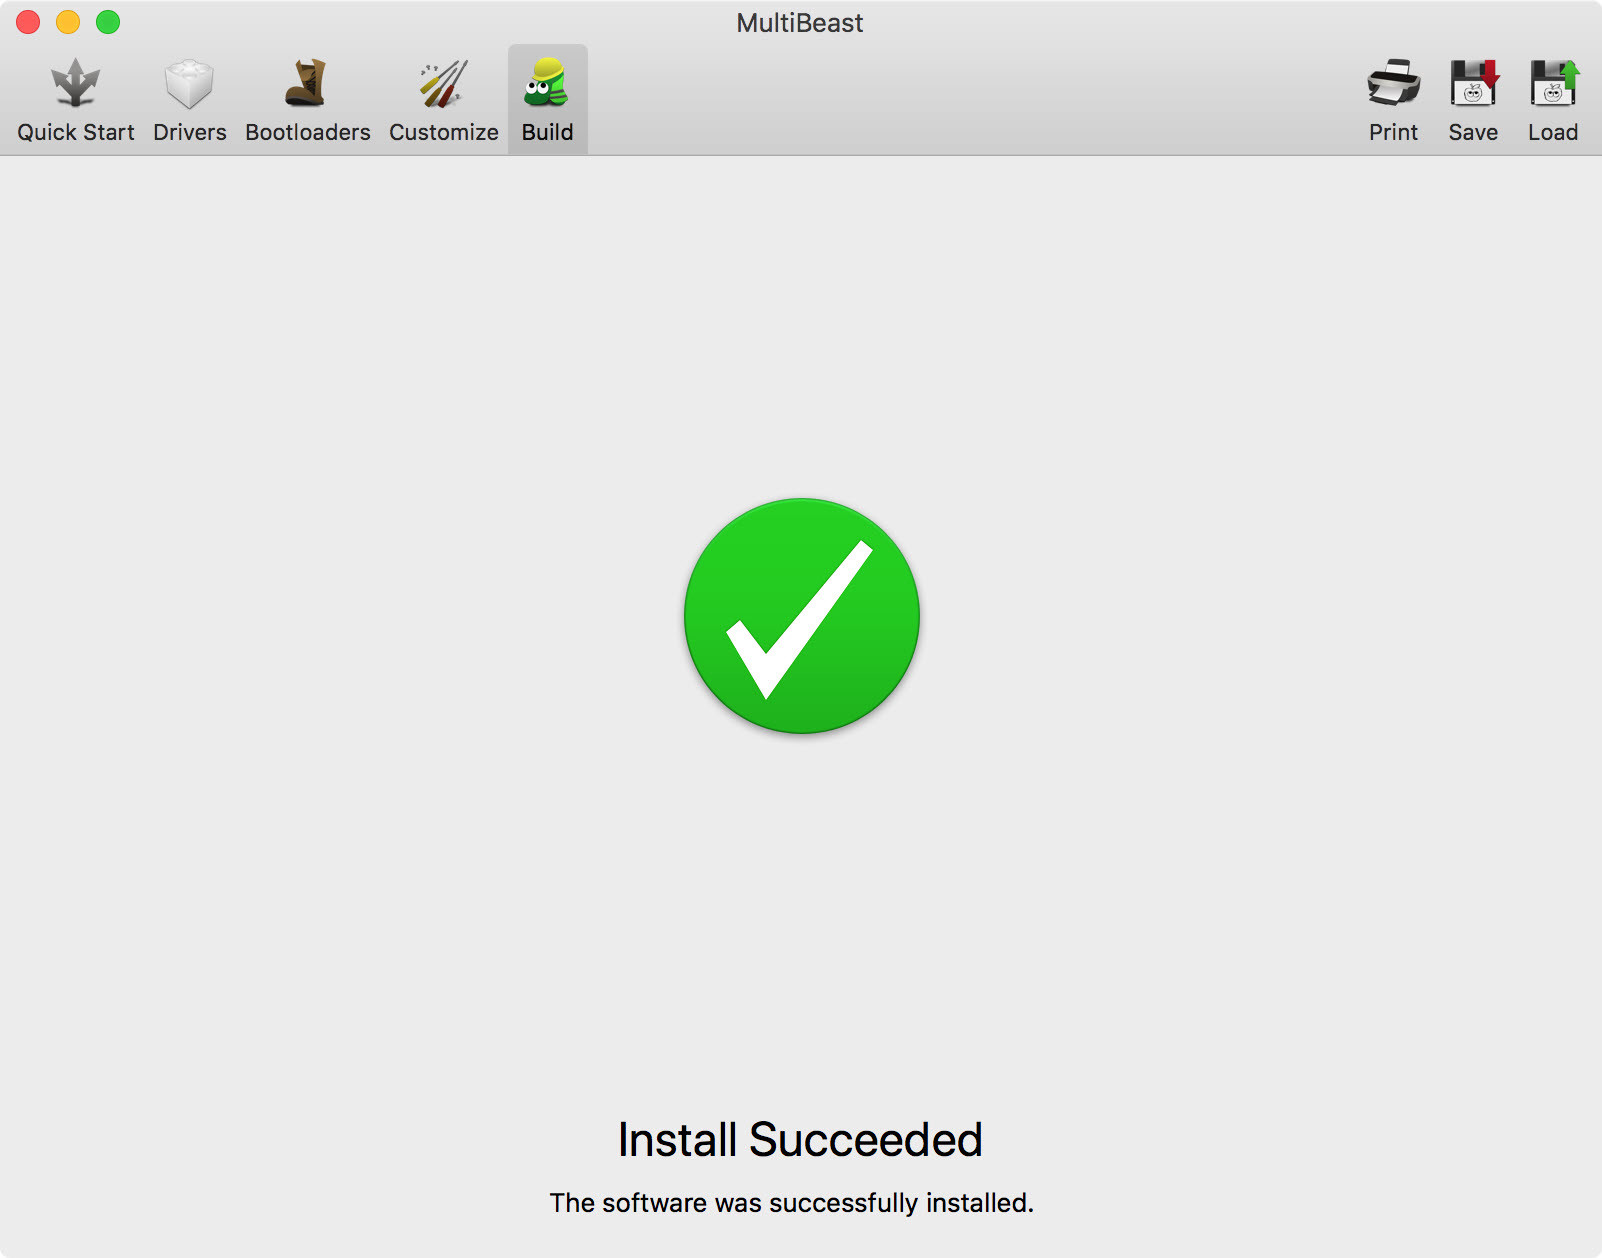
Install Succeeded
Step #6. Troubleshoot
If you’ve got any problem feel free to troubleshoot your device and also let us know if you’ve got any question.
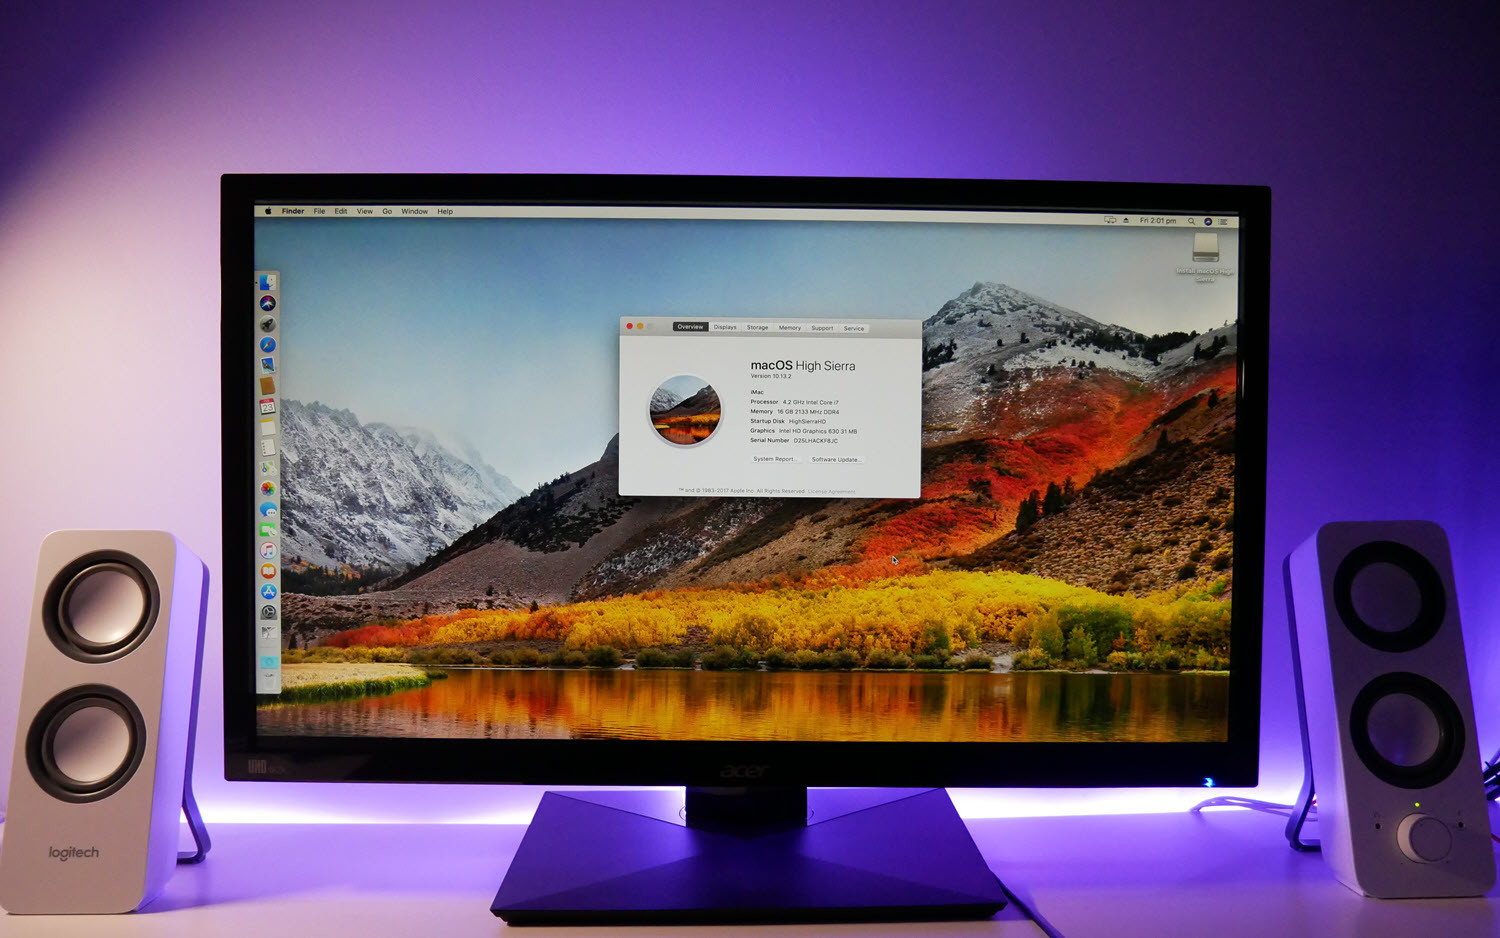
Final Result
Conclusion
It’s all about how to install macOS High Sierra on PC.
Thanks to all of the hard working developers, hackers, and testers all over the world without whom this guide would never have been possible. Special thanks to Tonymacx86 that provided UniBeast and MultiBeast. This guide can be complete by your suggestion and comments. Please feel free to share your experience with Hackintoshing your PC. We promise to update the post if we get a reasonable explanation from you guys. Thank you for reading this lengthy article.
Hi, I’m trying to boot from the usb installer I created using TransMac. I booted from the mac, got to the clover menu. Then selected the option to boot the installer. Then I see the apple logo, then the logo with the the progress bar. But then it just hangs up right there and never does anything showing 1% or so on the bar. I have a Gigabyte Z270 Gaming 7 with a 7700K. I tried turning off my overclock and running the suggested settings shown in the guide but no changes. I’m actually formatting the install on this tower to then install the drive into an old HP Compaq I picked up on the cheap.
i have celeron procesdor with 4GB ram can i install high sierra???
Hi all, so I get the installer made and boot up and go ahead and go through the first install process formatting the drive etcetera Etc and then when it reboots to go into the second phase to do the clean install it gets almost all the way done and then gives me an error message with no specifics just failed to initialize properly or something like that and my only option is to restart so I go back into the boot disk and find out that even though I formatted hfsplus the High Sierra installer converted it to a PFS so my question is, is this why my install keeps failing and do I need to add the a PFS file or text to my EFI volume on the new boot disk? Or do I use Clover to configure it differently or add it in there? I think this is the only thing holding me up at this point but I’m not sure what to do or how to do it so if someone could explain that part to me I would be ever so grateful. I’m installing onto a solid state drive and I do have a Santa to USB connector so I can easily connect the drive to my MacBook error and mount the EFI partition if I need to so if anyone could help me maybe figure out this last step I think I’m good to go and I can handle the rest I just need to get to that second part of the installation so it can finish properly without giving me the failed message with the only option to restart and try again. Thank you so much I look forward to any and all help that I can get I’m so close LOL thank
I need to download the
1. Download UniBeast and MultiBeast at https://www.tonymacx86.com/resources/categories/tonymacx86-downloads.3/
There have a lof ot files (below ) to download … which one may I download?
Files to download:
Chimera 4.1.0
iBoot 3.3.0
iBoot Broadwell 1.0.0
iBoot Haswell 1.0.1
iBoot Ivy Bridge 1.1.0
iBoot Legacy 2.7.2
KextBeast 2.0.2
MultiBeast 3.10.1 – Snow Leopard
MultiBeast 4.7.0 – Lion
MultiBeast 5.5.5 – Mountain Lion
MultiBeast 6.5.1 – Mavericks
MultiBeast 7.5.0 – Yosemite
MultiBeast 8.2.3 – El Capitan
MultiBeast 9.2.1 – Sierra
MultiBeast 10.4.0 – High Sierra
rBoot 1.2.0
rBoot-LE 1.2.0
UniBeast 5.2.0 – Lion, Mountain Lion, Mavericks and Yosemite
UniBeast 6.2.0 – Yosemite and El Capitan
UniBeast 7.1.1 – Sierra
UniBeast 8.3.2 – High Sierra
2. Download WiFi Card Driver
To download it I´ll need the model number of the wifi card driver. But I dont have any idea of it.
What can I do?
Download UniBeast 8.3.2 and MultiBeast 10.4.0 for High Sierra. If you are install macOS Sierra then select the High Version.
Find out the Wi-Fi model then google to download the drive.
I’m a noob to a lot of this. I do have a PC Laptop due to $$. I macs everywhere else: iPhones, iPads, Mac Mini. you said two things don’t work; Graphics
Sound. Does that mean I won’t have any sound on the PC and how will no graphics affect me. I do basic stuff, email, web, Youtube. No games. I do watch DVD movies occasionally. Will I be able to do these things. If I do a dual install and keep Windows 10 installed will it work on the Windows side or will that be affected by the Mac OS install? Thank you!
Yeah dear, you can do basic stuffs like email, web and youtube. Also, in your case the graphics and sound might work fine because you might have a different system but for us it didn’t.
Can I install on same hard disk on which window 10 is already running?
If “YES” please tell me how to install both windows on mac os on same hard disk.
Use this guide: https://www.youtube.com/watch?v=Bbkj19CAPT4
When I finish the installation I try to boot now from HDD my pc restarts and go back to cloverleaf, what should I do?
Thank you. I will try to usb hdd first. Getting out optical drive on my Inspiron 15 is difficult
Can I install on USB hard drive, if no then on second hdd in drive caddy(optical)?
Yeah you can install on HHD Caddy and also USB but caddy is preferred.