In a small single office, one printer is enough because you can easily share a printer in Windows 11 and Windows 10. To put it in simple terms, sharing a printer gives the opportunity to print all the documents from one computer over the network. Keep in mind that a wired printer needs to be shared with other computers over the network while at the same Wireless printer will automatically connect with other computers (As long as it they are on the same network). It doesn’t mean that connecting a wireless printer won’t require any setup, in fact, it does.
Note: Before starting with the process of how to share a printer in Windows 11, you must ensure the following options.
- The printer is connected to the primary computer and it is working properly (By properly I mean the drivers are installed).
- The printer that you’re trying to share with other computers must be connected to the same internet connection or so-called network.
How to Share a Printer in Windows 11?
Once you shared a printer with other devices, you can easily print Pdfs and emails using one printer from any device connected to the same network. Follow the below steps to share a printer in windows 11.
Step 1. Turn on file and printer sharing
- Click on the search box in the start menu and search for Advanced sharing settings.
- When the settings of the network open, turn on Network Discovery.
- Then check the box of Turn on file and printer sharing.
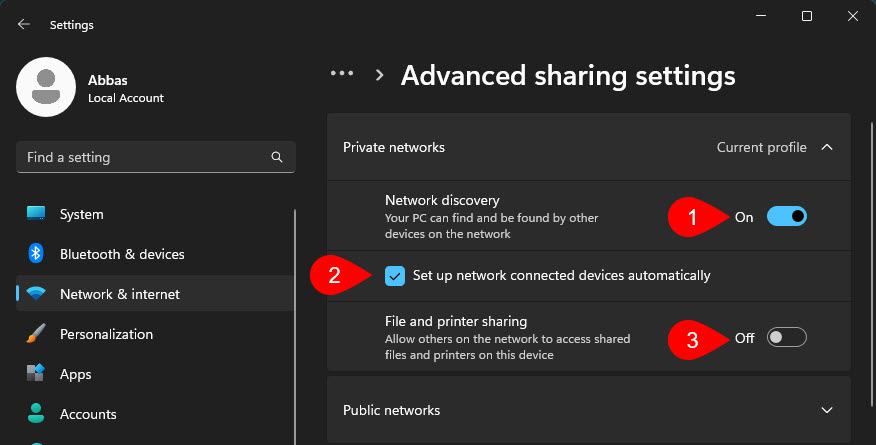
Turn on file and printer sharing
Step 2. Make your Network connection private
- Open the settings app.
- Visit Network & Internet and choose Wi-Fi or Ethernet (It depends on whether you are using Wi-Fi or internet cable)
- Following that click on Wi-Fi,> Click on the Router name that your computer is connected to.
- Under the Network Profile change it to Private Network.

Change Network Profile
Step 3. Share the Printer over the Network
- Visit Bluetooth & devices.
- Following that click on the Printers & scanners.
- Click on the printer that you want to share with others.
- Find Printer properties and click on them.
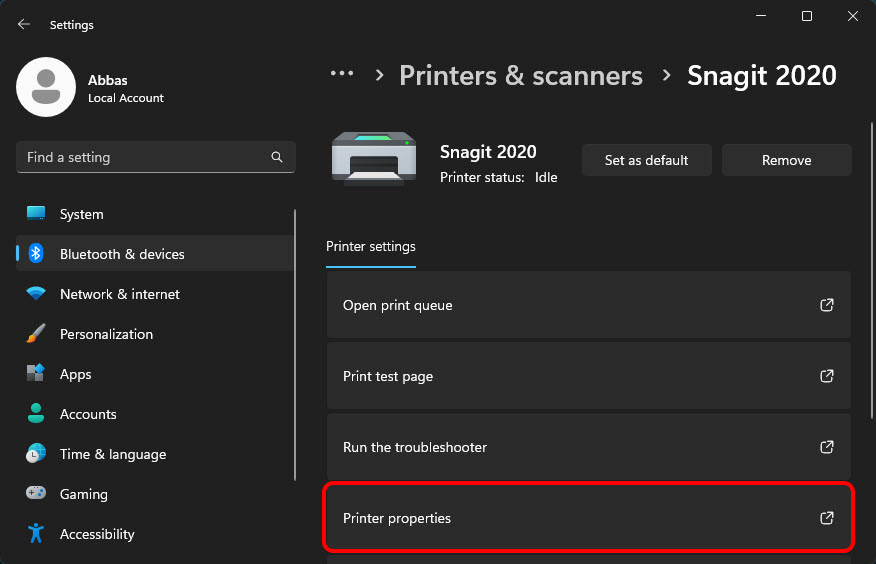
Printer Properties
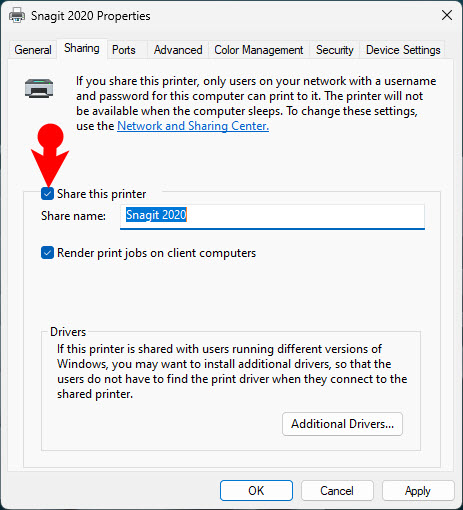
- After that, the properties that printer will open in a new tab and you need to go to the sharing tab.
- Click on Change sharing options.
- After that check the box to share this printer.
- Set a New name for the printer if you want (Optional).
- Click Apply then click OK.
-
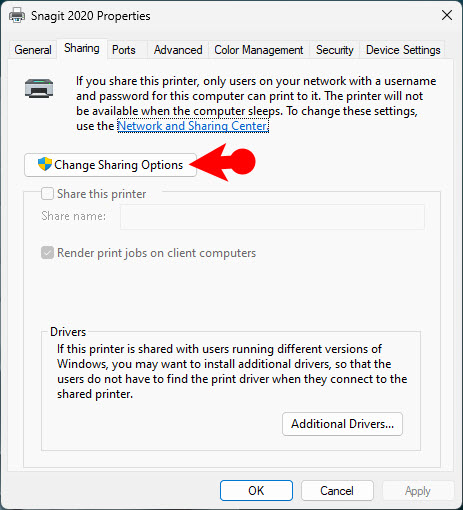
- Change Sharing Options
-
- Share Printer
Conclusion:
These were the step-by-step guide on How to Share a Printer in Windows 11 over the network. Let me know if you have any questions in the comment section.
Leave a Reply