In this post you are going to learn How to Create macOS Ventura VMDK Image Installer using the VMWare on Windows 11 PC. However you can use an actual apple computer, Linux or VirtualBox, the requirement is to have access to a MacOS operating system. VMDK stands for virtual machine disk which is commonly known for VMWare but it can be used in VirtualBox too. Just creating a VMDK is not hard but making that bootable and installing an operating system through it is another case. Which is why in this post you are going to learn How to a macOS VMDK image in the first place.
Steps to Create macOS Ventura VMDK Image Installer
- Find a computer with MacOS installed on it (It can be an Apple computer, Hackintosh or running macOS in a Virtual Machine)
- Create an extra virtual drive
- Get the macOS Ventura Installer
- Execute the command to create macOS Ventura VMDK image
- Install macOS Ventura using the VMDK image to test if the image is successfully created or no.
Step 1. Access a computer running macOS
In order to create MacOS Ventura VMDK image installer, you need to have access to a MacOS computer. It can be a virtual machine running on a Windows or Linux computer, or an apple computer running macOS.
In my case I have used the macOS Ventura virtual machine in VMware on Windows 11 PC. But I urge you if you have not installed MacOS Ventura on a virtual machine then you can use MacOS high Sierra or MacOS Sierra, since they work very well on windows. And their installation process is not a lot time consuming than the higher versions of MacOS. And by the way please keep in mind that you can also use VirtualBox too if you are not comfortable using the VMWare.
If you’re using a actual mac, then you can also use virtual machine but instead of visual machine, I recommend you to use a virtual disk. Although the steps of creating a virtual disk is different than the virtual machine, but the type of creation of the macOS Ventura VMDK is the same.
Step 2. Create an Extra Virtual Drive
If you’re using VMWare like me then follow the below steps exactly as I have done.
If the virtual machine of the Mac OS is running, shut it down right now.
To add a New Virtual Hard drive to the macOS Virtual machine click on the “Edit Virtual Machine settings“.

Edit Virtual Machine Settings
Once you are on the hardware type page, there you have to select hard disk and click next.
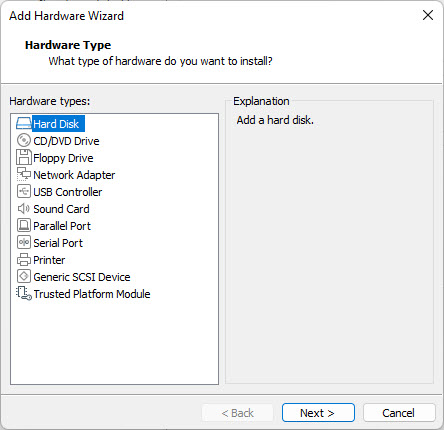
Choose Hard Disk
For now you have to select any hard drive type that you desire, but for now you can go with the default option of “SATA“. And by the way later during the installation everything will be erased.

Hard Disk Type
Here you have to select “Create a New Virtual Disk“.
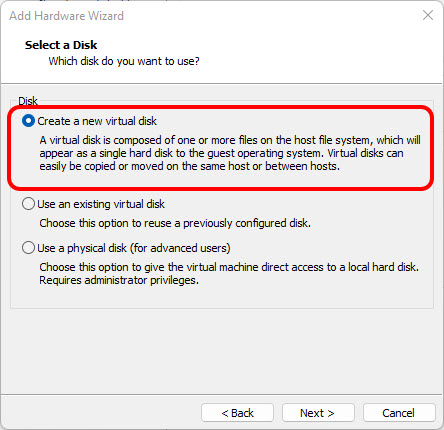
Create a New Virtual Hard Disk
Than you have to specify the disk size, please make sure that it should not be less than 15 GB. In my case I have made it 30 GB of storage. And by the way, check the first option which is “Store Virtual Disk as a single file.”

Set the Storage Size
Click on the browse and save it in a place where you have access to> after that click on Finish.
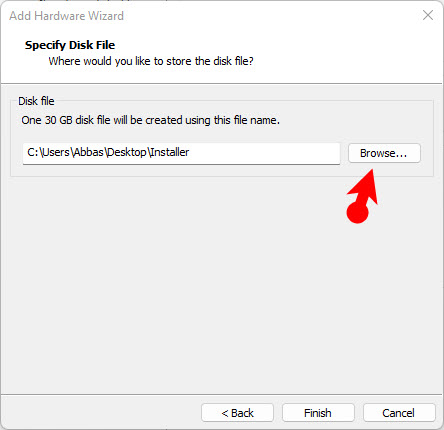
Save it to a Place
Now you can check that the Virtual Machine has two hard drive. To apply the changes click ok at the bottom.
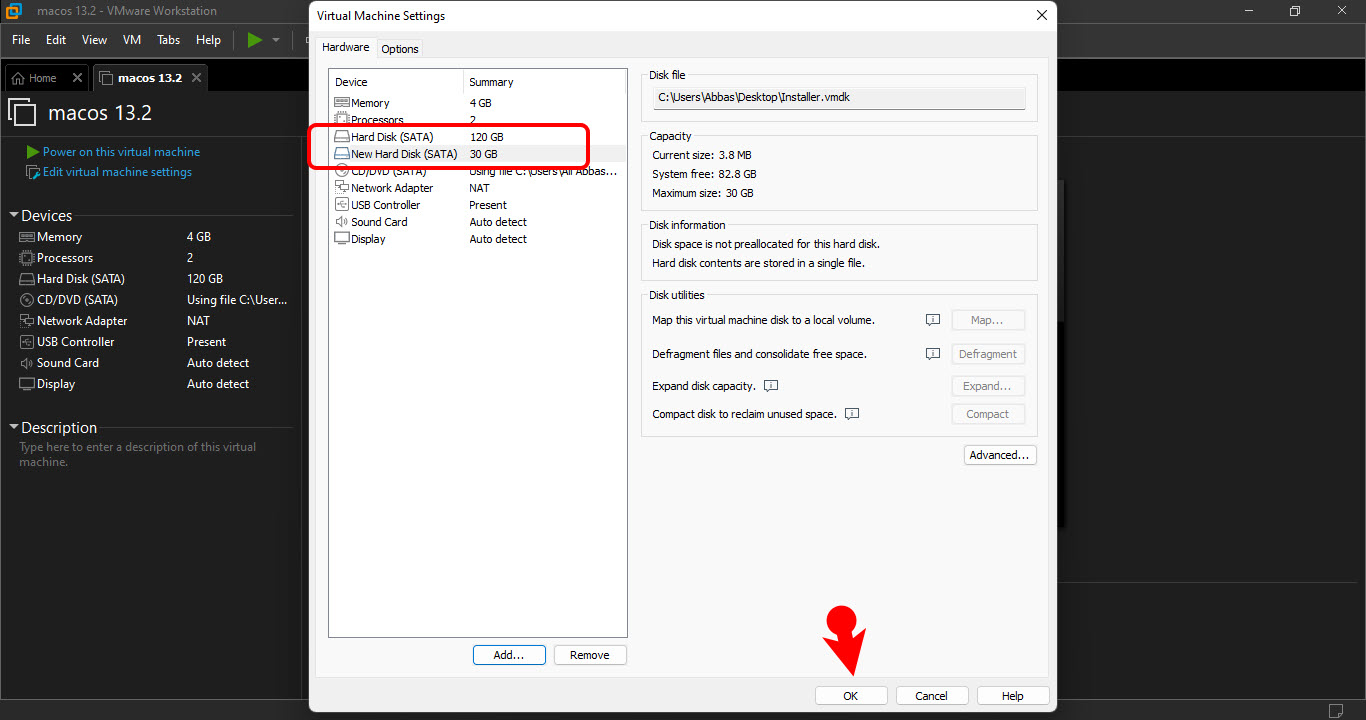
Hard Disk has been Added
For the Next step, you have to Power on the Virtual Machine.
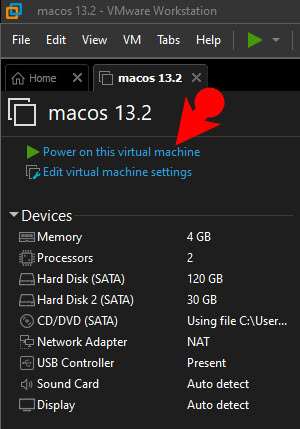
Power On the VM
Step 3. Erase the Hard Drive
The moment you power on and log in into the MacOS on your virtual machine, you will see a warning saying that macOS cannot open the drive. In that step you have to click on initialize and it will open the disk utility. After that, you have to format or erase the drive with the below settings.
- Name: Installer
- Format: Mac OS Extended (Journaled)
- Scheme: GUID Partition Map

Erase the External Drive
Step 4. Get macOS Ventura Installer
In order to create a makers Ventura VMDK image installer, the Mac OS Ventura is required. If you are part of the developer program of apple you can get it right now from the apple servers. Or if you want to make macOS Monterey VMDK image, then you have to download macOS Monterey from the App Store.
In any case there are other official methods that you can use to get the MacOS Ventura installer without a developer account. One method is to use GibmacOS or simply download the macOS Ventura Install Assistant.
Install Assistant contains the MacOS installer data and it is available on the apple servers. As long as you are part of the developer, you can have access to it beta versions. In any case mrmacintosh is providing the download link of macOS Ventura Install Assistant.
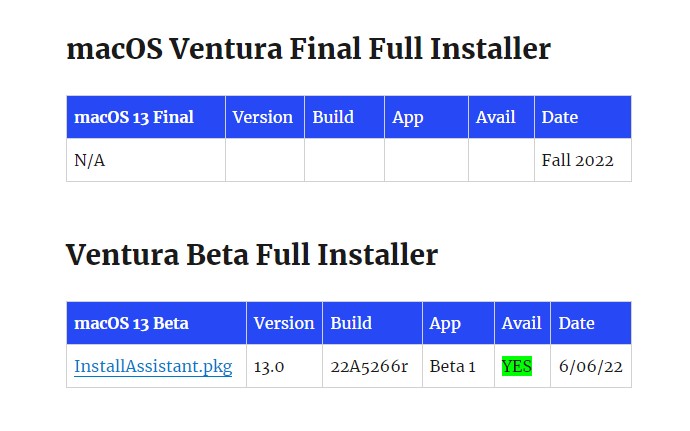
Get macOS Ventura Install Assistant
After getting the installer assistant of macOS Ventura, install it with the default options and the macOS Ventura will be added to the applications directory.
Step 5. Make macOS Ventura VMDK Installer Image
Finally it is time to create the MacOS Ventura VMDK installer image. Hold command + space or Windows button + Space on the keyboard to launch the spotlight. Search for Terminal and Launch it right away.
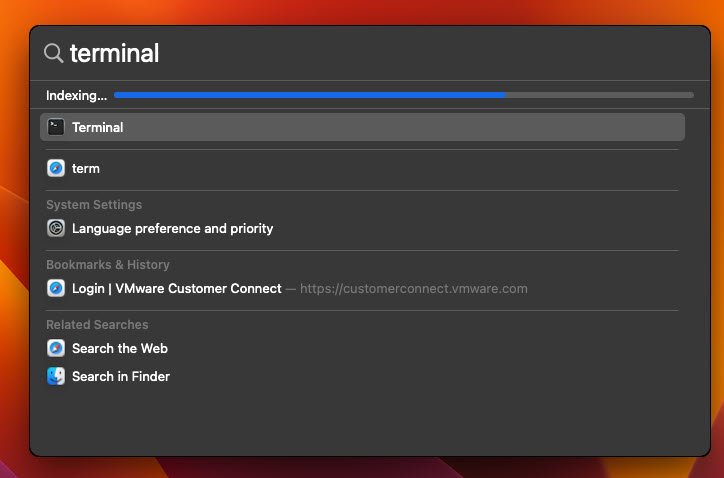
Launch Terminal
Execute the below command in the terminal.
Sudo /Applications/Install\ macOS\ 13\ beta.app/Contents/Resources/createinstallmedia --volume /Volumes/InstallerAfter executing the command, you have to enter your password and wait until it makes the External drive bootable> then it will copy the files to it.
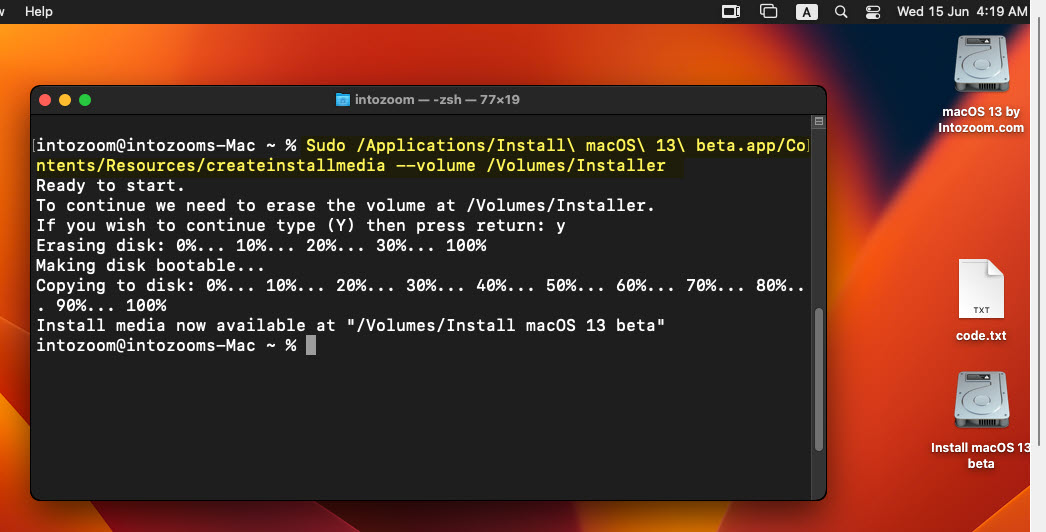
Create macOS Ventura VMDK Image
After creating the macOS Ventura VMDK image> you have to eject the drive.
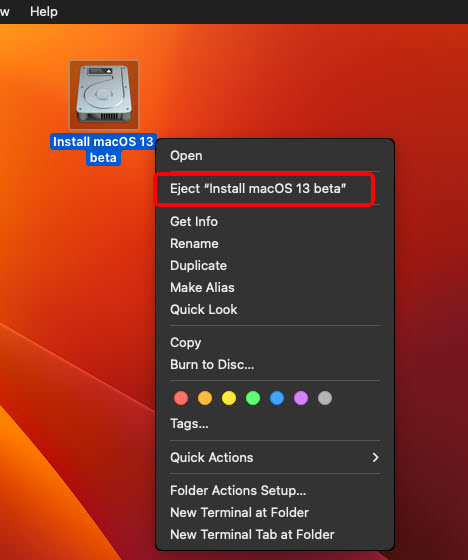
Eject the drive
And Take a look at the size of macOS Ventura VMDK image.

macOS Ventura VMDK Size
Step 6. Install macOS Ventura using VMDK Image
For the final step of this article we need to test whether the macOS Ventura VMDK image is working or not. In my case I’m going to experiment it on the VirtualBox so you have to learn how you can use it.
So you have to install the VirtualBox in your computer, then you need to create a virtual machine by the name of MacOS Ventura.
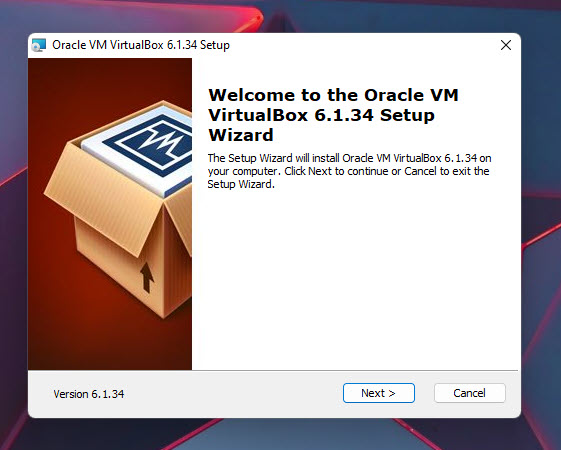
Install VirtualBox
Aside from the VirtualBox, you will also need to install the VirtualBox extension pack which is really necessary. Just double click on the installer, it will launch itself in VirtualBox> click Install and follow the default screen options.
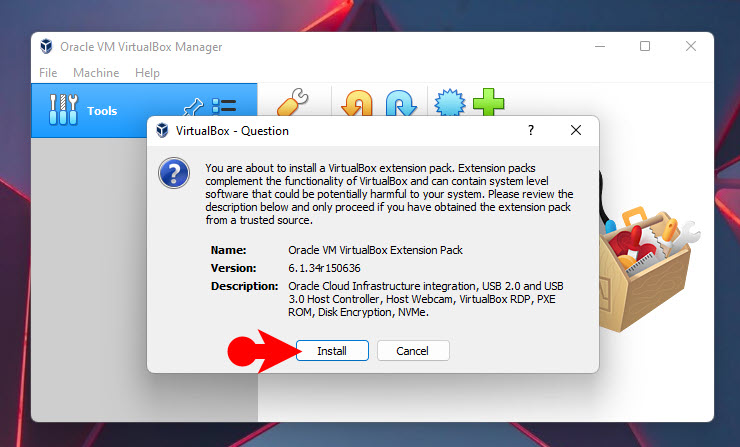
Install VirtualBox Extension Pack
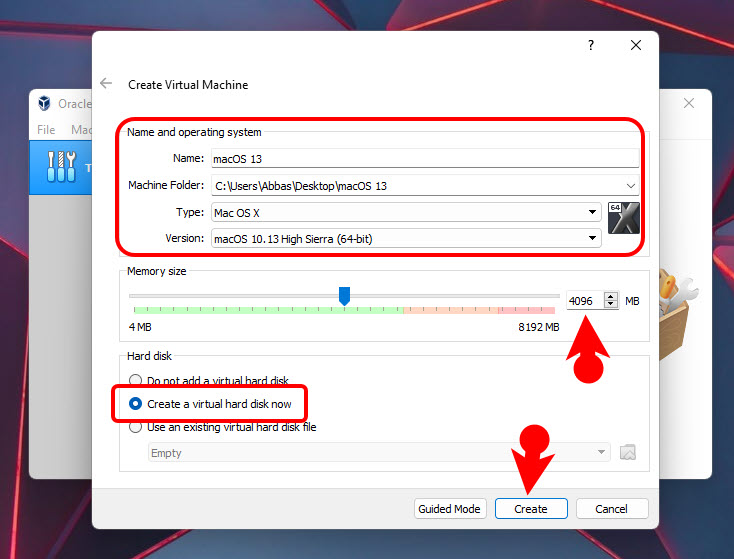
Open VirtualBox, and at the top level menu click on new.
A new dialog box will open, there you have to select expert mode.
At this step you have to enter the name of the virtual machine by the name of macOS 13, the guest type have to Mac OS X, and version must be macOS High Sierra.
Assign 4GB of RAM to the virtual machine.
And at the bottom choose create a virtual hard drive.
Configure Details of the Virtual Machine
In this step you have to configure the hard disk type. The hard disk type must be VMDK, the storage type should be Dynamically allocated, storage size should be 150 GB.

Configure Hard drive Details
After the virtual machine is created there are some configuration that you must do on the virtual machine, so click on the settings of the VM.
- Go to the System tab> uncheck Floppy.
- Access the process tab in system tab> increase the process number to 2.
- Access Display tab and increase the video memory to 128 MB.
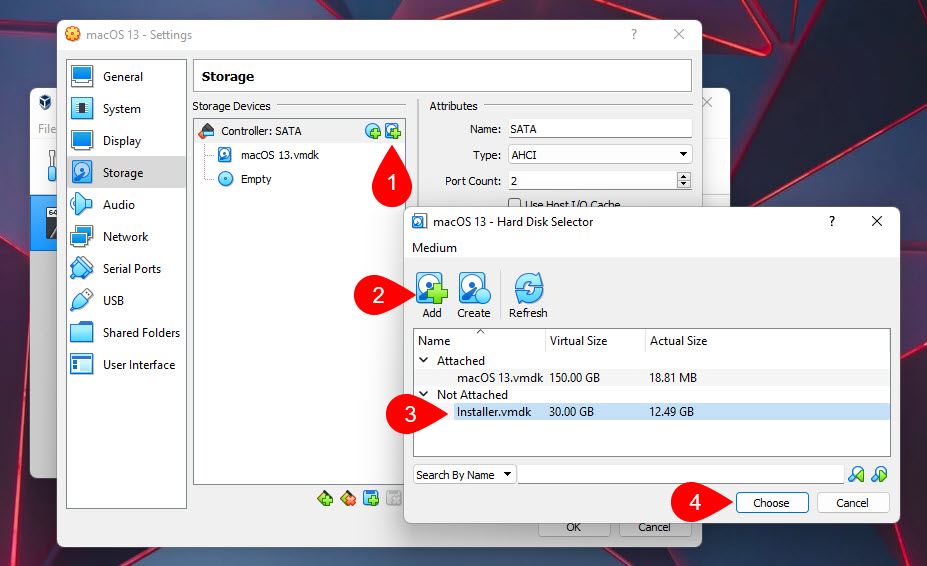
- Finally the most important part is adding the VMDK image, go to the storage tab> click on the Controller: SATA> then click on the Plus icon> Choose Add, and locate the VMDK image. Select it and click on the Choose.
Add the macOS Ventura VMDK Image
The other step is to Apply the codes into the CMD.
- Go to file> select exit.
- Get the codes and replace the VM Name with the name of the your virtual machine.
- Open CMD as Administrator and apply the codes line by line.
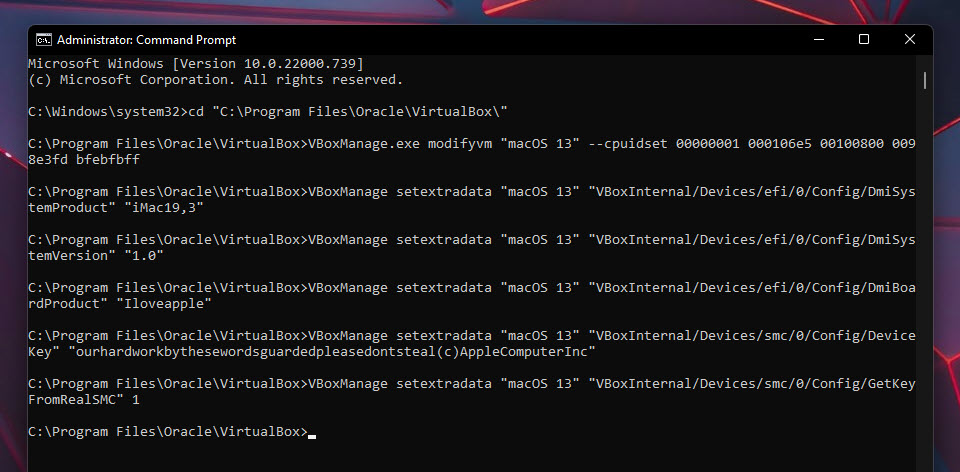
Apply the codes
Now open VirtualBox, start the virtual machine, wait for the macOS to boot> select your preferred language, Go to Disk Utility> Erase the Virtual Hard Drive> Quit Disk Utility> and Select Install macOS 13 Beta.
-
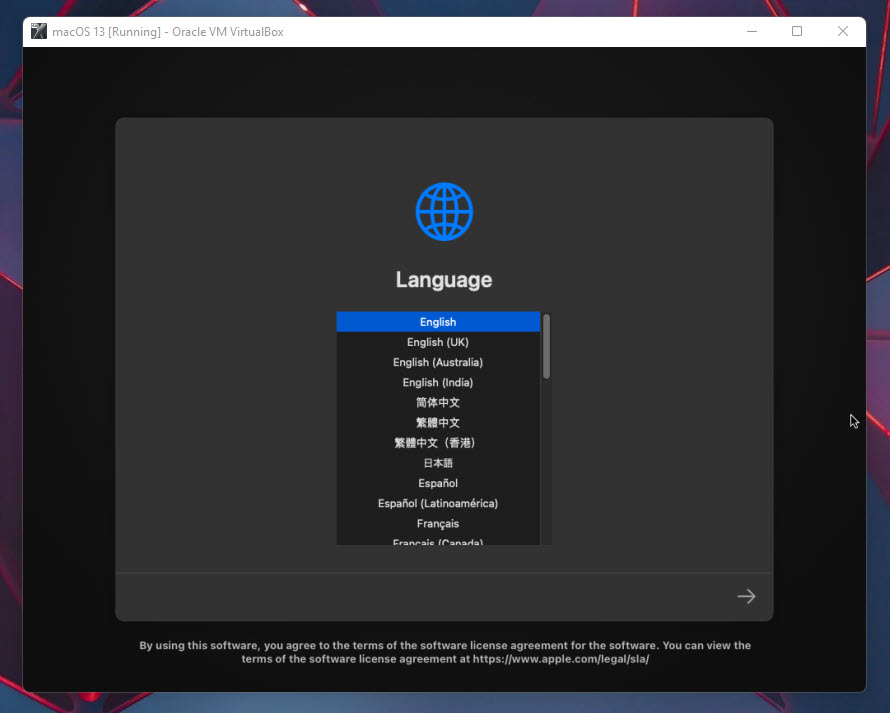
- Choose Language
-
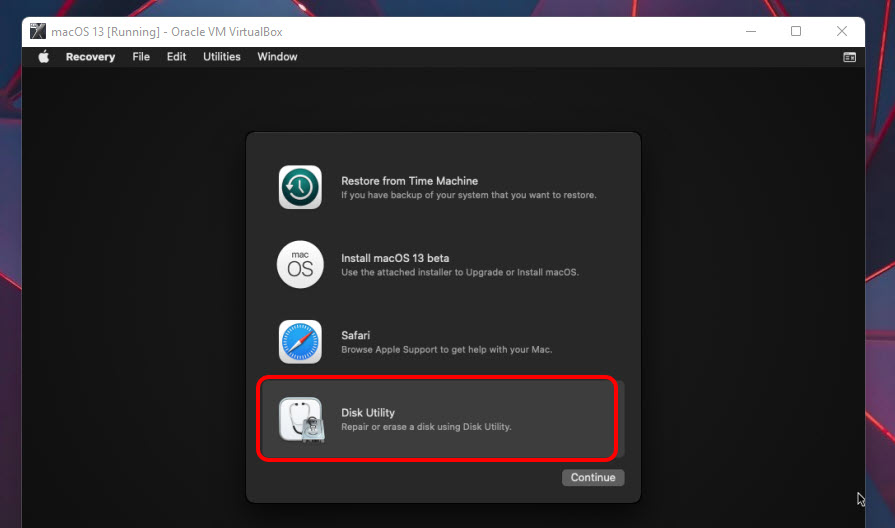
- Disk Utility
-
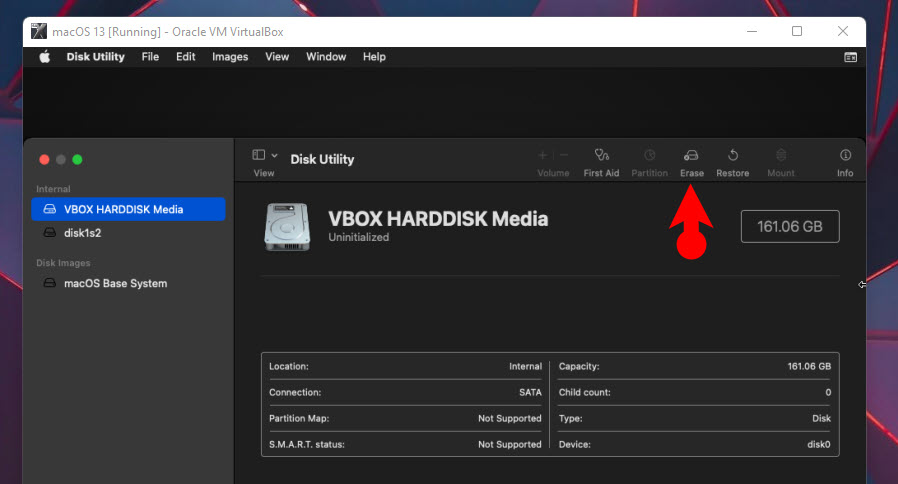
- Select the Disk
-
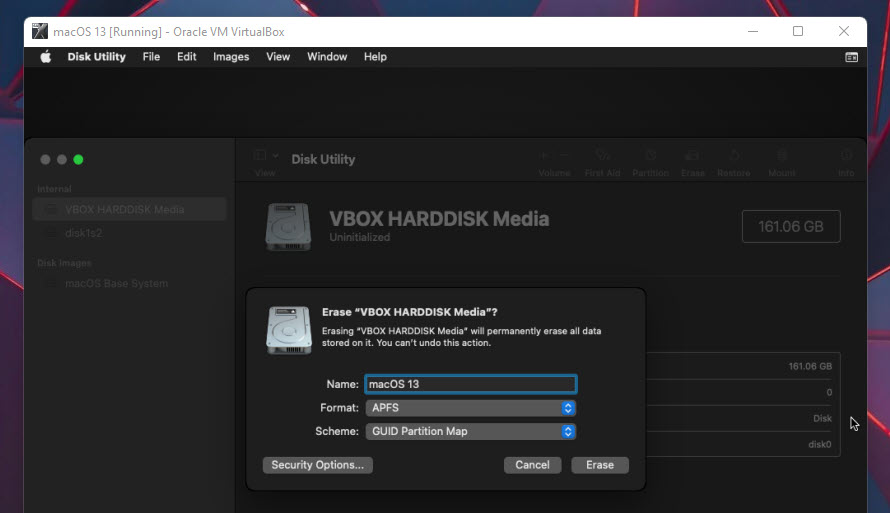
- Erase the Disk
-
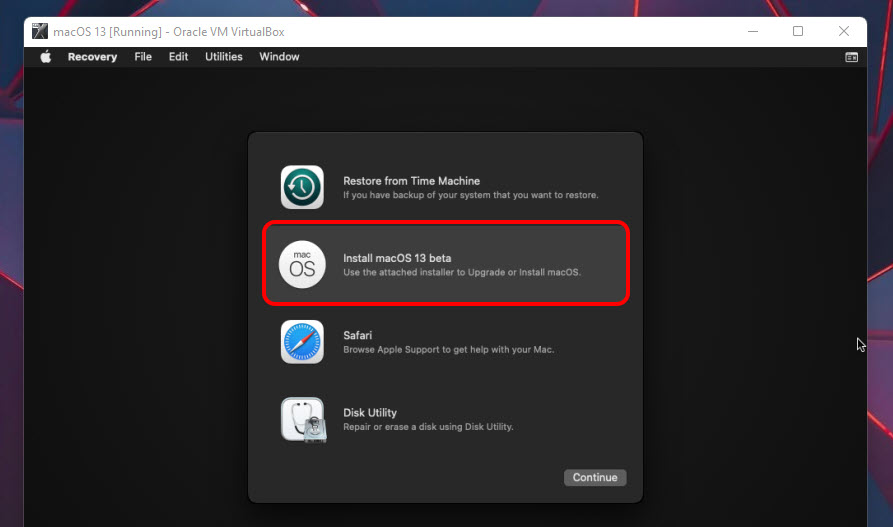
- Install macOS 13 Beta
After that click continue> agree> again agree.
In the final step you have to select the drive you just erased and click continue.
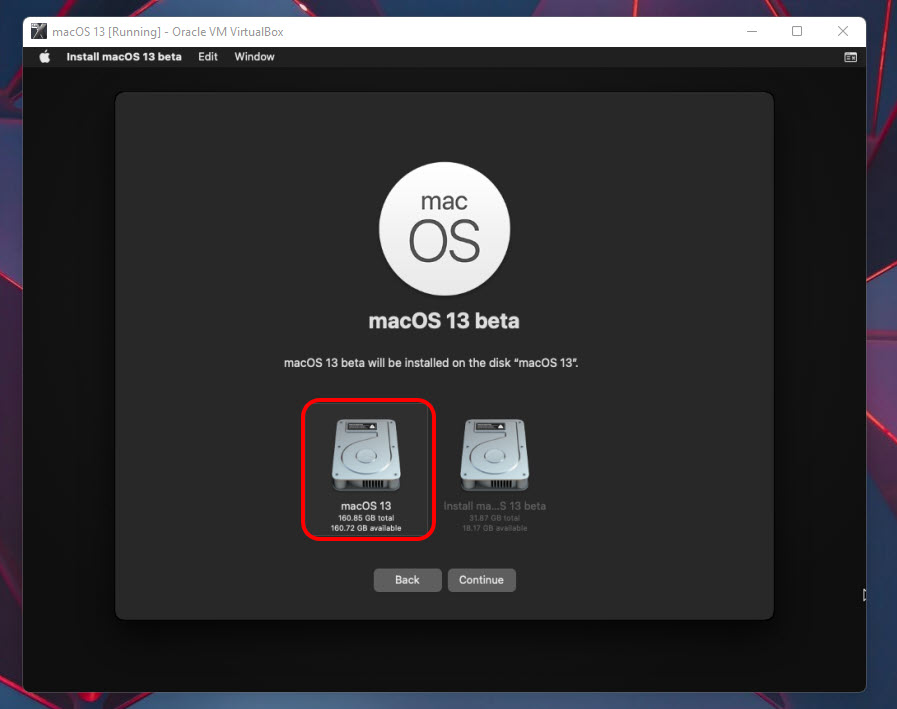
Choose the Drive and Install
Conclusion:
This is how we can create macOS Ventura VMDK image using a virtual machine in Windows 11 PC. I’m hoping that you have to learn all the steps and you have not faced any difficulties during the creation of the VMDK image. Let me know if you have any questions in the comment section and I’ll be happy to answer them.
Leave a Reply