In this article, you will learn the troubleshooting WiFi connectivity in Windows 10. You might have seen some laptops do have this problem that doesn’t connect to WiFi and warning that this device can’t connect to the Access Point or show limited. Most of the laptop users have this problem that their device can’t connect to the internet or the WAP. However they try to connect the laptop, can not do that. So there are several ways to troubleshoot “Wireless Access Point” connectivity. In this troubleshooting WiFi connectivity topic, I going to introduce some those issues.
Troubleshooting WiFi Connectivity
To troubleshoot or fix Wireless Access Point problem you will need to check the following tips & tricks and read the article consciously.
#1. Check the Internet Connectivity Using Ping
Try performing a Ping test to see if you can connect to the outside world. There are several free Ping utilities available, but the easiest way to ping a website using Windows is to open a command prompt and type “Ping” followed by the IP address of the site you want to ping. If you don’t know the IP address, you can type the full address. For example, to ping Google, type Ping google.com. This sends small data packets to the target site out and measures how fast your connection is in milliseconds. If the test is successful, you’ll see timed results. If it continuously fails, try pinging several sites. Keep in mind that not all websites accept pings. If you still can’t get results, you might have a problem with your modem or router, or the problem might be on your service provider’s end.
For example, to ping Google, type Ping google.com. This sends small data packets to the target site out and measures how fast your connection is in milliseconds. If the test is successful, you’ll see timed results. If it continuously fails, try pinging several sites. Keep in mind that not all websites accept pings. If you still can’t get results, you might have a problem with your modem or router, or the problem might be on your service provider’s end.
So to check Internet availability using Ping utility, open command prompt and type ping www.google.com. If the Google does not reply try miscellaneous websites.
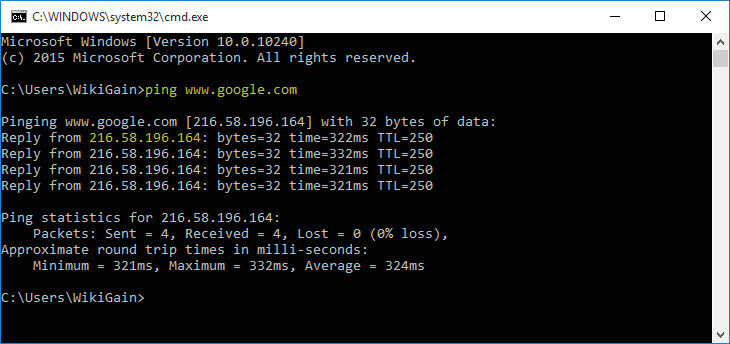
Ping Utility
#2. Assign Static IP Address
Give your wireless access point a static IP address. What static IP address means? An Internet Protocol (IP) address is a unique number assigned to every device on a network. Just as a street address determines where a letter should be delivered, an IP address identifies computers on the Internet. Network devices use IP addresses to communicate with each other.
Although computers use IP addresses – numbers – to communicate, it’s easier for people to remember words than numbers. The Internet uses DNS (Domain Name System) to enable people to use words instead of numbers for Internet addresses. You can think of DNS as an address book for the Internet. DNS maps domain names to IP addresses.
When you type a URL into your browser, your browser looks up that domain name in DNS. For example, if you type www.google.com into your browser, your browser would ask DNS for Google’s IP address. DNS would return the IP address assigned to Google’s domain name (74.125.239.35). Your browser then connects to that IP address.
And static IP Address is manually assigning an IP for your device. To give your router a static IP address follows the below steps.
Press Windows key + R to open up the RUN window. Once it pops up, type ncpa.cpl and hit enter. Now you will see the screenshot below. Right-click on the Ethernet or WiFi then choose “Properties“.

Choose Network Adapter-WiFi
Now double click on the “Internet Protocol Version 4 (TCP/IPv4). Tap on the second option ” Use the following IP address”. Type your network IP address. If you don’t know what is your network IP address, you can ask from network administrator to provide you the IP address.
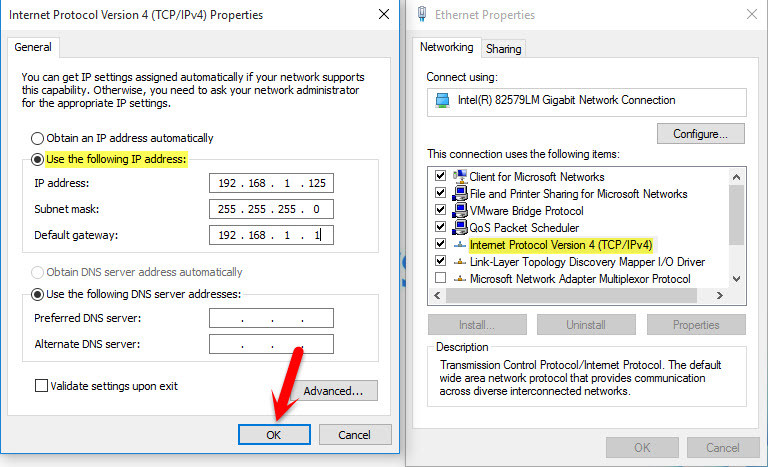
Assign Static IP Address
#3. Check your WiFi Status
If you have a modem and a router, make sure they are both functioning properly. Check your modem first to see if its power LED is lit. Also, check your Link or Online LED and any activity LEDs. If there is no power or LED activity, turn the modem and router off and wait several minutes before restarting. Wait until the modem comes back online before restarting the router.
If your router’s power LED is lit, check the Internet or WAN indicator. On most routers, this should be green and may be flashing. If your router doesn’t have status indicators, look around back to see if the Ethernet port lights are flashing. If there is no activity, turn the router off. Unplug and reconnect each cable, making sure each cable is seated correctly in the appropriate port. Wait a few minutes before rebooting the router.
Check WiFi Status
#4. Manage Known Networks
Sometimes when you connect your laptop on lots of access points so it causes a problem. In Windows 10 most of the time laptop cannot be connected to the WiFi. If you have faced this situation, just follow the below instructions. Go to your Windows 10 “Settings” then tap on “Network & Internet”.
Network & Internet
Choose WiFi from the top left-hand side. Navigate to the bottom of the window then tap “Manage Wi-Fi Settings”.
Manage WiFi Settings
Now you can remove from those “Wi-Fi” that once your laptop had been connected with. Now scroll down until you see the list of connected networks. Choose one by one then click on each of them. Click Forget then reconnect your laptop to the access point that doesn’t let you connect, or showing “Limited“.

Manage Known Networks
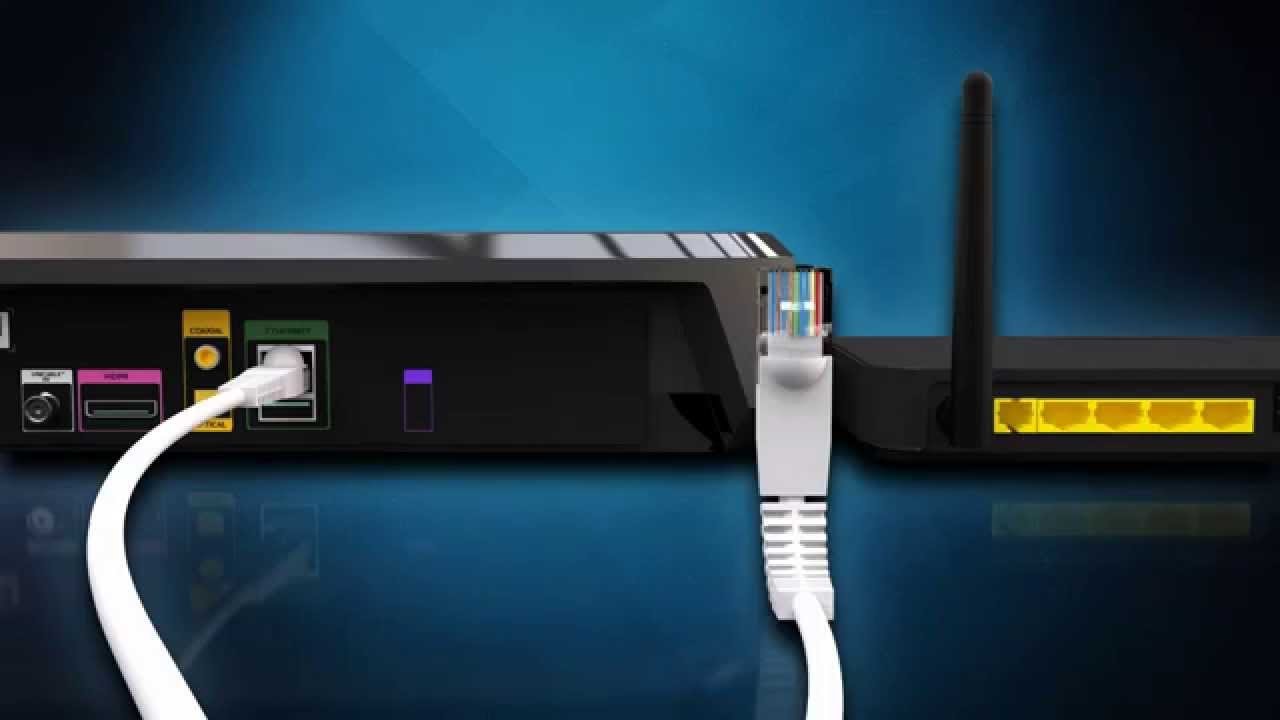
#5. Check Cable Connection
Before you start thinking about resetting or replacing your router, inspect the cable connection coming into your home. This is usually located on the side of your house and may or may not be housed in an enclosure. Make sure that the main cable hasn’t been chewed up by a squirrel or knocked loose by debris from a storm. If a cable splitter is being used, make sure each connection is tight and the connectors are properly crimped. If the splitter looks suspect, try replacing it.
Check Cable Connection
Conclusion
I hope that you have gotten some information about troubleshooting WiFi connectivity in Windows 10 operating system. If you have got some better suggestion about troubleshooting WiFi connectivity so please feel free to share with us via comment below this post. Thanks for being with us.
Leave a Reply