Do you also use your Notes as a wonderful way to seize thoughts or reminders on the go? I also do that and mostly my notes are written in a hasty manner, but sometimes I wish I could get entry to these identical notes from My Mac. If you also wondered whether you can sync Notes from iPhone to Mac, let me give you the news. It is possible and there are a few specific methods to sync notes from your iPhone to your Mac—with and without iCloud. So, let’s dive into the process.
Note: Before syncing, Notes from iPhone to Mac recheck the information below:
- Make sure to use the same Apple ID on both devices you want to sync notes
- Connect both devices to the internet
Sync Your Notes from iPhone to Mac using iCloud
One of the greatest method that you can use to sync your notes from iPhone to Mac is to simply use your iCloud. Fortunately, if you use the iCloud, all of your notes and photos will sync across all other devices, as long as you are logged in with the same iCloud account. So, if you are looking to sync your notes from your iPhone and vice versa using iCloud, you need to make sure that the sync option is enabled on your device.
Sync your notes on your iPhone:
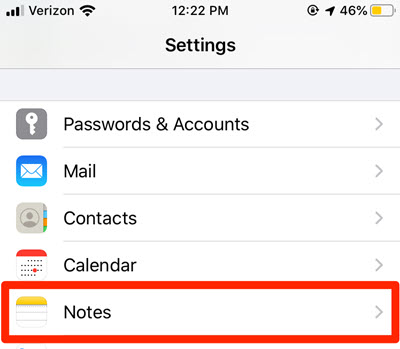
- To begin the process of syncing your Notes from iPhone to Mac, the first step accessing the settings apps, so tap on it.
- Following that, you have to tap on your iCloud Account> than tap on iCloud.
- Find notes and make sure that is sync option is turned on.
-
- 1. Tap on Notes
-
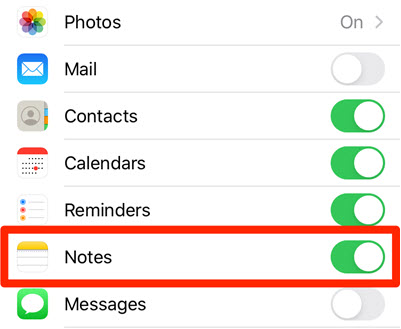
- 2. Sync Notes
Now that you have synced your notes using iCloud, you need to make sure that the syncing option on your mac and other devices are enabled too. If you are on a mac, you need to follow to below steps to enable the syncing option.
- Open the system settings (Previously called System preferences)
- Access the Apple ID> then click on the iCloud> Inside the iCloud settings, find the Notes App and make sure that it is synced.

Sync your Notes on mac.jpg
In case the system settings method a long way, you can sync notes directly from the notes App on mac too, for that you need to follow the below steps.
- Launch the notes App.
- After launching the Notes App> click on the Menu bar called Notes and choose accounts.
- On the next page, you have to Choose iCloud, then find the Notes and toggle it.
Sync Your Notes from iPhone to Mac without iCloud
Apparently if you’re trying to sync your notes from iPhone to Mac without Apple ID or iCloud, it is also possible. In fact there are many methods, among them are AirDrop, Gmail, mail, iMessage and more. In the end you can decide which one is better for you to sync your notes between the devices.
1. Use Gmail to Sync Your Notes
It is true that the default cloud option on apple devices is iCloud but however if you are using third party apps cloud apps to sync your notes, it is also possible. For instance Gmail is one them which people are using a lot.
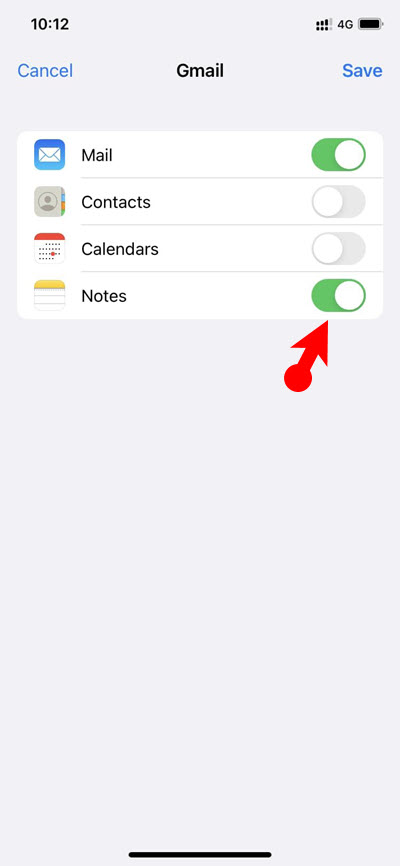
- In order to sync your notes using Gmail, first you have to add a Gmail account in your iPhone. For that you have to open the settings> following that you have to click on Notes.
- Once you are inside the Notes, you need to tap on account> than click on Add account.
- You have to select Google Account, then login without Your Credentials.
- After logging in, you have to toggle the Notes.
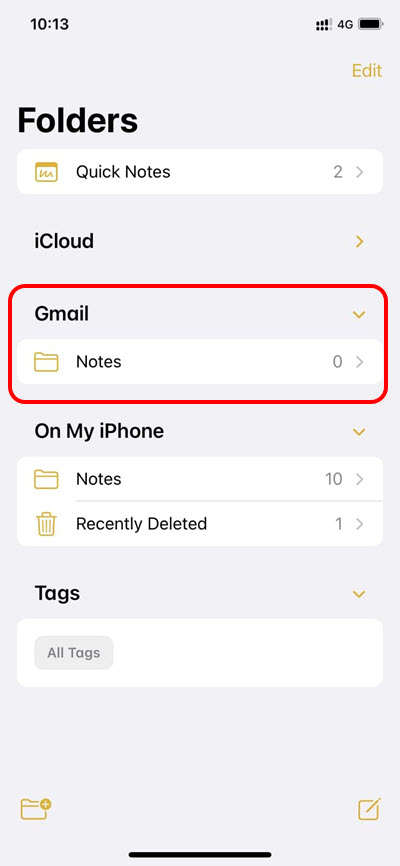
The moment you added your Gmail account into your iPhone, if you create a new note it will be saved directly into your Gmail account. After that you have to open the Notes> tap on black icon until you see all the folders> choose Notes under the email> than tap on compose. Their you will see a notes category.
-
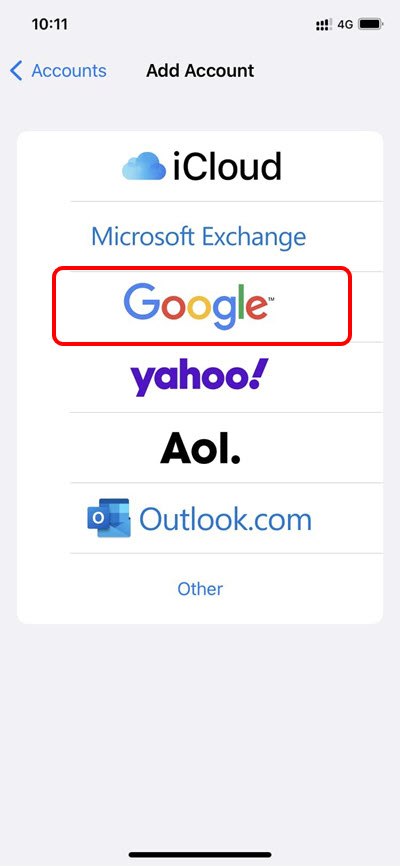
- 1. Tap Google Account
-
- 2. Save Notes on Google Account
-
- 3. Create Notes on Your iPhone
To view your iPhone Notes on your mac, open your favorite browser and search for gmail.com> then login with your credentials. On the left panel of the Gmail, you will see the Notes Category.
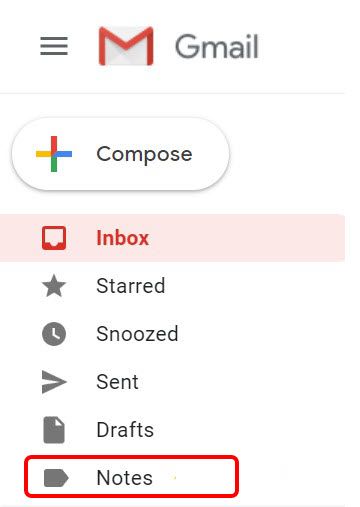
View Your iPhone Notes in Mac
2. Use AirDrop to Sync Your Notes
To begin the process of syncing your notes from iPhone to Mac and vice versa, the first step is to enable AirDrop on both devices. First you have to follow the following steps to enable AirDrop on both devices.
- On your iPhone open the Control Center> following that you need to hold the network settings> then you have to tap on AirDrop to enable it. And in the end you have to select everyone once AirDrop is enabled.
- At the same time on your Mac, open the Control Center from the menu bar> click on AirDrop and toggle it to turn it on> Just like iPhone, you have to select Everyone.
To sync the notes across the mentioned devices, follow the below steps.
- On Your iPhone open the Notes App.
- Choose a Note that you want to send to your mac.
- After selecting the Note, choose send a copy.
- Then you need to choose AirDrop.
- After choosing AirDrop, find your mac and tap on it to send.
- The moment the mentioned note is sent to mac, once you open it, it will be opened automatically on the Note’s App in your Mac.
Conclusion:
Anyway mostly iPhone users are using the iCloud option to sync their notes from iPhone to Mac. But if you are not OK with that you can use other third party options such as Gmail or you can just use AirDrop to simply sync one note at a time.
Leave a Reply