If you are a Linux system administrator, you have definitely done the IP setup on Linux. Most people often forget the process of setting up IP (static or dynamic) in Linux. And there are many who are afraid of this. In this article, I will guide you How to Set a Static IP in Kali Linux Using the ifconfig both using GUI and Terminal. So, let’s begin without wasting any time.
How to Set up Static IP Address in Kali Linux Using the GUI?
Step #1. Find the default Gateway of the Your Router
The first step is that we have to find out the default gateway of the router, if you change the default gateway, then basically you cannot connect with the network. To find out the Default Gateway of the router, type the following command in the Terminal.
ip r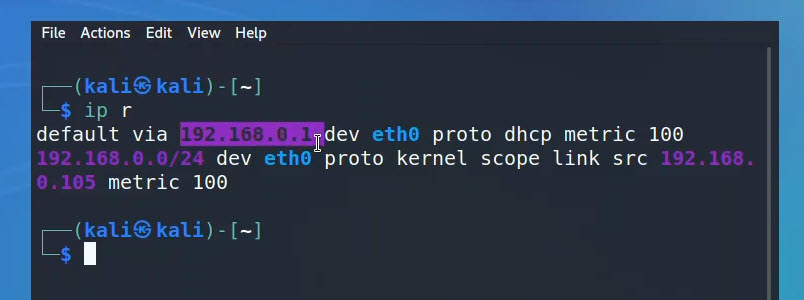
Find The Default Gateway
Step #2. Access Advanced Network Management
we have to access the advanced network management settings to configure the static IP address there. To access the advanced network management settings, right-click on the network connection and choose edit connections.

Edit Network connection in Kali Linux
Under the Ethernet, choose WIred connection 1, then in the bottom click on the settings.

Open Settings
Step #3. Set Static IP Address
once the advanced network management setting panel is open, go to the IPV4 category. First, change the method from DHCP to Manual, then insert the IP address, Netmask and the default Gateway. If they are available in the router, you will notice a green color, if they were taken, you will see a red color.
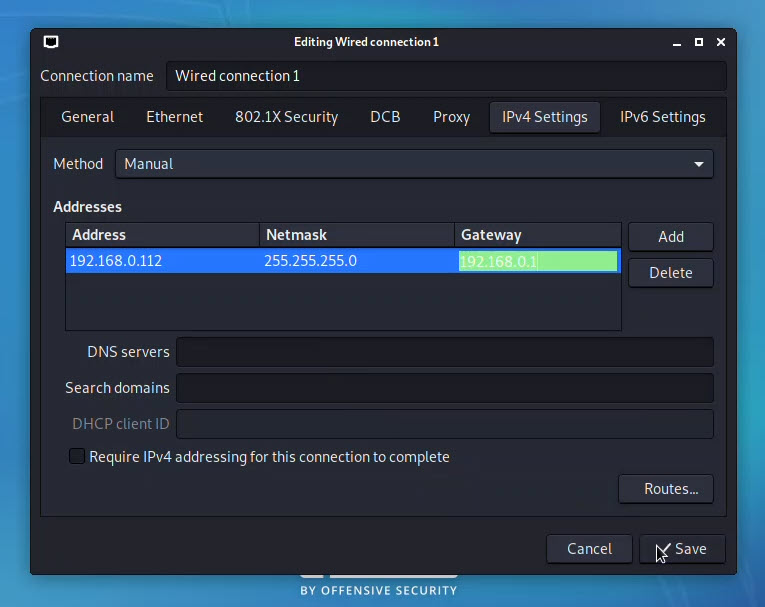
Set Static IP Address
Once all the changes are saved, you have to restart the Kali Linux to apply IP Address changes to the nettrok.
How to set up a Static IP address using the ifconfig in Linux using Terminal?
Open the terminal and type the first below to set up a manual IP address alongside the subnet mask on Kali Linux. And by the way sure that the Terminal is running with the root user.
sudo ifconfig eth0 192.168.1.2 netmask 255.255.255.0Now we need to set up the default gateway for the mentioned ethernet port, which is Ethernet 0 with an IP address of 192.168.1.2. Use the following command to configure the default gateway.
sudo route add default gw 192.168.1.2 eth0 To configure the DNS, use the following command.
echo "nameserver 1.1.1.1" > /etc/resolv.conf 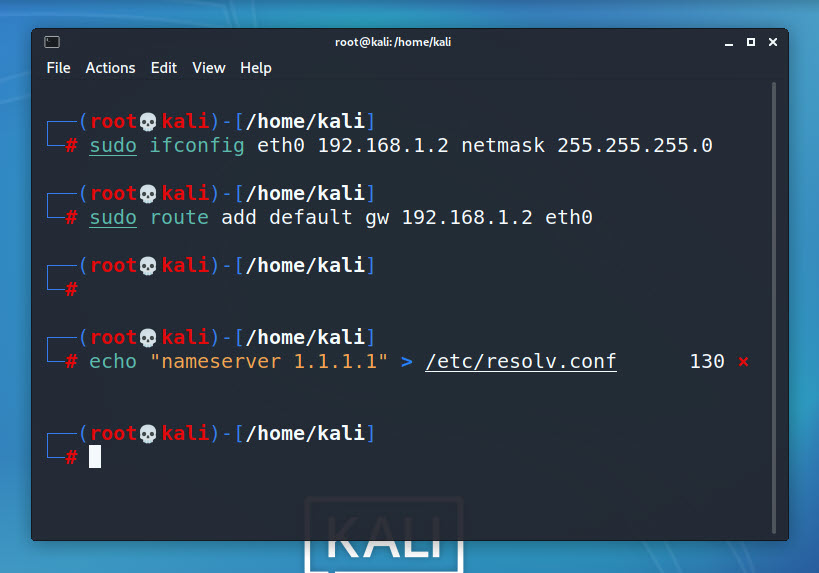
Set up Static IP using the Ifconfig
Here are the commands which are applied in the Terminal Together.
 ┌──(root💀kali)-[/home/kali]
└─# sudo ifconfig eth0 192.168.1.2 netmask 255.255.255.0

┌──(root💀kali)-[/home/kali]
└─# sudo route add default gw 192.168.1.2 eth0

┌──(root💀kali)-[/home/kali]
└─#

┌──(root💀kali)-[/home/kali]
└─# echo "nameserver 1.1.1.1" > /etc/resolv.conf
Remember, for setting up a static IP, you have to configure the following options which we already did.
- DNS 1 and DNS 2
- Gateway
- Hostname
- NetMask
- IPADDRESS
Now that you have applied all the settings, it is time to make sure if the static IP address is working or no. To check it, type ping google.com and press enter.
If you see the following message, then it means you have to reconfigure the Static IP address.
- ping: google.com: Temporary failure in name resolution
If you see the following message, then it means it is working totally fine and you are good to go.
┌──(kali㉿kali)-[~]
└─$ ping google.com
PING google.com (142.250.181.14) 56(84) bytes of data.
64 bytes from fjr04s05-in-f14.1e100.net (142.250.181.14): icmp_seq=1 ttl=128 time=38.6 ms
64 bytes from fjr04s05-in-f14.1e100.net (142.250.181.14): icmp_seq=2 ttl=128 time=38.5 ms
64 bytes from fjr04s05-in-f14.1e100.net (142.250.181.14): icmp_seq=3 ttl=128 time=38.2 ms
^C
--- google.com ping statistics ---
3 packets transmitted, 3 received, 0% packet loss, time 2004ms
rtt min/avg/max/mdev = 38.162/38.408/38.606/0.184 ms
Conclusion
To set up a static IP in Kali Linux, the step one is to find out the default gateway of the router. Then open the network management, go to the IPV4 panel, insert a static IP address. That’s all with How to set up static IP address in Kali Linux.
Leave a Reply