These days smartphones have become a part of our day-to-day life, setting up an alarm, scheduling a meeting, or even doing conferences on your Phone. You may have heard about the app called Apple notes app which may only be used for taking notes whenever you’re in the classroom or watching some online classes. However, you have to keep in mind that you can make checklists on your iPhone using this app. You make a checklist for groceries if you are a student make a checklist Or even if you are a professional teacher you can make a checklist for your students within this app. once you take the advantage of notes for creating checklists, later you can easily delete, edit, share that checklist.
How to Make Checklists on iPhone using the Notes App?
Just make sure that you follow the below steps for Making checklists on your iPhone using the Notes app.
- Open the Note app on her iPhone.
- Then tap on create a new note.
- Go ahead and title the notes app.
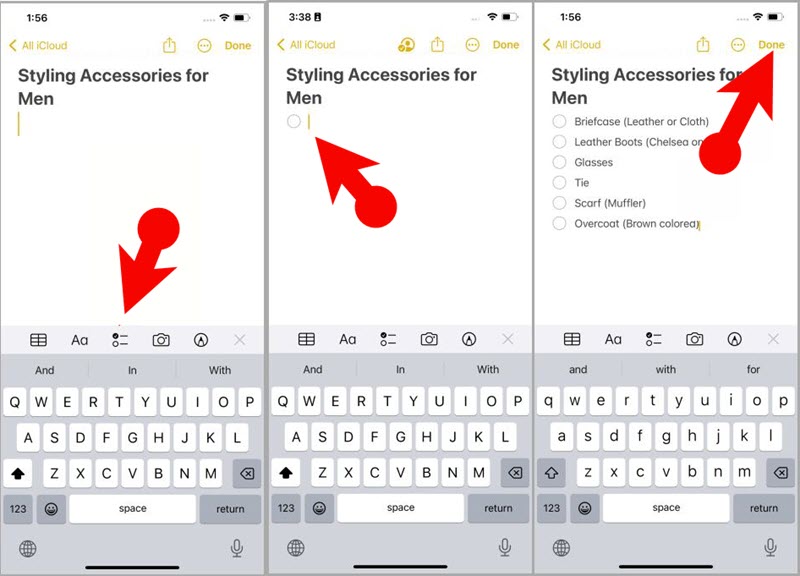
- After that select the checklist from the options and then start typing or listing.
- A bubble shape will appear where you have to simply type and tab return for moving to the next line.
- you have to simply repeat this process until you are done. After that simply tap on done to save the checklist on your iPhone.
Note: You have to press the return key twice to convert the checklist back to a simple field.
Create a Checklist using Notes App
How to Manage Checklist on iPhone using Notes App?
If you have created a checklist within your iPhone using the Notes app you can easily sort, rearrange and delete items in a checklist. Keep in mind that you can check the items too.
Step 1. Rearrange and delete the checklist
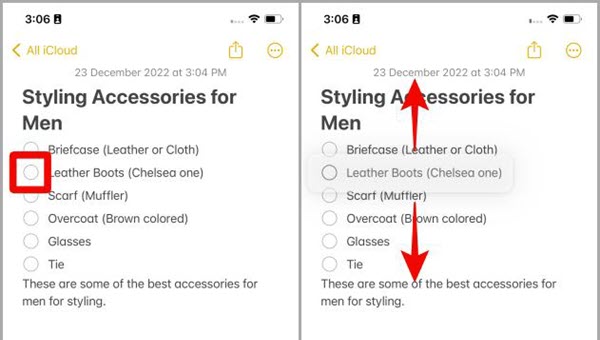
- If you want to rearrange an item within the checklist, you have to long-press it and then move it to its new location (Move up or move down).
- If you want to delete a checklist, simply press the Backspace/Delete key on the keyboard until the area is clear.
Rearrange the Checklist in Notes App
Step 2. Check Items and Sort Completed Items
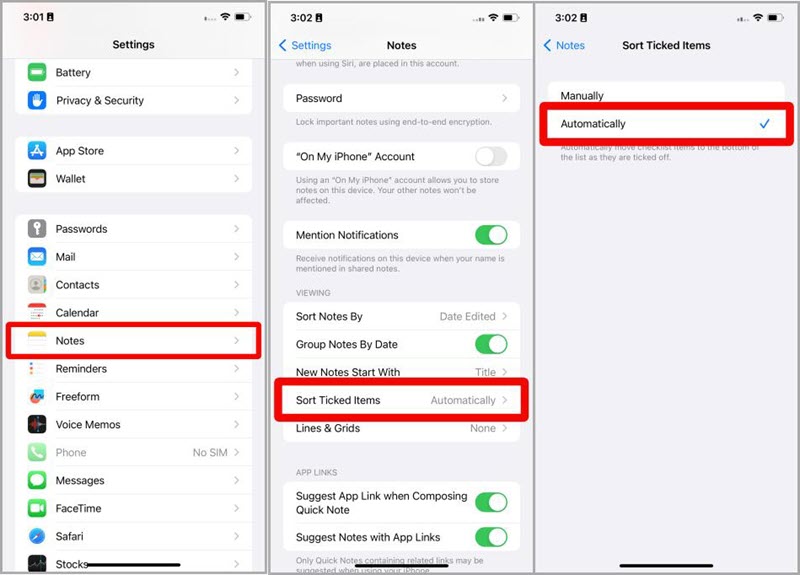
- Launch the settings app.
- Find the Note app and tap on it.
- Tap on Sort Ticked items.
- Select “Automatically” to automatically move completed items to the bottom of the checklist. If you prefer to keep completed items in their original location in the checklist, choose the “Manually” option.
Sort Ticked items
To check a list, tap on the bubble icon, after that the checked item will move to the bottom.
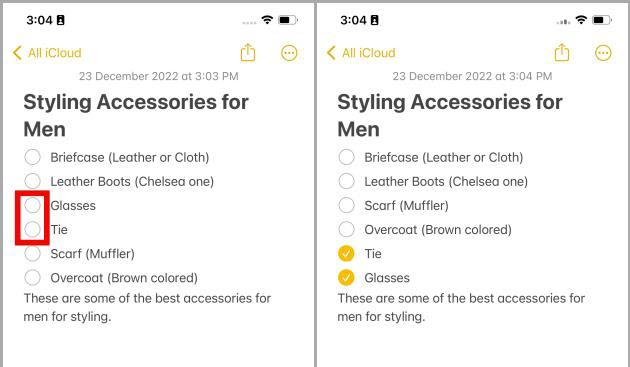
Checked items
Conclusion:
By now you have learned how to make a checklist on iPhone and how to manage them, Please keep in mind that you can also share these notes with others too. You can share the notes with others, However, they will not have the authority to edit the checklist unless you choose “Collaborate”. Now mention the person, and send the invitation through the message.
Leave a Reply