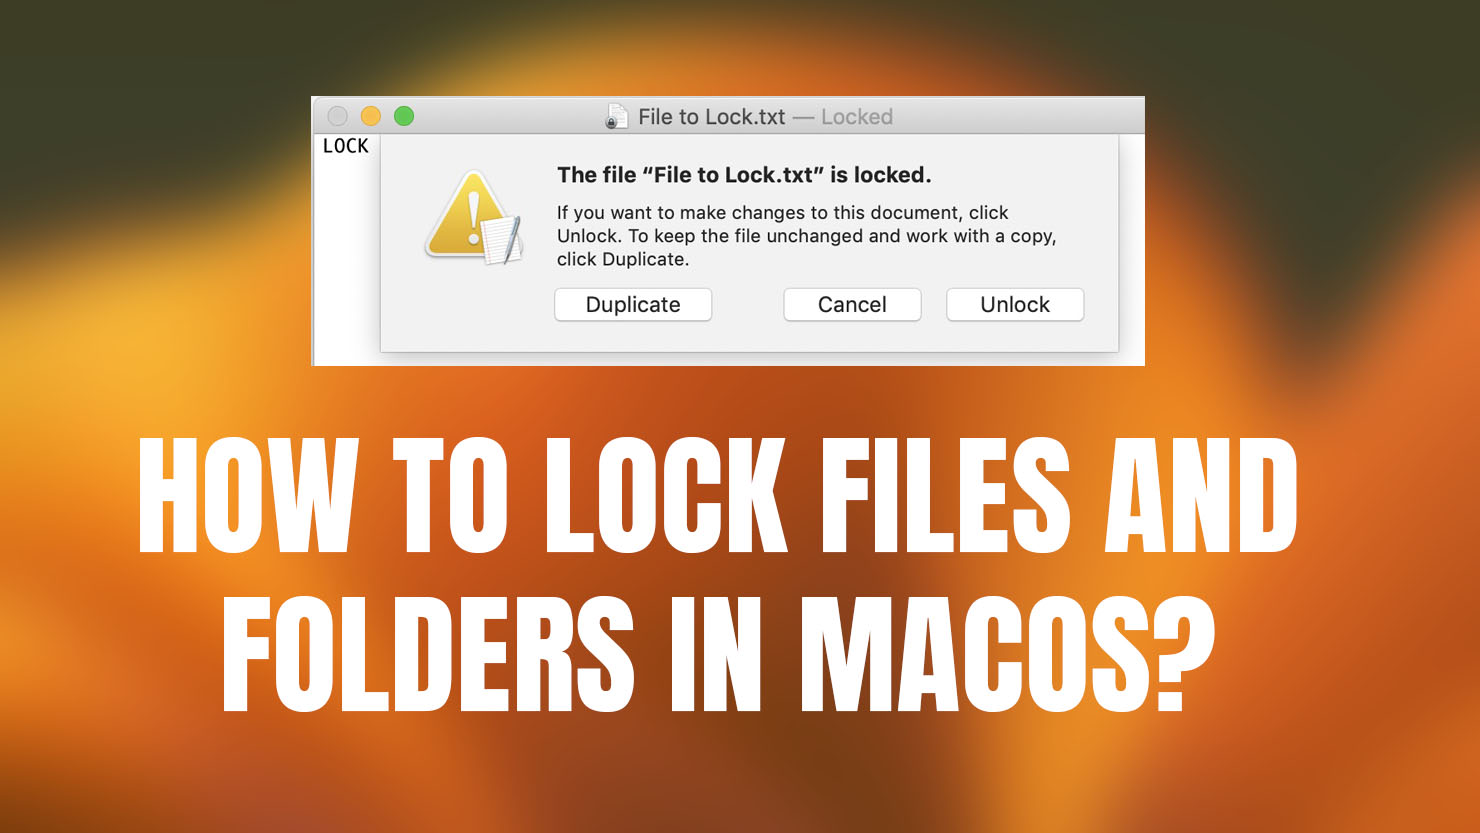
This post covers how to lock files and folders in macOS Ventura, Monterey, Catalina, Big Sur and older versions of macOS. Locking the files does not mean encrypting and not allowing other to access it. If your Hard Drive holds sensitive and important data on your computer then you also must protect it too. Locking the file does not mean encrypting it with password and not letting anyone else to check it out. No, it means prevent it from bringing changes like deleting accidentally or if you have given the computer to someone who has the user and password, stop him from making changes to the document or the file. This is the only main reason that you may want to lock your file on your Mac. At least that is what I am using the lock feature inside MacOS.
Now you know the reason why you should use this feature. Apparently there are two methods that you can use to lock your files and folders in macOS, the graphical user interface and the complex method terminal. You can use any method which are comfortable with.
How to Lock Files and Folders in macOS Graphically?
The reason that I started to lock files and folders in macOS using graphically is simple. Because it is easy and many people do not know how to use the terminal.
Steps to Lock files and folders on macOS:
- Select the items (Files and folders), then right click or press the Control Click.
- Choose Get Info
- Under the Shared Folder, check the box of Locked.
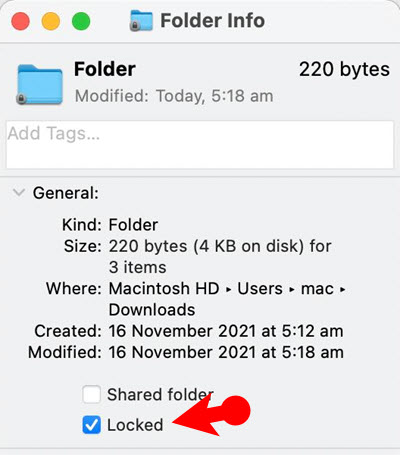
Get Info
Using this method you can simply lock and unlock the files and folders on your Mac. Once the changes are applied, you won’t be able to bring any changes unless you reverse the lock item. You should also keep in mind that all the locked files and folders will display a small padlock on their icon, which means that the item is locked.
How to Lock Files and Folders in macOS using Terminal?
Terminal is a lot more powerful compared to the graphical user interface of any operating system which also includes the MacOS. Although it is hard but it is a lot more powerful and certainly it helps with the complex issues. I recommend you at least to learn the basics of how to use the terminal.
Steps to Lock Files and Folders on macOS using Terminal:
Open Terminal and execute the following Command, and make sure to replace the path.
chflags uchg [file path]
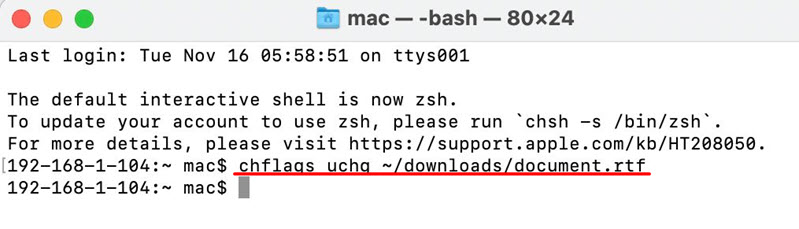
Lock Files Using terminal on macOS
Just by executing the mentioned command, the file is locked the same way that you used to lock the file in the graphical user interface.
In order to unlock the file you need to execute the following command.
chflags nouchg [file path]
Unlock File using Terminal
Check the Status of Files if they are locked or no
in the graphical user interface you will see there is a small padlock which identifies that this file or folder is locked. The question is how you can check the status of the file or folder if it is locked or not using terminal. In any case you need to follow the below steps to find out how.
- You need to launch terminal either by using spotlight or using the launchpad.
- You need to execute the following command and make sure that you replace the path with the path of the file.
ls -lO [file path]The moment you execute the mentioned command, there are two results that you will get.
- If uchg is written within this status it means it is locked.
- If uchg is not their, it clearly indicates that the mention file is not locked.
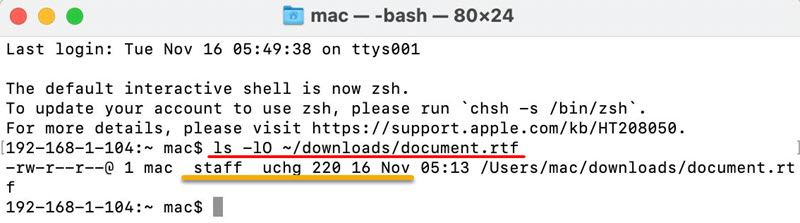
Check status of the file
Conclusion:
If you enable the lock feature on your files and folders, it means you can read it but you can’t bring any changes to it. MacOS will simply prevent from bringing or altering the file and folder. If you have applied the settings only to a single file the rule will will only be applied to that. However if you have locked an entire folder, it means all the files and folder within the directory has been locked.
Leave a Reply