Windows 11 has a feature called “Let Windows manage my default printer” which is automatically setting the newest printer as the default option for printing. For a single computer, this option works pretty fine, however, if you have multiple printers working within one computer, this will cause an issue. Why, because it is constantly changing the default printer which causes sending a print job to another device. This brings us to this topic where you are going to learn how to set a default printer in Windows 11, even if you have attached several printers.
Steps to Set a Default Printer in Windows 11
- Open the settings app when the Windows 11 computer.
- Visit the Bluetooth and devices within the settings.
- Following that, you have to click on printers and scanners.
- Toggle “Let Windows manage my default printer” to turn off. (if you do not turn off this option, you will not be able to set another printer as the default option for printing on your Windows 11 machine).
- Right now you have to select the printer which you want to make as a default printing option.
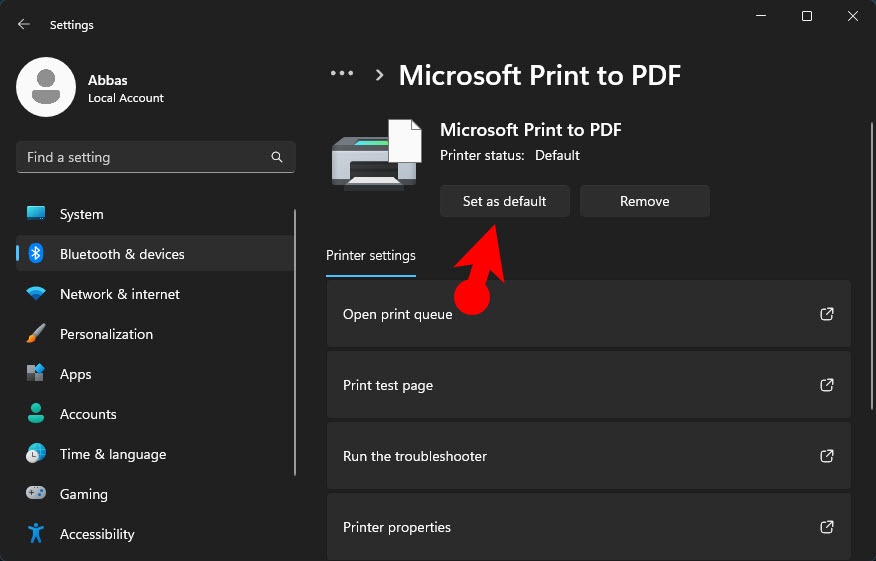
- Following that, within the properties of that printer, at the top, you will have to click on “Set as default“. button. This will enforce that printer for the default printing options within the Windows 11 machine that you are using.
-
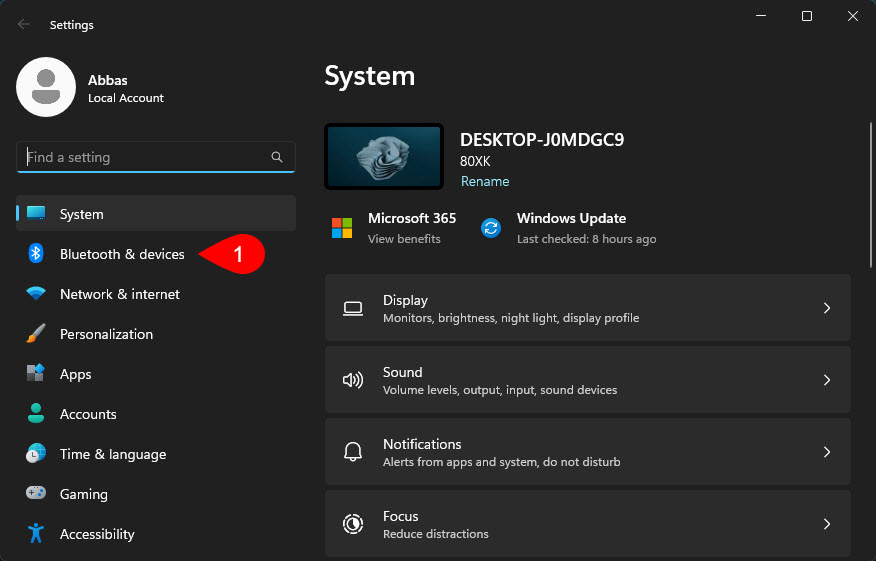
- 1. Bluetooth and devices
-
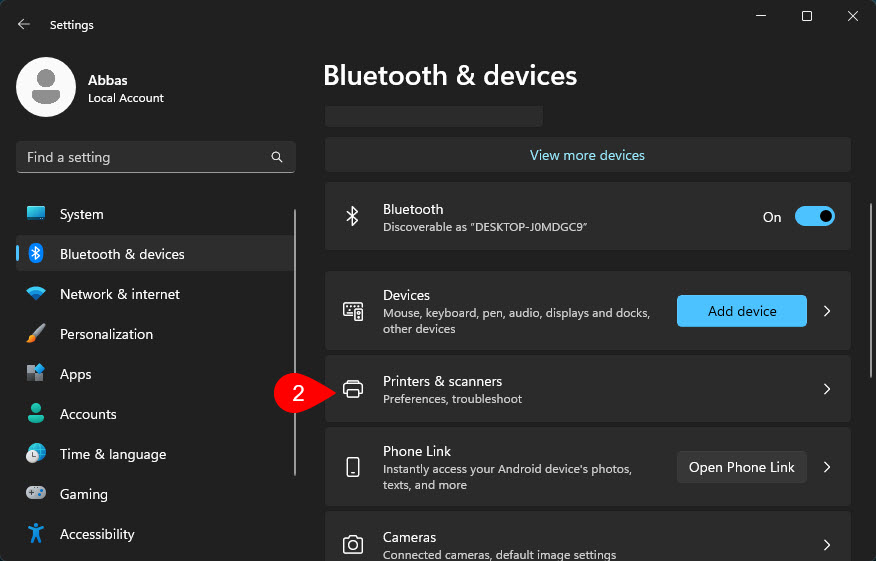
- 2. Printers and Scanners
-
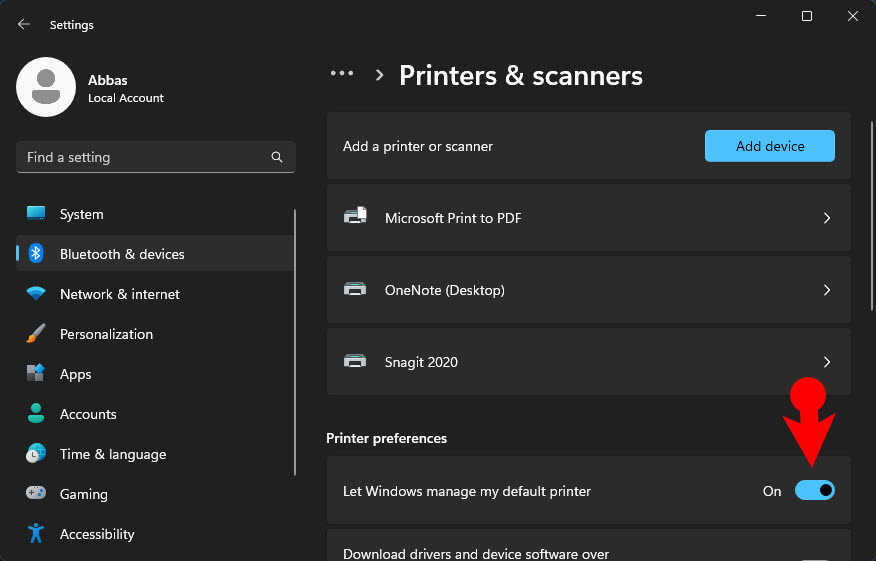
- 3. Turn off the Let Windows manage my default printer
-
- 4. Set a Default Printer
Conclusion:
Just turning off a single option (Let Windows manage my default printer) in the settings will solve many printing issues in Windows 11/10. The same method can be applied to Wireless printers too.
FAQ:
How to Fix the Default printer keeps changing in Windows 11?
You must visit the Printer & scanners in the settings and then turn off “Let Windows manage my default printer“. After that set, a default printer and you will not face this issue anymore.
How to troubleshoot if the printer is not working in Windows 11?
Here are some things that you must perform to troubleshoot the Printer in Windows 11:
- Restart the Printer.
- Check if the printer cable is working properly.
- Set a default printer using the steps performed within this article.
- Run the Printer troubleshooter to find the issue. {To troubleshoot the printer, open the settings> system> Troubleshoot> Other troubleshooters> Find Printer and click on Run}
- If a document is getting stuck in the queue while printing, you must Restart the Print Spooler service. Open the services from the search box in the taskbar> Find Print Spooler service> Right-click and choose properties> click on stop. Following that open this path
C:\Windows\System32\spool\printersand delete the print spooler. After that restart the Spooler service.
Can I set up a Wireless Printer in Windows 11?
Yes, You can easily set up a wireless printer in Windows 11.
Leave a Reply