

How to Install macOS 27 Golden Gate on VMware on PC
Apple released macOS 27 Golden Gate on September 14, 2026, and it is a big one — a new Liquid Glass design, a smarter Spotlight, a dedicated Games app, and an AI-powered Siri. You do not need a Mac to try it. Using VMware Workstation on your Windows PC, you can run the full Golden Gate experience in a virtual machine in under an hour. This guide walks you through the complete installation, step by step, the same way we have covered every previous macOS version on wikigain.
What You Need Before You Start
- A Windows 10 or 11 PC with a 64-bit Intel or AMD processor
- At least 8 GB of RAM (16 GB recommended) and 100 GB of free disk space
- Virtualization enabled in your BIOS/UEFI
- VMware Workstation Pro (free for personal use since version 17)
- The VMware macOS Unlocker (DrDonk community unlocker)
- The macOS 27 Golden Gate ISO file (about 15 GB)
Step 1: Enable Virtualization in BIOS
Restart your PC and enter the BIOS or UEFI settings (usually by pressing Del, F2, or F12 during boot). Find the CPU configuration page and enable Intel VT-x or AMD-V (sometimes called SVM Mode). Save and exit. In Windows, you can confirm virtualization is active in Task Manager → Performance → CPU — “Virtualization: Enabled”.
Step 2: Install VMware Workstation
Download VMware Workstation Pro from the official Broadcom site — it is free for personal use. Run the installer, accept the defaults, and finish the installation. Do not open Workstation again until you have run the Unlocker in Step 3, because the patch must be applied before VMware is first launched after installation.
Step 3: Unlock VMware for macOS Support
VMware Workstation does not officially support macOS guests on Windows hardware, so you need the community Unlocker.
- Download the latest DrDonk macOS Unlocker release (release-python-embedded.zip).
- Extract the archive, right-click win-install.cmd and choose Run as administrator.
- Wait for the patcher to stop VMware services, copy the macOS support files, and restart them. This takes a minute or two.
Once it completes, open VMware Workstation — the guest OS list will now include Apple Mac OS X.
Step 4: Create a New Virtual Machine
- Open VMware Workstation and click Create a New Virtual Machine.
- Choose Typical and click Next.
- Select I will install the operating system later, then click Next.
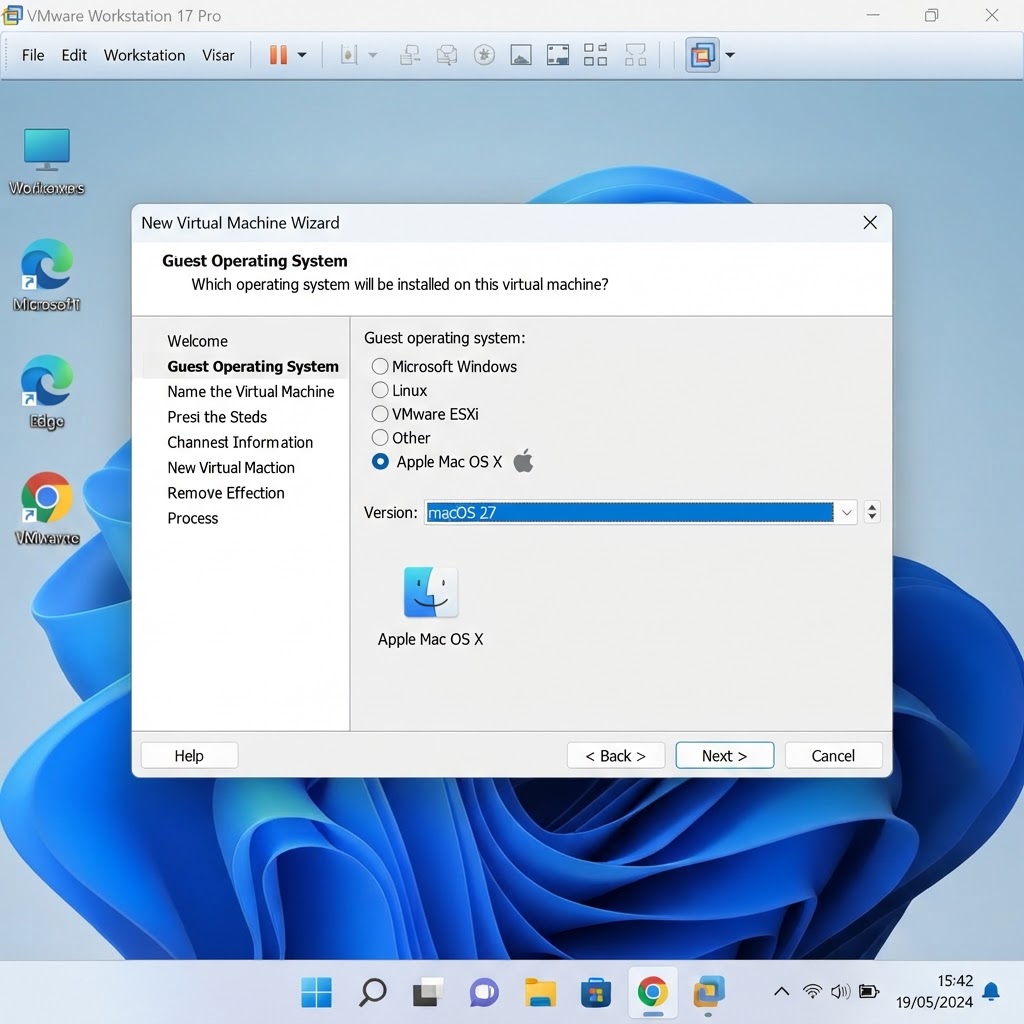
- Choose Apple Mac OS X as the guest operating system and select macOS 27 as the version. Click Next.
- Name the VM (for example, “macOS Golden Gate”) and pick a location with at least 100 GB free. Click Next, then Finish.
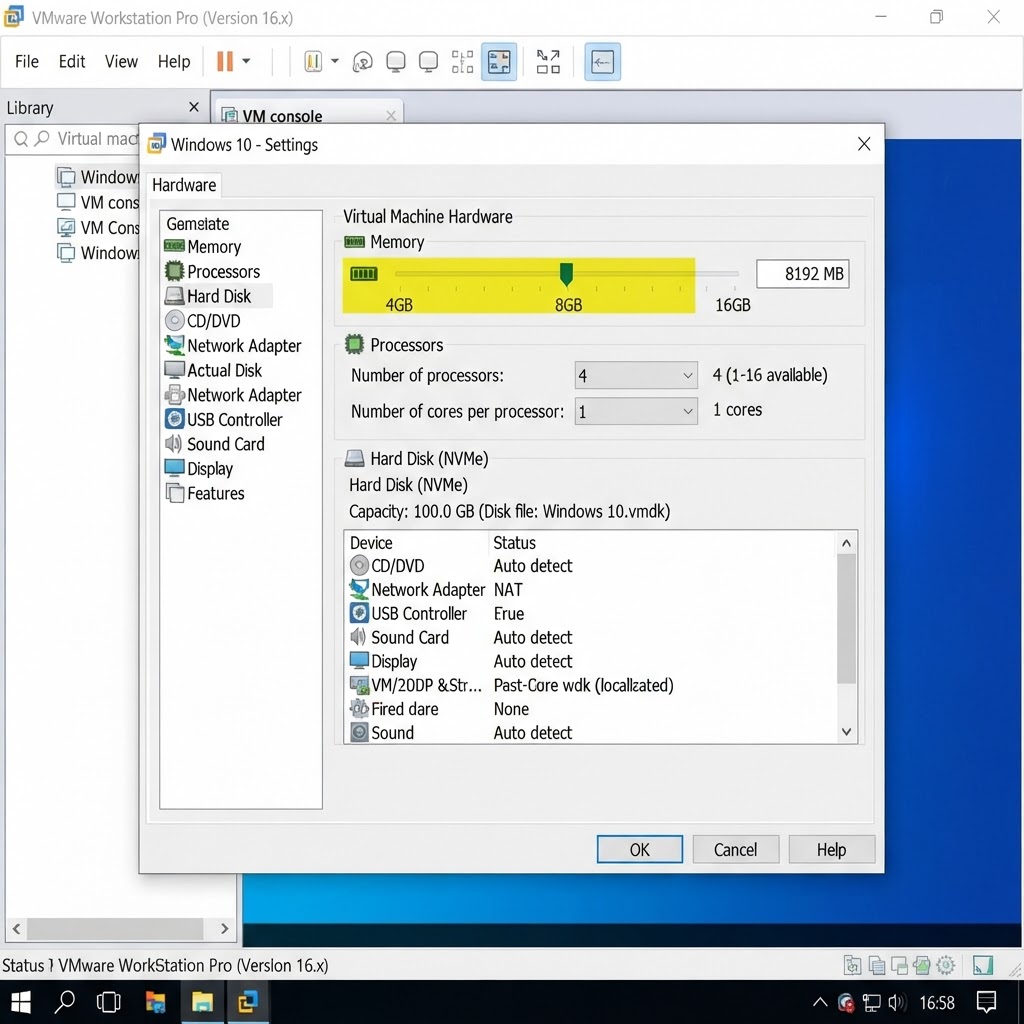
- Open VM Settings and set Memory to at least 8192 MB (8 GB) if your PC has 16 GB RAM — otherwise 6 GB.
- Set Processors to 4 cores if your CPU allows it.
- Under CD/DVD, select Use ISO image file and browse to your macOS 27 Golden Gate ISO. Make sure Connect at power on is checked.
- Under USB Controller, set USB compatibility to USB 3.1.
- Expand Hard Disk and confirm 100 GB, then click OK.
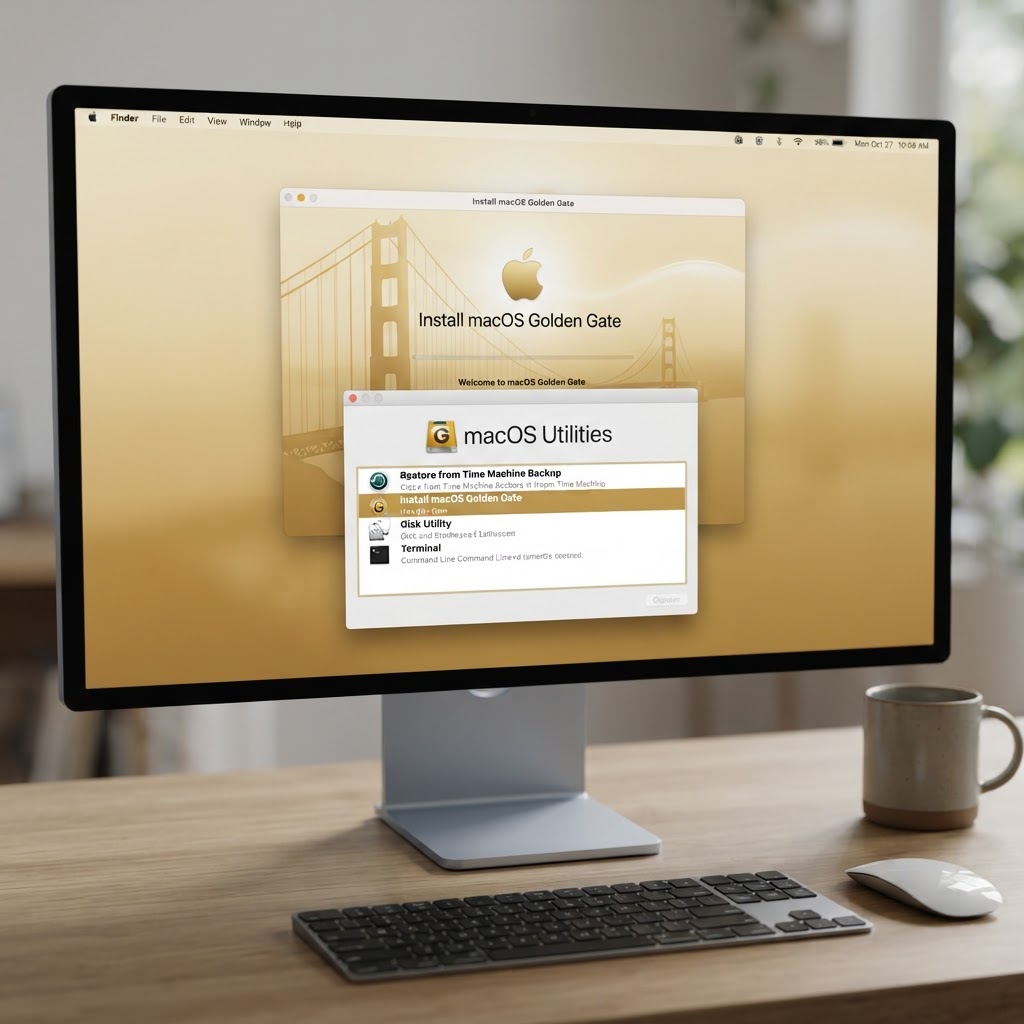
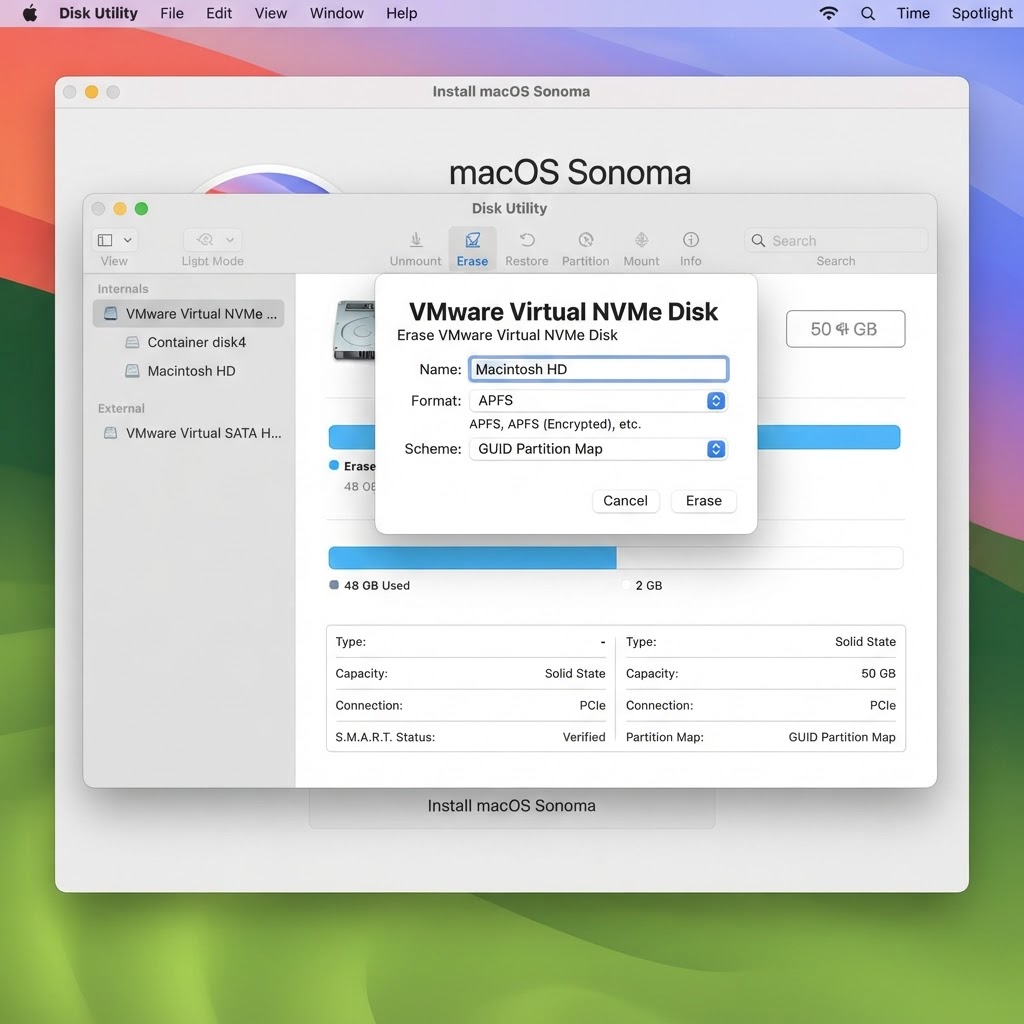
- When the macOS Utilities window appears, choose Disk Utility and select the VMware Virtual NVMe disk.
- Click Erase, name it Macintosh HD, choose APFS and GUID Partition Map, then click Erase. Close Disk Utility when it finishes.
- Back in the utilities window, choose Install macOS Golden Gate and click Continue.
- Agree to the license, select the newly erased Macintosh HD volume, and click Install.
- The installer copies files and reboots the VM several times. This takes 30–45 minutes depending on your disk speed.
Step 5: Configure the Virtual Machine Settings
Before powering on, tune the hardware so Golden Gate runs smoothly:
Step 6: Install macOS 27 Golden Gate
Power on the virtual machine and let it boot from the ISO.
Step 7: Complete Setup and Install VMware Tools
After the final reboot, the Golden Gate setup assistant walks you through region, keyboard, network, and account creation. Skip Apple ID sign-in if you prefer — it works fine without one inside a VM.
To get full screen resolution, smooth mouse movement, shared folders, and sound, install VMware Tools: click Player → Manage → Install VMware Tools (or VM → Install VMware Tools in Workstation Pro), run the installer inside macOS, and restart the VM one last time. Your Golden Gate virtual Mac is ready.
Frequently Asked Questions
Is it legal to run macOS on VMware on a PC?
Apple’s software license agreement technically permits macOS only on Apple hardware, but running it in a VM for personal testing and learning is widely practiced and tolerated. Do not use it as a replacement for a production Mac for commercial work.
Why does my VM show the “no bootable device” error?
Usually the ISO is not connected. Go to VM Settings → CD/DVD, re-select the Golden Gate ISO, and check Connect at power on. If the boot order is wrong, power on and press Esc to open the boot menu and choose the CD/DVD drive.
Can I upgrade my existing macOS Tahoe VM to Golden Gate?
Yes. Back up the VM first, then inside the Tahoe VM download Golden Gate from Software Update or System Settings → General → Software Update and run the upgrade. A fresh install, as in this guide, is still cleaner.
Conclusion
Installing macOS 27 Golden Gate on VMware is the same reliable recipe as previous versions: enable virtualization, patch VMware with the Unlocker, build the VM, and install from the ISO. Give the VM at least 8 GB of RAM and 4 cores and it will run the new Liquid Glass interface smoothly. Once VMware Tools is in, you have a fully working Golden Gate desktop on your PC — perfect for testing, learning, or just satisfying curiosity before buying a Mac.
Have questions or hit a snag at any step? Let us know in the comments below.
Leave a Reply