Are you running out of storage in your windows 11 operating system on the main PC? If yes what steps should you use to free up the storage on windows 11, so stay with us and follow how to free windows 11 storage with these powerful steps.
Windows has hidden caches, junk files, temporary files, and if you have turned on hibernation on the PC then it has storage. You can not go and delete everything on Windows 11, if you do, you will destroy the operating system, and you will face some big errors. Sometimes you won’t be able to boot the operating system, So delete only those files which we will mention in this post.
Steps to Free Windows 11 Storage
1. Reset Windows 11
The easiest and the simplest method that you can use to free windows 11 storage is to reset windows 11 itself. This is not very hard but it is very time-consuming and you have the option of to completely remove everything on the hard drive or only keep the files and remove the installed applications. I do not recommend this for a home user, but if you are running a shop you may perform a clean installation on the PC to clean up everything or you’ll have to go to settings and reset the windows then make it available for the customers to buy.
To reset Windows 11, go to the settings> system> recovery and click on the reset PC.
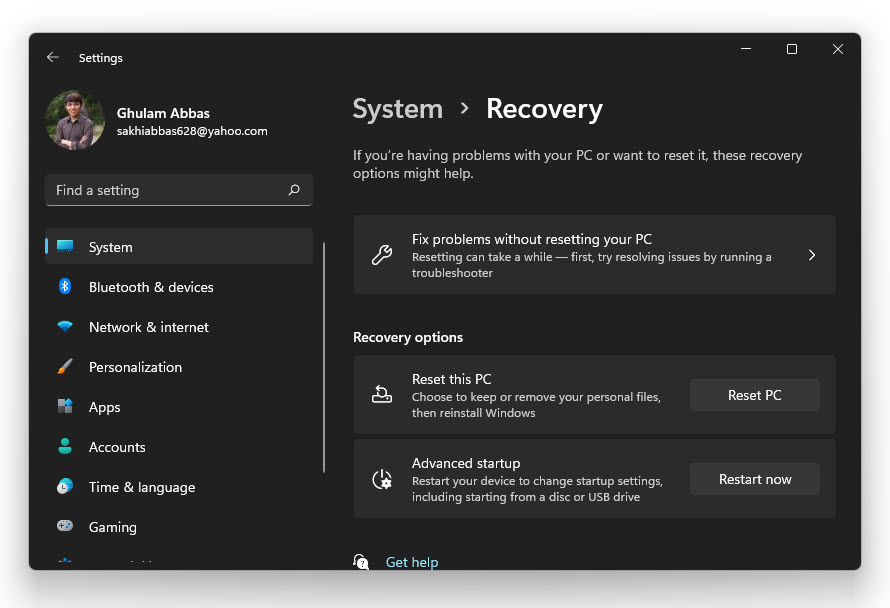
Path to Reset the PC in Windows 11
Once you clicked on them you will two options of keeping my files and remove everything. Once you click Keep my files, on the next window, you will two options of cloud download and local reinstall. Choose the option that is comfortable with.
2. Configure Recycle bin Size and Enable Storage Sense
The files that you don’t need when you are deleting them from your PC will be redirected to the recycle bin. It means they have not been removed, they are still storing the amount of storage on your computer. You can manually delete the recycle bin files by visiting it and then select all right click and choose delete. If you have a habit of visiting the recycle bin on the daily basis or weekly or monthly, it is good for you.
Empty the Recycle Bin
However, if you are like me, you are not visiting the recycle bin at all, then you have to configure the storage sense.
Storage sense is a feature that was added in Windows 10 and when you are running out of storage, windows will delete the files from recycle bin automatically if the storage sense is enabled. Storage sense has a lot of features and one of those features is to delete recycle bin files after a period of time without visiting the recycle bin manually. Suppose I’m going to configure the storage sense, to delete the files inside the recycle bin after two weeks of time.
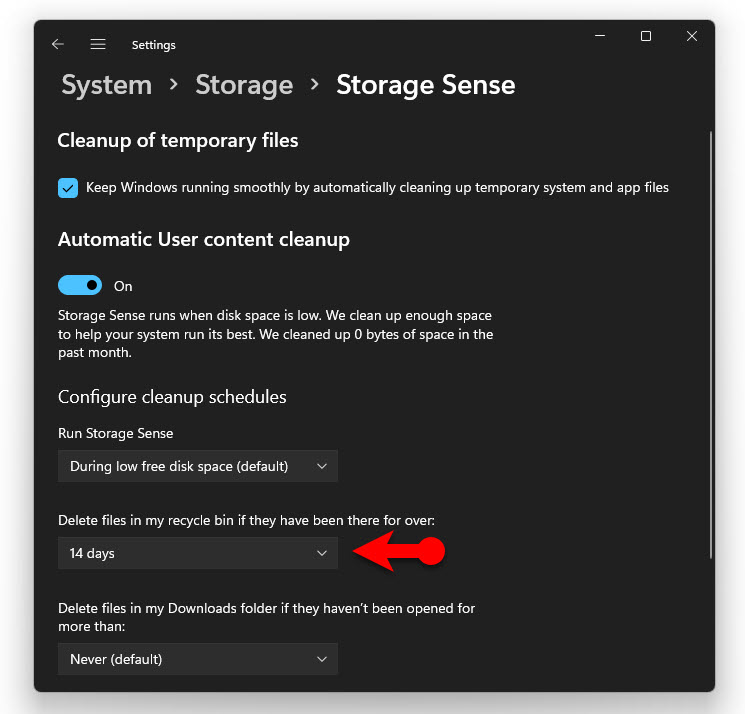
Storage Sense Settings
You can also configure the recycle bin size, that how many junk files it can contain inside it. To configure the recycle bin size, right-click on it and choose properties. You can see the recycle bin size can be configured for each drive separately. Look at the screenshot below, drive C has 9484 MB and drive D has 18394 MB.
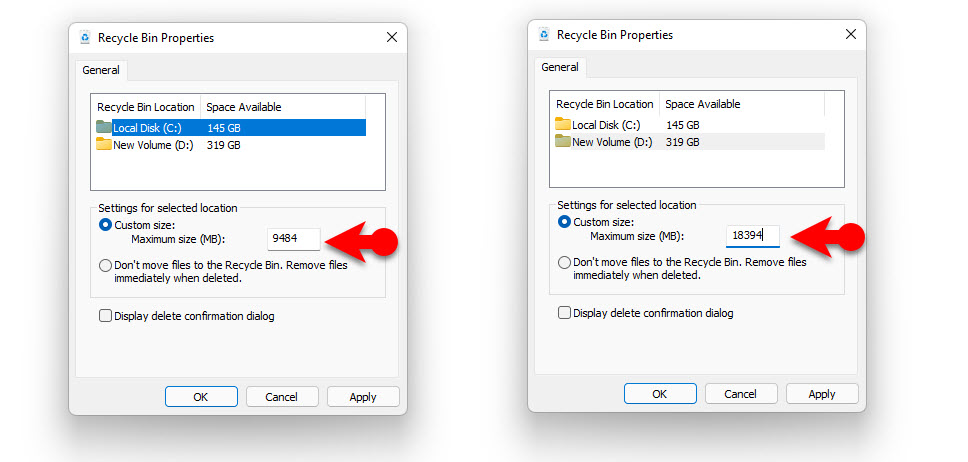
Recycle Bin Size for the drives
You can change those numbers or simply choose the second option which is don’t move files to the recycle bin, remove files immediately when deleted.
3. Remove Pre-installed useless apps
Believe it or not, Microsoft is promoting other apps also on their main operating system. Windows 10, there was a mess of applications that were preinstalled on the operating system as soon as it was connected to the network. In Windows 11 there are also many of these apps available when you are installing Windows 11. And most of them are useless for users but it is cleaner compare to the Windows 10.
Look at the screenshot below, those are only some pre-installed apps in Windows 11, there are more if you see them in the start menu.
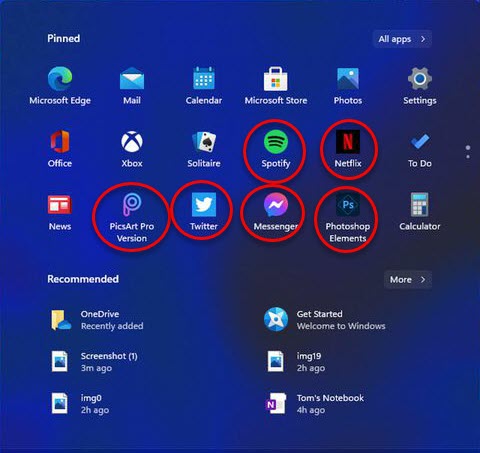
Windows 11 Pre-installed apps
I know deleting these apps will not provide a lot of storage but it is better than nothing, you can delete these apps by visiting the windows settings>apps> apps & features and then find those apps and uninstall them manually.
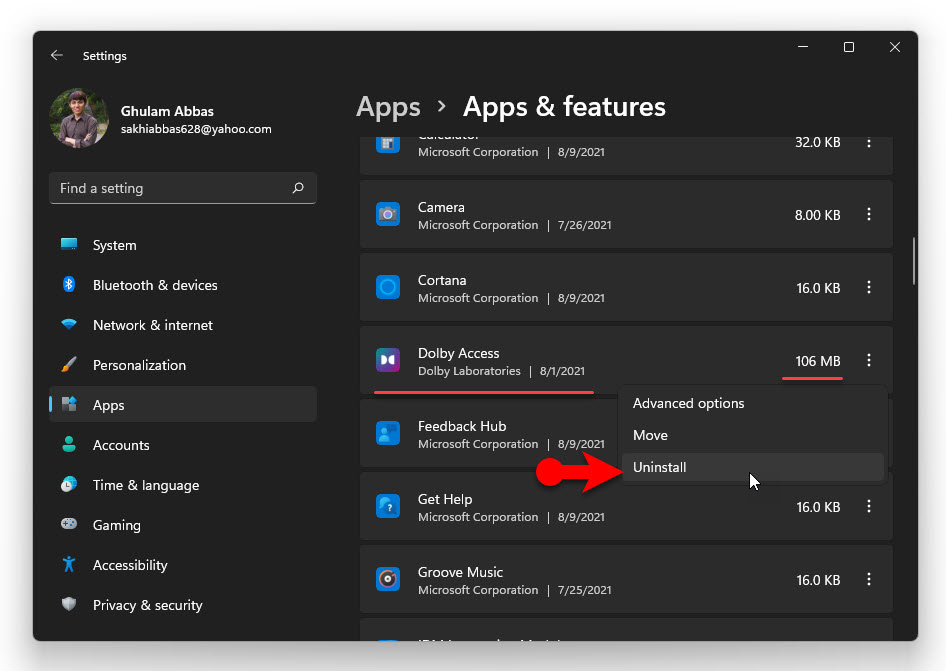
Uninstall Apps in Windows 11
4. Use Disk Clean up
The most powerful application in windows that can help you to clean up your hard drive is probably disk cleanup. Disk cleanup can perform the cleanup process in two options which I am naming them the basic clean and the advanced cleanup. Basic cleanup only removes the files of the memory, temporary files, recycle bin and more. But the advanced cleanup can clean both the basic and the system files.
Disk Clean up can remove the following files.
- Windows updates and old windows if you have upgraded
- Microsoft defender antivirus
- Downloaded Program Files
- Temporary internet files
- System error memory dump files.
- System error minidump files
- Windows error reports and feedback
- DirectX shader cache
- Delivery optimization files
- drive driver packages
- language resource files
- Recycle bin
- Temporary files
- Thumbnails
If you want to use the disk clean, open the run dialog box and type cleanmgr, and press on the keyboard. Once the disk cleanup is opened, you’ll have to choose the drive that you want to free some storage. In my case, I’m going to clean the drive C.

Open Disk clean up
This method is going to open the basic disk clean and you can clean them easily. if you want to clean the system files, click on the clean-up system files.
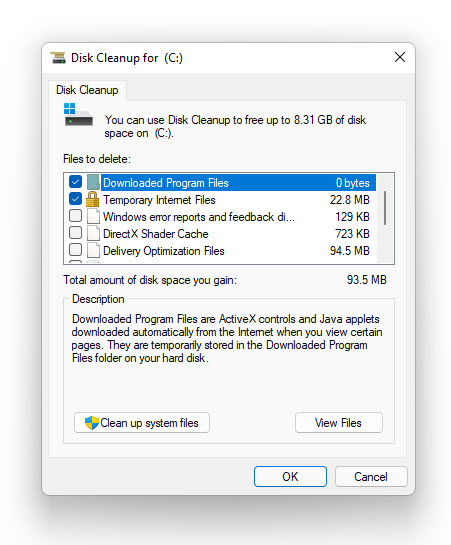
Basic Disk Cleanup
Again choose the drive C and wait a moment, then you will the disk clean up for the system has been opened. You select all of them and choose cleanup.
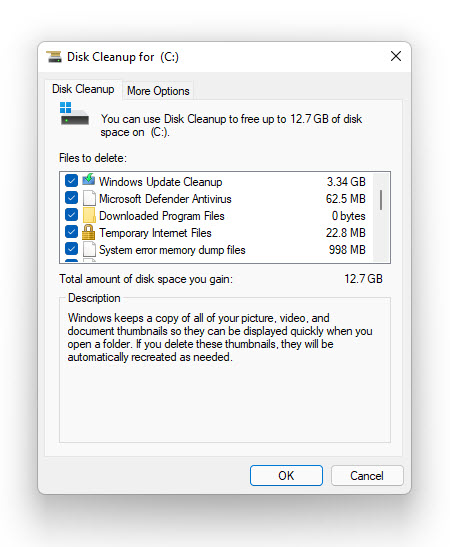
Clean system Files
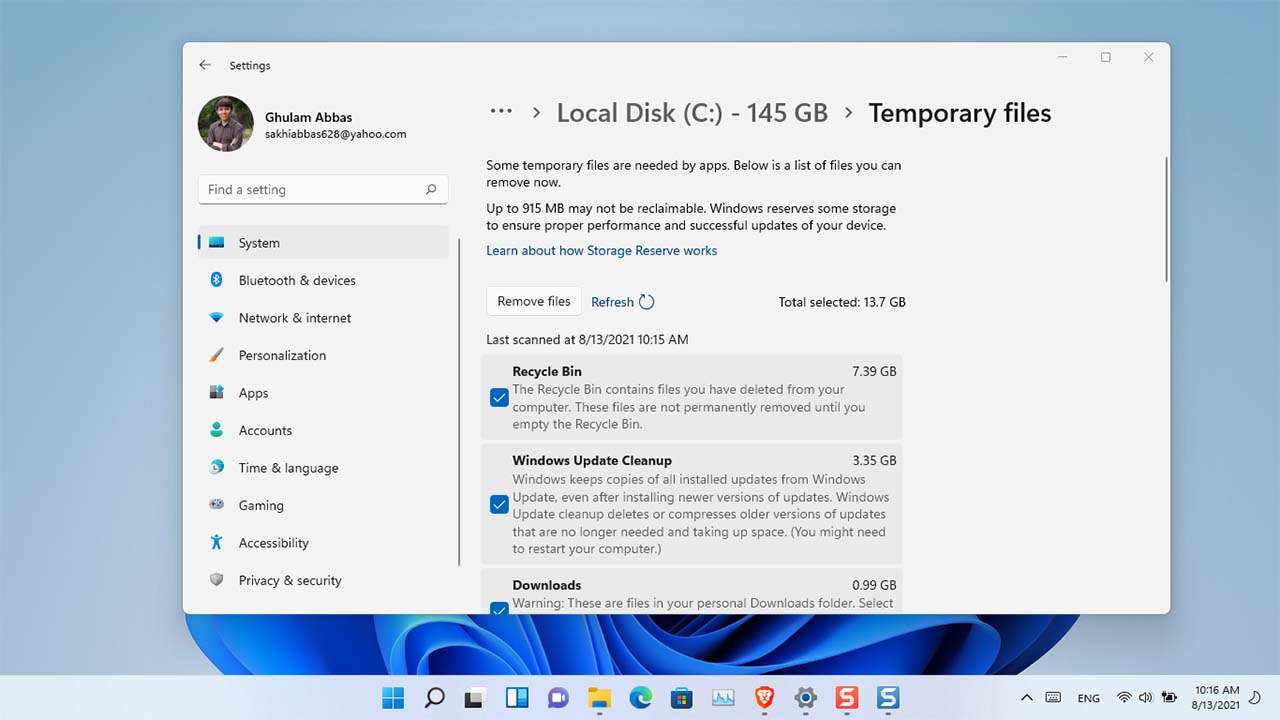
Microsoft has integrated the disk cleanup inside the windows settings, you can find it under the system> storage> Advanced storage settings> Storage used on the other drives> Temporary files.
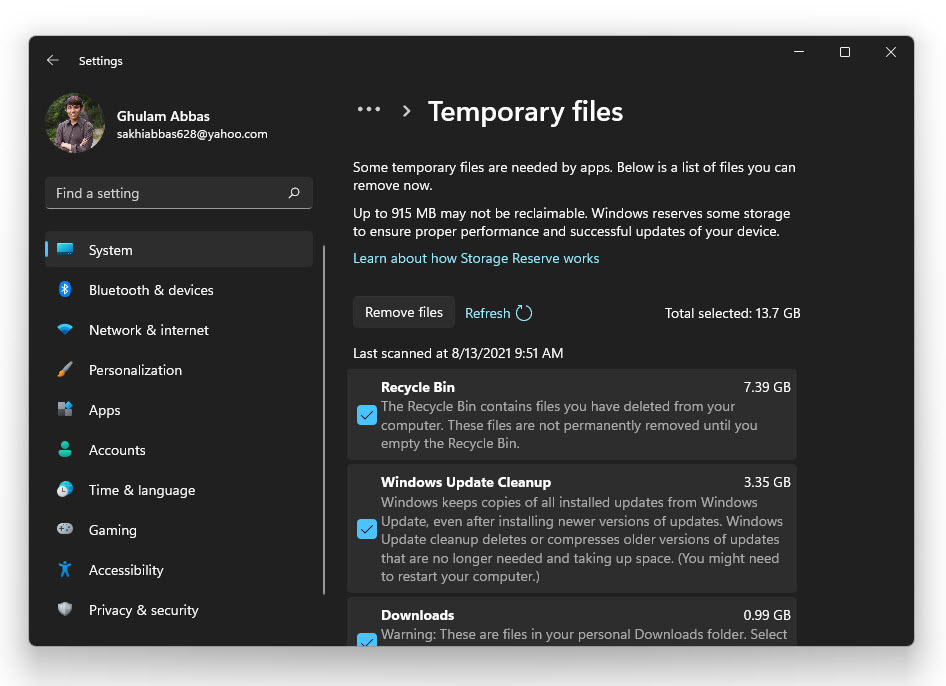
Cleanup the Disk using the Windows Settings
This is not probably the method that can clean up the system but it is good to know that how much of the storage is Windows using. You can find out by following the same path and choose system & reserved instead of Temporary files.
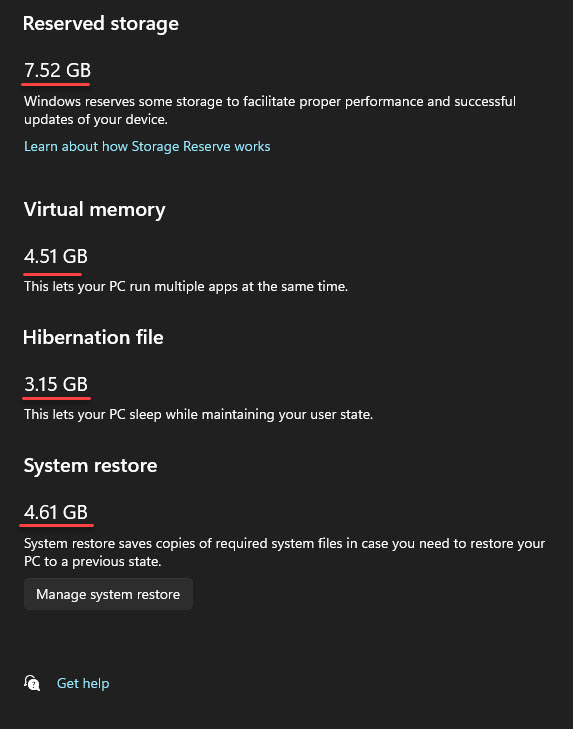
Reserved Storage
By the way, you can also delete the temporarily stored files without using the disk cleanup too. Just type temp on the run dialog box and press. The temporary directory will open in the file explorer, select all of them and holder shift + delete to erase permanently from PC.
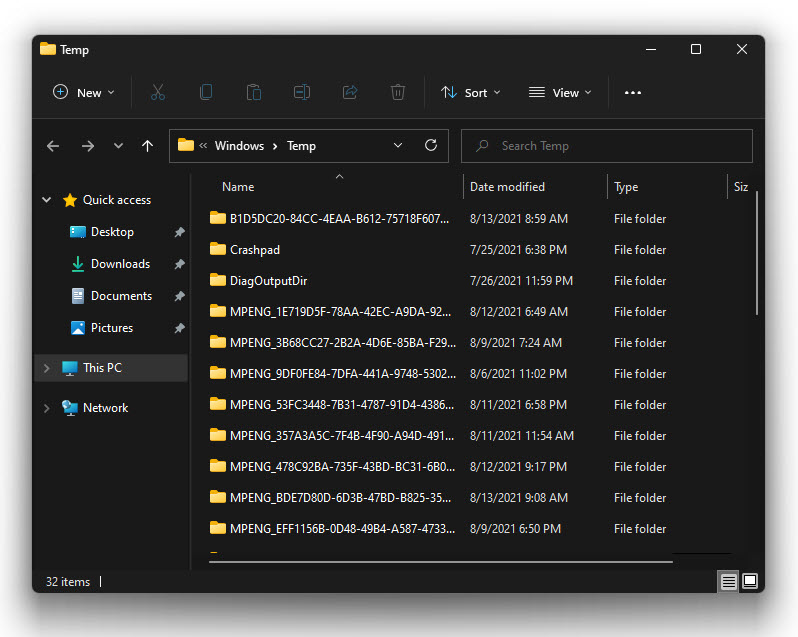
Clean the Temporary files
Well, if you %temp% on the run dialog box, it will open the system’s temporary files. So, there is a difference between the temp and %temp%. Just look at the below screenshot, and the items found in both of them.

temp and %temp%
Summary:
before running out of storage I recommend you enable the storage sense and configure the amount of storage inside the recycle bin. Also whenever you are running out of storage make sure that you use the disk cleanup to remove the unwanted files. And these were my Powerful steps to free Windows 11 storage, I hope it was helpful.
Leave a Reply