A virtual machine is an application that can run multiple operating systems on the same physical hardware machine in an isolated in a secure place. Suppose you can run macOS Monterey in windows 11 inside a virtual machine and vice versa. As long as your physical hardware can support you, run any operating system like Linux, Solaris, Chrome OS, Windows, and others.
The installed operating system inside a virtual machine is known as the guest and your actual computer or physical hardware will be called the host. In recent years many developers are using virtual machines to test their applications or the beta operating system of Microsoft and apple. The virtual machine is not just limited to test the desktop environment operating system, it can also be used to test Android or iOS too.
Fortunately, there are several Virtual machine applications available that you can use to test any type of operating system or application that you want. Some of them are free, for some you’ll have to pay and some of them come with the built-in license that you buy.
Believe it or not, Hyper-V is a virtual machine that comes with the built-in features of Windows when you purchased it. The thing is that it is not enabled by default, you’ll have to go and enable it manually from the settings. So, in this article let’s find out how to enable Hyper-V in Windows 11 using the Windows settings and the old buddy control panel.
How to Enable Hyper-V in Windows 11 using Windows Settings?
Since the release of Windows 10 in 2015, we have noticed that Microsoft is slowly moving the control panel settings into the windows settings. So, eventually, there will be no more control panel, that’s why in this post I will guide you where you can find the option to enable Hyper-V in Windows 11 inside the Windows settings.
Step #1. Open the Windows settings from the start menu or by pressing Windows + I on the keyboard. Once the windows settings are launched you’ll have to go to the category known as apps. Click on the optional features to enable Hyper-V.
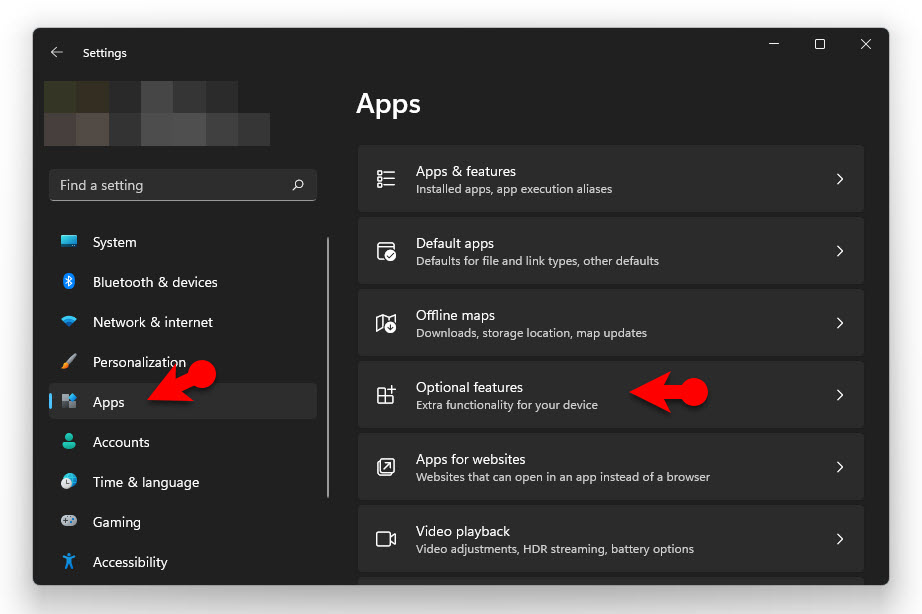
Open the Optional Features in Windows Settings
Step #2. Inside the optional features, you will see that the current features that are installed on your computer. And do not forget that these features are optional and by default, they were installed through the Microsoft Store in the background. You can remove them if you want but we are looking for Hyper-V, and Hyper-V is not among them.
Scroll down to the end, and click on the More Windows Features.
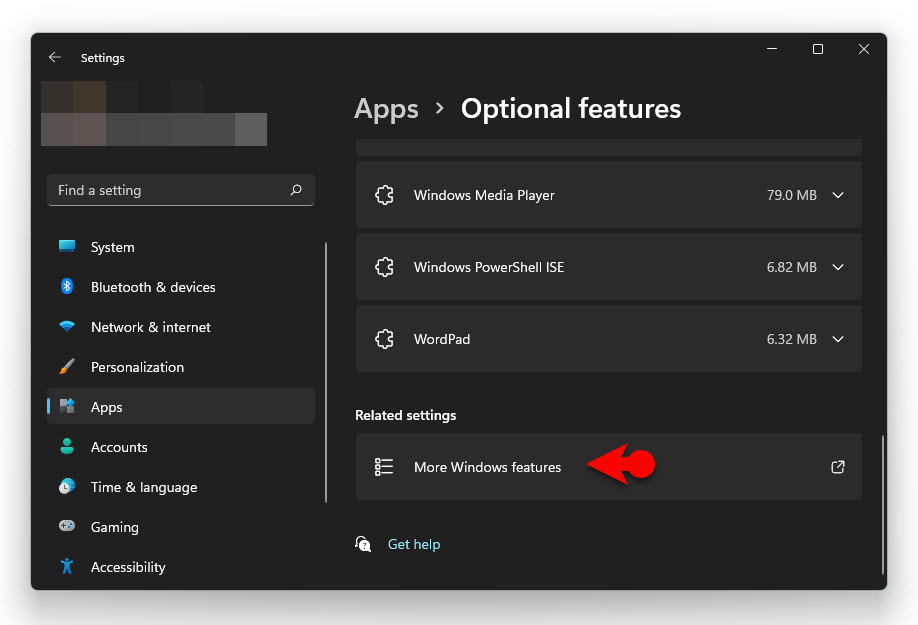
Access More Windows 11 Features
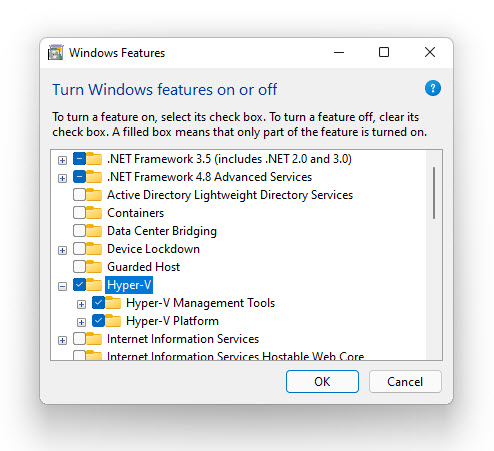
Choose Hyper-V in Windows Features
Step #4. Once you click OK, it is going to search for required files, if those files were not available it’s going to download it directly from there. However, it was available you will see a restart now or restart later option.
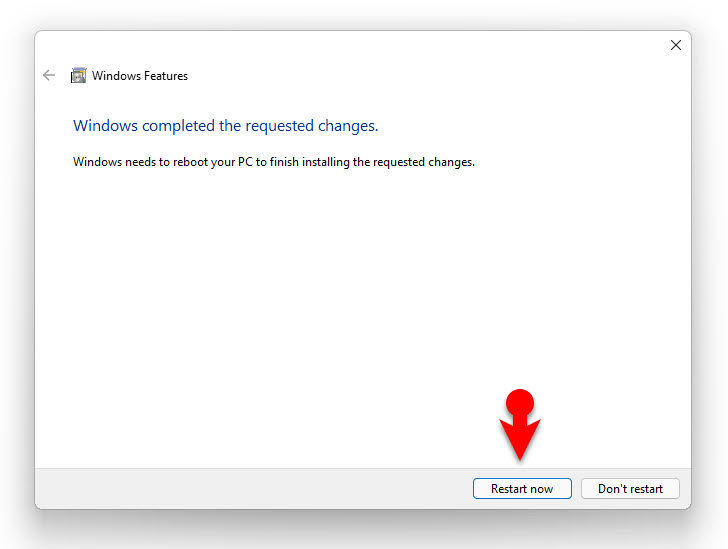
Restart the PC to enable Hyper-V
once the PC is restarted, you can find the Hyper-V inside the Windows tools. You can also search for Hyper-V in the search box too.
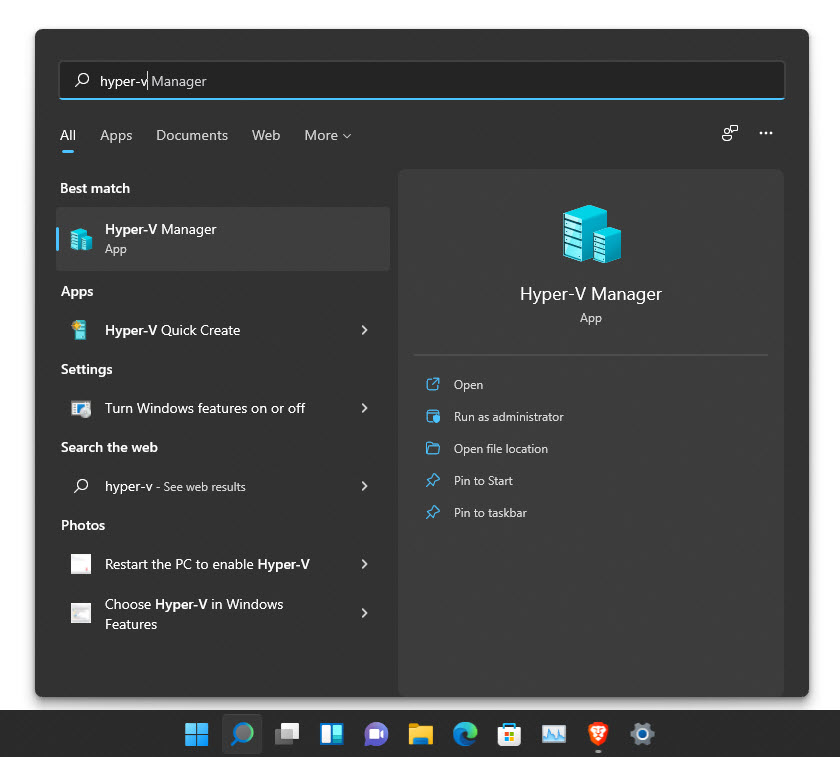
Open Hyper-V in Windows 11
Enable Hyper-V in Windows 11 using the Control Panel
Well, if you are using Windows 10, Windows 8, or an older version you can still enable the Hyper-V from the control panel too. I am showing you a very quick and simple method to enable Hyper-V in Windows 11 using the control panel. So, let’s go started.
Step #1. Open the Run dialog box by pressing Windows + R on the keyboard.
Step #2. In the Run dialog Box type, Appwiz.cpl, and press enter. This simple command is going to open the programs and features.
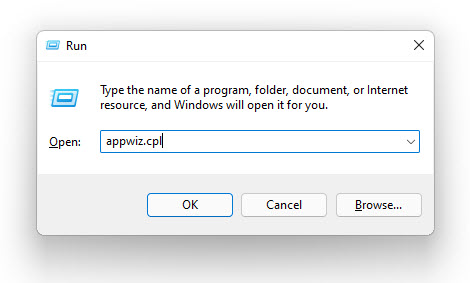
Command to open the Program and features
Step #3. In the left panel, click on Turn Windows Feature on or off.
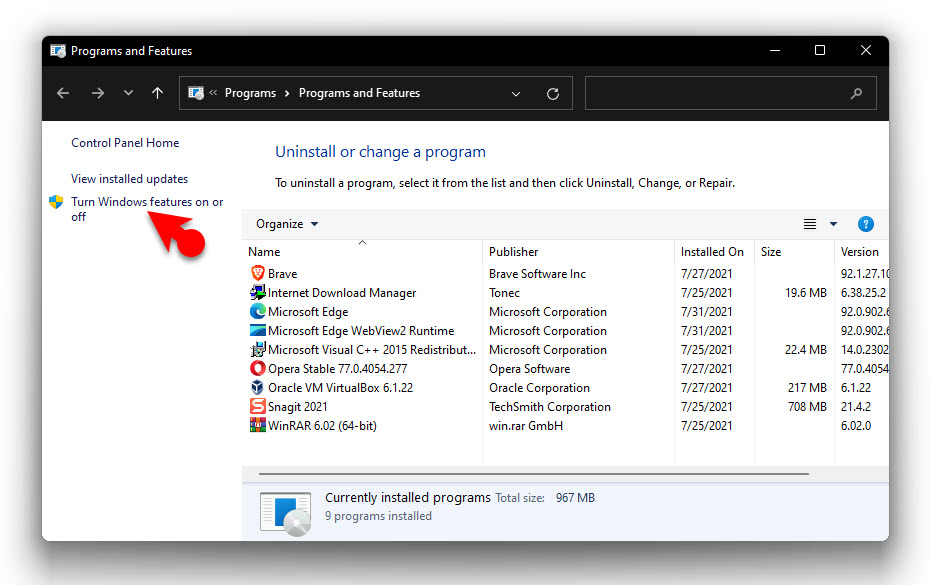
Turn Windows feature on or Off
Step #4. When you clicked on the Turn Windows feature on or Off, the Windows Feature Panel will open where you can choose the Hyper-V and click OK.
Summary:
Hyper-V is Microsoft’s built-in Virtual machine application, by default, it is not enabled. You need to go to the Windows features and Enable it manually.
Leave a Reply