You can free up storage on your computer by deleting unnecessary temporary files. These files may take up a significant amount of space on your primary drive. Windows 11 offers several ways to delete these temporary files through the Settings app, Disk Cleanup tool, Storage Sense, and other simple methods. Temporary files are created by the system and programs as a temporary storage during installation, updates, and error reports. Over time, they can accumulate and take up a lot of space. Deleting these files can help prevent your computer from running low on storage and improve performance. Anyway, Let’s find out How to Delete Temporary Files on Windows 11 with different methods.
Steps to Delete Temporary Files on Windows 11
There are several ways and methods that you can use to delete temporary files on Windows 11. Let’s go through all of those methods one by one and find out which method is suitable for you.
1. Delete Temporary Files using the Settings App
- Press Windows button + I to open the settings app.
- Under the system, click on storage.
- Within the storage options, you will find the Temporary Files options too, click on it.
- Choose all the folders that you want to remove their files, than click on remove.
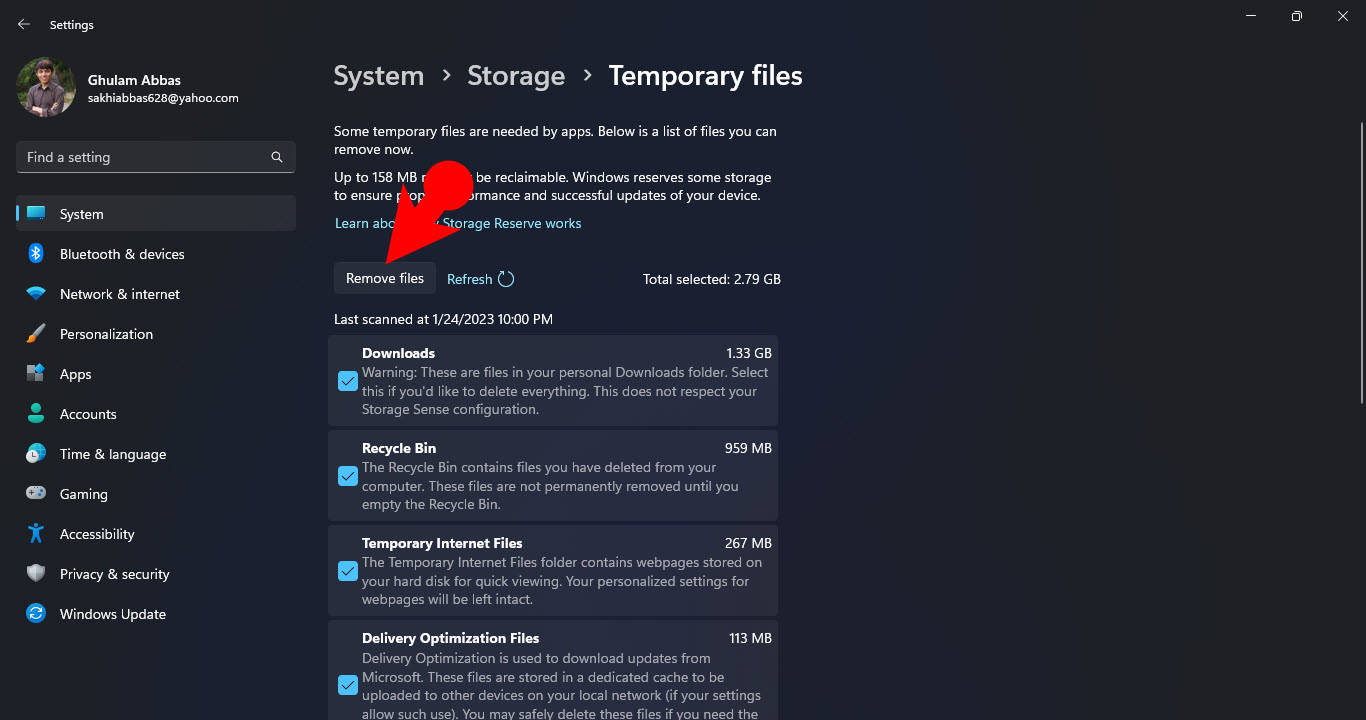
Remove Files using the settings app
2. Delete Temporary Files using Disk Cleanup
The oldest technique that you can use for deleting temporary files including the windows updates is the disk cleanup. Follow the below steps to learn how to use disk cleanup to clean up the Temporary Files.
- Click on the search icon at the taskbar and search for Disk cleanup.
- Next, choose the drive C, since we want to delete the Temporary Files.
- Choose all the folders that you wish to delete, after selecting, click OK and wait for the removal.
Note: If you wish to delete the System files, click on the system files, then choose all the folders and click ok.
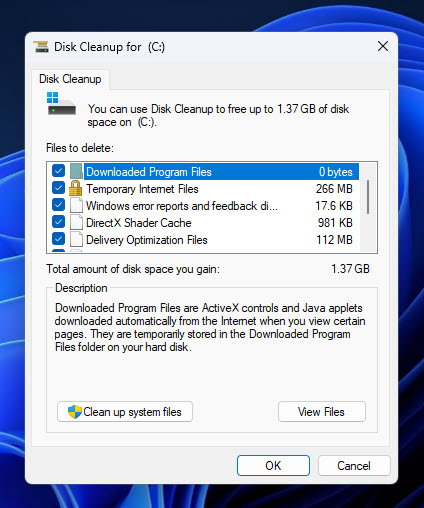
Delete Temporary Files using Disk Cleanup
3. Automatically Delete Temporary Files using Storage Sense
Another cool technique which is a lot more simpler and easier for deleting temporary files is the storage sense. The storage sense is a feature which was introduced back with Windows 10, however it has been a bit of more improvement with Windows 11. Do keep in mind that after a based on your configuration, it’s going to delete the temporary files automatically.
- Open the settings.
- Under the system, Go to the Storage.
- Find storage and click on it.
- Now, go ahead and configure the settings of storage sense for deleting temporarily files.
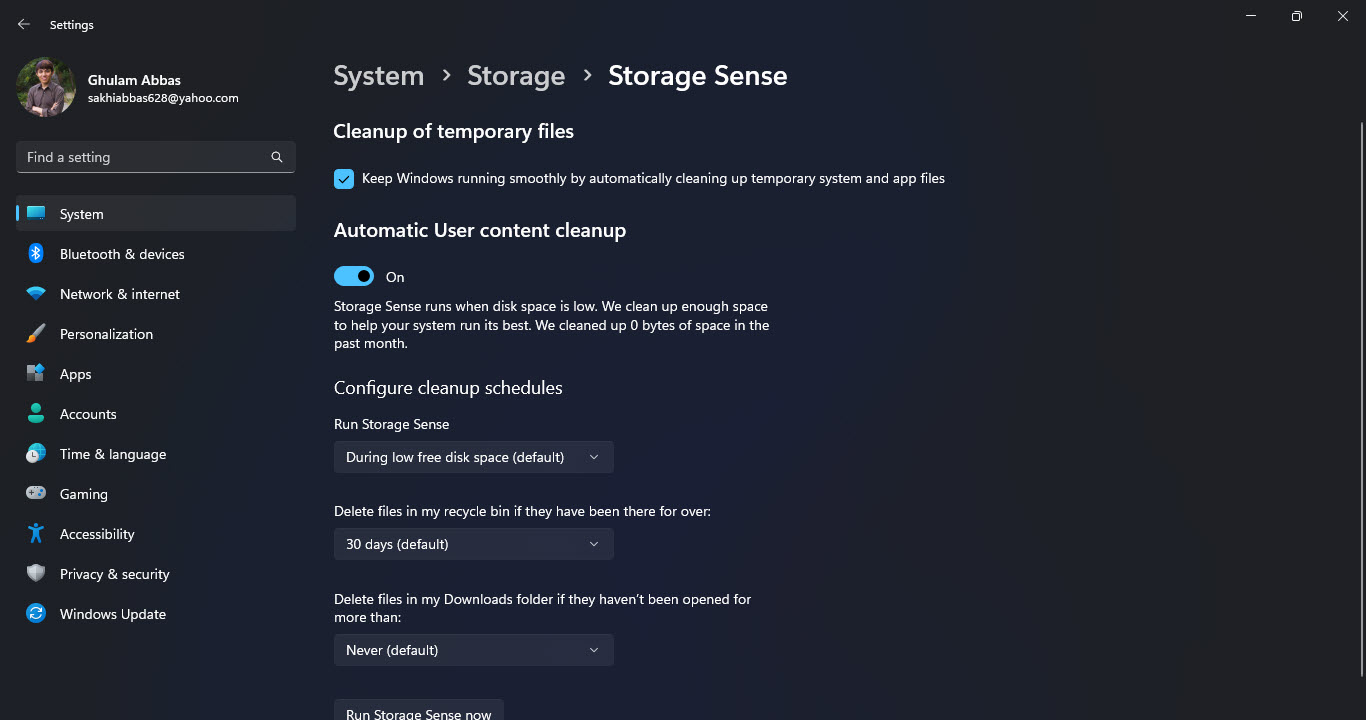
Storage Sense
4. Delete Temporary Files using CMD
Like it or not but CMD is even more older than Disk cleanup. In fact, as long as you know the commands to navigate around CMD, it is a lot simpler to do anything which also include deleting temporary files.
- Press Windows + S to open the search box from the taskbar.
- Than search for CMD and run it as Administrator.
- Next, you will need to execute this command for deleting the temporary files.
del /q/f/s %TEMP%\*
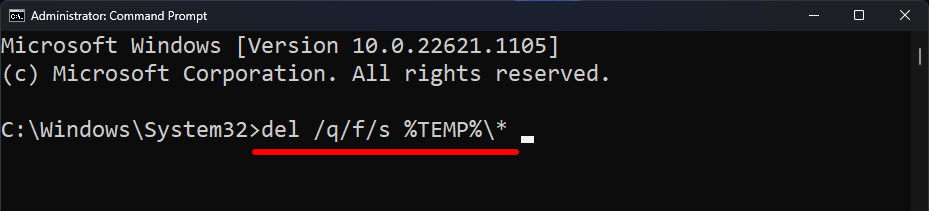
Delete Temporary Files using CMD.jpg
5. Delete Temporary Files using Bash Script
The final method that I want to introduce to is by using bash script to permanently deleting temporary files. But first the first step is creating a better script in that you can could run it anytime that you want.
- Launch Notepad.
- Paste the these codes and Press Ctrl + Shift + S.
rd %temp% /s /q md %temp% - Name the file whatever you want but make sure the extension is .bat.
- Once the file is saved, it will look like a script, just double click and wait until the job gets done.
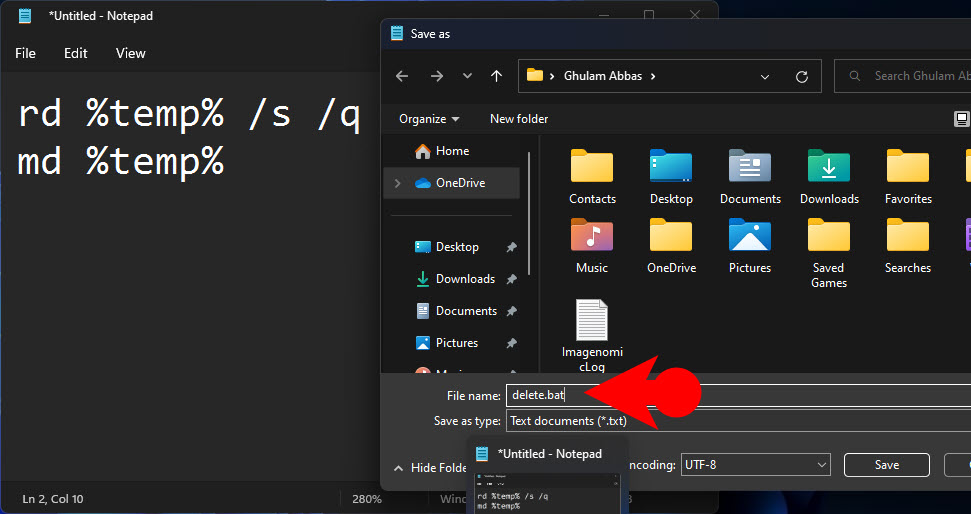
Save the file as a bat file
Conclusion:
These are the five techniques that you can use to Delete Temporary Files on Windows 11/10 easily. Let me know what other methods you use for cleaning up your system in the comment section.
Leave a Reply