Are you trying to install windows 11 on your PC or laptop, then there are two things you need to prepare before installing. You need to download the Windows 11 latest version ISO image and prepare at least 8 USB flash drive for creating a bootable USB. And by the way, if you are not interested in using the windows command prompt, you have to download Rufus to create Windows 11 bootable USB.
Steps to Create Windows 11 Bootable USB
- Step #1. Download Windows 11 ISO Image Latest Version
- Step #2. Prepare 8 GB of USB Flash drive
- Step #3. Download Rufus or Use Command Prompt
Step #1. Download Windows 11 ISO Image Latest Version
At the moment Windows 11 is released and it is in insider preview, however, when the final version of Windows 11 is released you can get it from Microsoft’s official website. Even though, since windows 11 is released in the dev channel, the moment it is released in the insider preview, which is more stable than the Dev channel. You can get the ISO of Windows 11 from the Microsoft software section.
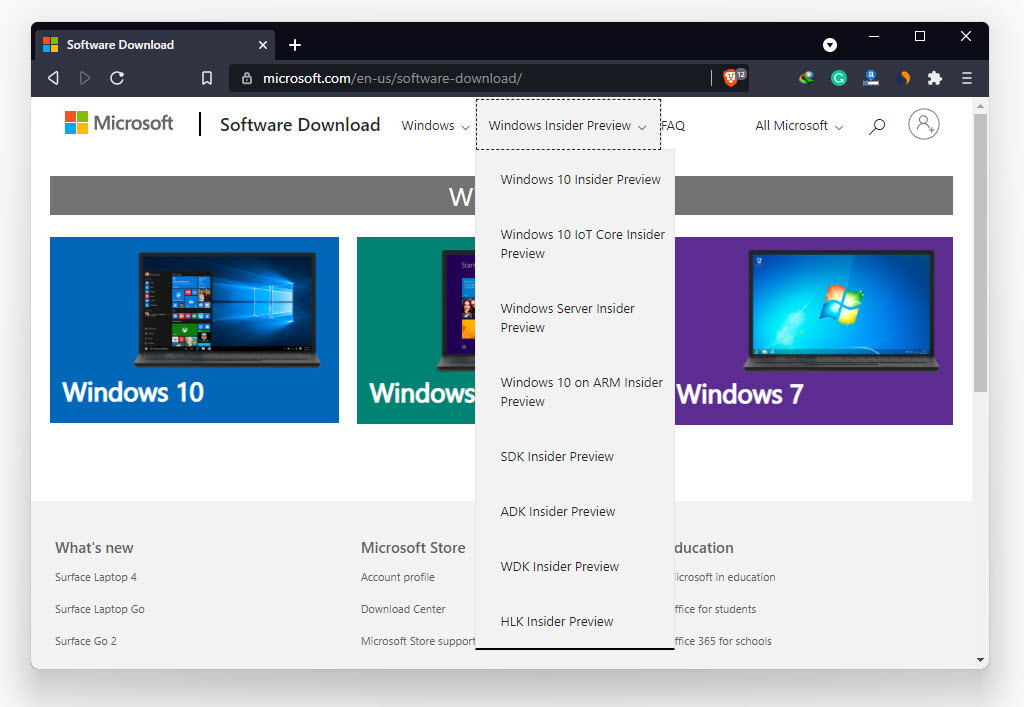
Download Windows 11 ISO Image
There’s also another scenario, and that is when Windows 11 will be released, it will definitely have the windows 11 create install media tool. This tool is the same as Windows 10 where you can download Windows 10 using the tool. As soon as the tool is released we’ll update this post.
At the moment you can use the below download link to download the Windows 11 ISO image.
- Download Windows 11 ISO Image Insider Preview 22000.52
Step #2. Prepare 8 GB of USB Flash drive
you need to buy at least 8 GB of USB flash drive for creating a bootable USB. If you are buying then buy a USB 3.1, Because it will save a lot of time during the creating bootable USB of Windows 11. I am not saying that you can’t use USB 2.0 but USB 3.1 way faster than 2.0.
Step #3. Download Rufus or Use Command Prompt
The easiest and fastest way to create a windows 11 bootable USB is to download Rufus. Rufus is open-source software that you can use to create bootable USB for Linux, Windows, and Chrome OS. Alongside that, it has all the features and the functionalities of a legacy boot, and the modern boot, known as UEFI. And Since windows 11 requires a UEFI boot alongside the secure boot, you have to create a UEFI bootable USB of Windows 11.
To download Rufus, go to the below link and download the Rufus portable version.
- Download Rufus
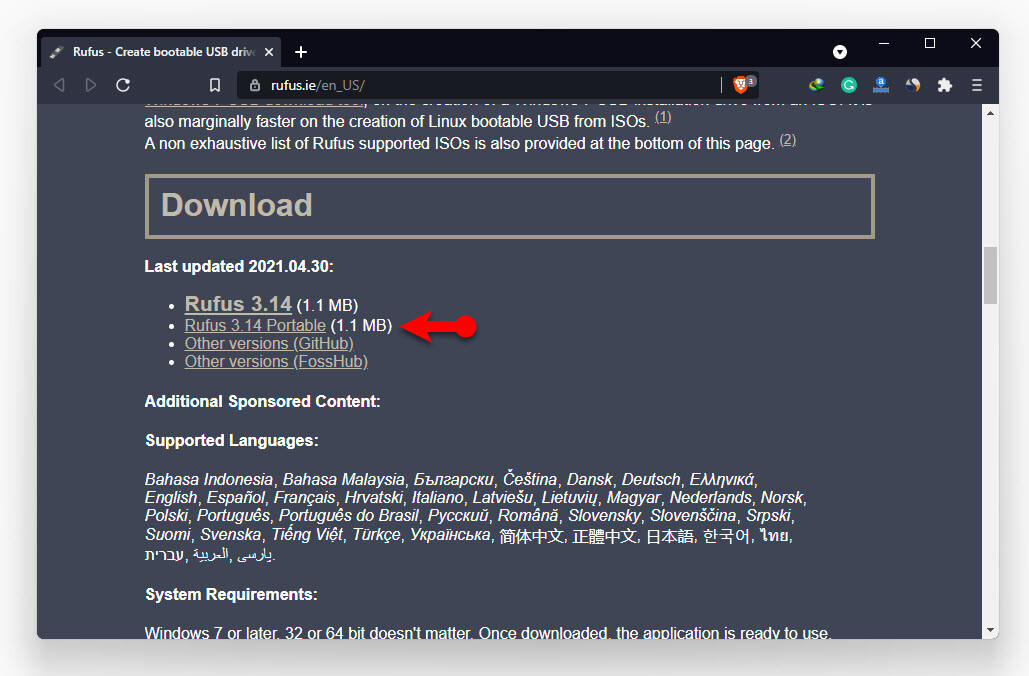
Download Rufus
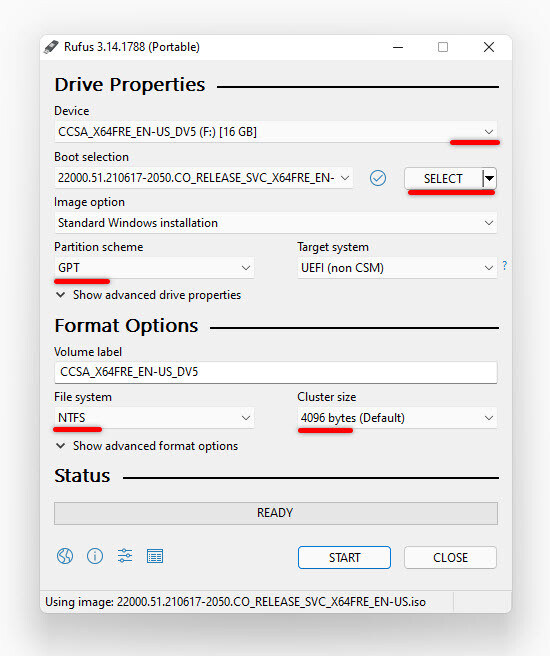
Attach the USB flash drive to the computer and run the Rufus. By default, Rufus will detect the USB flash drive however if you have attached multiple USB flash drives to your computers then in that case, you need to choose the USB which you want to create a bootable USB of Windows 11.
In front of the boot selection, click on the select ISO, and locate the windows 11 ISO image that you downloaded.
- Leave the image option to standard windows installation.
- Make sure the partition scheme is GPT, if it is MBR then it will be the legacy boot. Based on selecting the scheme, the target system will change. If GPT is selected, it will be UEFI (Non-CSM), however, if MBR is selected it will change to BIOS (Non0CSM).
- Leave the file system in NTFS, and make sure the cluster size is provided as default as it is.
Create Windows 11 UEFI Bootable USB using Rufus
The moment you are done with setting the Rufus to create Windows 11 bootable USB click on the start button to move forward. Once the start button is pressed, Rufus will warn you that the USB flash drive will be formatted so you have to simply click OK and make sure that there is not any important file in the USB flash drive.
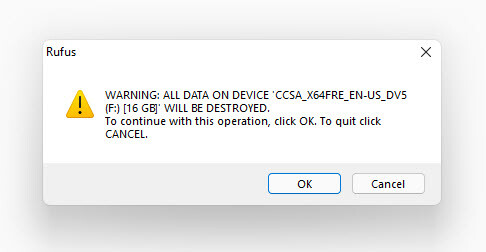
All the data will be wiped out
Now you have to wait and see until Rufus is going to erase the disk. Then it’s going to partition the disk as the NTFS file system and finally, once it is done with partitioning, it will copy the Windows 11 files into the USB.

Copying ISO Files to USB
When the files of the Windows 11 ISO are copied into the USB flash drive you will see that an important notice notification will appear. Which is saying that you have created a UEFI bootable of windows 11 and when you are booting a computer you need to disable the secure board for more reasons you have to visit more information.
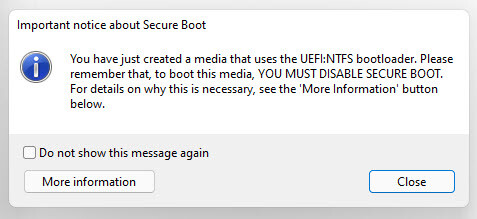
Important Notice
Create Windows 11 UEFI Bootable USB Using Command Prompt
If you are trying to learn, then I’m definitely preferring using the command prompt over Rufus. Rufus is just a window with a graphical interface, and everything is provided all you have to do is just click and select the settings, and everything will be done with you within a minute or so. But if you want to get the true feeling of using Windows 11 to create a bootable USB that is basically the command prompt. I know the command prompt is not very cool, it does not have a very good interface but it is very powerful compared to the graphical user interface of the Windows operating system. So I’m definitely preferring you to use the command prompt to create a windows 11 bootable USB. So, just follow the below steps one after another and you will know it soon enough.
Open the run dialog box in type Diskpart, or you can simply open CMD and type this Diskpart and press enter on the keyboard.
Step #1. The moment Diskpart is launched in the CMD, you have to find out how many disks are attached to the computer, to do that one simply type list disk.
Step #2. Now you have to select the USB flash drive using the select disk number. On my PC disk 1 the USB flash drive. So, simply type select disk 1 or the short form is Sel disk 1 and press enter on the keyboard.
Step #3. Now you have to clean the USB flash drive. Remember that when you type clean, it clean the file system, partition, cluster and everything will be removed. So, if there is no partition there is no file system then basically there won’t be any file. Then make sure that the USB flash drive is totally empty.
Step #4. If you want to create a UEFI bootable USB of Windows 11 you have to type convert GPT. However, if you are looking to create a legacy bootable USB of windows then simply type convert MBR. However, if your PC’s default file system is GPT then you will see a message that the specified disk is not an MBR. if it is an MBR if you type convert GPT to convert it to GPT.
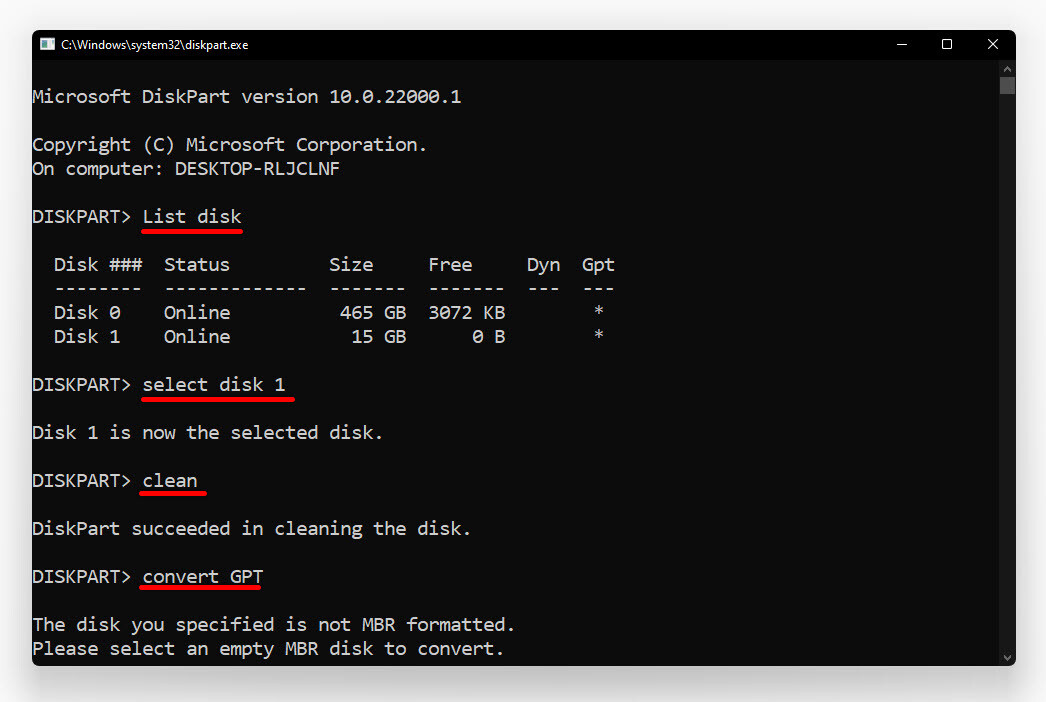
Create Windows 11 UEFI Bootable USB using CMD Part 1
Step #5. Now it is time for us to create a partition primary for the USB flash drive since it does not have any. type create Partition Primary and press enter.
Step #6. We also need to do a quick format of the USB using the format FS = NTFS quick command. And finally, simply type active if you are on a legacy boot, if your default boot is UEFI, you will the below message.
The selected disk is not a fixed MBR disk.
The ACTIVE command can only be used on fixed MBR disks.
Step #7. type exit to quit the CMD.
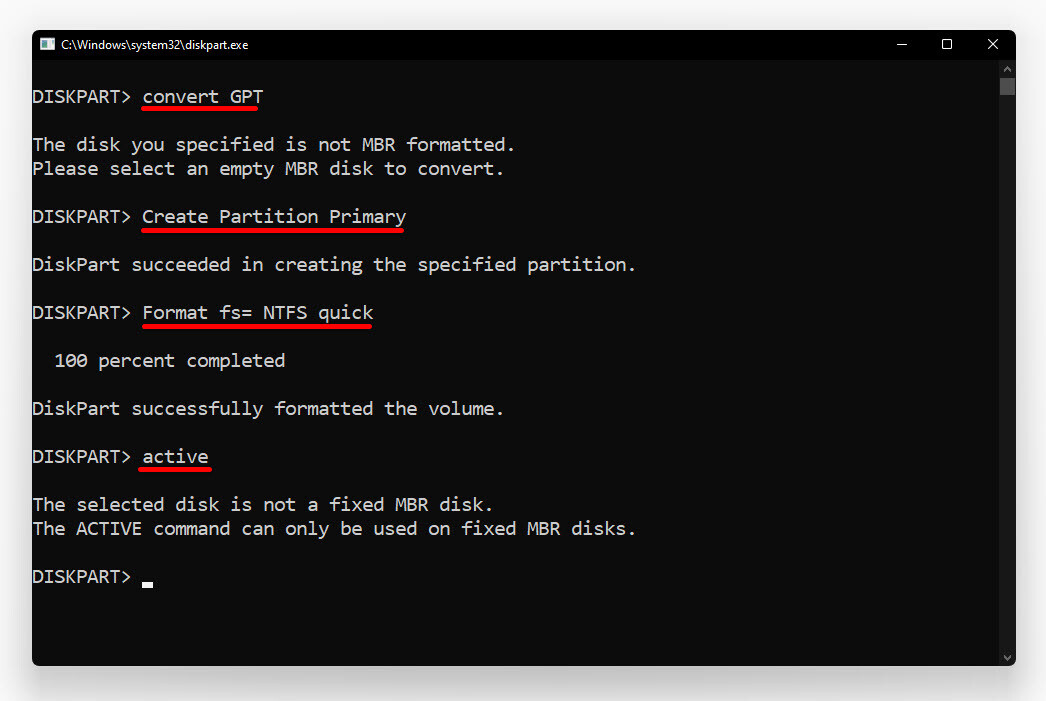
Create Windows 11 UEFI Bootable USB using CMD Part 2
Open the Windows ISO Image and copy all the files and paste it inside the USB flash drive you just formatted using the command prompt.
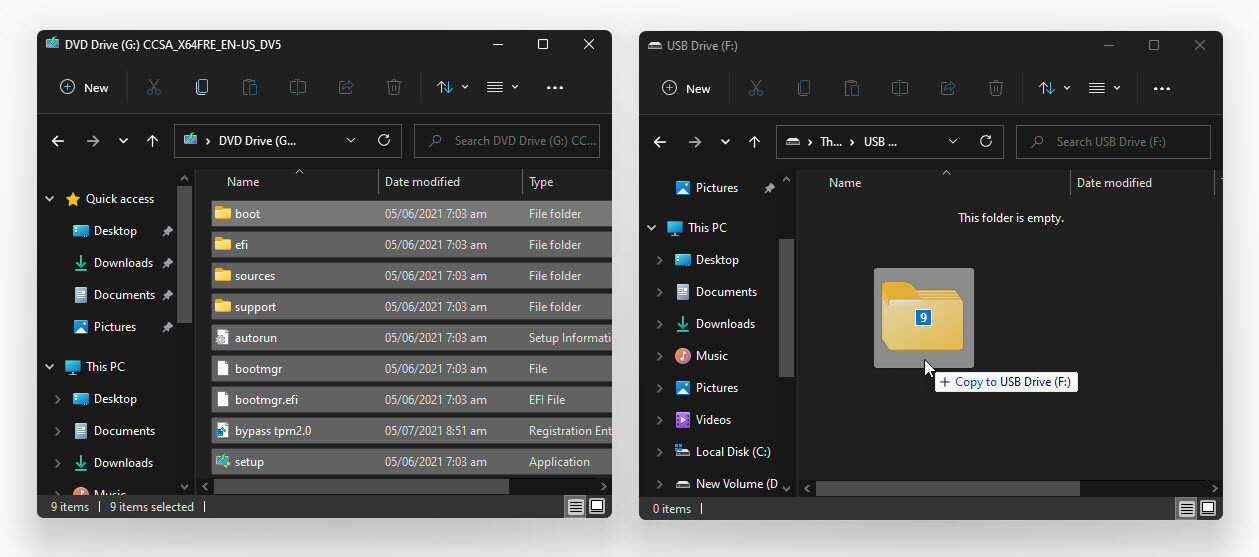
Copy Windows 11 ISO File to USB Flash Drive
Summary:
I’m hoping that you have learned the easiest method to create a windows 11 bootable USB without any issue. However, there is also another method that you can use to create Windows 11 Bootable USB and that is the command prompt.it is a long shot but it can do the job to create windows 11 bootable USB.
Leave a Reply