Microsoft has created many software over the years, talking about communication apps, Skype and Microsoft Teams are some of them. During the Pandemic, People started using more Microstf Teams which leads to Adding the Apps in Windows 11. If you are not using Microsoft Teams, You have to learn How to Disable and Uninstall Microsoft Teams in Windows 11. Also, How to hide its icon from the taskbar.
In other words, you can put it this way too, that Microsoft is Forcing their users to use Microsoft Teams, which I hate a lot. If you have not used Microsoft Teams, It is an application for audio, video calls, one on one chat conversations, group messaging, synchronizing schedules, and more.
By default, if you have upgraded to Windows 11, or performed a clean installation of Windows 11, you will see the icon is attached in the taskbar. Which is annoying if you are using other apps like Skyper, Zoom, Google chat, WebX, and more. Also, Microsoft has integrated the app in a way, even if you are using it, it will use your PC’s resources in the background. Which is not cool at all. So, if you are not using the Teams, follow the below instructions to Hide, disable or uninstall it.
1. Hide Microsoft Teams Chat from Taskbar
Apparently, Windows 11’s taskbar is a bit different compared to Windows 10, and most of the time for beginner users it is a bit confusing. Even if you right-click on the Chat icon, you won’t see the option of “unpin from the taskbar”. So, follow the instruction below and Hide Microsoft Teams Chat from Taskbar.
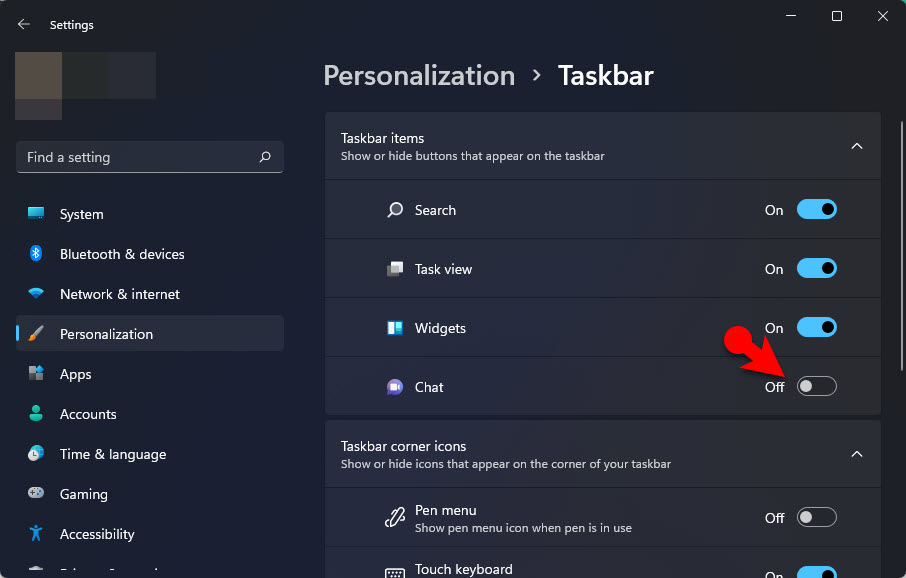
Right-click on the taskbar and choose taskbar settings.

Access Taskbar Settings.jpg
Uncheck the box of the Chats and it will disappear from the Taskbar.
Hide Teams from Taskbar
2. Stop Microsoft Teams from Running in the Background
Apparently, removing those apps from the taskbar will not stop the app from running in the background. You can see it in the taskbar corner overflow.
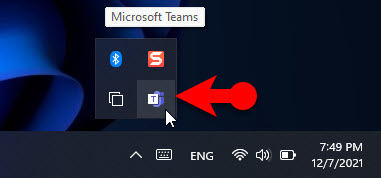
Teams Running Taskbar corner
To Stop the App running in the background, you have to manually set it in the settings to stop it in the background. Right-click on the start menu and choose settings or press Windows + I to open the Settings.
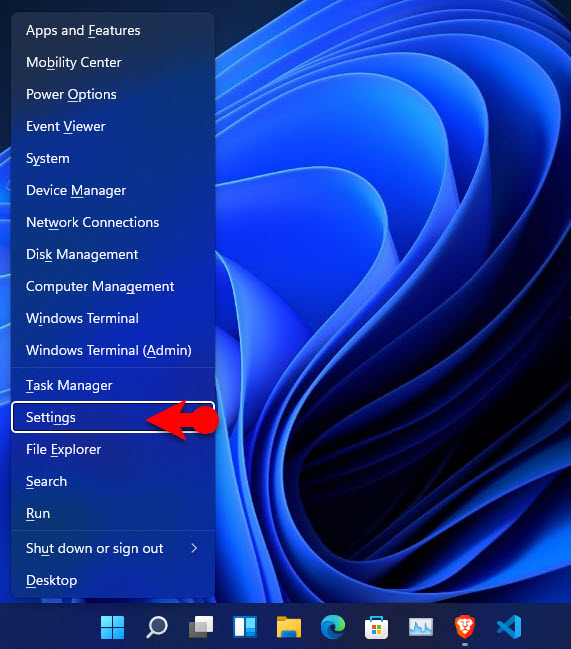
open Settings
Click on the apps and choose the Apps & Feature.
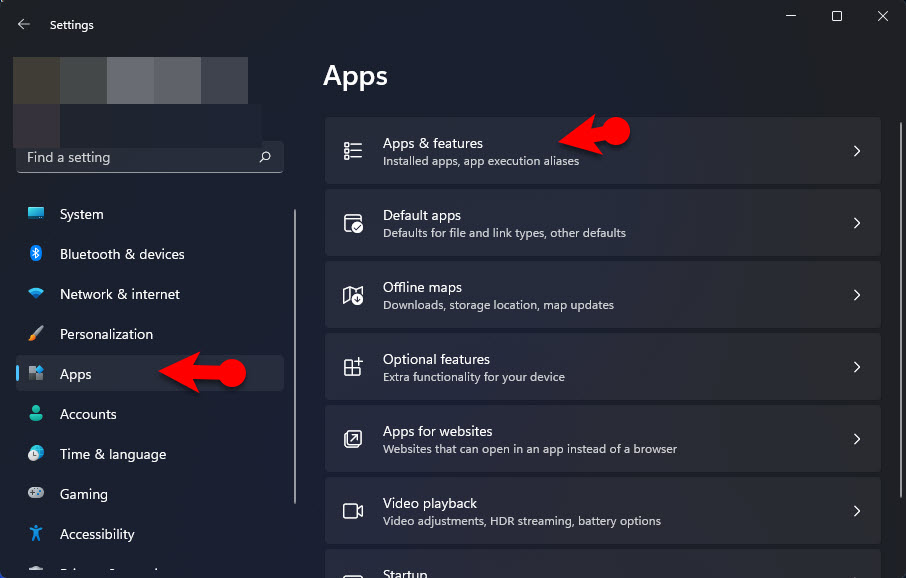
Access Apps and Features
Find the Microsoft Teams among the other installed applications, then click the three dots and choose advanced options.
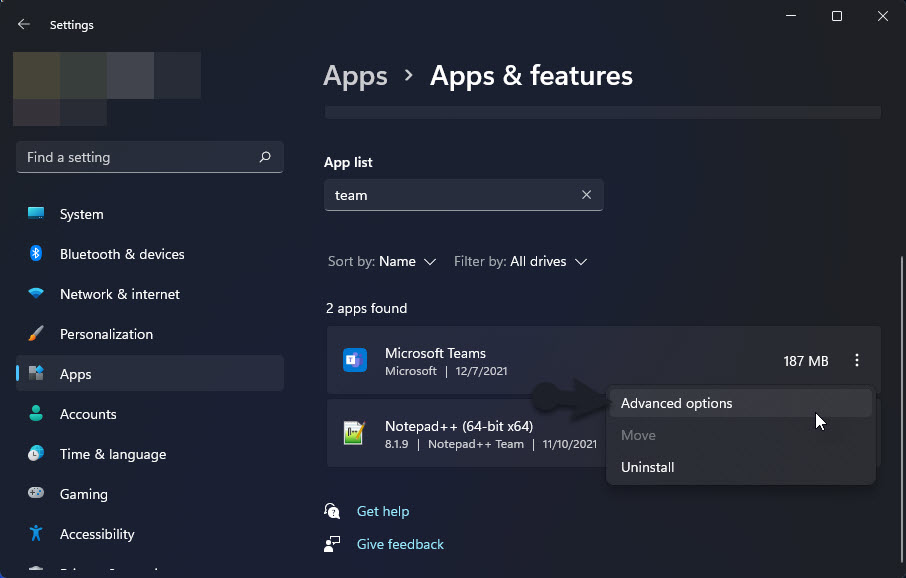
Microsoft Teams Advanced Options
Under the background apps permission, click on it and choose never instead of Power Optimized (Recommended).
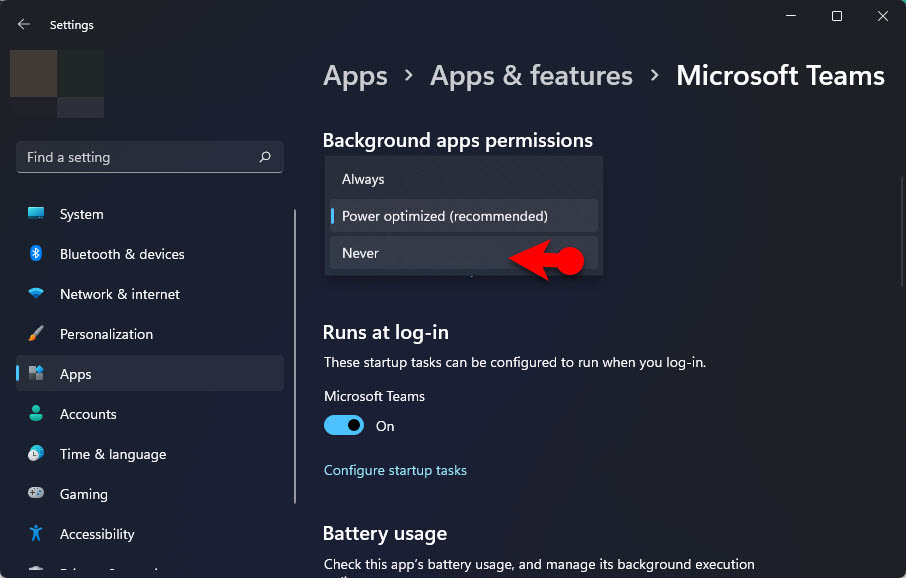
Stop Microsoft Teams from running in the background
3. Disable Teams in Windows 11 in Startup
Step #1. Right-click on the start menu and choose Task Manager or press the Ctrl + Shift + T to open Task Manager. You can also press Windows + X instead of Right-click, then choose Task Manager. The moment the Task Manager is opened, click on the More Details.
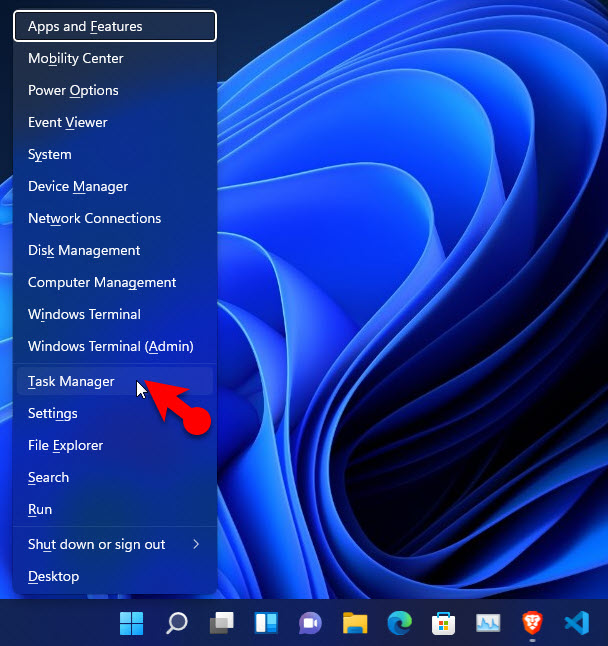
Open Task Manager
Step #2. Go to the startup tab, find the Microsoft Teams, and disable it while starting Windows 11.
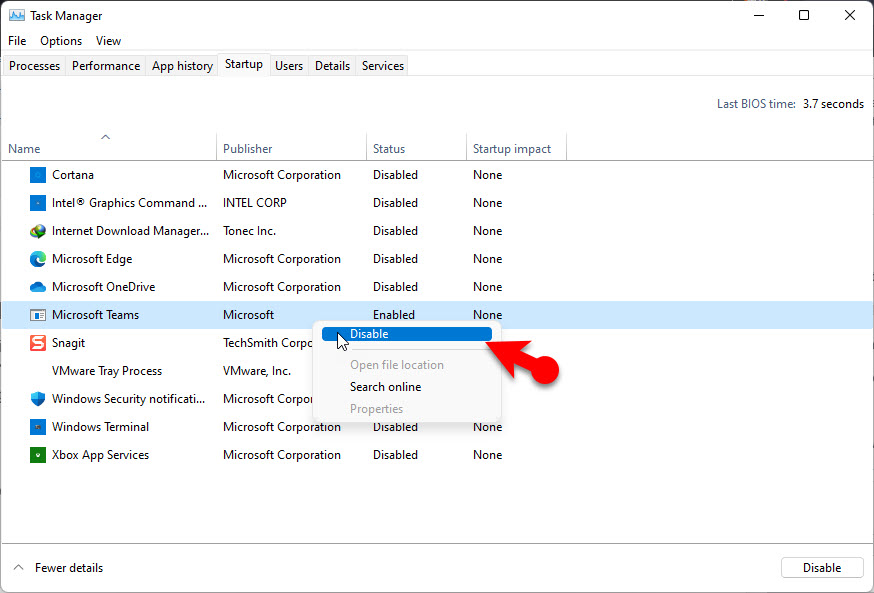
Disable Microsoft Teams in Startup
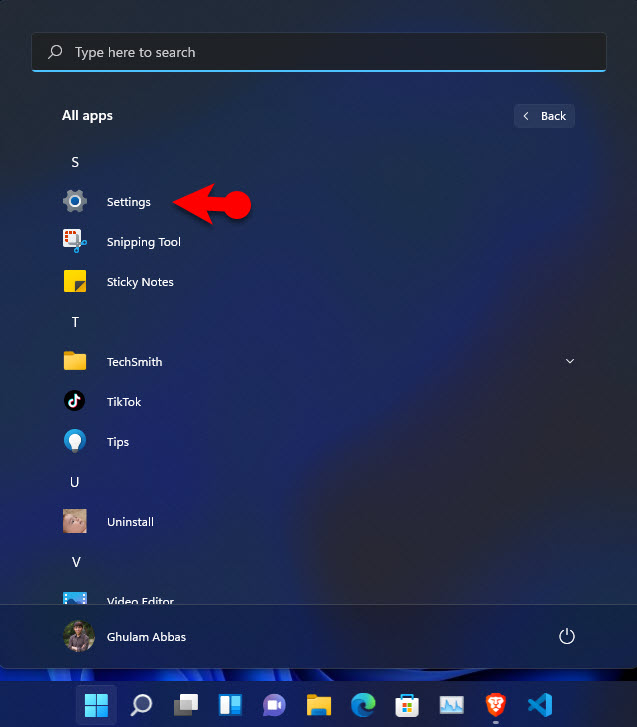
3. Uninstall Teams in Windows 11
To uninstall Microsoft Teams in Windows 11, click on the start menu and open the Windows Settings. You can also press the Windows + I which is the shortcut to open Windows Settings.
Open Windows Settings
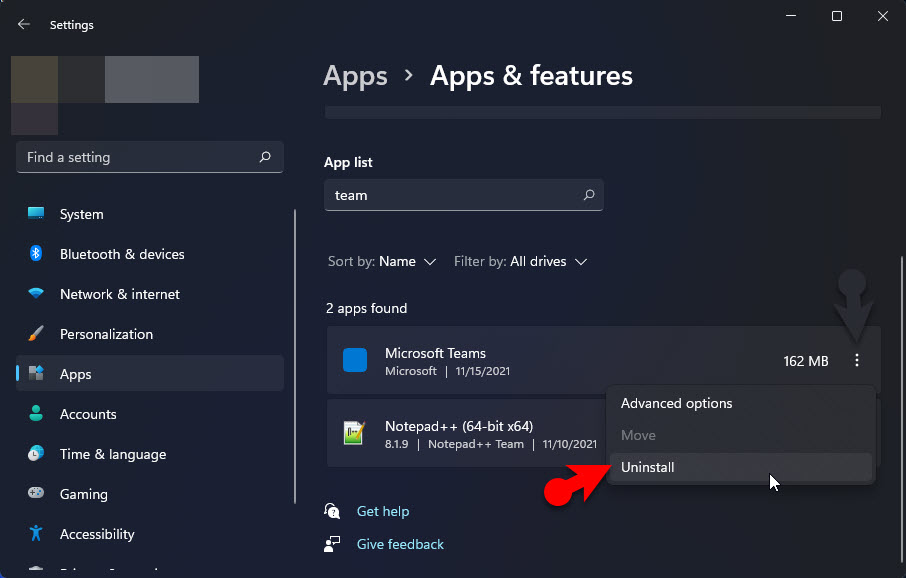
Step #2. After opening the WIndows Settings> click on the Apps at the left side and choose Apps & features.
Access Apps and Features
Step #3. You can search for it, or scroll down and find it, then click on the three dots and choose to uninstall.
Uninstall Microsoft Teams
Conclusion
This is the easiest method that you can use to avoid the Microsoft Teams by running in Windows 11. I hope you have liked this article and let me know if you have any questions.
Leave a Reply