There is no need for learning any graphic skills for adding a watermark on the images that you are taking you using your Samsung Galaxy phone. In fact, you can enable the Watermark settings within the camera so next time you took a photo automatically the watermark will be attached to it too. Keep in mind that the full functionality of the watermark is available within Samsung’s One UI 5.0. Within the older versions of Samsung one UI, you can only add a watermark text which will force the Samsung text alongside the camera logo. within the one you are I 5 Point O, you can customize the font, and add dead and time, there will not be any Samsung text and the camera logo. Anyway, let’s focus on How to Take Watermark Photo using Samsung Galaxy Phone?
How to Take Watermark Photo using Samsung Galaxy Phone?
- Open the camera app on your Samsung Galaxy phone
- Then you have to tap on the gear icon AKA settings in order to enable the watermark in the first place.
- Following up, once you are within the camera settings menu, you have to scroll down to the pictures category and easily toggle the watermark to enable it (In other Samsung Galaxy Phones, Watermark may be located under the General category).
- By default, the watermark text will be the name of your device but you can change it. Tap on Watermark, then your own text, and following that save the changes.
- Now if you go ahead and take a Photo, at the left bottom of your screen the Watermark will be there.
-
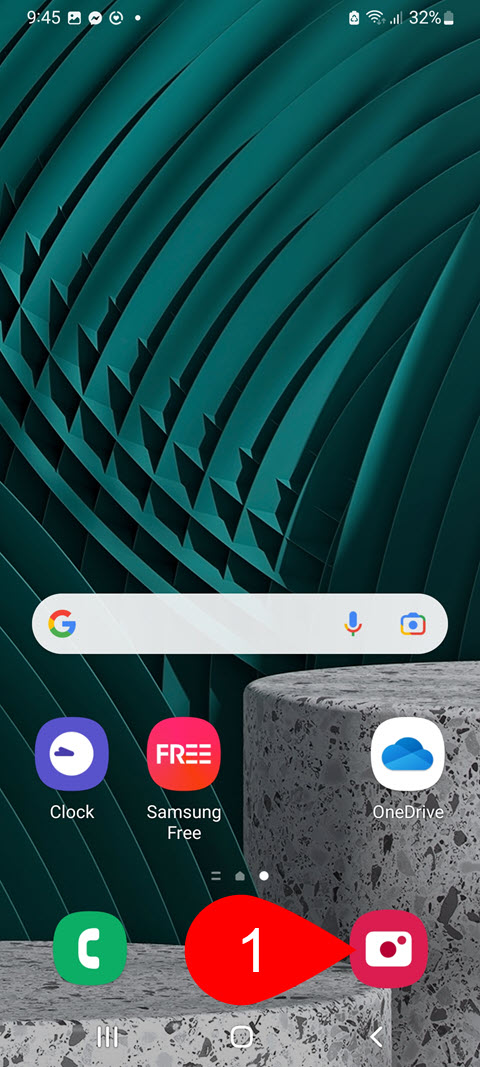
- 1. Tap on the Camera
-
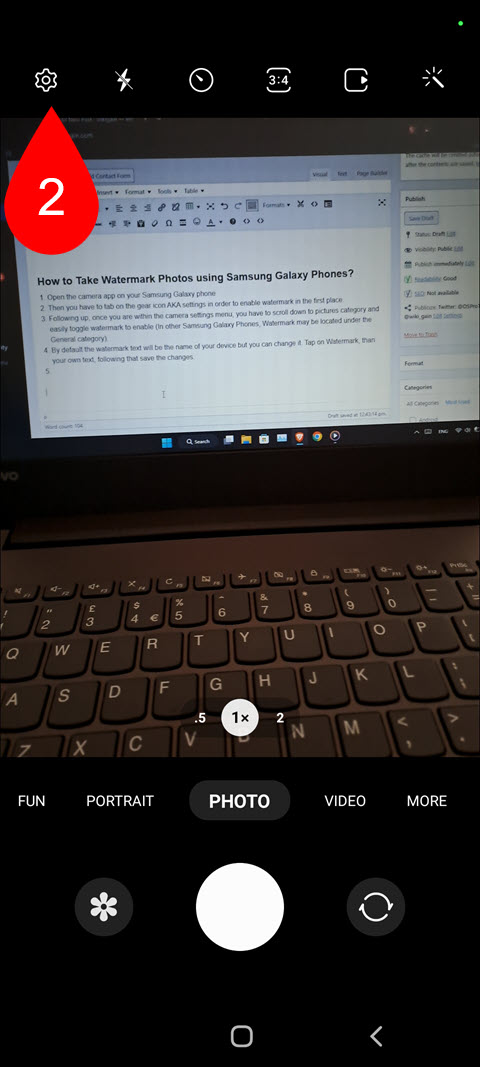
- 2. Tap on the Gear icon
-
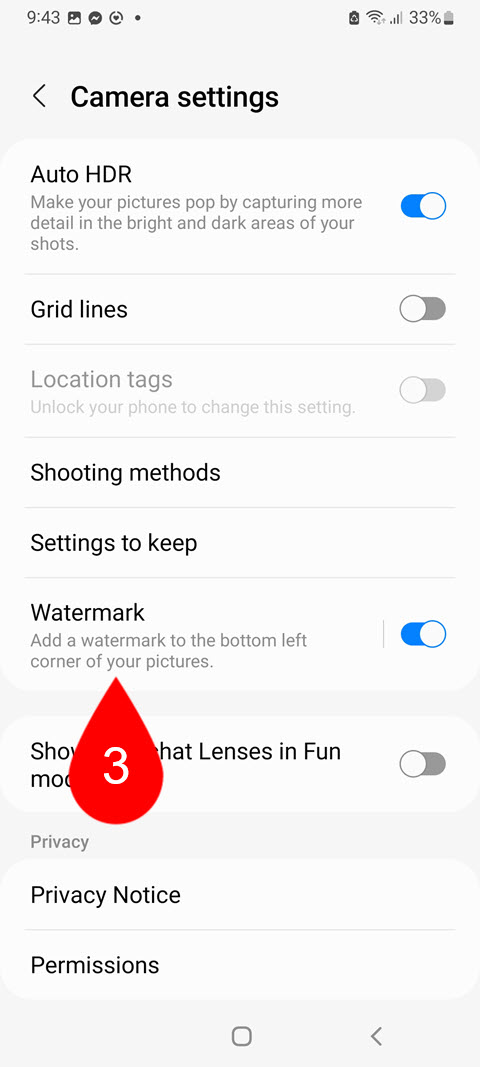
- 3. Enable Watermark
-

- 4. Change the Watermark Text
Take a Look at the Photo with the watermark.
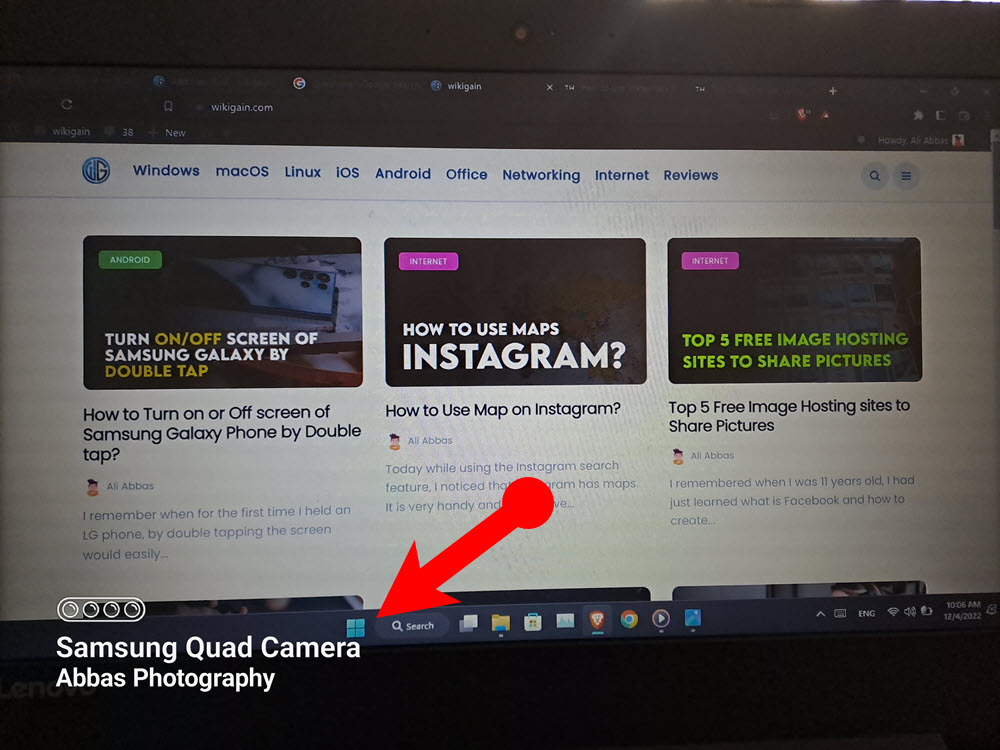
Photo Taken with Watermark
Points to Keep in Mind:
- Not every Samsung Galaxy phone has the ability to customize the watermark such as Galaxy A33 which only gives you the ability to change the watermark name. And when you take pictures, a Quad-core logo, alongside the label called “Samsung Quad Core” will appear, and underneath your own text will be there.
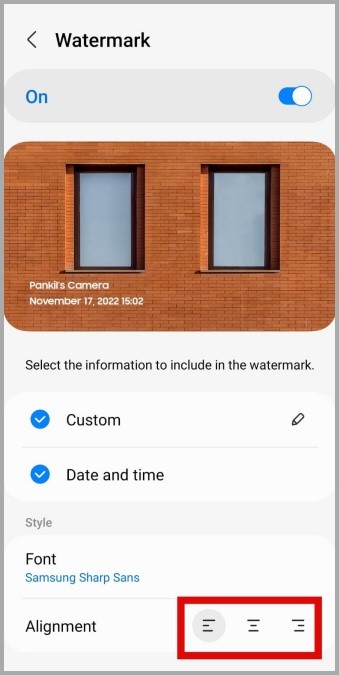
- Your Samsung Galaxy Phone may give you the ability to change the watermark alignment and add a date and time.
- You can also the Font of Watermark.
Configuring Watermark settings
Erase the Watermark From the Photo using the Object Eraser
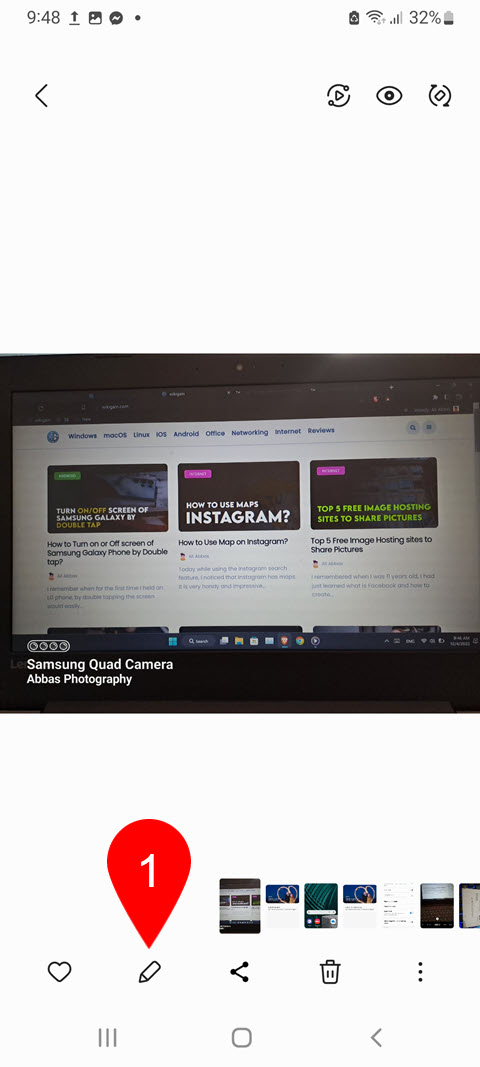
- Launch the Gallery app, and view the image that you want to remove its watermark.
- Tap on the edit icon (It has the pencil icon)
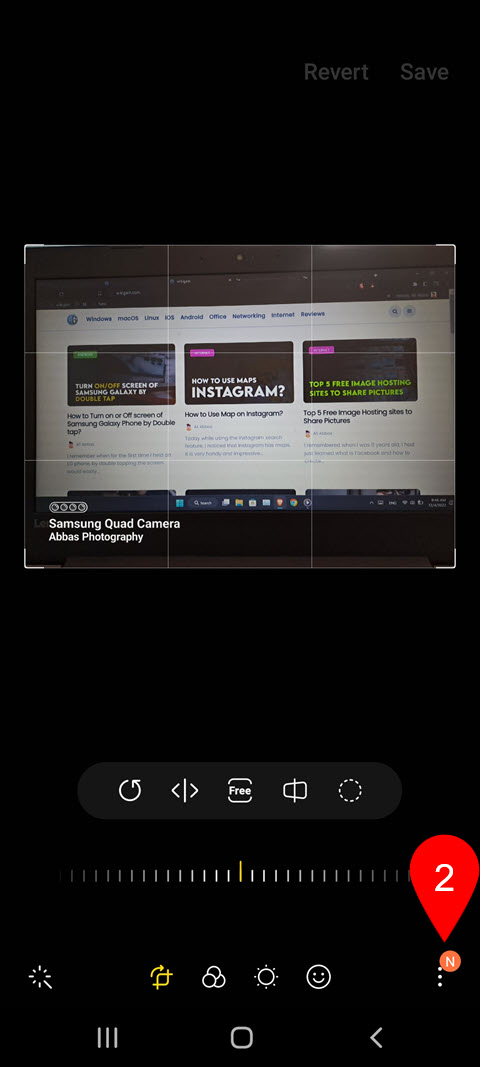
- Tap on the three dots.
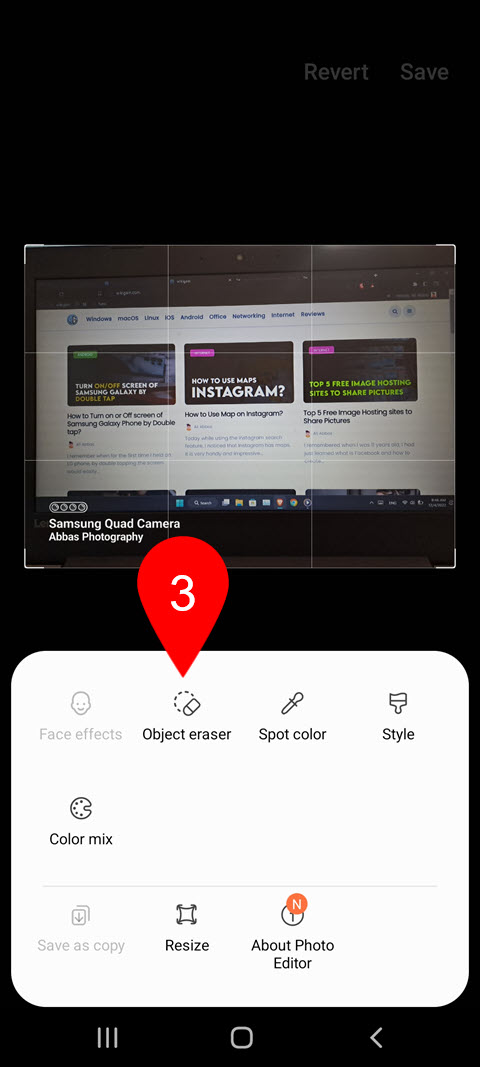
- Choose Object Eraser
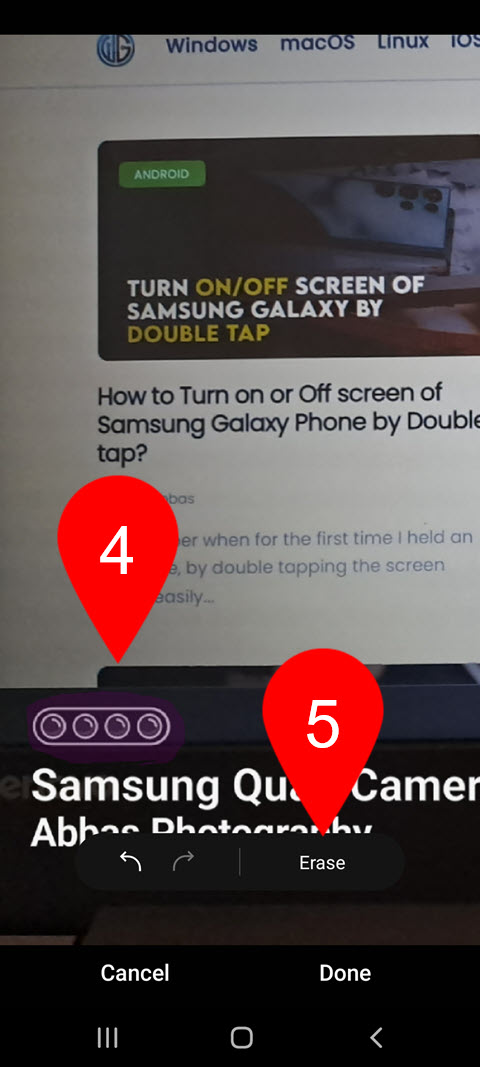
- Simply highlight the watermark section.
- After highlighting tap on erase.
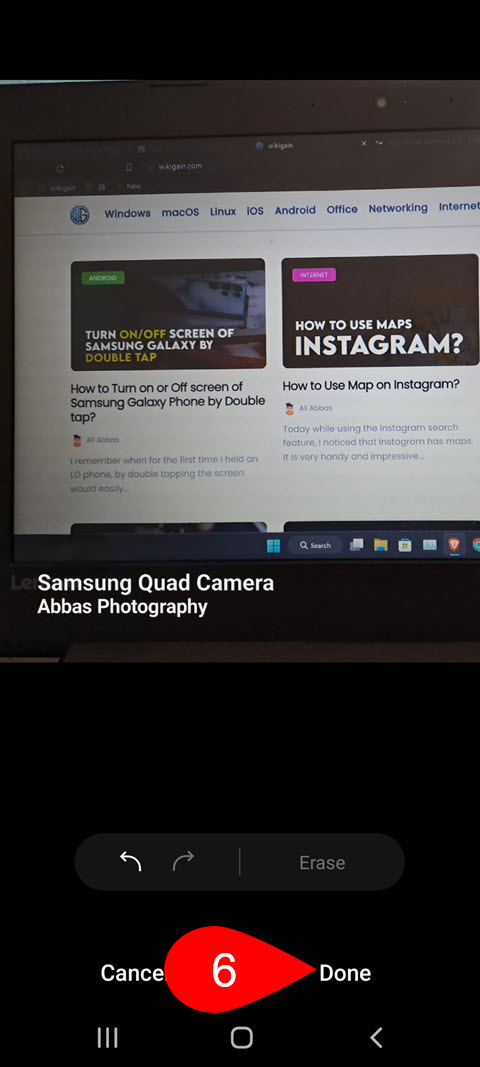
- Once it is done, tap on done.
- Save the changes.
-
- 1. Tap on Edit button
-
- 2. Tap on three dots
-
- 3. Choose Object Eraser
-
- 4. Highlight the section to remove
-
- 5. Tap on Erase
-
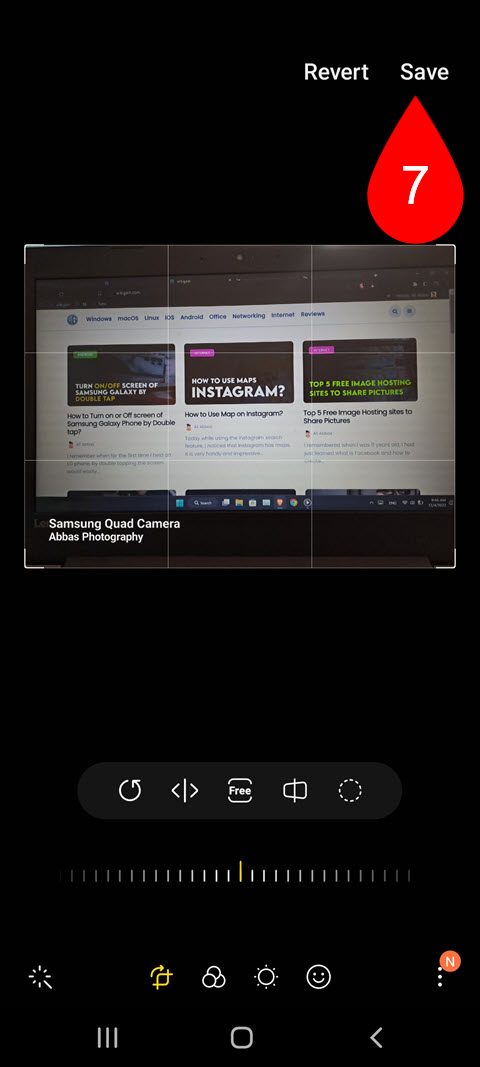
- 6. Save the Changes
Have a look at the below photo which I have removed the Quad Core Logo using the Object Eraser.

Removed Watermark
Conclusion:
By Now I am assuming that you have learned How to Take Watermark Photos using a Samsung Galaxy Phone. Aside from that, erasing the watermark can be done using online tools too, for instance, zmo.ai will do the job if you are not interested in using the object Eraser.
Leave a Reply