One of the easiest ways that you can test any operating system on your computer is to install it on a virtual machine. Up until now, the best virtual machine software is known as VMWare workstation Pro which is quite powerful and can support every operating system on the market. That includes the MacOS Ventura which was announced on 6th June of 2022. The point is once the installation is completed, you have to install the drivers of that operating system too. In the case of drivers for the virtual machine inside VMWare, it is called VMWare tools. So, if you have just installed macOS Ventura on VMWare workstation pro then you must know how to Install VMware Tool on macOS Ventura.
What is VMware Tools?
VMware tools are a set of drivers and utilities that enhance the performance of a virtual machine’s guest operating system. In other words, VMware tools are used to improve the speed, reliability, and functionality of an operating system within a virtual machine. VMware tools enable features such as time synchronization and mouse integration with the guest operating system.
VMware Tools is included in all VMware products but sometime while installing VMware tools you face an error called “Could not Find Component on update server“.
The VMware tools provide many benefits to the users including:
- Improved performance: VMware tools improve performance by increasing maximum memory, reducing disk activity, and improving network throughput.
- Reliability: The VMware tools are designed to detect and report hardware configuration changes, which improves the reliability of virtual machines.
- Monitoring: The VMware tools provide monitoring capabilities for CPU utilization, disk latency, and disk space among other things.
- Troubleshooting: The VMware tools can be used to troubleshoot issues like network connectivity problems etc. because they are installed in the guest operating system itself.
Steps to Install VMware Tools on macOS Ventura?
Go to VM menu> click on the Install VMware tools.
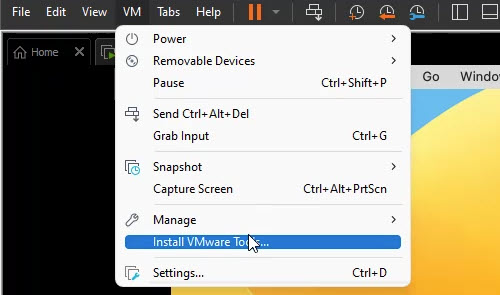
Install VMware Tools
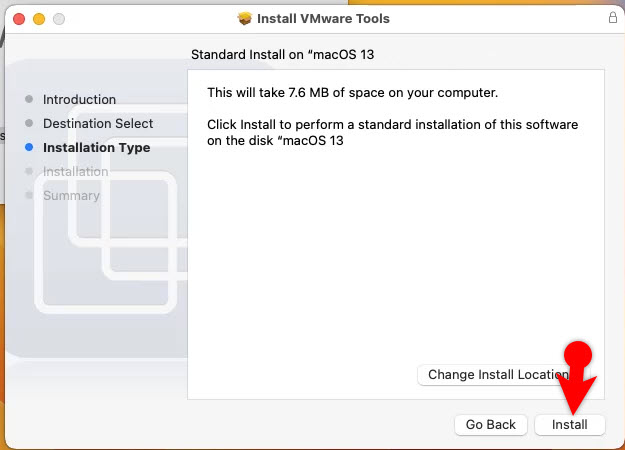
Once the Vmware Tools are opened, click on the Install VMWare Tools.
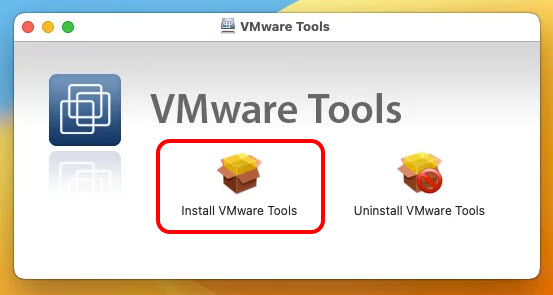
Click on Install VMware Tools
Click Continue> continue> Install> and enter your password.
-
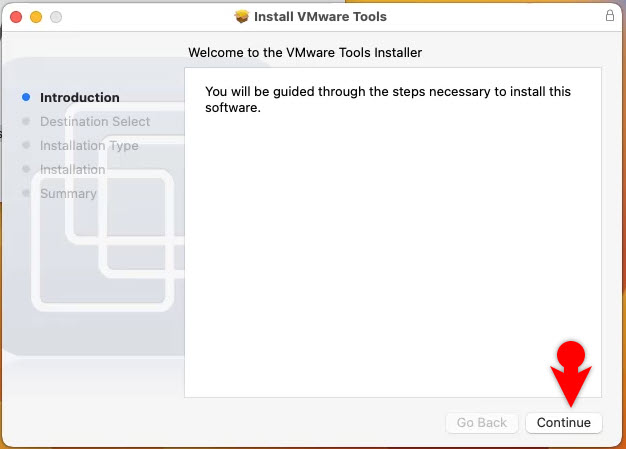
- Welcome
-
- Install
Click on Ok if you see the installer would like to modify your computer.
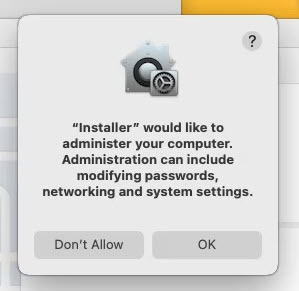
Permission
Then click on the Open Security preferences.
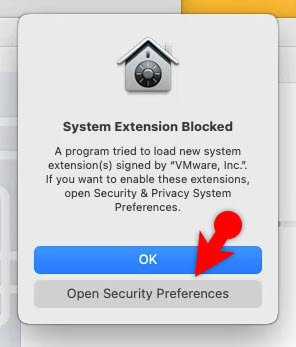
Open Security Preferences
Go to the privacy and Security> Scroll to the end and choose Allow> enter your password.
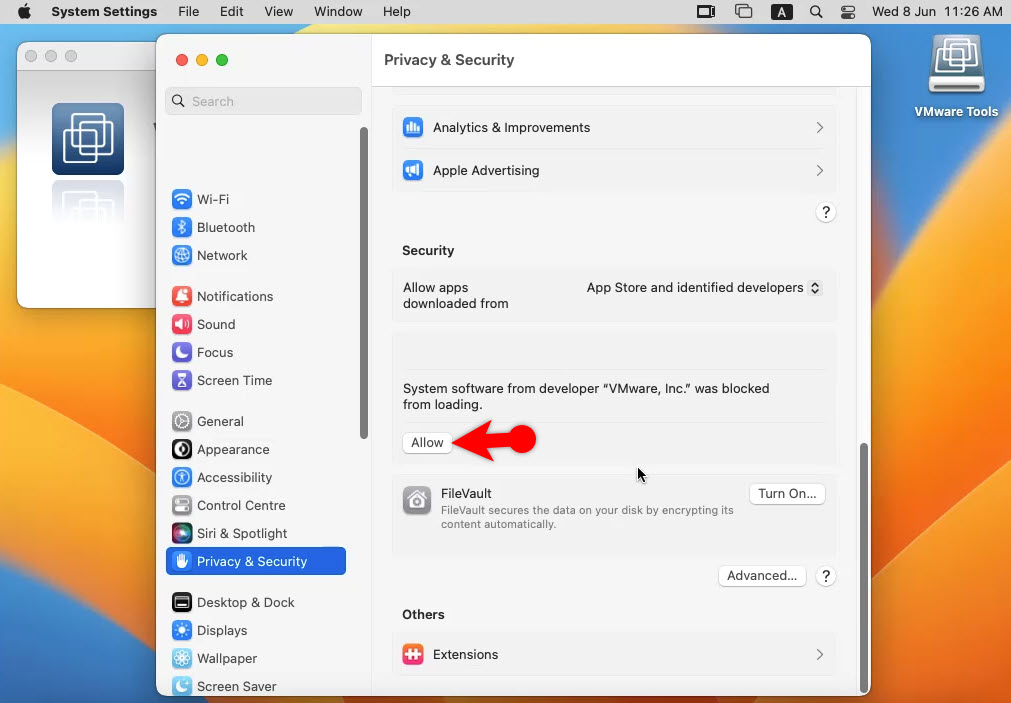
Allow VMware Inc
Once the VMware Tools are installed, restart your Virtual machine.
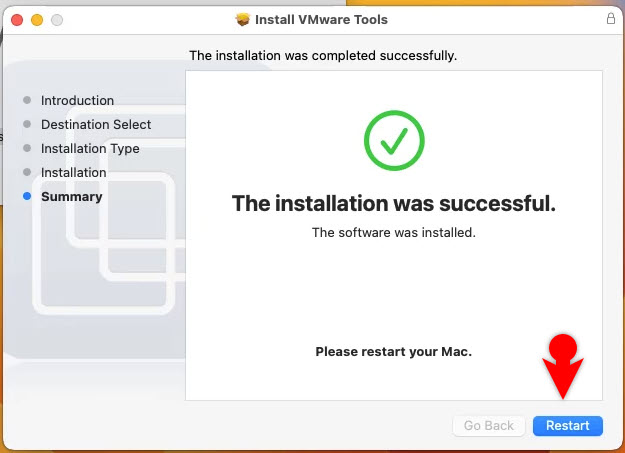
Restart the VM
How to Fix Could not Find Component on update server?
If you focus exactly on their error it is saying that a component is missing from the virtual machine. It means the VMware tools come into packages that are already available on the drive C of your computer when you install VMware. But unfortunately, sometimes it cannot find or the file is not available within the drive C of the VMWare Workstation. So in order to fix it follow the below steps.
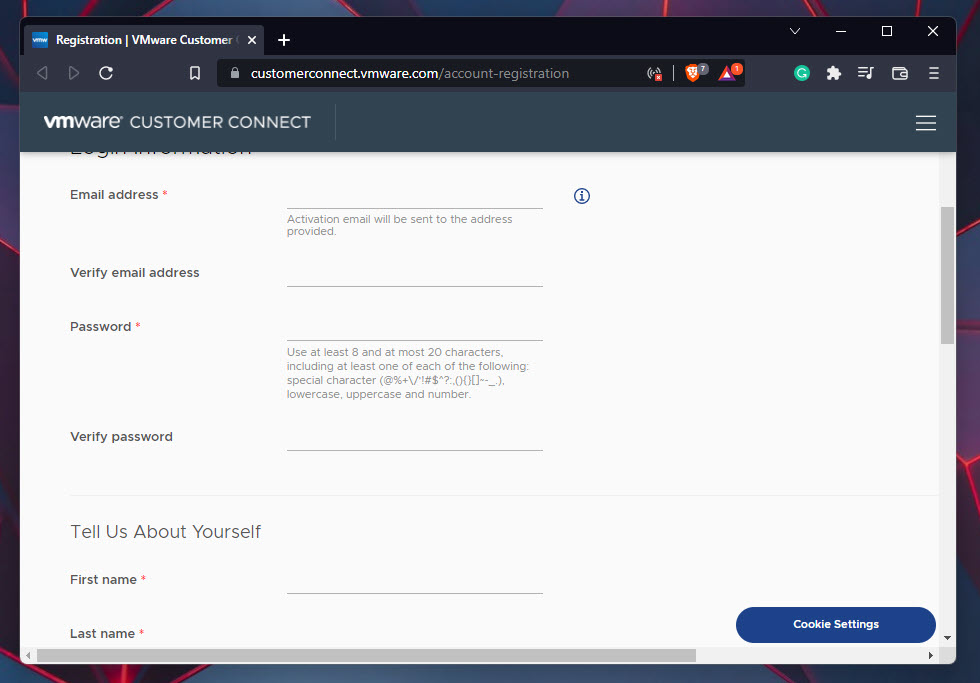
Step #1. Sign up on VMware
Even if the VMware tools are missing from the virtual machine, you can download them free from VMware’s official website. You must create an account inside VMWare then you can get the VMWare tools for any guest operating system that the VMWare is supporting.
Signing up for VMWare is not hard, all you have to do is enter your personal information such as email, Phone number, address, company name, and more.
Sign up for VMWare
Step #2. Download Darwin.iso image
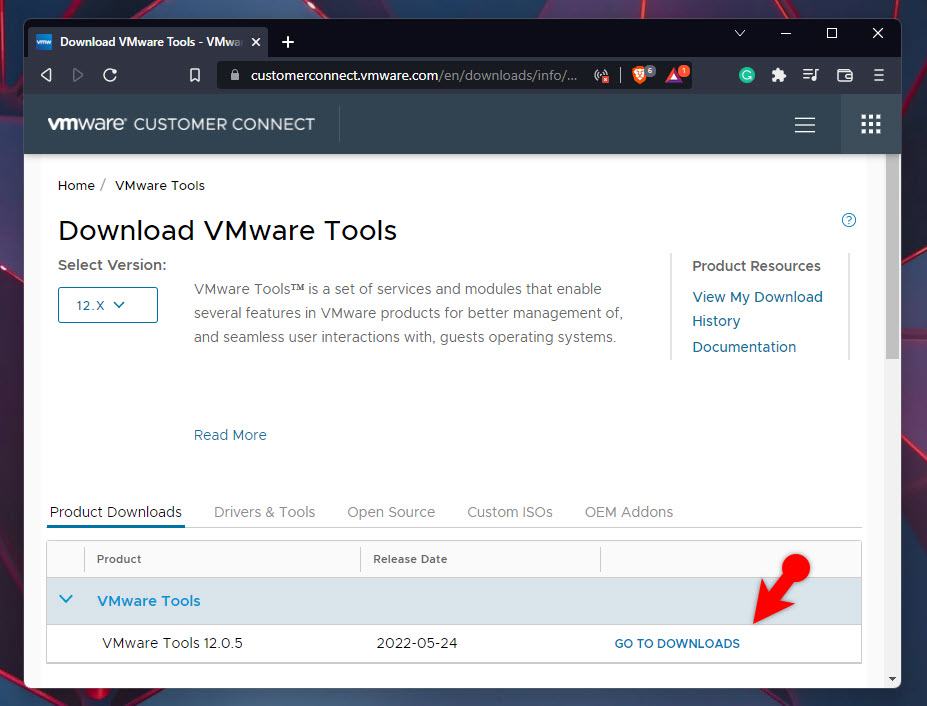
After signing up for VMWare, make sure that you are signed in, and then click on the below link, it will take you to the download section of the VMWare tools.
Once you are on the download section of VMWare tools, click on the go-to downloads.
Go to the Downloads Folder
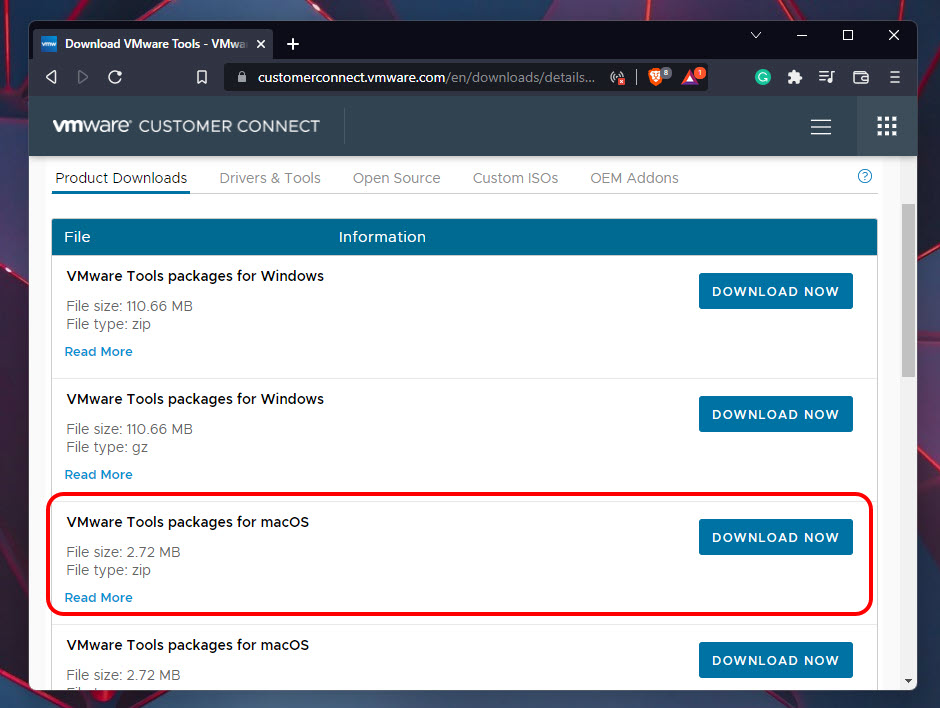
Right now you will see all the VMWare tools for the different guest operating systems. You have to find the VMWare tools for MacOS and download the test version.
Download VMware Tools for macOS
Before downloading the VMware Tools, you have to agree to the end-user agreement.
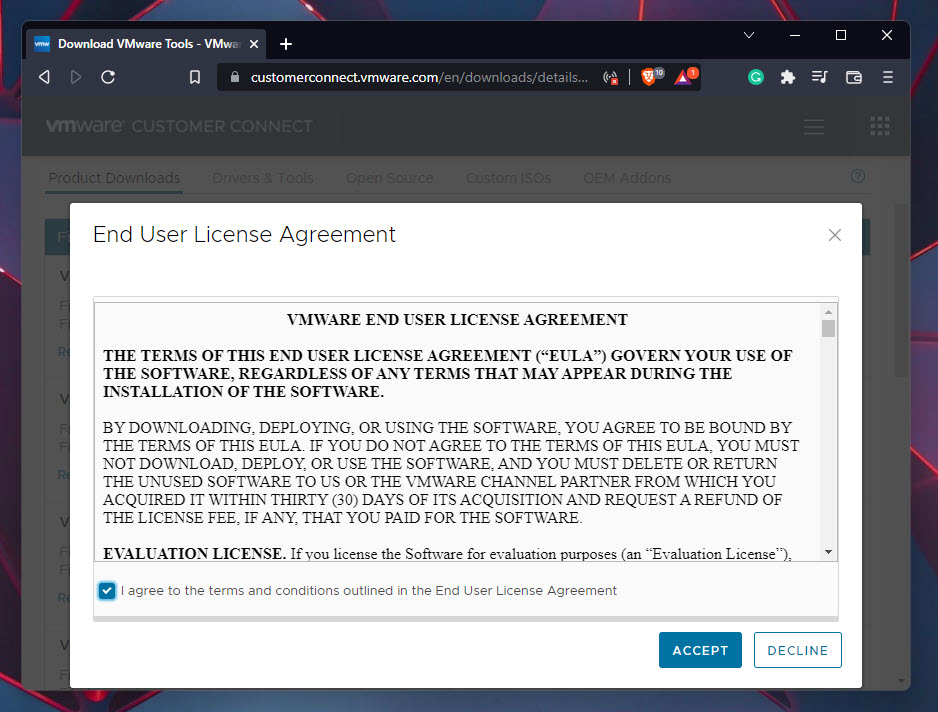
Agree to the user agreement
After downloading the VMWare tools for MacOS, you have to extract them. Please keep in mind that the VMWare tools for MacOS are called Darwin.iso.

Extract the ISO
Step #3. Add Darwin.iso to the VM
For the final step, you have to attach the downloaded VMWare tool known as Darwin.ISO to the MacOS virtual machine. To add it, go to the VM menu> click on the settings> select CD/DVD(SATA)> after that select Use ISO image file and locate the darwin.iso.
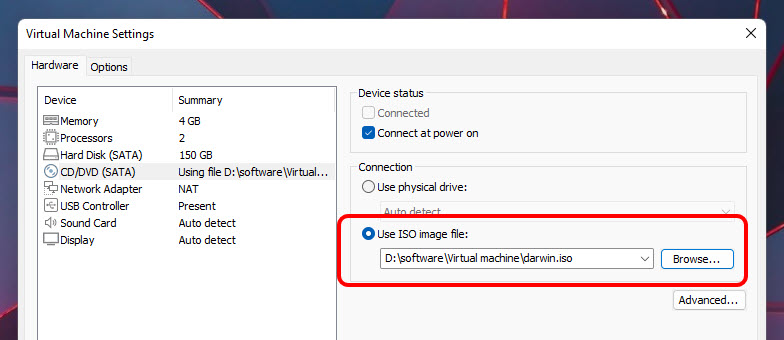
Add darwin file to CD DVD ROM.jpg
Step #4. Start Installing VMware tools
For the final step, once it is added, you have to start installing VMware tools as it is explained at the beginning of this post.
Conclusion:
I am hoping that you have learned what is VMWare tools, how to get them, and finally Install VMware Tool on macOS Ventura. Let me know if you have a problem with installing VMware tools, I will do my best to help you.
Leave a Reply