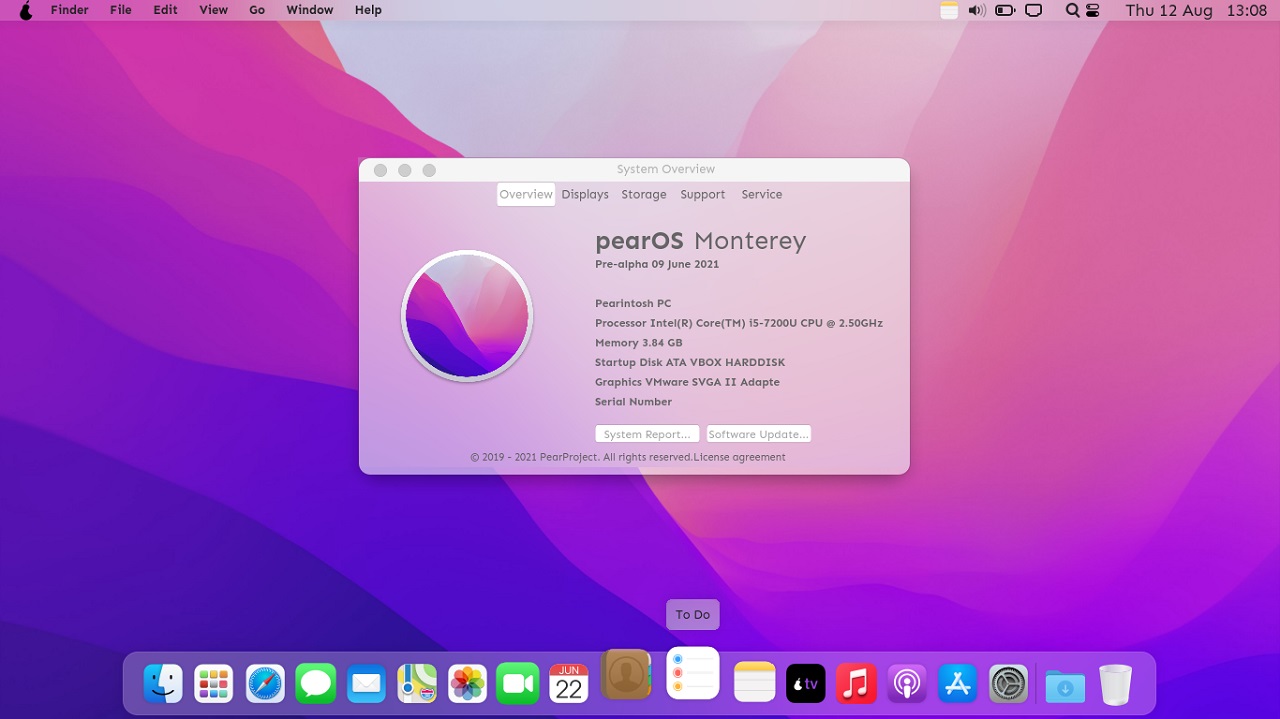
You have definitely heard about the macOS Monterey, and it is the new operating system that is replacing the macOS Big Sur on apple computers. However, do you know that there is an operating system that is similar to the macOS but it is a Linux distro, and the theme and the look are basically from the macOS? If you don’t know, well, now you know. Because pearOS is that Linux distro that has the macOS features (Kinda). And in this post, I will guide you How to Install PearOS on PC inside the Virtual machine.
Install PearOS on PC
It is a new Linux Distro which is built under ubuntu but it has the look of the macOS. At the moment I can see PearOS Catalina, PearOS ThiccSur, and finally PearOS Monterey on their official website. For this article, I’m going to use VirtualBox, and then inside it, I’m going to install the PearOS Monterey.
Step #1. Since PearOS Monterey is an open-source operating system, I will also use the open-source virtualization software. It is called VirtualBox, so, the first step is to download both of them and you can get them from the below links.
Step #2. The moment you downloaded the required software, you’ll have to install VirtualBox on your computer. Then you need to create a new virtual machine specifically for the PearOS, you can leave the name as Ubuntu too. Or you can follow the below steps.
- Open the VirtualBox and click on the new button on the homepage.
- When the VirtualBox’s virtual machine wizard is open, click on the expert mode.
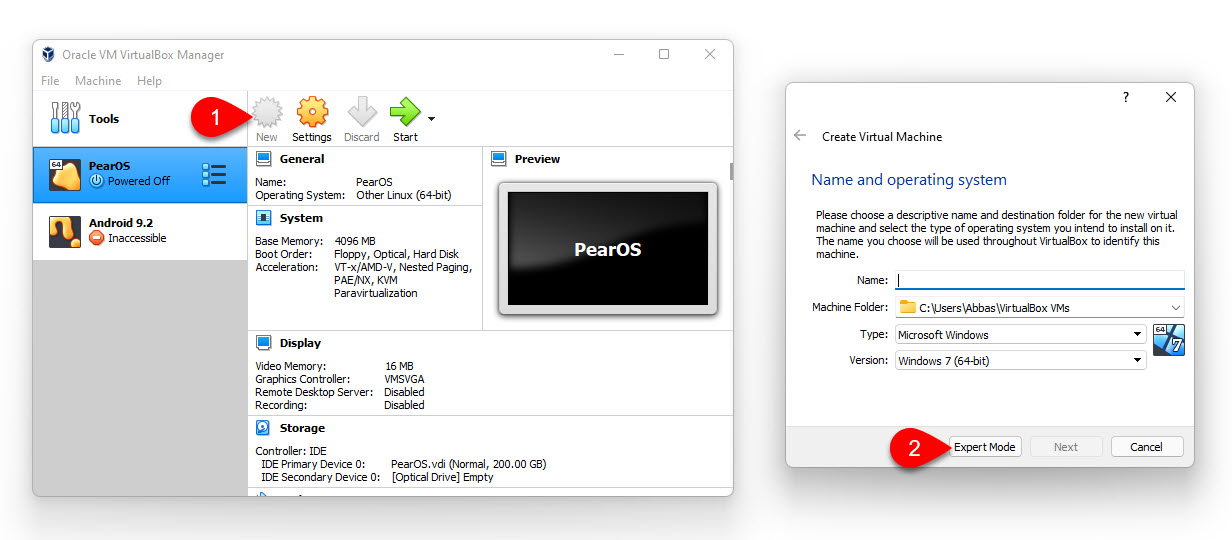
Enable Expert Mode
Step #2. For this step, you have to provide a name to the virtual machine and then make sure that the operating system type has to be Linux with the other 64 bit Linux operating system. For reference, you can follow the below screenshot.
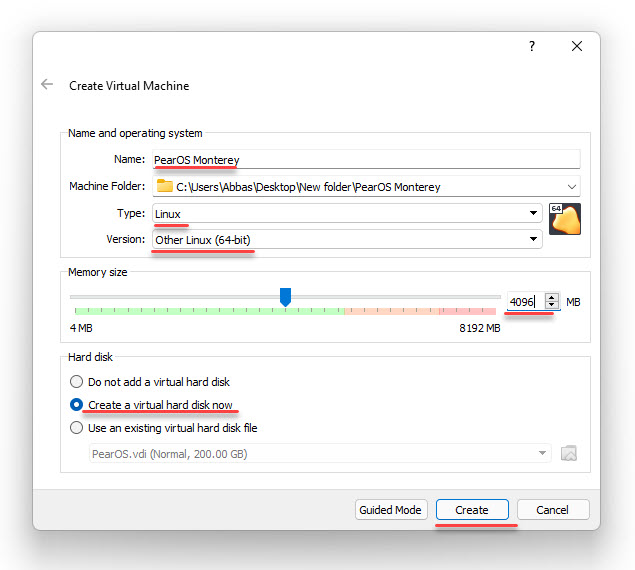
PearOS Monterey VM Details
Step #3. You have to enter the amount of storage that you need for the PearOS Monterey. I will go with 100 GB of storage for testing purposes but 20 GB will be totally fine.
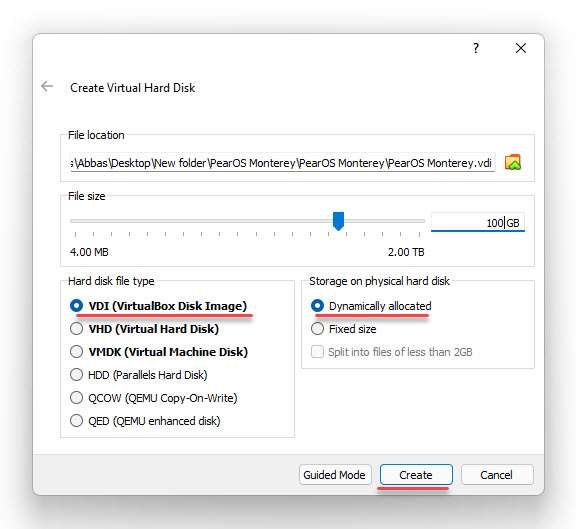
PearOS Monterey Storage Size
Step #4. We have to attach the PearOS Monterey to the Virtual machine from the settings. Go to the settings> Storage, and add the ISO Image to VM.
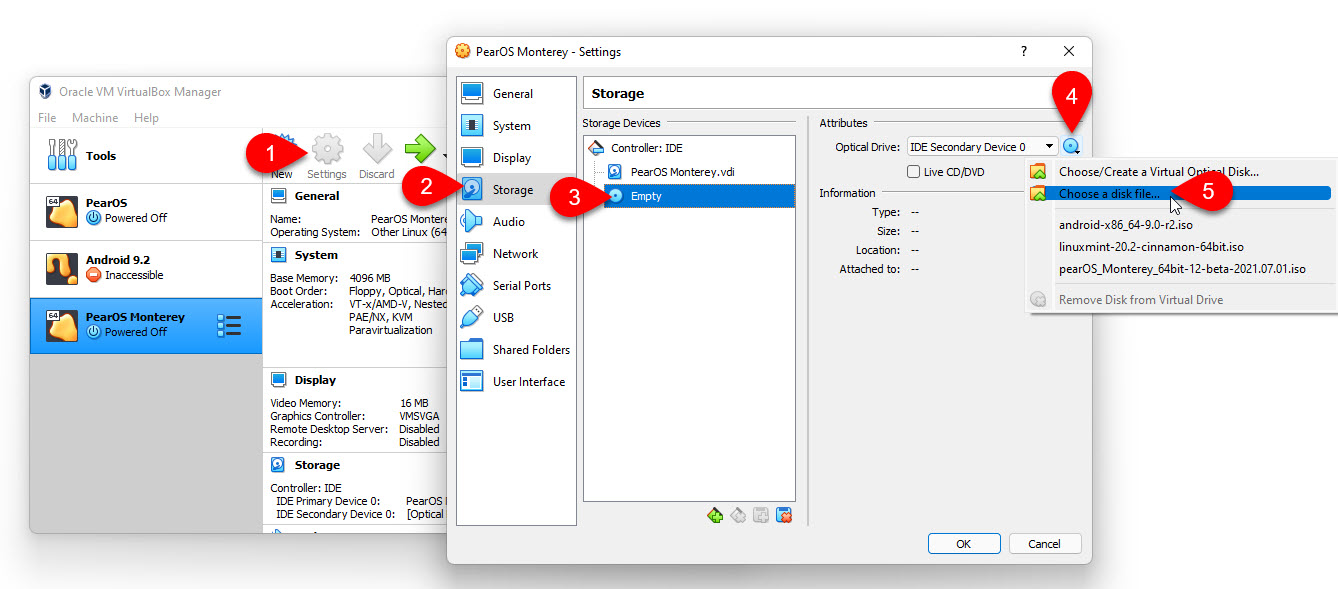
Add PearOS Monterey ISO Image to the VM
Step #5. This is the step where we are going to start installing PearOS Monterey on the VirtualBox on Windows machine. So, click on the start button at the homepage.
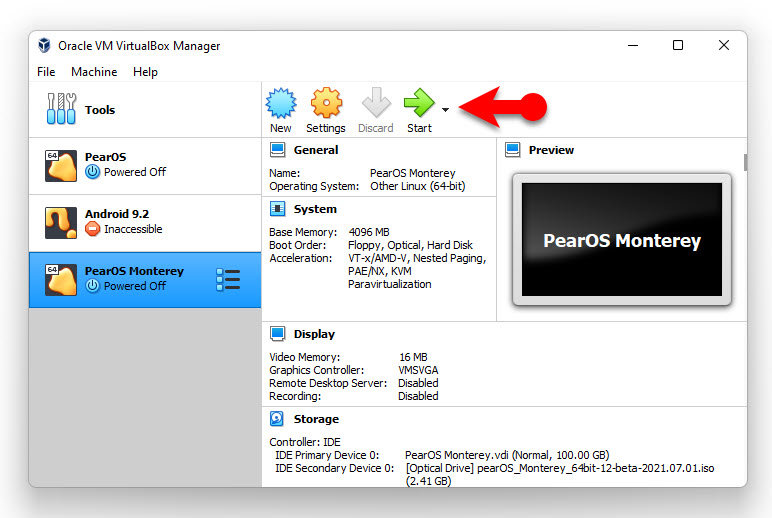
Start the VM
Step #6. When you power on the VM, wait a moment until the OS is running live on the VM. Double click on the PearOS Monterey to launch the installer for the PearOS Monetary.
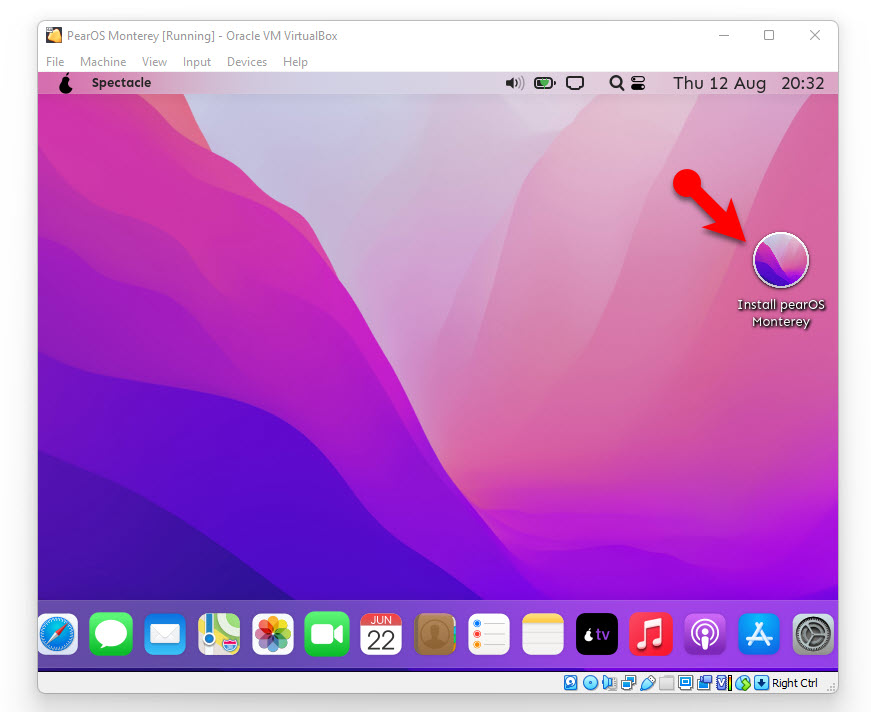
Launch PearOS Monterey Installer
- Choose a Language and click next.
- Select your location and move on.
- Choose a Keyboard and click next.
- Click erase the disk to wipe everything and go on to the next step.
- Insert your personal information and enter a password.
- Now, wait until all the files are copied inside the Virtual machine.
- Once the installation is done, restart the operating and make sure that the PearOS Monterey ISO is removed.
Summary:
If you have never used a macOS operating system, probably you can’t install it in VM or in a PC. It is a good opportunity, at least try to learn how the interface settings look in macOS. PearOS is an Open-source operating system, install it on a PC or a VM, the endpoint is, you don’t have to pay a single coin. These were the steps How to Install PearOS on PC using the VirtualBox in Windows 11, I hope it was helpful.
Leave a Reply