
If multiple people are using your computer, then it is better to create user account for each one of them separately. Mostly multiple users are used in an office environment or at home. Using multiple accounts on a single computer has a lot of benefits, and among them is seperating your account settings and files. The good news is that Microsoft have provided the option to create multiple users on a single computer, it does not matter whether it is an official Microsoft account or a local user account. By now you have got the idea that there are two types of account in windows, Microsoft account and local user. So in this article you are going to learn 3 methods of how to Create Local Windows 11 Users account easily.
1. Create Local user account using CMD
CMB is a very powerful utility which is available in every Windows operating system.. CMD works by taking commands and than it shows the result based on the command. There is a reason that I am recommending CMD to Create Local user account at first step because it is very fast and saves a lot of time. So, let’s begin the process.
Step #1. Run the CMD with Admin Privileges
In order to create a local user in windows 11 using command prompt, you have to make sure that it is running with the administrator privileges.Click on the search icon at the taskbar and search for CMD, when it appears simply choose the option of run it as administrator.
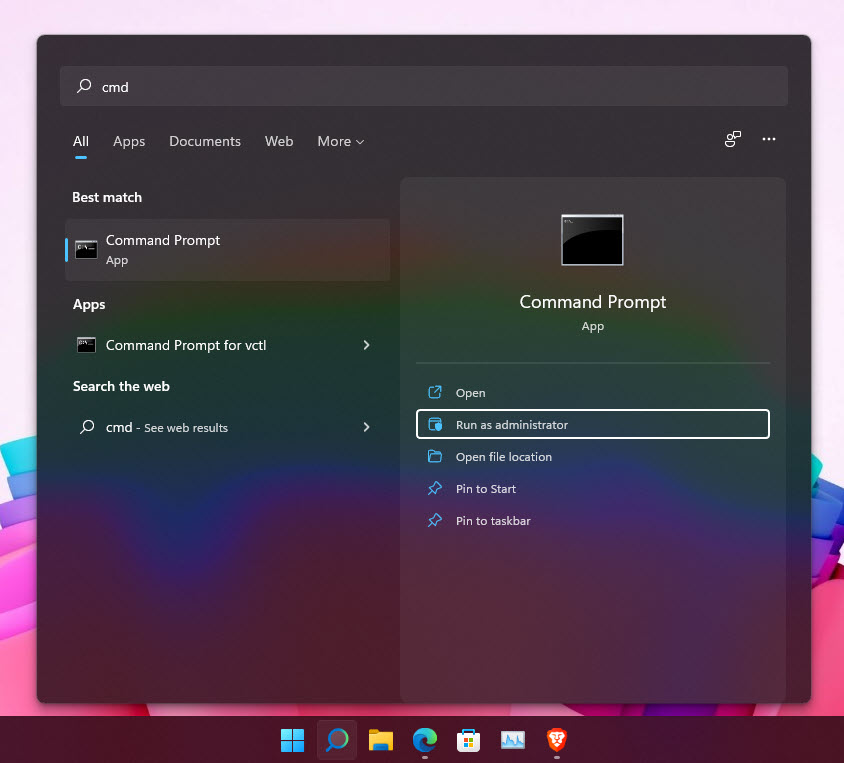
Run CMD as Admin
Step #2. Create a new Local User Account
The moment command prompt is launched, you need to try the following come on and press enter.
<strong>net user [username] [Password] /add</strong>
<strong>Net user Khaliq 123 /add</strong>
To see How many local user accounts are available, type <strong>net user</strong>.

Create a User account using CMD
Step #3. Change Standard user to Administrator
these are account that we just created, it is just a simple or stanard user account with limitataion. So, what if you are looking to make it an admin user account. Just type the following command.
net Localgroup Administrators khaliq /add
net Localgroup Administrators username /add
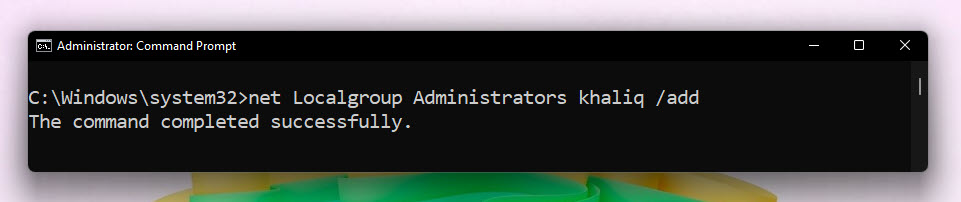
Make standard user an Admin using CMD
net user username
On the below screenshot you can see that in front of local group memberships, the administrators is written so it means it is part of the administrative group.
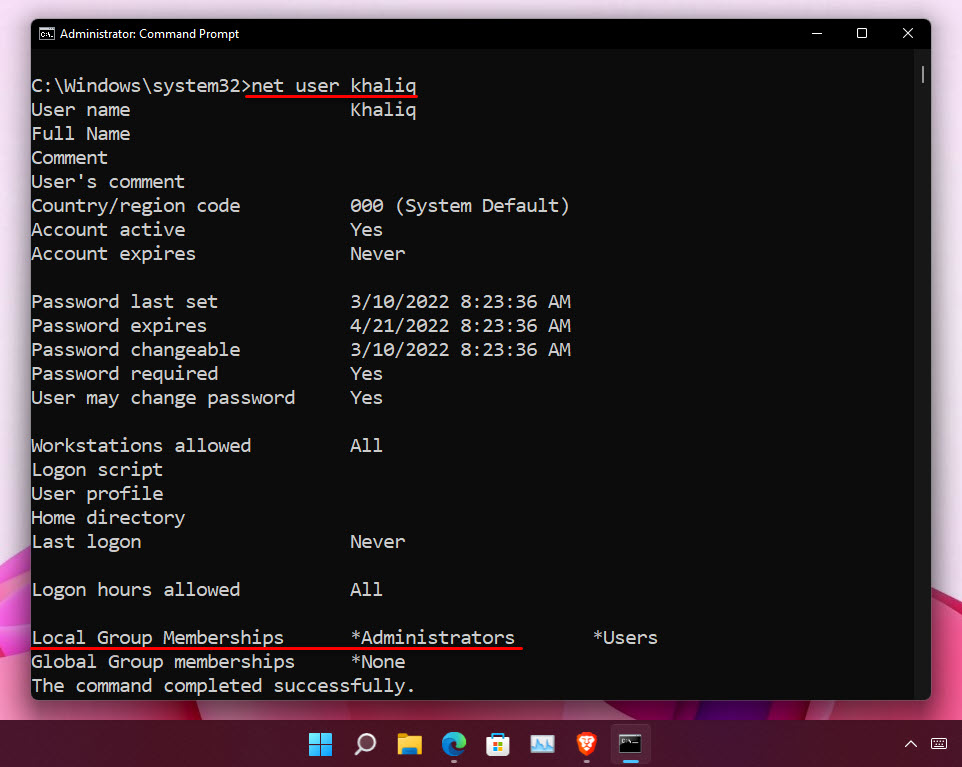
Check user Details.jpg
Step #4. Delete a user account
Anyway if you are looking to delete the account type the following command.
Net user khaliq /delete
net user username /delete

Delete the user account
2. Create Local Windows 11 Users account using Windows Settings
Within our arsenal there is another method which is commonly used among the Windows users, and that is windows settings. This method is also easy but it is a bit time consuming so here are the steps.
Step #1. Open Settings
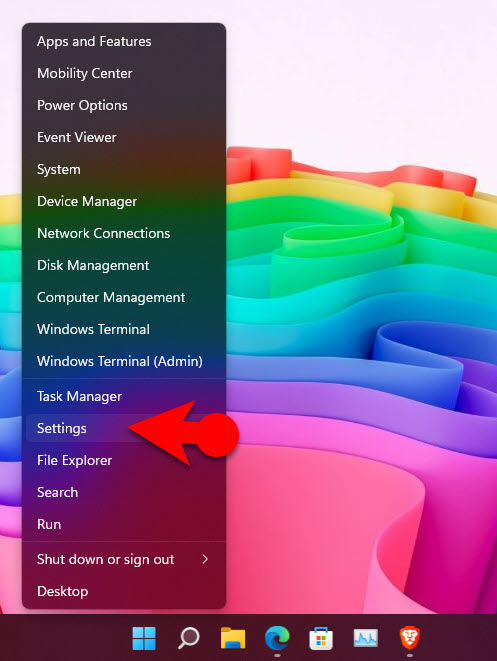
To get started we need to open the windows settings, there are a couple of methods that you can open the windows settings application. The shortcut is to press windows + I on the keyboard, or if you’re not comfortable with the shortcuts, you can right click on the start menu and choose settings.
Open Settings
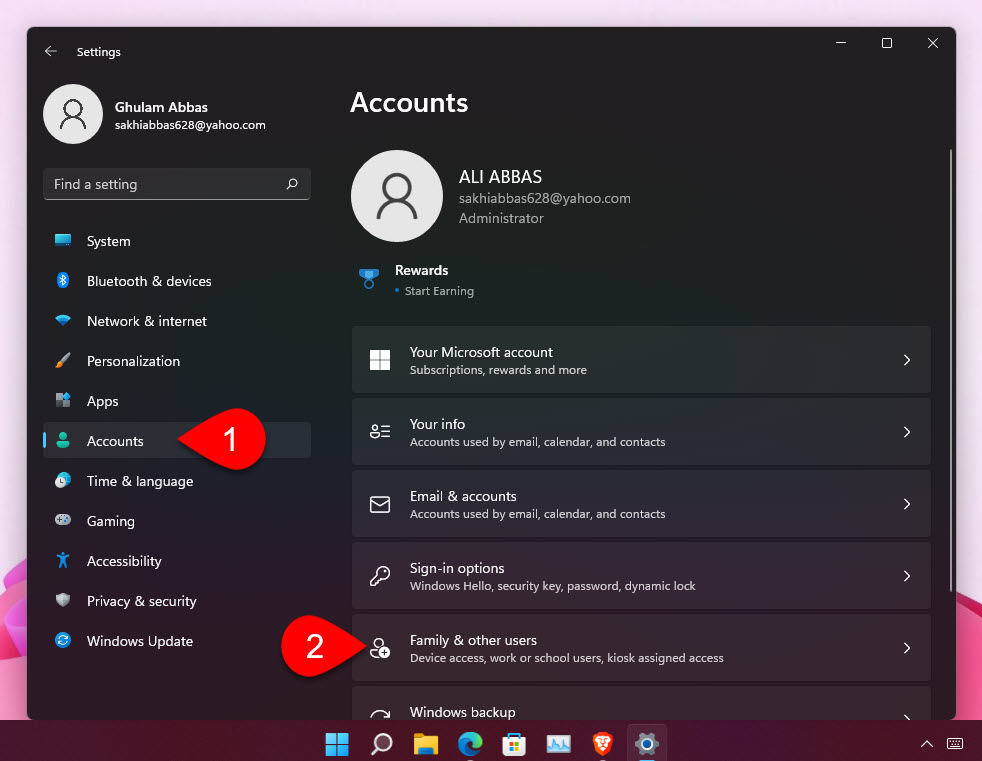
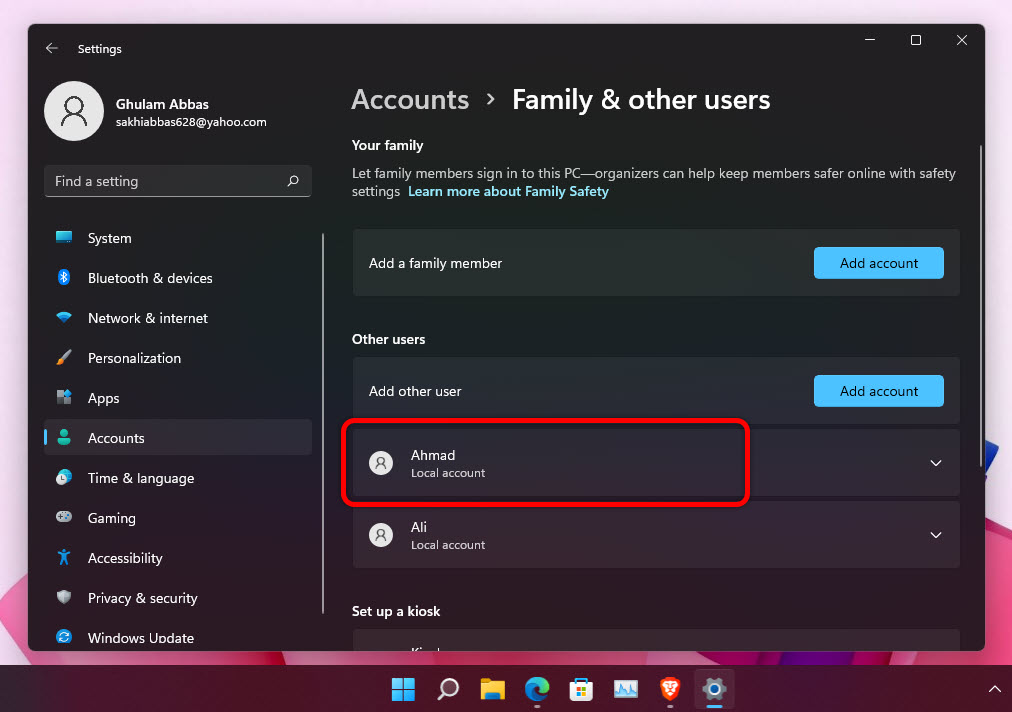
Step #2. Access user Accounts
upon the opening of the windows settings, click on accounts and then choose family and other users.
Access user Accounts
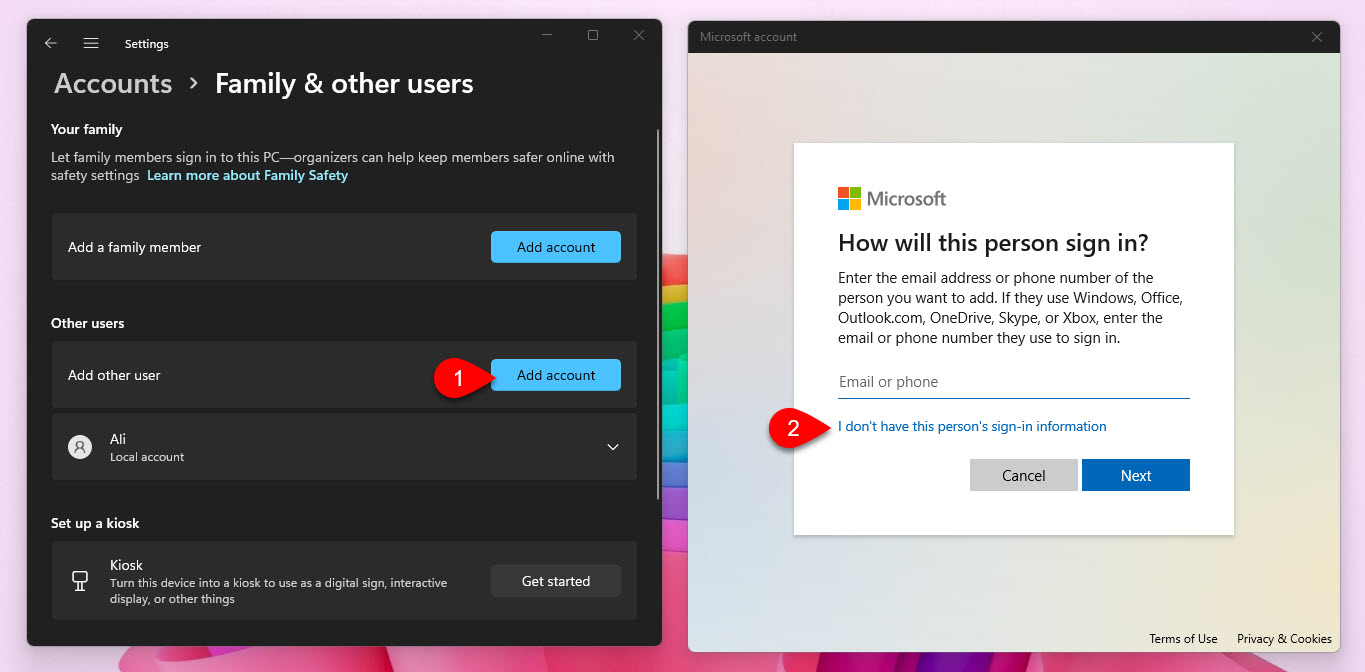
Step #3. Create a Local Windows 11 user account
To create a local windows 11 user account, under the other users click on add account.
Then a new dialog box will open where it will be saying how will this person sign in, by default Microsoft is recommending to use an email address or phone. However we are looking to create a local account, so you have to choose the other option which is I don’t have this person sign in information.
Add a New user
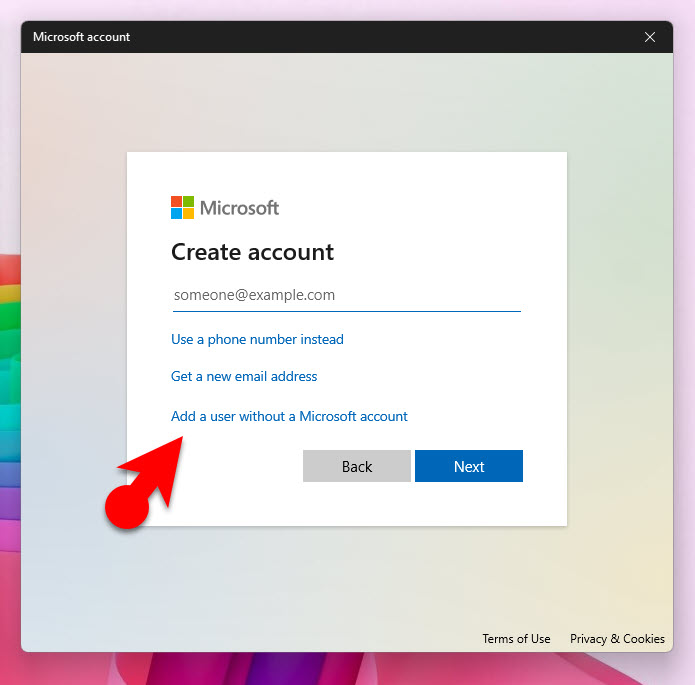
Step #4. Add a user without a Microsoft account
Again Microsoft is forcing us to use an email address or a phone number. So, basically Microsoft is forcing us to use Microsoft account for the user account. Right now you have to choose add a new user without a Microsoft account.
Add a user without a Microsoft Account
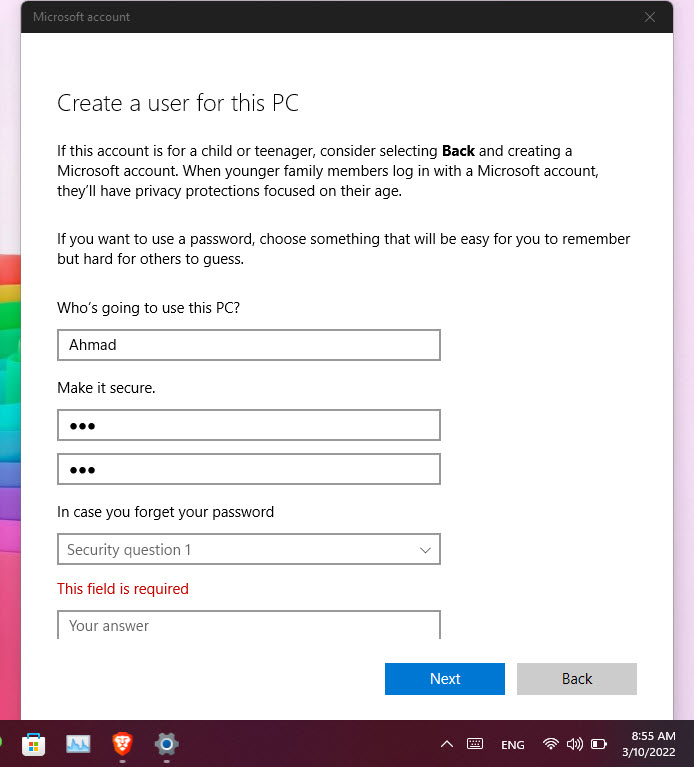
Step #5. Create a user for this PC
You have to fill the information for the user account that you want to create. There should be a username ,password and you have to answer the security questions. Basically there are three security questions that they will be asking you have to reply to all of them.
Fill Your Info
Congratulations now you have created a local windows 11 user using these settings app.
User Account Created
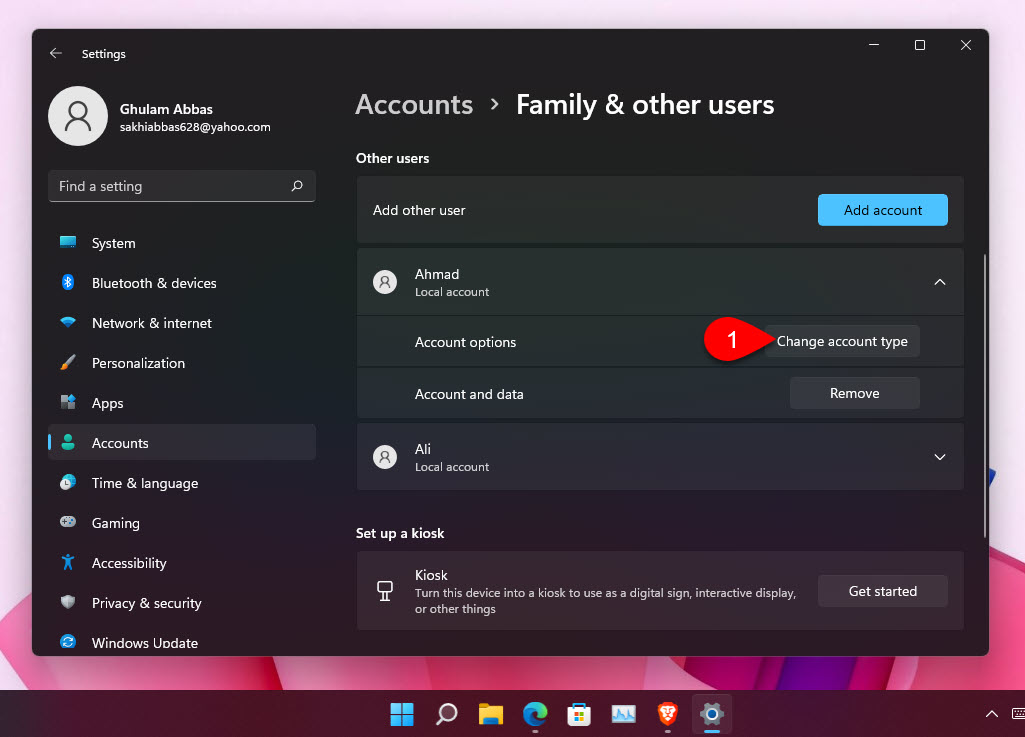
Step #6. Chnage standard account to an administrator account.
The user that we just created, that is in a standard account with the limitations to the administrator. To change the account type, click on the user and then choose change account type.
Change account type
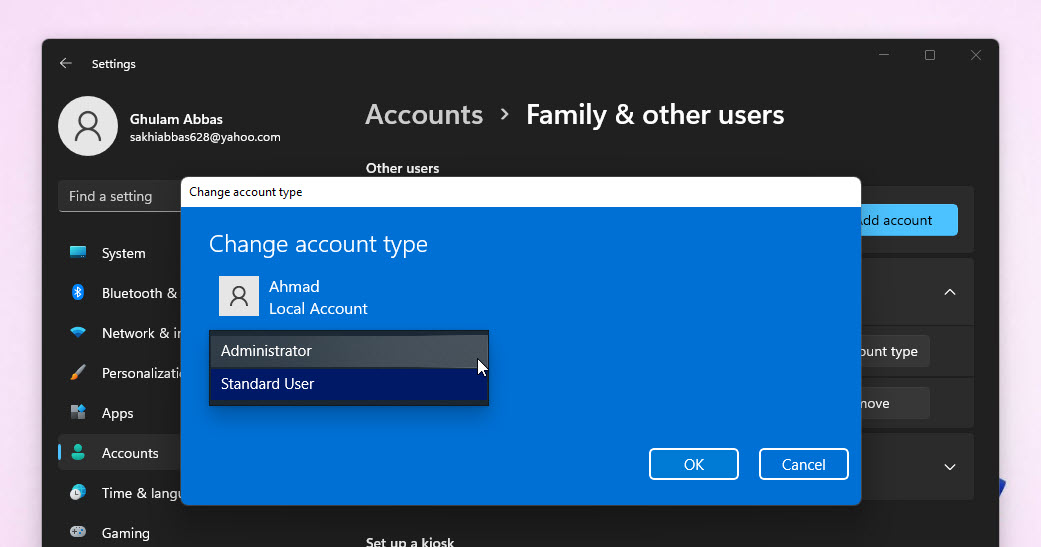
A new dialog box will open, there you have to click on the arrow key and you will see the administrator option. Select that one and click OK, now the user is an administrator.
Make your Account ad Admin
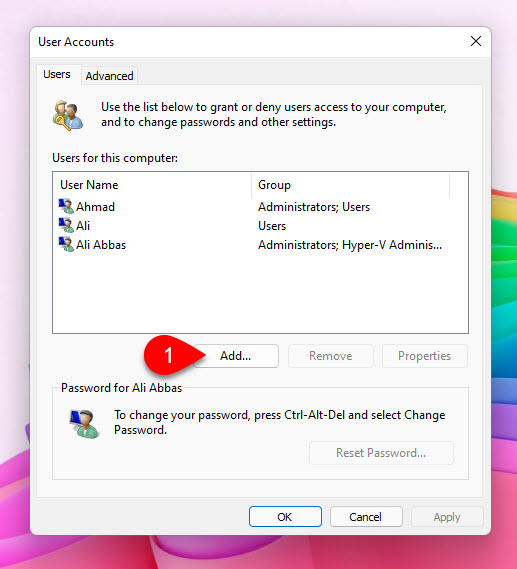
3. Create user account in windows 11 using Netplwiz
There is another utility in windows 11 which is quite helpful if you are into creation of user accounts. This utility is called Netplwiz you may call it a control panel for the user accounts. Since it is a control panel for user accounts, you can add, remove and change the local account to administrator or add it to another group.
Here are the steps to create a local account using the Netplwiz.
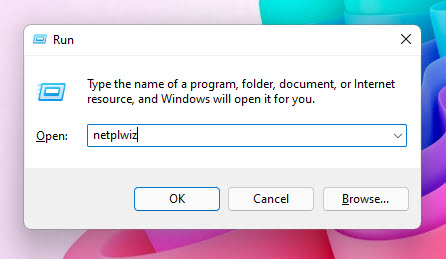
Step #1. Type Netplwiz
Hold windows + R on the keyboard to open the run dialog box, after opening it type netplwiz and press enter.
Open user Account
Step #2. Add a new user
To create a new user account from the user accounts settings, click on add.
Add a New user Account
Step #3. Continue without using a Microsoft account
Upon the opening of how will this person sign in, you have to choose the last option which is sign in without a Microsoft account.
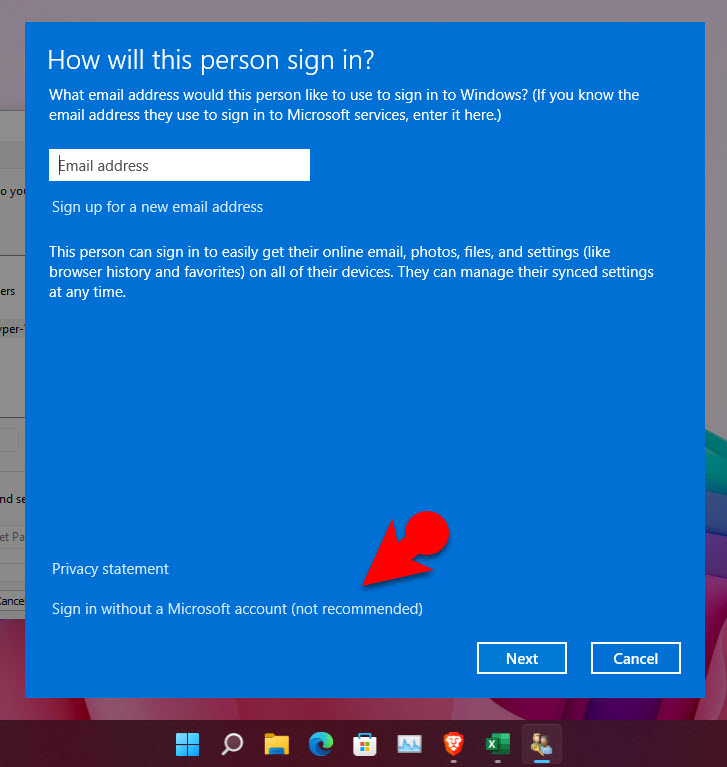
Sign in without a Microsoft Account
Step #4. Create a local account
To create a new user Microsoft has explained two options of the Microsoft account and local account and their benefits according to them. We are looking to create a local account you have to choose local account to move on.
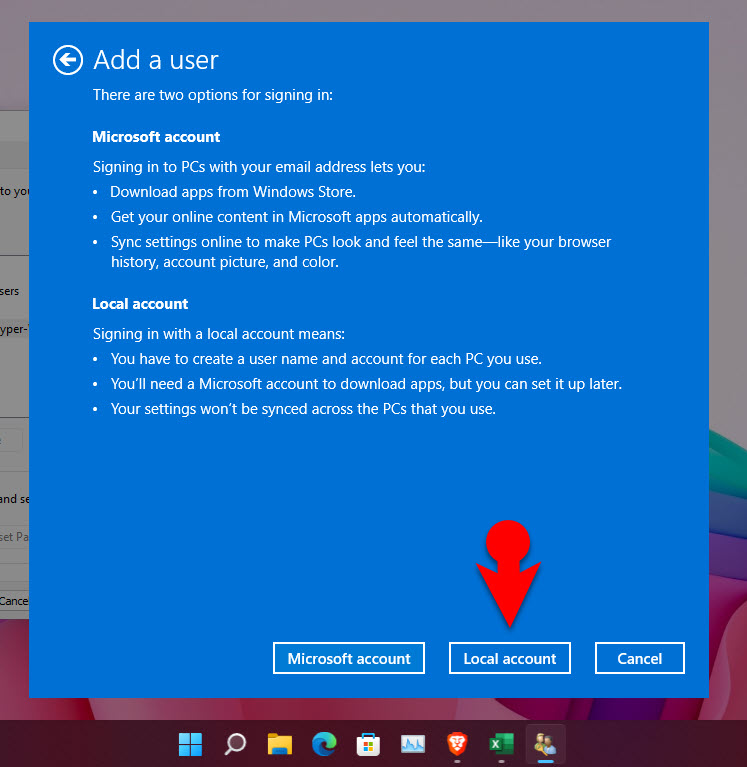
Go with Local Account
Step #5. Insert your information
Enter your username password in a password hint.
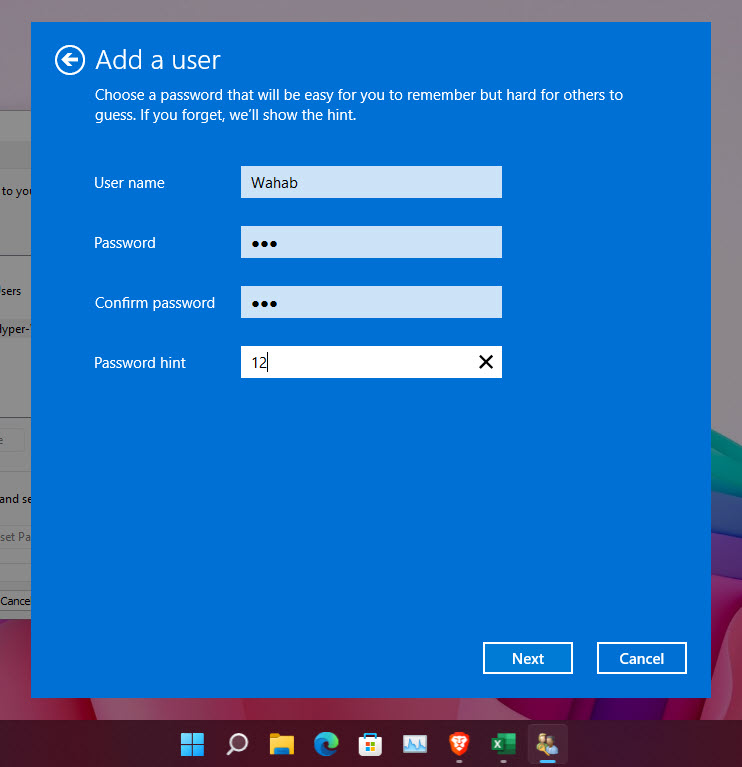
User Details
Step #6. Finish the process
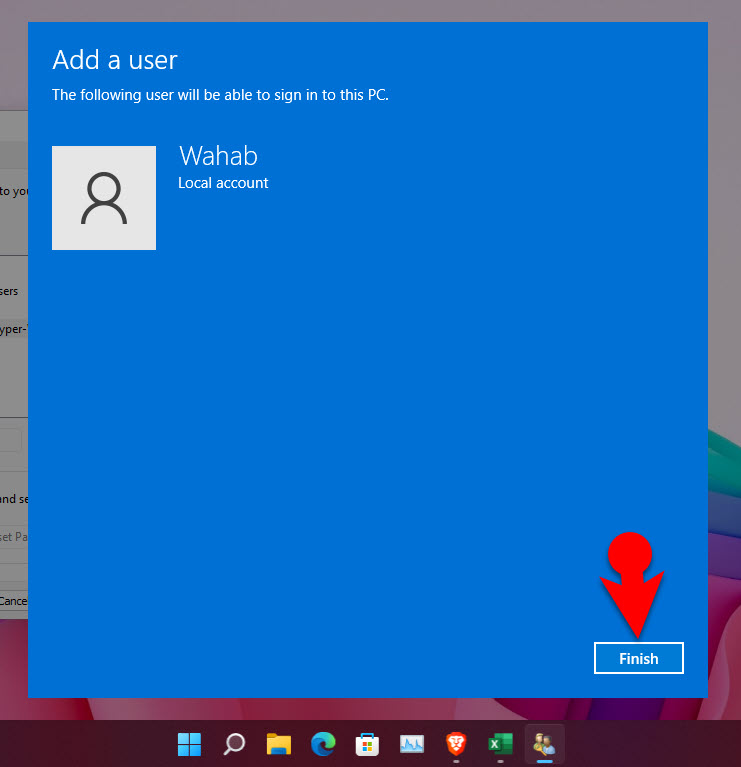
User Created
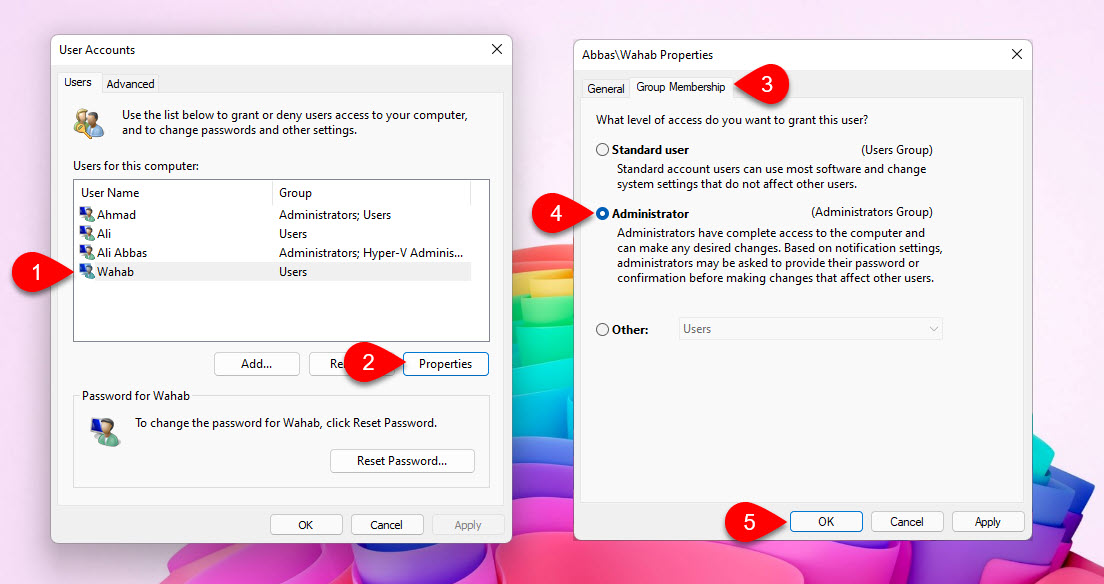
Step #7. Convert standard user to an administrator
The moment the user account is created, select the user, click on properties then a new dialog box will open, go to the group membership from the general tab and then choose administrator and press OK.
Make the user Administrator
Conclusion:
These are the three methods that I mentioned to Create Local Windows 11 Users account . It does not matter which method you approach the end result is the same you’ll get a user account, and then you can configure it to make get an administrator.
Leave a Reply