Windows 11 has a lot of features, and among them the color filter is also a built-in feature. Color features come in handy when you’re having issues seeing your screen. Some users are having issues even after enabling the night mode or adjusting the brightness. This is the place where you can use the color filter to fix this problem. Once you manage to configure some certain changes, that time you can distinguish between the objects.
This is how color filters in windows 11 works.
Color filter is going to modify the color palettes on the screen which means it is tunning the contrast to make things visible. Once you started to bring changes to the color filters on windows 11, you will see the difference between the colors of the screen attributes. A good example can be changing the color palette to differentiate between colors of text, images and objects.
Now that you know what is color filters, and when we can use it, let’s get into the practical work and learn how to change the color filters on windows 11 PC.
Steps to Change the Color Filters on Windows 11 PC
Step #1. In order to bring changes to the color filters on windows 11, the first step for us is to access the color filters in the windows settings. So right click on the start menu and choose settings.
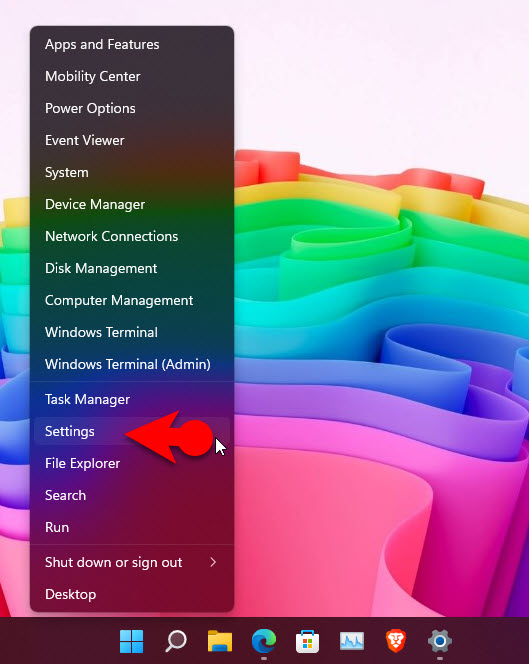
1. Open Settings
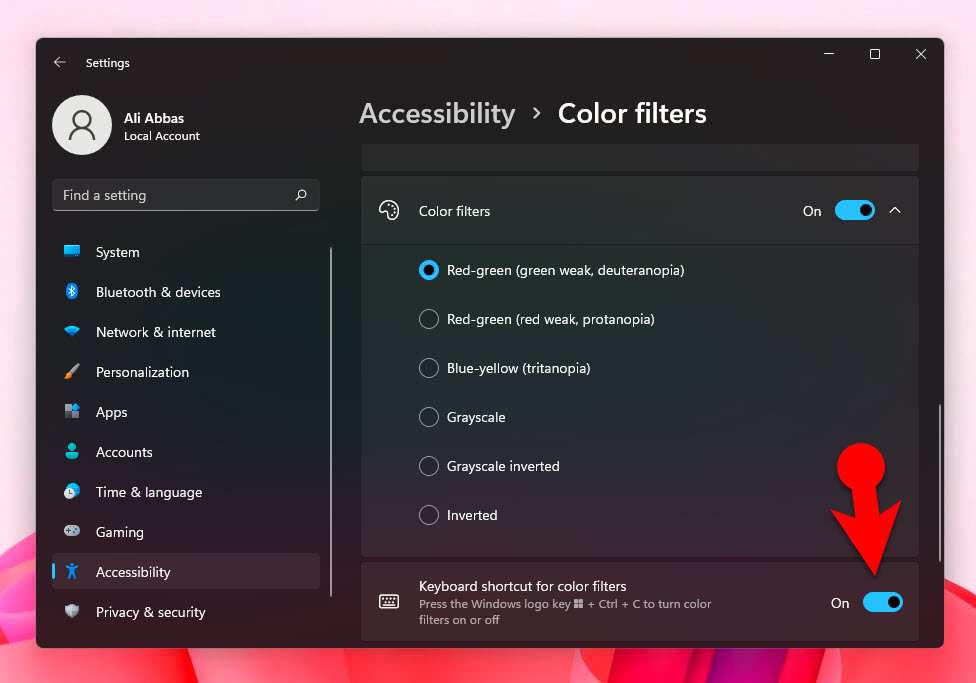
Step #2. Once these settings is opened, go to the accessibility. You can access the accessibility on the left panel of the Settings. now click on color filters on the right panel.
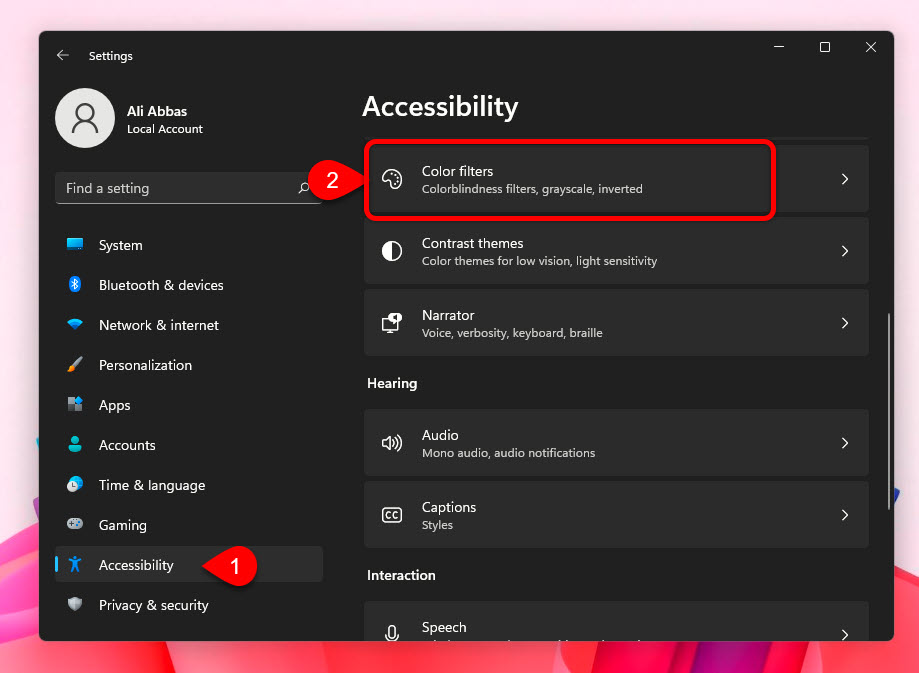
Access Color Filter
Step #3. It is time for you to turn on the color filters and start configuring the settings, simply toggle the color filters.
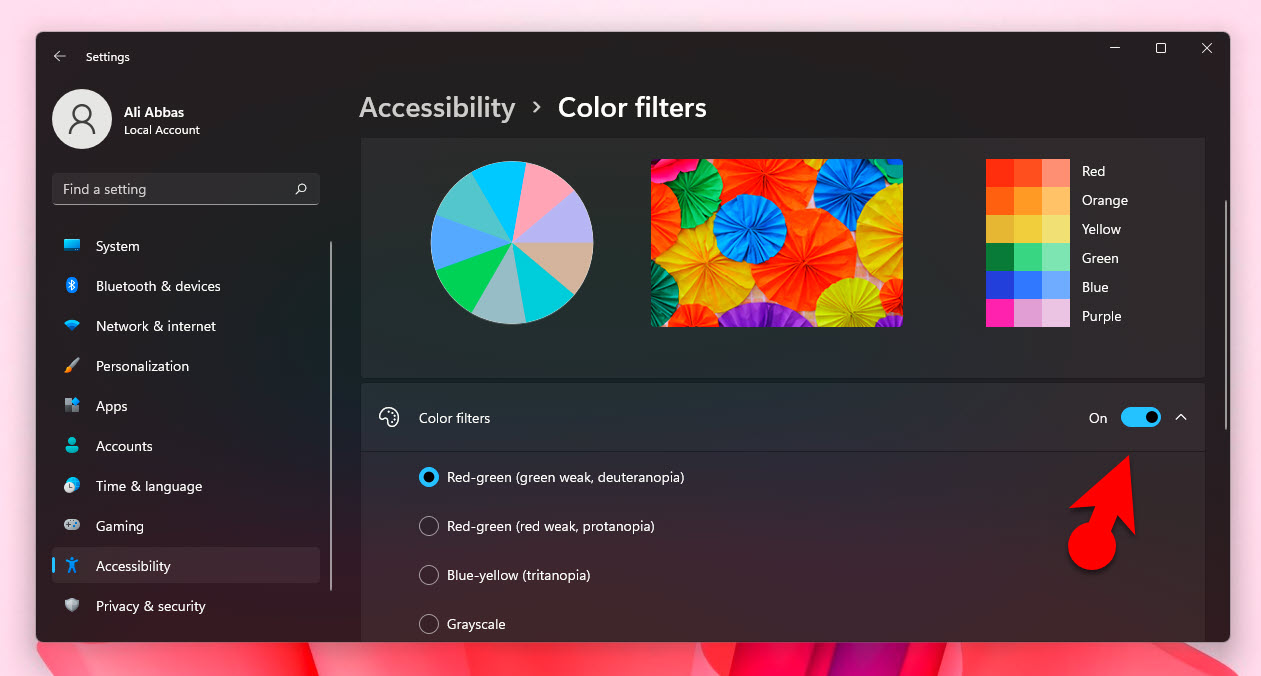
Enable Color Filters
Once you turn on the color filter, basically there are default six presets are available, you can choose from any of them based on your need. For a better experience you can try each one of them and see which one is suitable for you.
Here are the Color Filter Presets available in Windows 11:
- Red-green (green weak, deuteranopia)
- Reed-green (red weak, protanopia)
- Blue-yellow (tritanopia)
- Grayscale
- Grayscale Inverted
- Inverted
How to Easily Enable or Disable Color Filter on Windows 11?
Apparently the method that you just learned is a bit time consuming. Microsoft has built shortcuts for the color filters in the Quick settings area and you can also enable its shortcut from the settings of the color filters. So let’s take a look at each one of them one by one.
1. Enable Color Filters using the Quick Settings
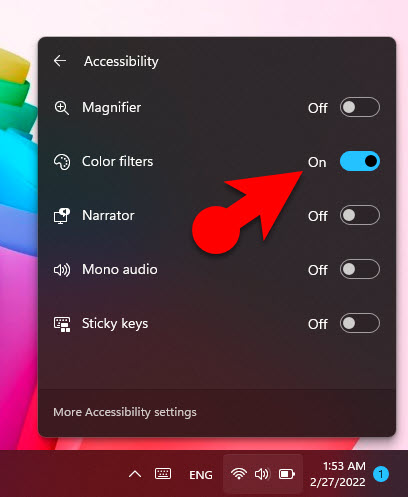
to enable color filters from the quick settings, first you have to open the quick settings. So simply click on the system tray icons (Wi-Fi, Battery, sound are the called system tray icons). Then click on the accessibility, simply toggle the Color filters and it is activated.
Note: Enabling Color Filters from the quick settings will only enable the default color which is Red-green (green weak, deuteranopia)
-
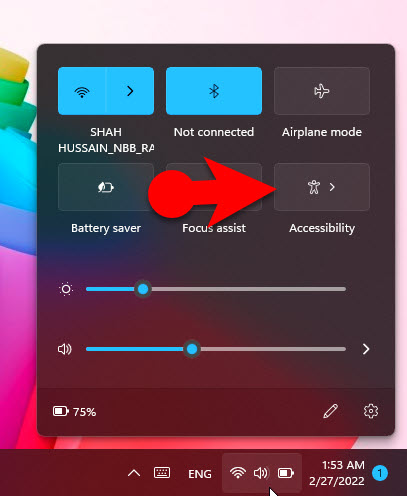
- Accessibility
-
- Enable Color Filters
2. Enable Color Filters using the Shortcut
well shortcut is obviously the fastest method that you can enable or disable car filters in windows 11 but by default this shortcut is not enabled from these settings. So go to the color filter settings only windows settings panel. It means you have to open settings> accessibility >and click on color filters.
Scroll down and toggle the Keyboard shortcut for color filters.
Enable Color Filter Shortcut
Conclusion:
Color filter is definitely important feature in windows 11, and you definitely need to change the color filters on windows 11 PC. So let me know if changing color filters solve the issue, also if you have another method just let me know in the command section.
Leave a Reply