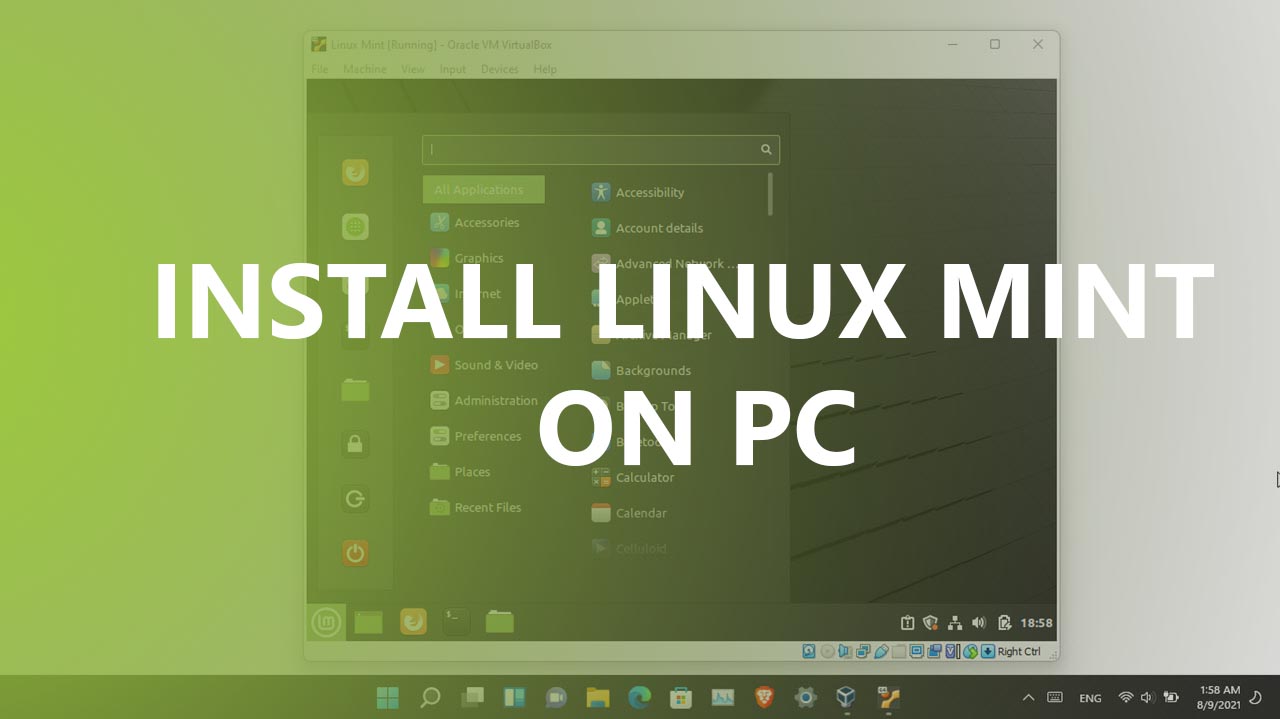
This article covers the step to Install Linux Mint in Windows 11 with powerful easy steps. If you want to know how, read the post to the end.
Microsoft has created a fuss regarding the TPM chip in the new best operating system known as Windows 11. Now many users are considering switching from Windows to the Linux operating system. However, if you have skills then you can survive in their Linux operating system but if you do not have then you better have to stick with windows. Now if you are trying to learn Linux step by step, then you better have to switch to the Linux operating system which is commonly familiar to the operating system of windows. I know it is hard because many applications that you are using inside windows, are not available inside Linux but you can install Windows applications inside Linux using the emulators. Just like Apple is installing Adobe and other applications on their M1 chip using emulators.
That’s why I recommend you to use Linux Mint, not on your actual PC but inside a virtual machine where you can actually test it, install your application, and then see if you are good with it, go on and perform a clean installation on your actual computer. If not then stick with the current version of the windows that you are using. And Microsoft is supporting Windows 10 up to 2025.
How to Install Linux Mint in Windows 11?
Step #1. I’m not going to confuse you a lot if you are a beginner to test Linux Mint inside windows. In simple words, you have to download VirtualBox and Linux Mint ISO from their official websites. Do not worry both of them are open source and you do not have to pay a single coin for them.
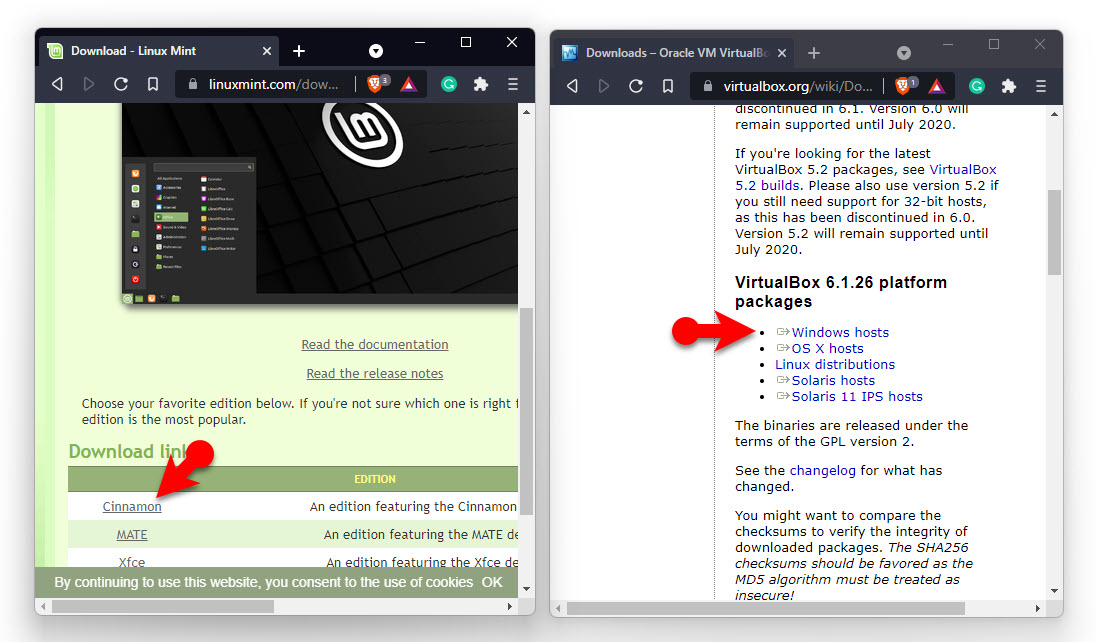
Download Linux Mint and VirtualBox
Step #2. The next step is to install VirtualBox on your main computer, in my case I’m installing VirtualBox in windows 11 beta that currently I am using. To put it simply, installing VirtualBox in windows is not very hard all you have to do is simply click next, and install. However, if you do not know then I recommend you to follow the visit this link, everything has been explained with screenshots.
Step #3. Open VirtualBox and create a new virtual machine specifically for Linux Mint that you want to test. Do not worry if you don’t know how to create a virtual machine specifically for Linux Mint, just follow the below steps. On the main page of the VirtualBox, click New, and then click on the expert mode.
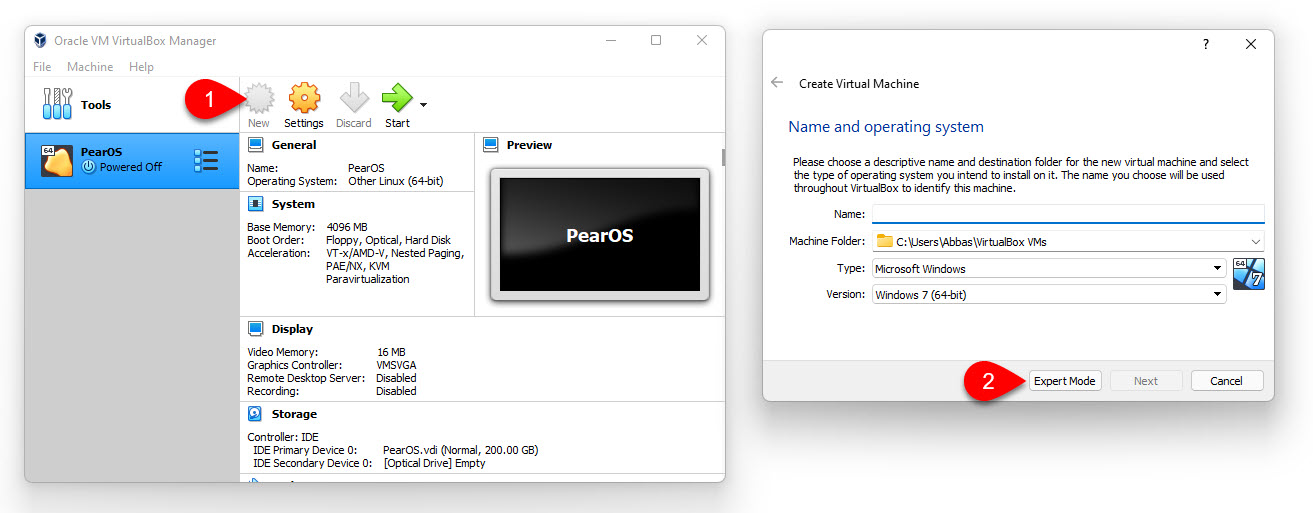
Create a New VM For Linux Mint
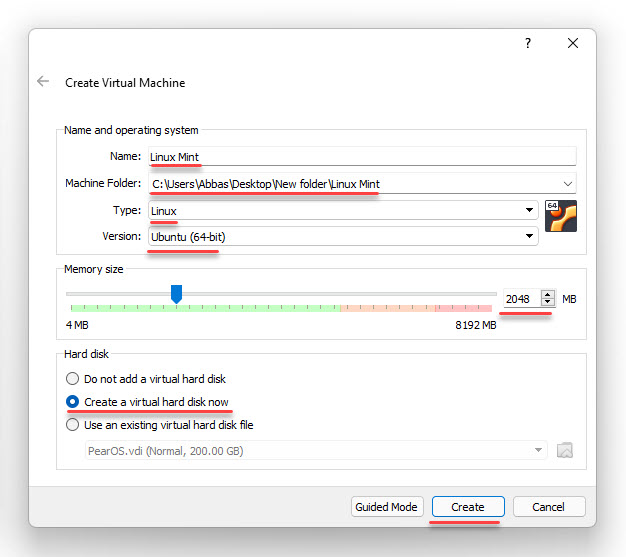
Step #4. Now make sure that the virtual machine has the following settings except for the location you can save it anywhere that you want but I have changed it into a new location.
VM Settings
Step #5. You’ll have to mention the storage size for the Linux Mint, I’m going to put at least 200 GB since I am going to installing windows applications inside it.
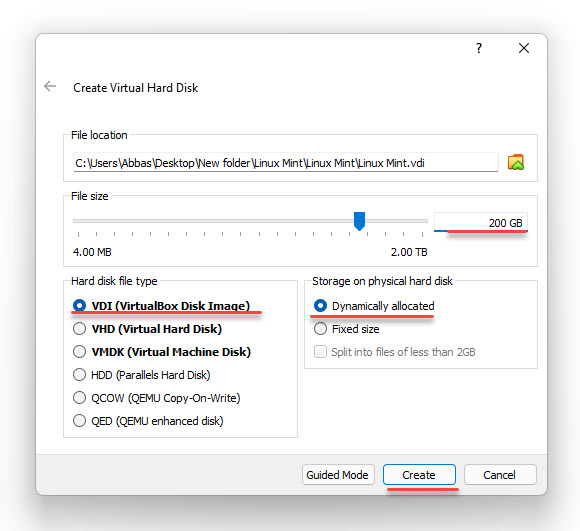
VM Storage Size
Step #6. It is time for us to add the Linux Mint ISO to the VM. To add it, click on the settings of the VM then visit the storage category and finally click on the empty icon. Next, click on the CD icon, then click choose a disk file. Finally, locate the ISO of the Linux Mint and choose it, and finally, once you’re done, make sure that you check the box of live CD/DVD and click OK.
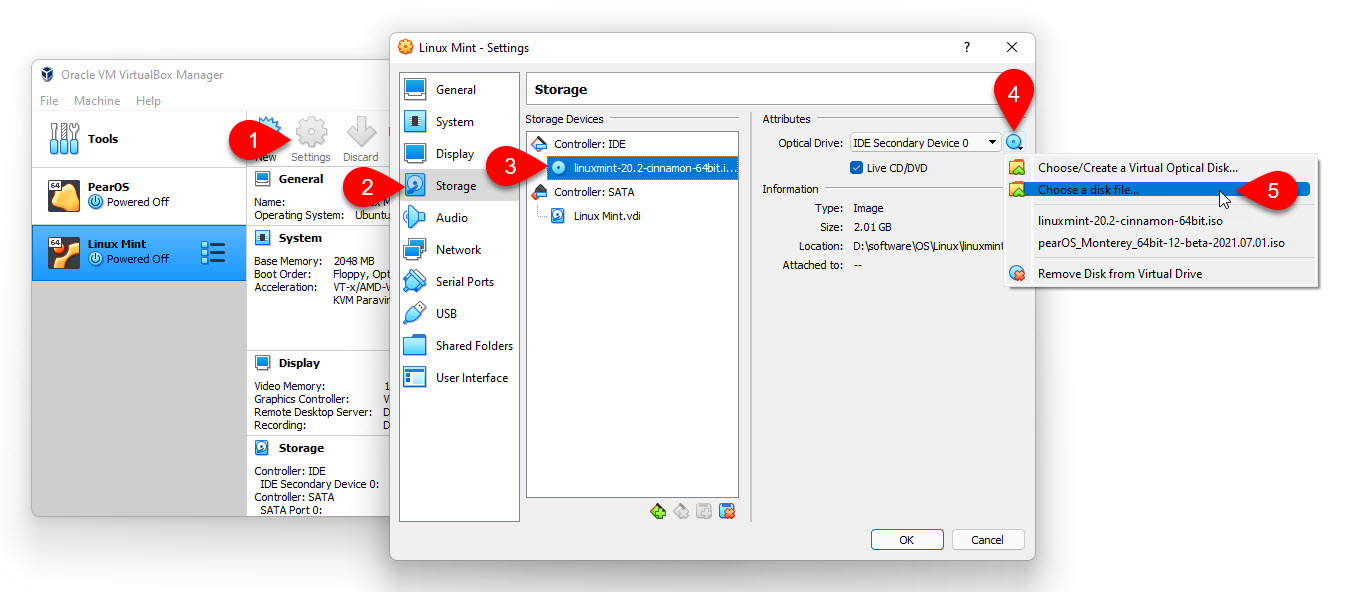
Add Linux Mint ISO to the VM
Step #7. It is time to install the Linux Mint inside the VirtualBox in windows 11 for a stop so on the homepage of the VirtualBox, click on the install button and a new window will open Barry will see the Linux Mint has been booted. Choose OEM Install (For manufacture) and press enter on the keyboard.
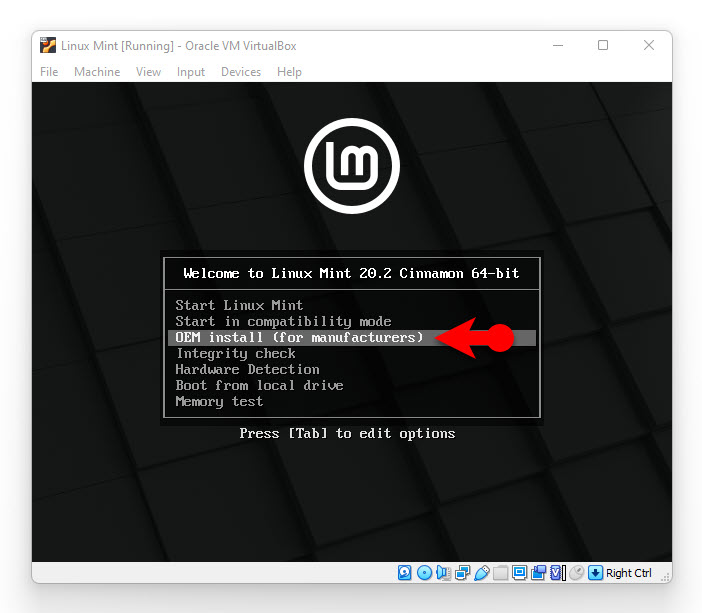
Choose OEM install
Step #8. Configure the following steps by reading the below bullet points, and in the end, you will see the screenshots in the slideshow.
- The moment you are on the welcome panel, Click continue.
- Choose a Language for Linux and Click continue.
- Install Multimedia codes by checking the box.
- Erase all the disks on the and Click Install Now.
- Click continue for confirmation regarding erasing the disk.
- Choose the region where you live.
- Insert account details for the Linux Mint, after that, you will have to wait until the OS is copied into the Virtual HDD.
- Once the installation is done, click Restart now.
Before starting, Go to devices> Optical device and click remove the disk from virtual drive.

Remove the Linux Mint ISO
Summary:
If you truly wish to test and Install Linux Mint in Windows 11, hurry, download the VirtualBox and ISO of Linux Mint. Install the VirtualBox, create a VM, and finally install Linux Mint inside the VirtualBox in Windows 11.
Leave a Reply