
In this article, you’re going to learn how to enable Windows 10 full screen start menu or how to disable Windows 10 full screen start menu. Start menu is back with Windows 10 and it is the default setting for users having a Mice and Keyboard attached to their systems. However, the Start Screen (or full-screen Start Menu) does not go. It still exists and should be the default layout for those of us using Touch Enabled devices such as Tablets. For those interested in using the full-screen Start on their desktops.It can be easily enabled in Windows 10.
Similarly, users who want to change from full-screen Start Screen to the smaller Start Menu can also follow this tutorial.before starting the steps there are some other tutorials about the “desktop“, you can click on the link.Enable or Disable Full Screen Start Menu in Windows 10 helps you know better about start menu in windows 10.
Remember one thing from starting till ending of the tutorial that important points are marked with colors and aimed with the lines.
Enable Windows 10 Full Screen Start Menu
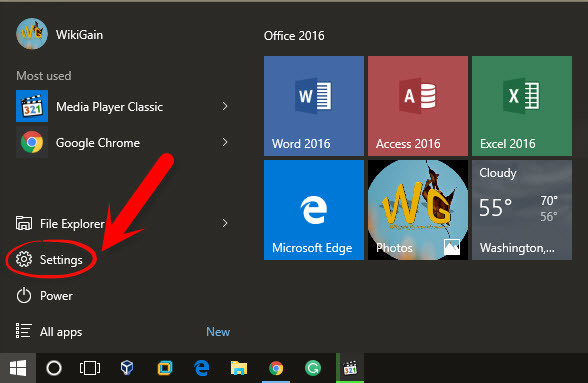
Step #1. Click on the start button and in the bottom left-hand corner, you have to click on the “Settings”. Or simply press the Windows key from your keyboard then tap on “Settings“.
Disable Full Screen Start Menu in Windows 10
Step #2. Now, another window will open and you have to click on the “Personalization” option.
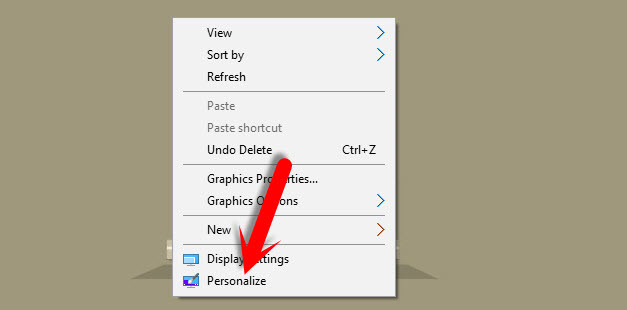
Personalization
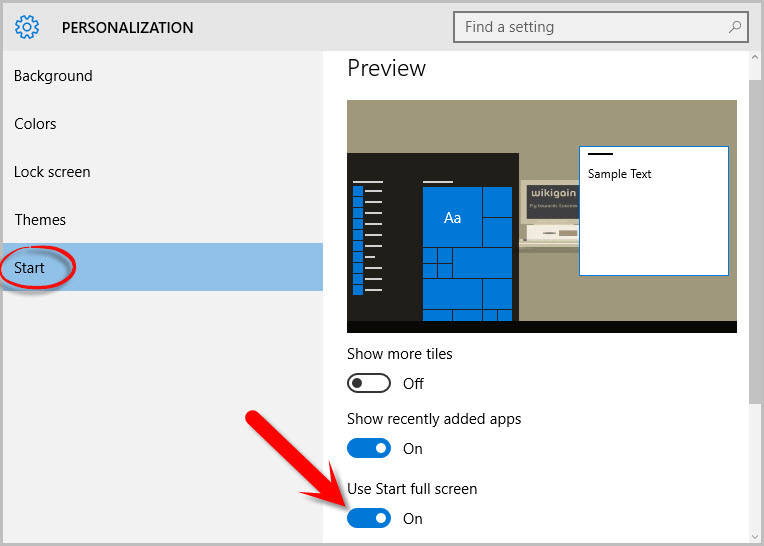
Step #3. In the personalization window, find the “Start” and click on it. Right after clicking on the “Start“, a slide will appear at the left-hand side. Navigate to the bottom of the window then enable “Use Start Full Screen“.
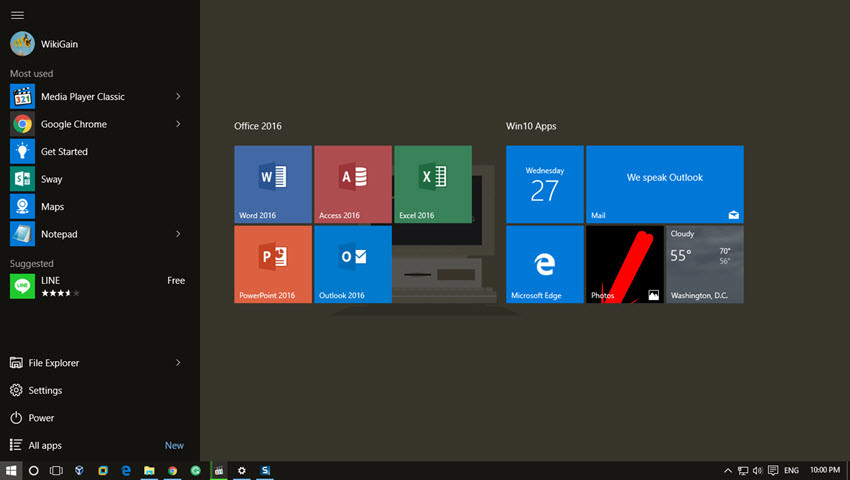
Enable Windows 10 Full Screen Start Menu
Disable Windows 10 Full Screen Start Menu
Windows 10 operating system is somehow complecated rather then Windows 7 or Windows 8. In Windows 8, you had the full screen start menu but in Windows 10 you have both “Full screen start menu” and “Windows 7 type Start menu”. You can use either of them. As I’ve explained above on how to enable Windows 10 full screen start menu. In this step I’d explain that how you can disable Windows 10 full screen start menu.
- #1. Go to the Windows 10 settings. To find setting simply press the Windows key from your keyboard then tap on “Settings“.
- #2. In the settings window, click on the “Personalization“.
- #3. A new window will pop up. Click on the “Start” at the lower left-hand side. Navigate to the bottom and then disable “Use Start Full Screen“.
Enable Full Screen Start Menu in Windows 10
Conclusion
This was all, how you can disable Windows 10 full screen start menu or how to enable Windows 10 full screen start menu. If you’ve any question regarding this article, or other articles, feel free to ask down below this post. Thanks for being with us.