
In this article, I’m going to customize Quick Access Toolbar which is identified sometimes as QAT in Word 2016. I hope that you should understand what I’m going to tell you in this lesson. Let me first put a glance on this feature of Microsoft Word 2016 that available on the earlier versions of the Word as well.
What is Quick Access Toolbar?
By default, buttons representing the Save, Undo, and Redo commands appear on the Quick Access Toolbar. If you regularly use a few commands that are scattered on various tabs of the ribbon and you don’t want to switch between tabs to access the commands, you might want to add them to the Quick Access Toolbar so that they’re always available to you.
Customize Quick Access Toolbar
There are three ways to add commands to the Quick Access Toolbar:
- From the Customize Quick Access Toolbar menu that appears when you click the button at the right end of the Quick Access Toolbar. Some of the most common commands, including the popular Quick Print command, are available from this list.
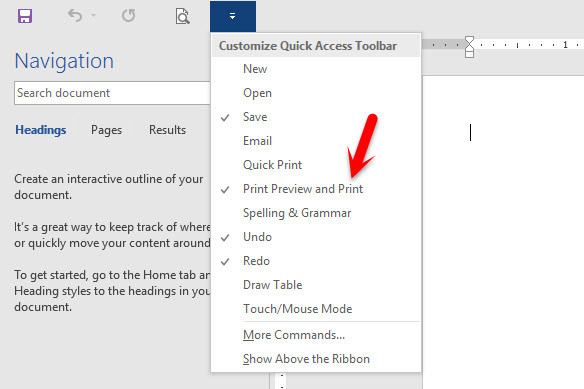
Add Print Preview to QAT
- By right-clicking a command on the ribbon and then clicking Add to Quick Access Toolbar. You can add any type of command this way; you can even add a drop-down list of options or gallery of thumbnails.
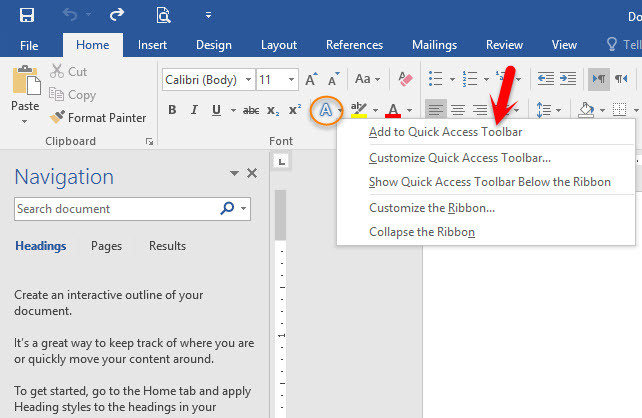
Add to Quick Access Toolbar
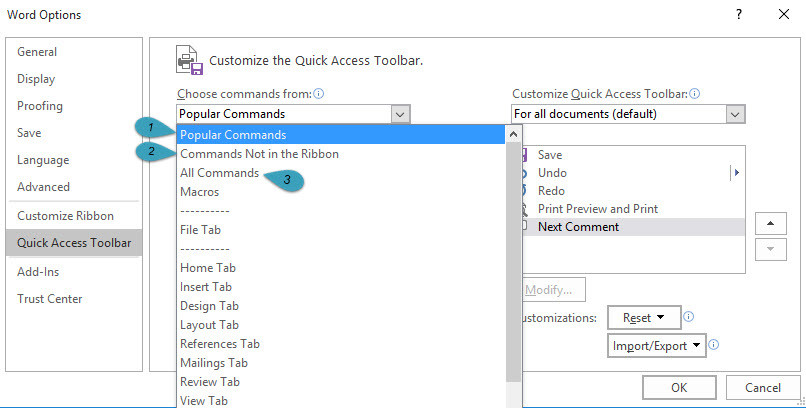
- From the Quick Access Toolbar page of the Word Options dialog box. On this page, you can customize the Quick Access Toolbar in the following ways:
- You can define a custom Quick Access Toolbar for all documents, or you can define a custom Quick Access Toolbar for a specific document.
- You can add any command from any group of any tab, including tool tabs, to the toolbar.
- You can display a separator between different types of buttons.
- You can move commands around on the toolbar until they are in the order you want.
- You can reset everything back to the default Quick Access Toolbar configuration.
Word 2016 Quick Access Toolbar Customization
After you add commands to the Quick Access Toolbar, you can reorganize them and divide them into groups to simplify the process of locating the command you want.
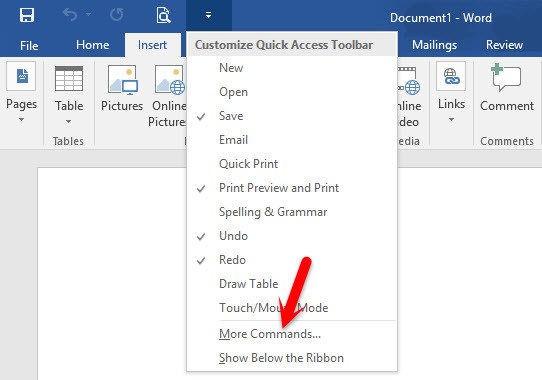
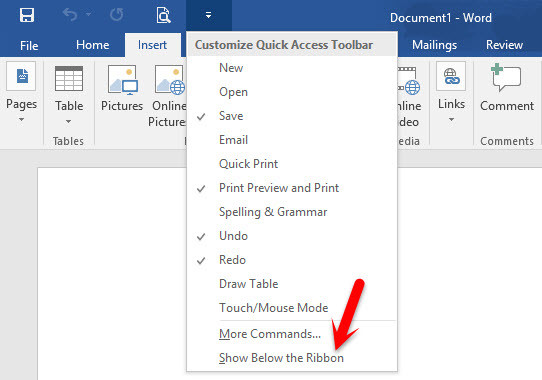
As you add commands to the Quick Access Toolbar, it expands to accommodate them. If you add a lot of commands, it might become difficult to view the text in the title bar or all the commands on the Quick Access Toolbar might not be visible, defeating the purpose of adding them. To resolve this problem, you can move the Quick Access Toolbar below the ribbon by clicking the Customize Quick Access Toolbar button and then clicking Show Below The Ribbon.
In this exercise, you’ll add commands to the Quick Access Toolbar for all documents, then organize and test the commands.
On the Customize Quick Access Toolbar menu, click More Commands to display the Quick Access Toolbar page of the Word Options dialog box. Available commands are shown on the left, and the commands currently displayed on the Quick Access Toolbar are shown on the right.
Show more Commands on Quick Access Toolbar
In the Choose commands from list, click on one of the commands and Add it to the QAT list. Scroll to the bottom of the list and double-click commands to add the command to the list on the right.

Word Options
Change Quick Access Toolbar Location
You also can change the Quick Access Toolbar location. To change the QAT location follow these steps.
Click OK to close the Word Options dialog box. The Quick Access Toolbar now includes the default buttons and the additional commands you’ve added.
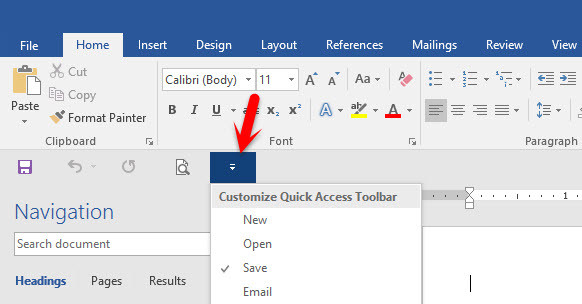
Now we’ll display the Quick Access Toolbar in a more convenient location.
On the Customize Quick Access Toolbar menu, click Show Below the Ribbon to move the Quick Access Toolbar close to the document content.
Show Quick Access Toolbar Below the Ribbon
Now let’s experience how much more efficient it is to work with commands on the Quick Access Toolbar rather than the ribbon. You can perform each of these actions from another area of the user interface, but you can perform them with fewer clicks from the Quick Access Toolbar.
QAT Below the Ribbon
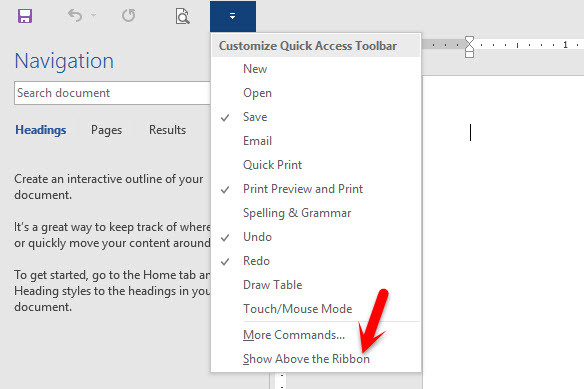
As well you can also change it to wise verse. Click on the small triangle icon then choose above the ribbon.
Show QAT Above the Ribbon
Conclusion
I hope that you have enjoyed with this article and don’t forget to share your idea with us regarding this topic. If you know some better ways of Quick Access Toolbar Customizations. Feel free to hit a comment below this post. Thanks for being with us.
Word 2013 had coloured icons in the Quick Access Toolbar. Word 2016 has them all plain white which makes them MUCH harder to distinguish. How do I get the colour back? The icons in the Ribbon are all coloured.